Find Out How to Adapt & Create Original Quilting Patterns
Hello to all of our wonderful Princess YellowBelly members!
If this is your first time here, then no worries, we’re about to do a first of our own. And if you’ve been with us for a while, then you know that the announcement that we’re about to do a live interview – our first every live video event ever – isn’t an exaggeration.
We enjoy doing video, and doing live interviews has been a dream of our for over a year.
And now it’s finally about to happen, thanks to a true friend and fellow innovative fabric artist Laura Piland from Slice of Pi Quilts.
Slice of Pi Quilts – Original Quilting Patterns
Laura’s already shared a bit of her amazing story of how she creates amazing quilting patterns and how we’ve adapted one of hers. I highly recommend reading her story before you join the video, to find out more about Laura beforehand, and figure out questions that you’d like to ask her live!
We’re sure excited to get to talk to her about creating and adapting original quilting patterns. Please do make sure to join us live for an interesting conversation with questions like:
How many patterns have you adapted?
Do you have a standard method for adapting patterns?
How do you get ideas for new quilting patterns?
What’s your process for creating a new pattern?
See you there this afternoon, September 28 @ 4 PM (Eastern Standard Time)!
*If for any reason you can’t join us live, the replay will be available on our Facebook page, and we’ll be seeing what we can do to share it here, as well.
Welcome to a new segment for Princess YellowBelly Designs! We’ve shared amazing artists with you before (and we’re about to again), but we’ve realized that there’s another kind of category.
Really we should have figured it out before, because it’s our own category. And it’s artists’ sharing their creativity so other’s can use their ideas.
It’s a beautiful place to be.
And since we’ve narrowed it down, we’ve realized that a lot of these wonderful artists are in the sphere of Etsy. Again, it shouldn’t have surprised us because we ourselves got our start on Etsy.
Yet we didn’t think of sharing our unique product suppliers – patterns, knickknacks, specialty beads, trims, and ideas in general – until we purchased a very special pattern.
How We Met a Unique Product Supplier
And now we at Princess YellowBelly Designs would like to introduce to our first brave, unique, and wonderful Unique Product Supplier: Laura from Slice of Pi Quilts.
What made you start creating your own patterns?
Joining Instagram! A friend encouraged me to join the social media platform to share my quilts. Once I did, I found a wonderful community of other quilters that I had no idea existed! Other people began asking for patterns for the quilts I was making, and it turns out, that was my dream job!
What inspires you?
I’m *always* hunting for quilt inspiration! I take photos of floor tiles, tissue boxes, walls, shadows…anything and everything that catches my eye. I keep those photos in a folder in my phone, then I scroll through them when I’m in the mood to start a quilt!
Why do you enjoy making your own patterns – and inventing your own techniques?
When I made my first quilt, I had no idea what I was doing. I watched YouTube videos and called my mom and grandmothers dozens of times to ask questions. I loved the thrill of figuring it out! I promised myself right then that I wanted to try something new with every quilt that I made!
Biography
I’m Laura! I’m a quilter, pattern designer, deal hunter, and homeschooling mom of three boys! I’m also an ex-math teacher – and with a last name like Piland – there’s a strong love of pi in our house!
I started quilting in 2010, then started Slice of Pi Quilts in 2016. I have made over 400 quilts in that time! I love inspiring others to quilt and am always trying something new!
I live outside of Kansas City, MO.
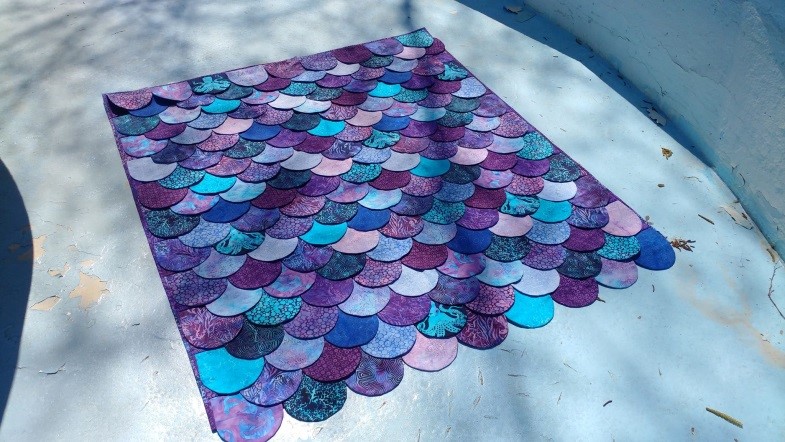
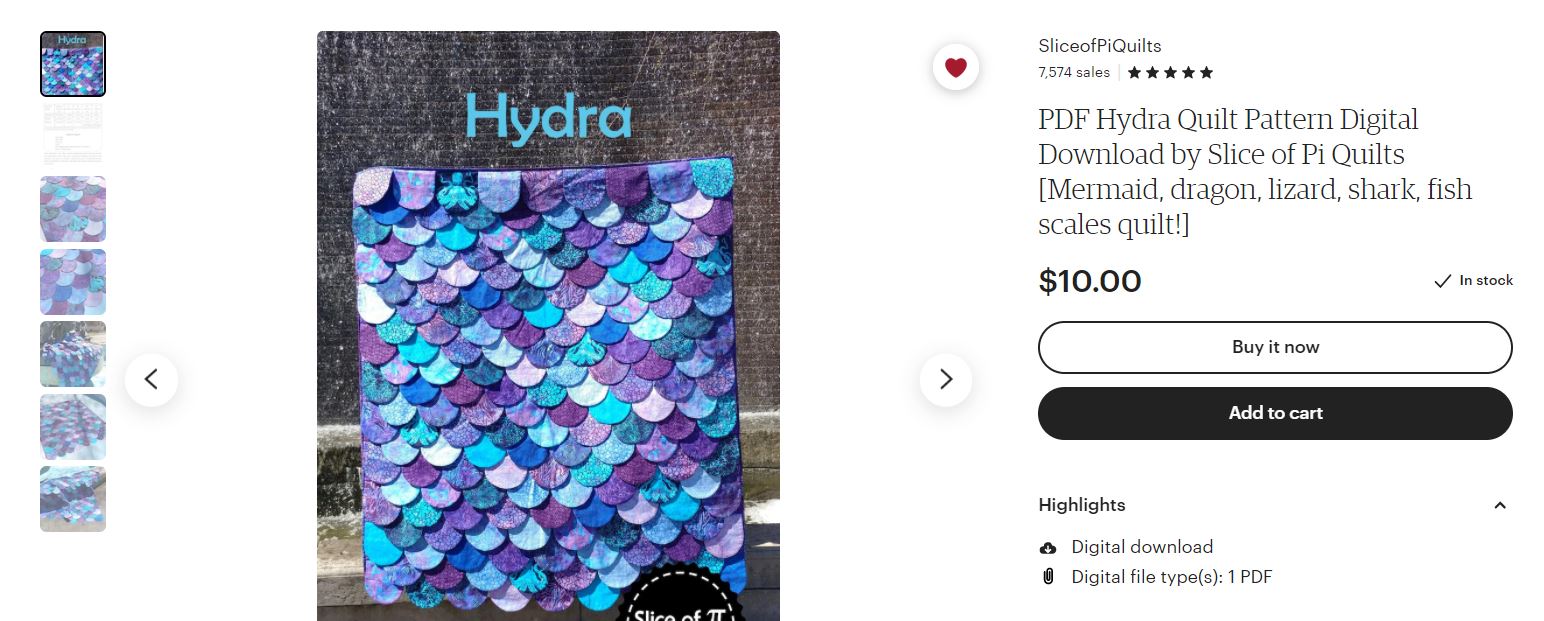
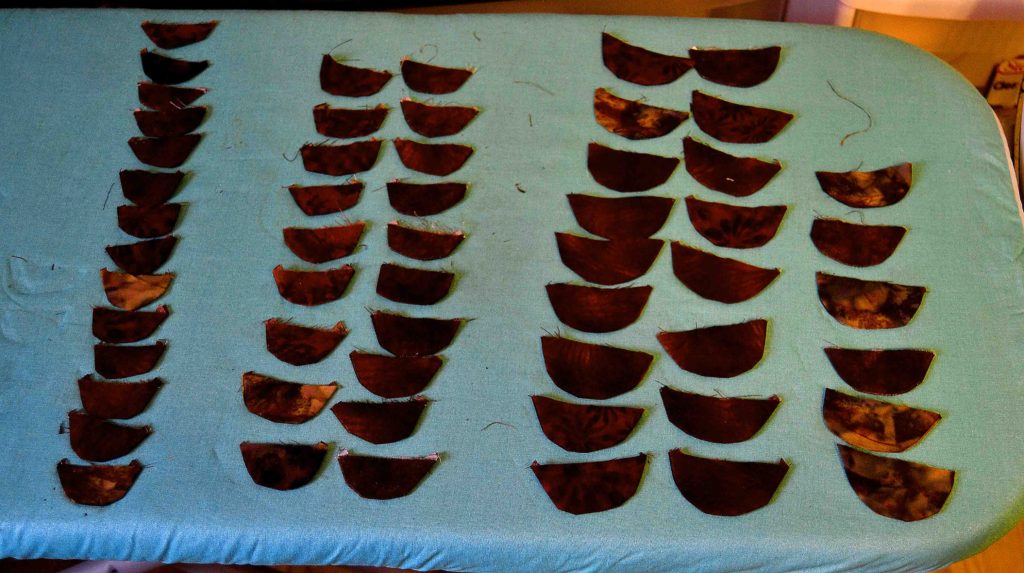
*We’ve used your Hydra scales pattern ourselves (and it’s awesome!)In fact, hang around till the end, and we’ll give you a glimpse of just what we did with Laura’s pattern…
How did you come up with that one? How many different places/ways have you used it?
That’s such a fun quilt! I had just finished making a quilt with prairie points, and wondered if I could make other shapes instead of triangles.
Turns out, you can!
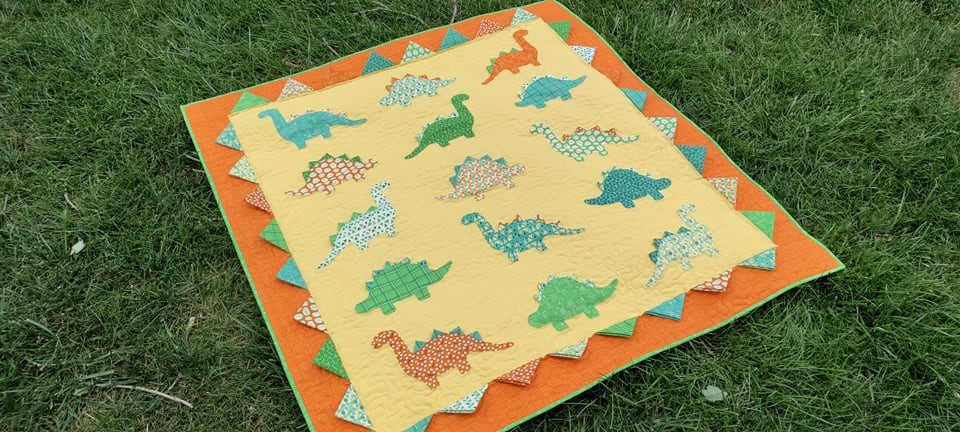
Teresa Coates of Shannon Fabrics made the quilt using their Cuddle! I think that’s a brilliant use of the pattern! Wouldn’t it be so fun to make each scale with a different textured fabric! What a great baby quilt that would be!
What materials do you use?
I’m always trying new tools and techniques, but I do sometimes use non-traditional fabric too! I have made quilts with selvages, minky, fleece, lace, and even rayon fabric!
How long does it take to design something new?
Sometimes, inspiration strikes and I can’t scribble the design on the back of a napkin fast enough! Other times, it takes months for an idea to simmer long enough to be ready for cutting up fabric.
How many have you made in all (or a rough estimate)?
I have finished 403 quilts since 2010. Yes, I have a spreadsheet! That does not include other projects like pillowcases, zipper pouches, or other non-quilty projects, which I usually have a dozen or so of those each year too.
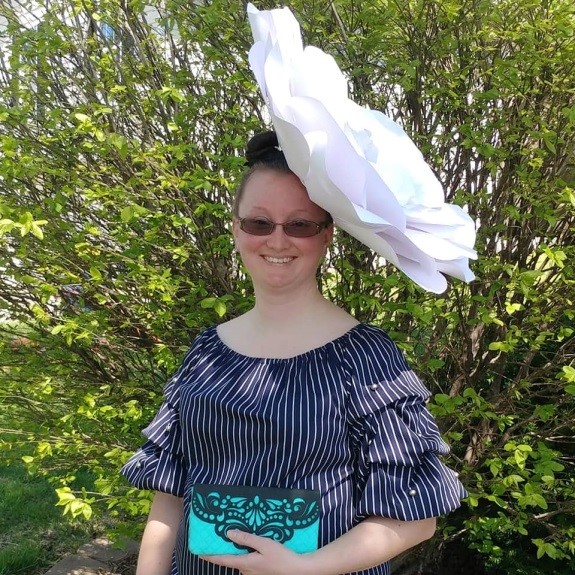
What’s the weirdest thing you’ve ever made?
It’s not sewing, but I recently made a giant white flower fascinator with cardstock and hot glue for a local Kentucky Derby themed party! I even won first prize for it!
Do you do any selling or displaying at fairs?
I teach quilting to kids in our local 4-H club, and they display their quilts at our county fair! I do not sell any quilts, but I will occasionally take quilts to the local quilt show.
How do your boys and homeschooling affect your quilting passion?
Our days are definitely a blend of school and work! While the boys are doing school, I’m often multi-tasking and filling pattern orders or writing a blog post. The boys are also quick to point out barn quilt blocks, quilt shops, or quilts in books and movies!
Coming soon…
What’s new or coming next for you?
I have three new quilt patterns coming out next month! I’m working behind the scenes now on making the samples and finalizing the patterns!
What’s the best place for our readers to find and/or contact you?
If you’re on Facebook or Instagram, I’m Slice of Pi Quilts there.
And whatever else you do, I highly recommend that you sign up for my newsletter on my website!
Princess YellowBelly Highly Recommends Slice of Pi
Laura is, in our humble opinion, a brilliant artist. We can also tell you that we’ve made her Hydra scales pattern for ourselves. Her pattern style is clear, cohesive, easy to follow, and really a lot of fun.
From all those hundreds of little hydra scales, we managed to adapt and change her idea to suit our needs.
*Incidentally, that’s a great metric for whether or not a pattern is good: it should be easy to adapt.
Now that we have the Hydra Scales pattern, I know that we’ll be using it many, many times in the future. Probably – sorry Laura – in ways that our wonderful Unique Product Supplier wouldn’t even recognize.
If you want to, you can watch the whole interview with Laura, FREE, on our official YouTube channel. If you want to be notified (and reminded) when we next go live with a unique artist like Laura, subscribe to our newsletter! It’s fast, it’s free, and you get a great gift as well.
Don’t you just love autumn designs? I know that Princess YellowBelly does – in her role as my quilting muse she seems to return to autumn designs and elements for probably around half of all my original quilts and quilting patterns.
Which leaves us with A LOT of autumn, harvest, and fall quilts – or at the very least, autumn-interpretative.
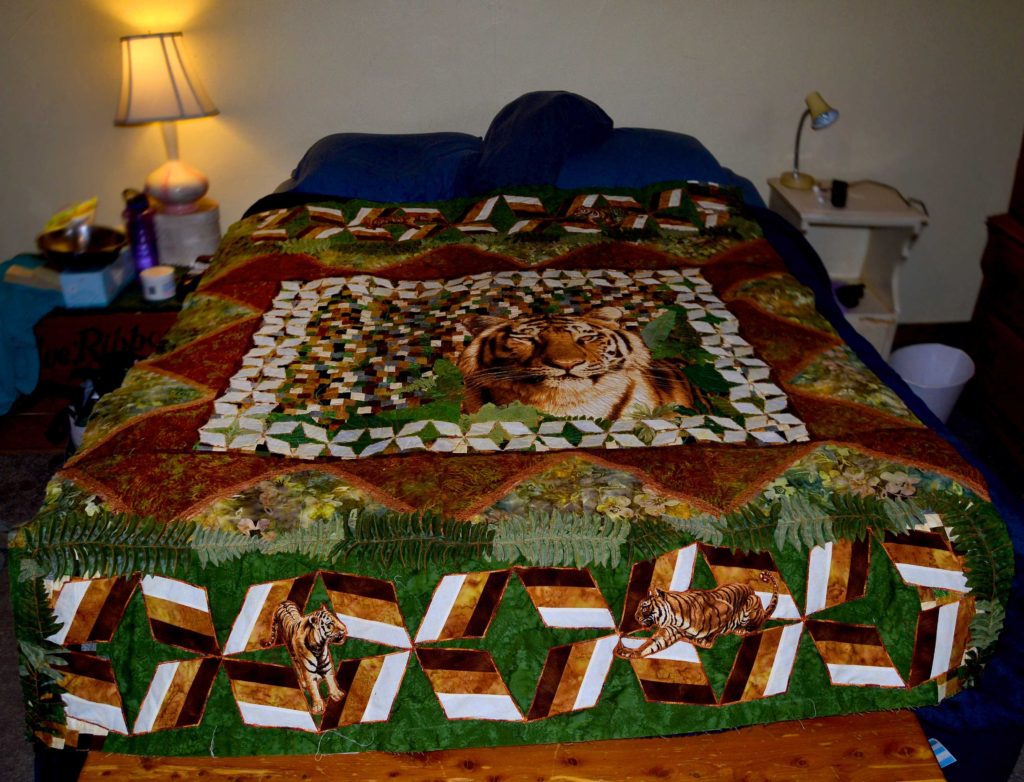
For instance, our Tiger Quilt isn’t technically an autumn design, but it can be used in that way!
Which leaves us with a weird problem. It’s one of those problems that we’re actually glad that we have, because it’s a problem of overabundance.
We have too many fall-themed quilts, wall hangings, and table toppers!
It’s like Old MacDonald had a farm, and on that farm he had some fabric and some fall leaves and left them alone for a while. And having hung many of these projects on my walls for my internal “changing of the seasons” decorating efforts, I think my creativity is running a little low.
Please Help Us Get Our Creativity Going this Fall!
Would you please share with us how you decorate for autumn? Especially if you use quilts, wall hangings, and other forms of fabric art as part of your interior decorating scheme. But even if you don’t really use fabric art in your home, please share with us how you make a fall-ish look.
Do you decorate more for Thanksgiving or Halloween?
Do you do a lot of decorating or minimal decorating?
How would you incorporate unique pieces like furniture?
Would you use antique – well, anything – to help display a wall hanging or quilt?
Please let us know your ideas, your decorating tips, your past experiences! Fall will be on us before we know it – thank goodness, since I’m done with the summer heat – and I want to do something really unique.
We’ll be sharing some of our past fabric art decorating methods on Facebook & Pinterest, and there’ll be some fun prizes for anyone who gives an answer!
Human curiosity is a marvelous thing, and it’s the driving force behind our shared need to know the end of the story – which is something we fabric artists can put to work for us when we’re creating quilting stories. The more curiosity’s used and trained the healthier it gets. In fact, it becomes almost magical when it’s coupled with a healthy imagination. This may seem like a hard thing to achieve, but in reality – curiosity and storytelling are both skills that can be trained.
As
we all know, the sooner you start training a character trait in a child, the
stronger that trait becomes.
Michael
and I raised our 3 kids on an isolated ranch with no neighbors and homeschooled
them to boot. Because the kids weren’t
getting a lot of outside stimulus, I worked very hard making sure that their
minds were constantly engaged with:
Made-up stories
Books – by the hundreds
Games
And all sorts of
verbal stimuli.
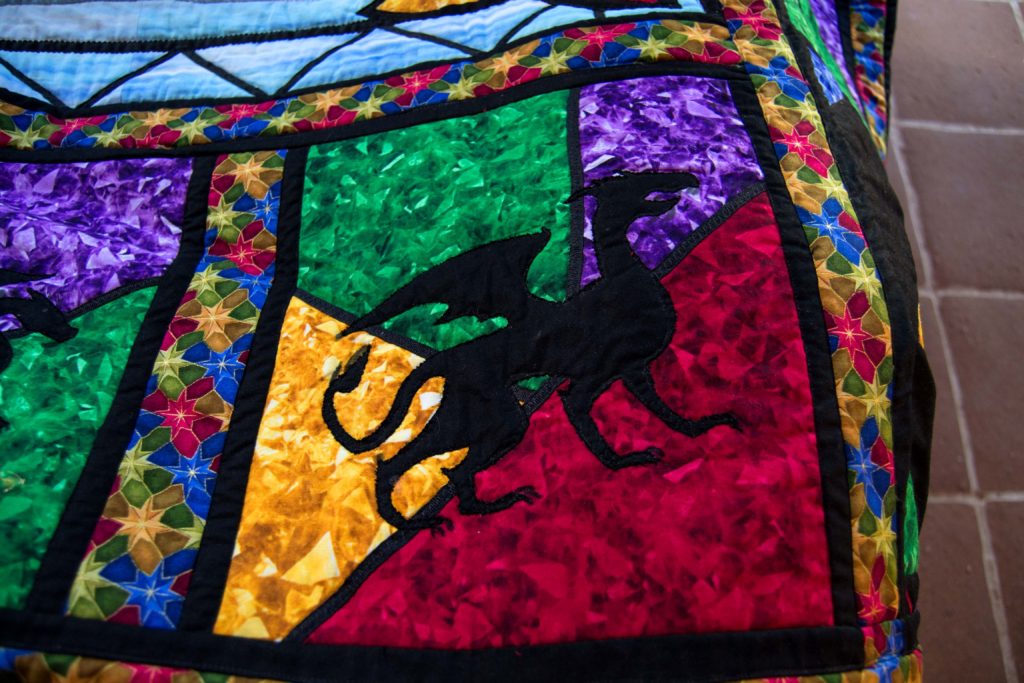
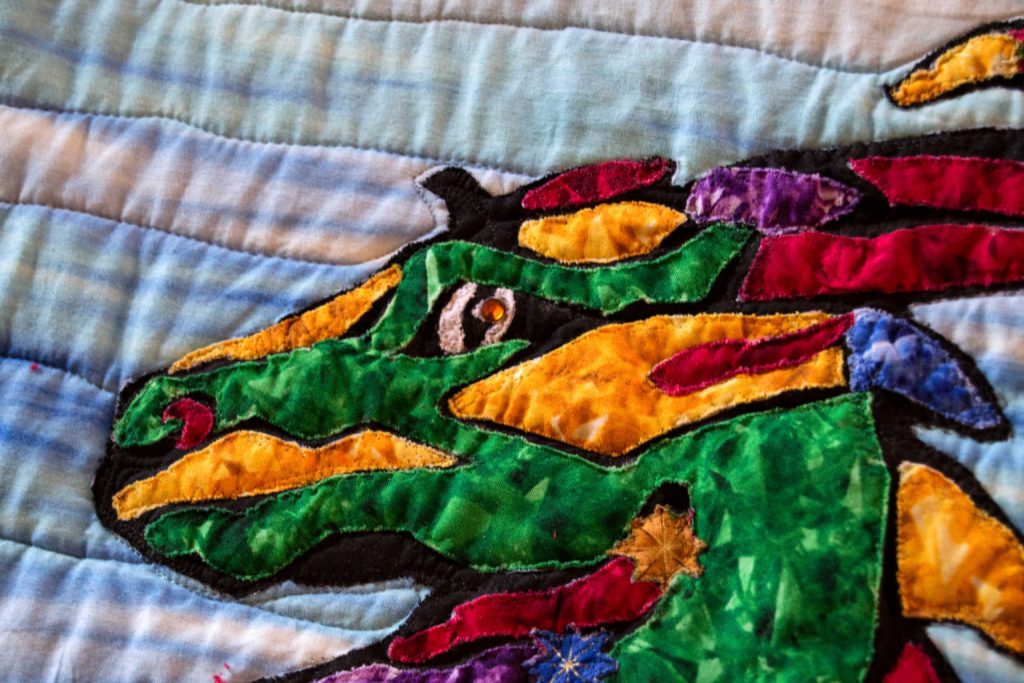
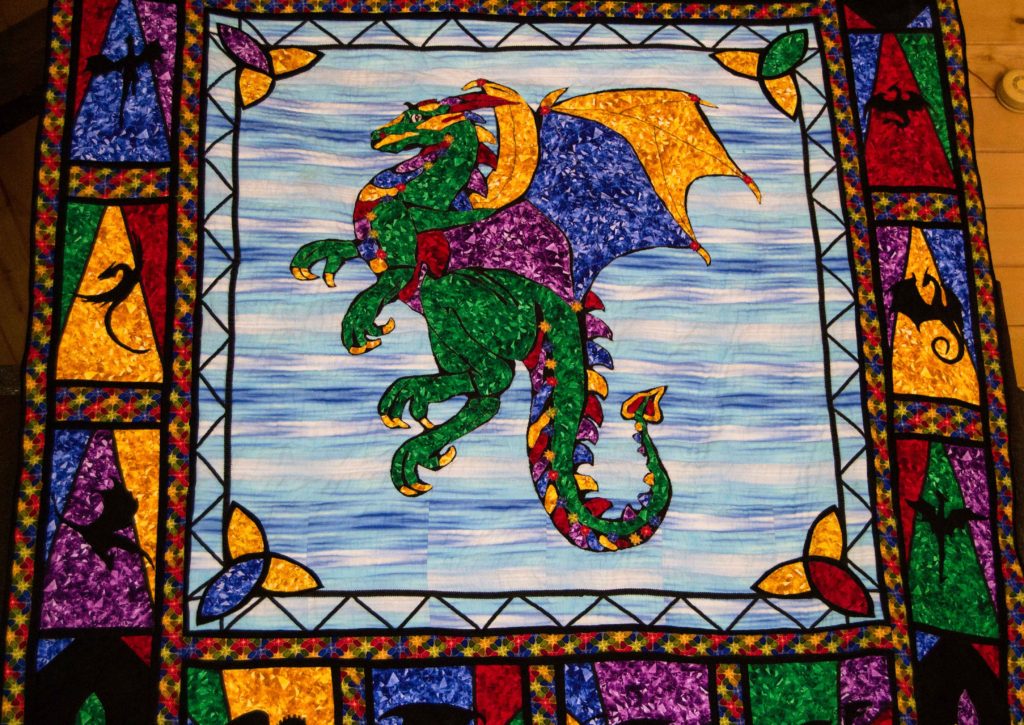
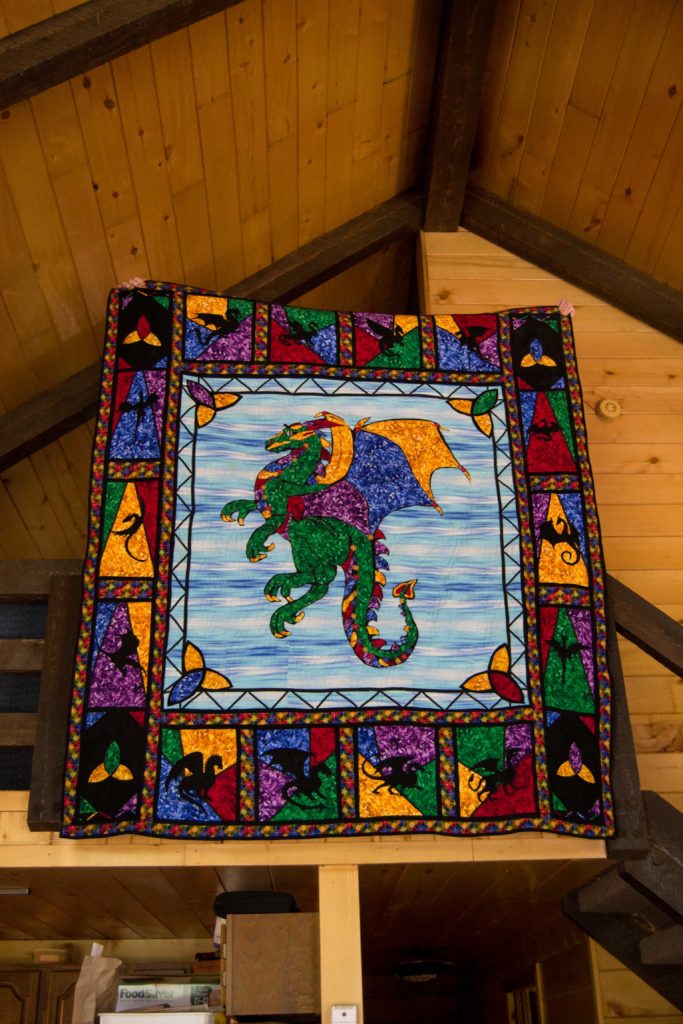
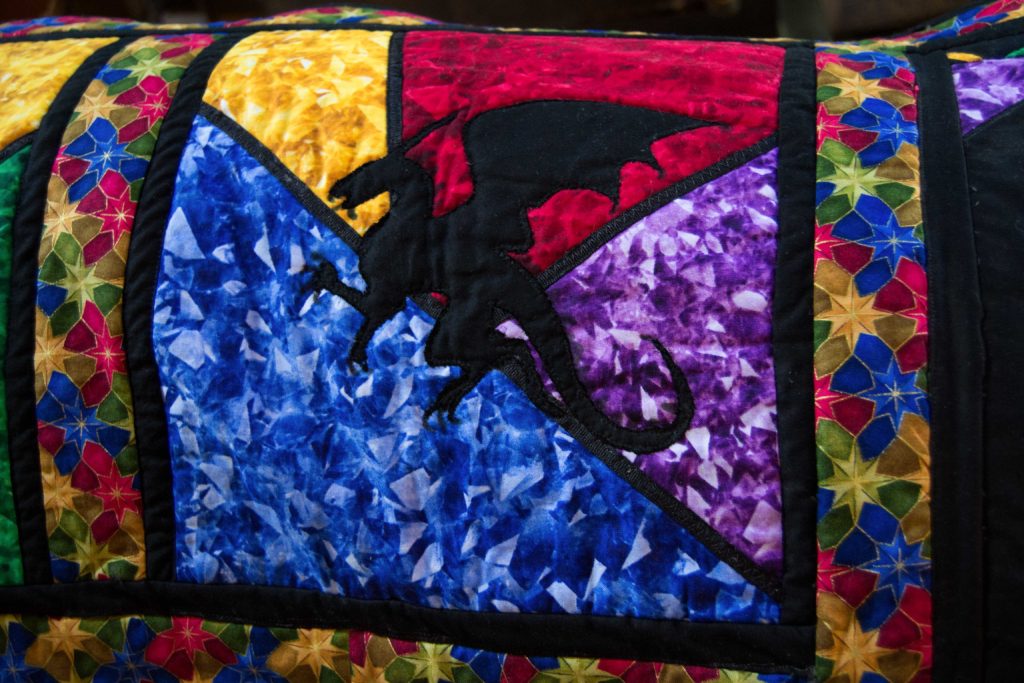
I knew I had succeeded when they finally took me to their favorite outdoor play place that they had named Dragon Rock. It looked like a boring old ditch to me, but they confidently assured me they could see the scales of a petrified dragon wing and proceeded to enthrall me with all the stories they had come up with about it. (This was the inspiration for my dragon quilt, by the way).
This is my family – I think we turned them into an imaginative bunch!
Wanting
their imagination muscles to continue developing, I took a long look at the
quilts I was thinking of making them, and decided they were really blank
canvasses just waiting to spring into life.
How to Develop Your Imagination
Muscles
There
are ways to begin developing your imagination muscles faster so that you can
start creating quilting stories, rather than just ordinary quilts.
Add Heroes to Your Quilts
I’ve
found that it’s a lot easier to tell a story about a character you love and are
inspired by. If you’re in love with the
main hero of your quilt – people who see it will be, as well. This holds true for everything from
butterflies, to a traditional Lazy Susan quilt, to some of my wilder creations.
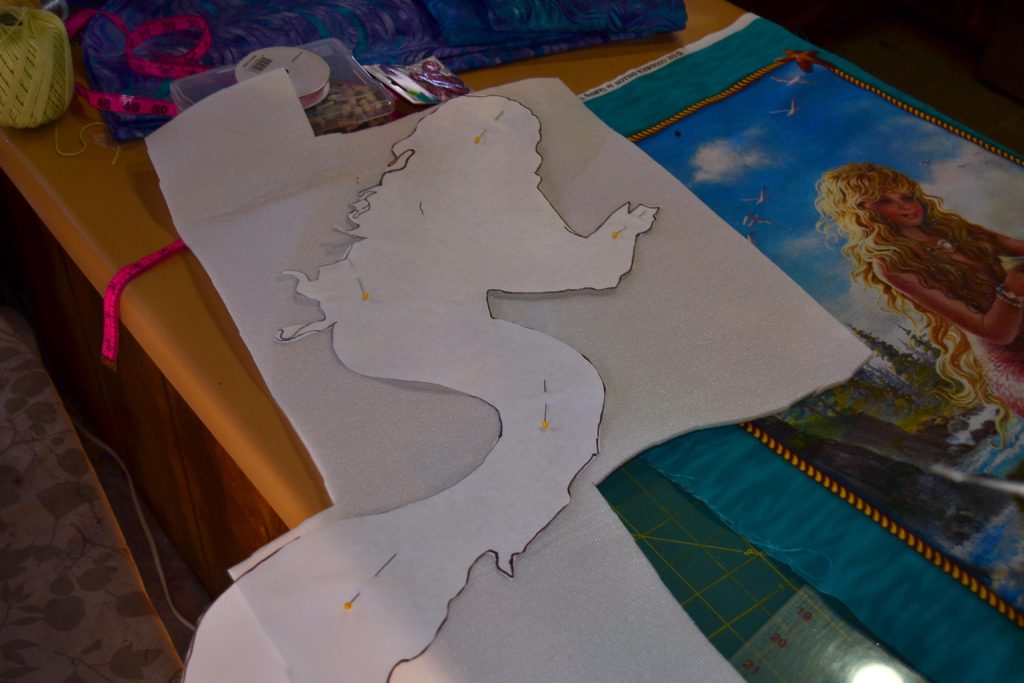
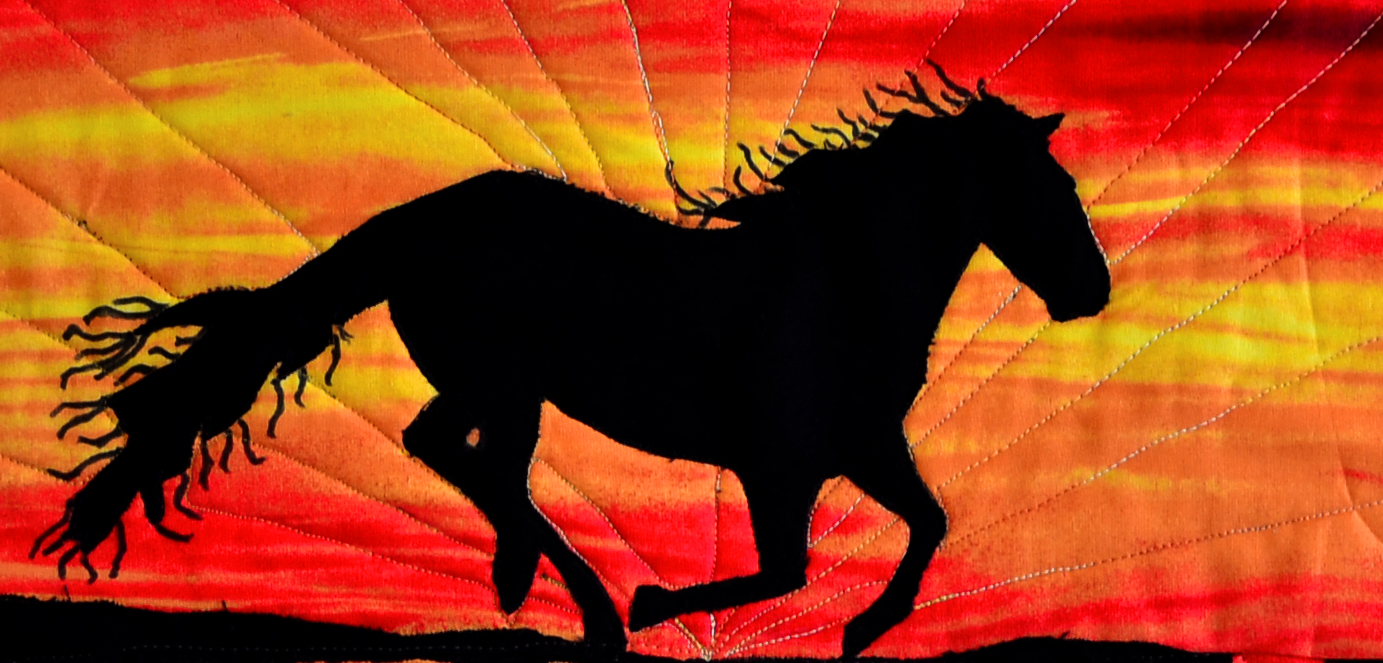
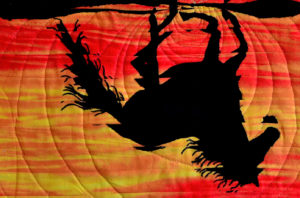
This is a stock photo we found on Google Images – please do not attribute ownership to us! This was labeled FREE for REUSE…
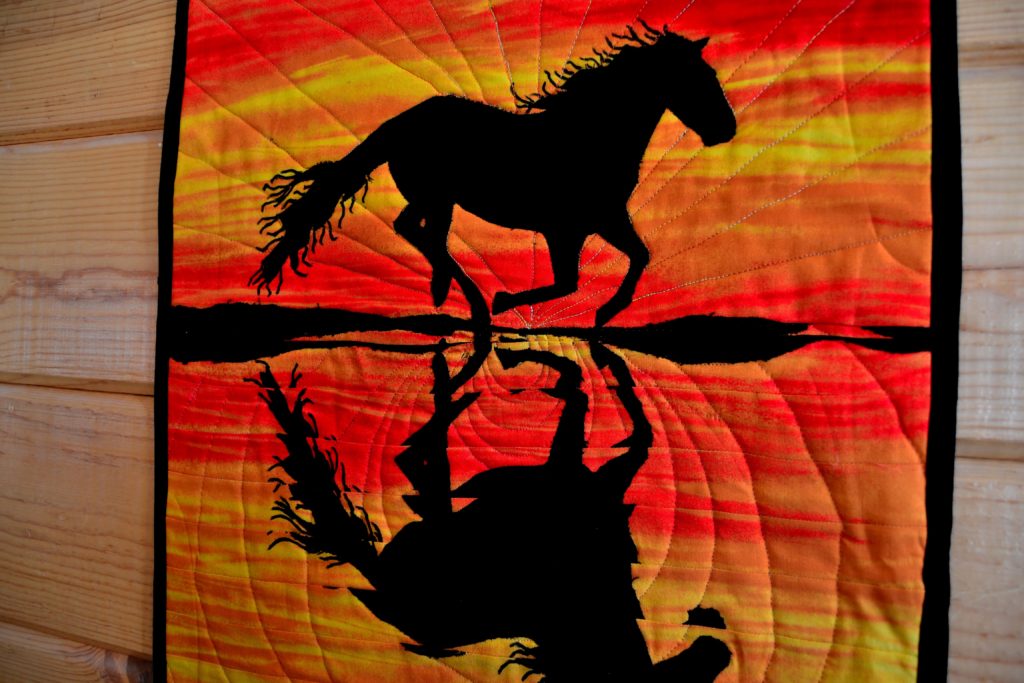
From that photo – and others – we created our “Running Wild” panel
Finding
these heroes is a lot easier than it sounds…trust me.
FIRST – I think about what I want
the piece I’m working on to say or do
Are there characters that can fire the imagination and generate stories or is there only movement? Keep in mind that ‘characters’ does not necessarily mean ‘human’. They can be anything, from mermaids, dragons and fairies, to puppies, vehicles or fish.
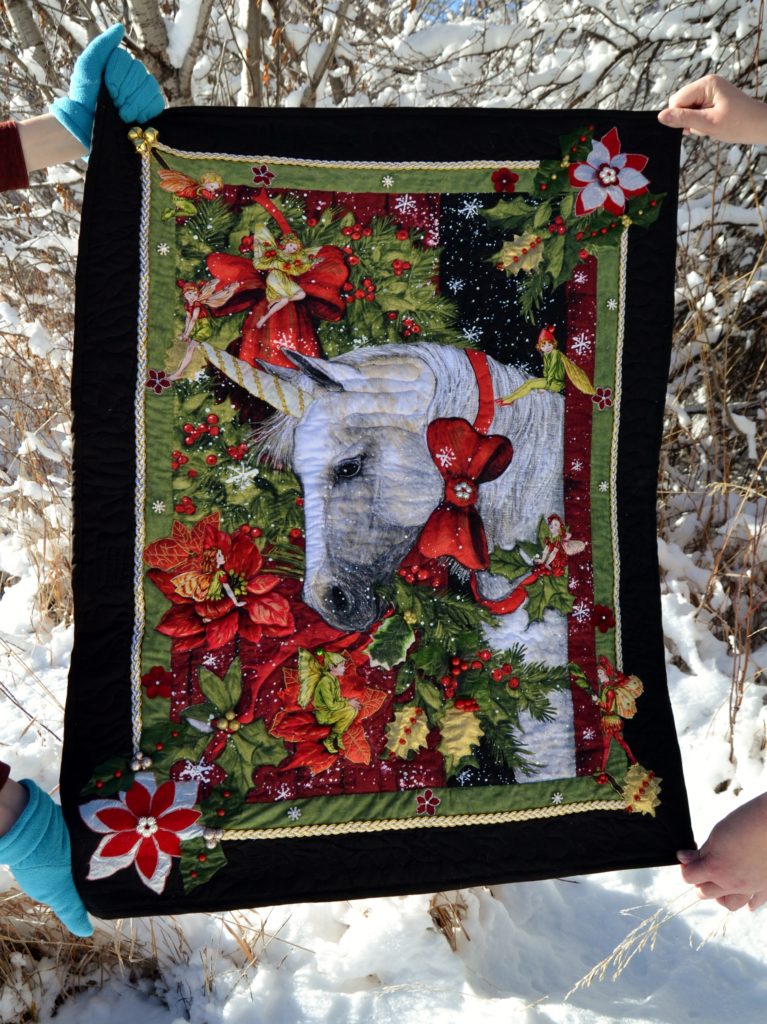
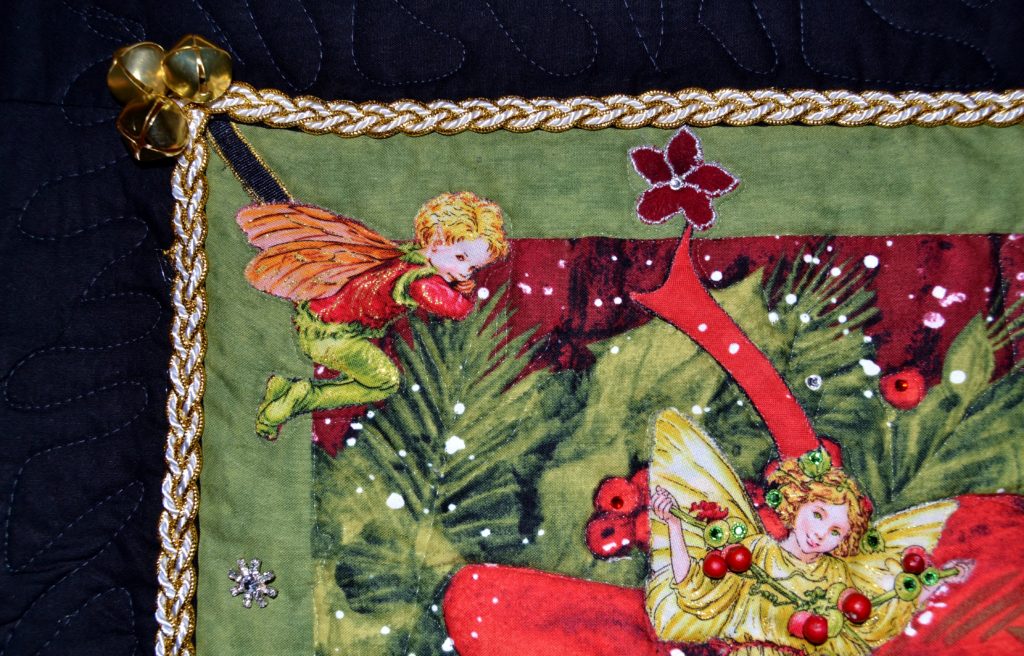
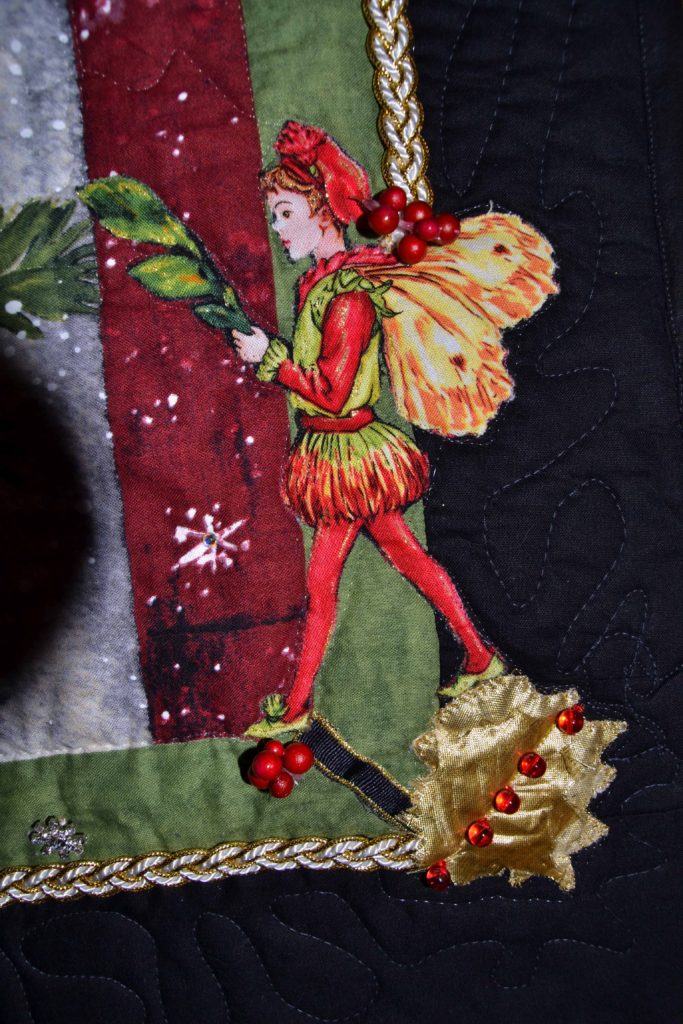
The main focus should always be on this main character with the movement and story going on around them. Look at my ‘Christmas Delivery” Panel. The main character is the unicorn (and he’s only a unicorn because I added the horn).
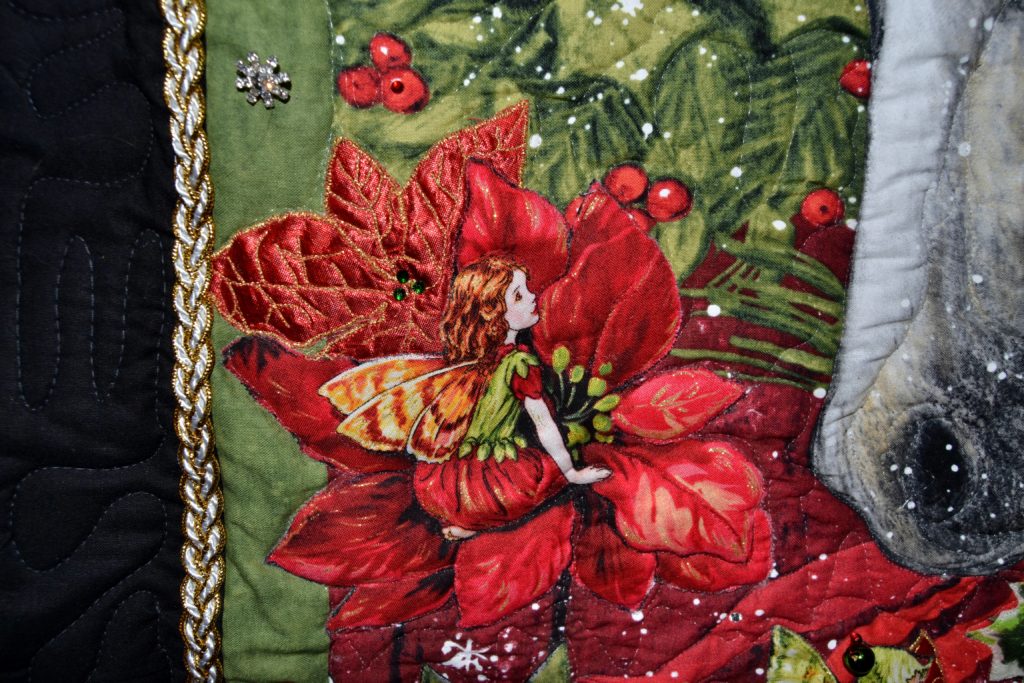
I also added 7 fairies engaged in different activities; but they’re there in support of the unicorn.
Now, instead of having a plain white horse with some Christmas greenery around it (pretty but typical); you have a unicorn (magical) that is being delivered to someone – (part of creating quilting stories is in letting your imagination come up with that someone) by other magical creatures – the fairies.
You can see that the unicorn is having a chat with one of the fairies, while the rest are busy getting him ready for the Christmas Delivery.
SECOND – I create countless
unanswered questions
The
Christmas Delivery scene generates multiple questions in my mind, such as:
What are they chatting about?
Where are they?
Who is receiving this magic gift and why?
What is the unicorn’s mission? Will only the recipient be able to see him, or everybody else as well?
Etc.
In my dragon quilt – which is stunning, by the way – if you have any imagination at all, you begin to wonder why there are dragons on an old abbey window.
Were there ever
real dragons there?
What happened to
them?
Why is the focus
all on the big one in the middle?
What did it do…accomplish…destroy?
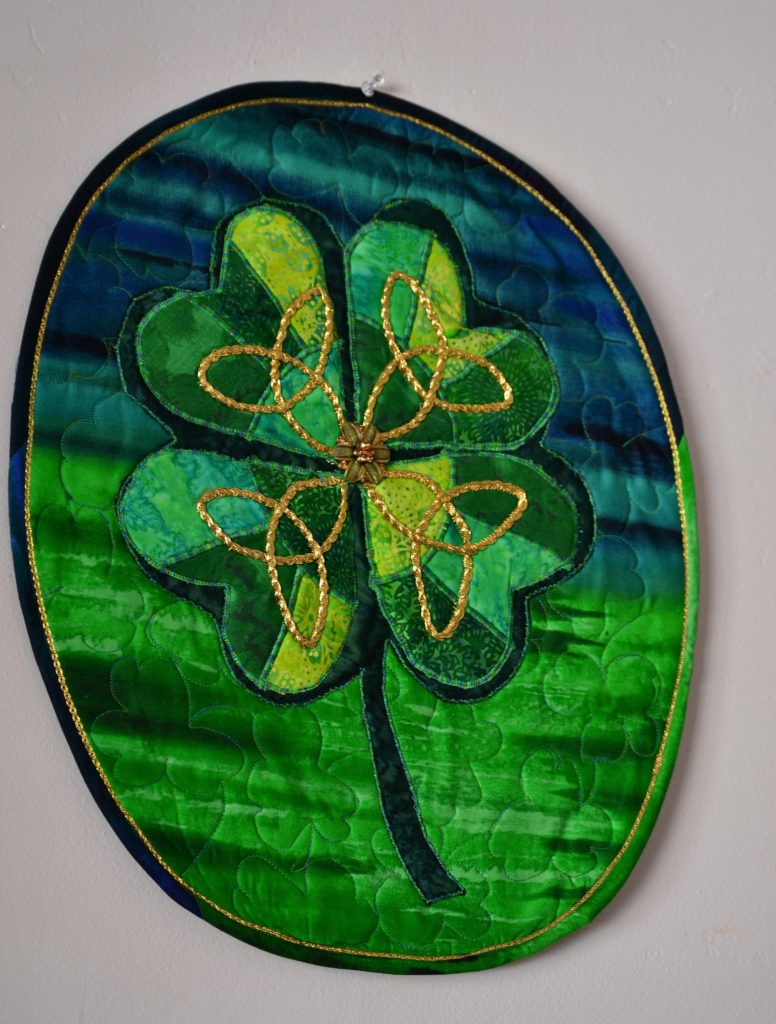
Even
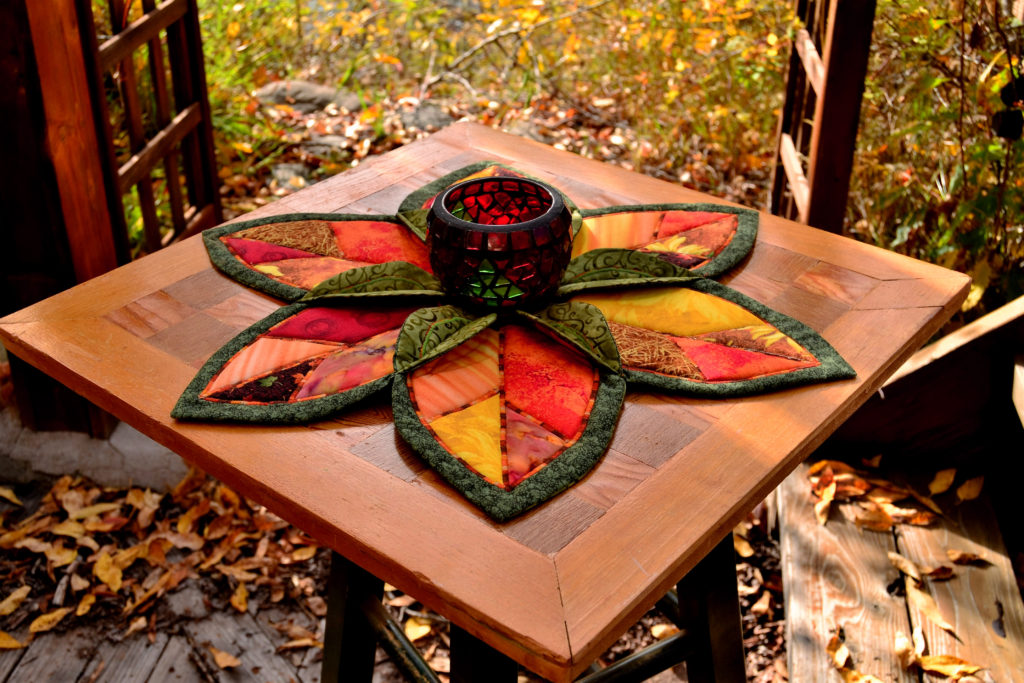
inanimate objects, such as my Shamrock Table Topper can make you stop and
think. Why is this four-leaf clover special? Will anyone find it? What magic can it create?
Engaging
your viewer in the story brings it to life, and makes it much more interesting
(to my mind) than a regular patterned quilt.
Let Your Project Have a Hand in Creating Quilting Stories
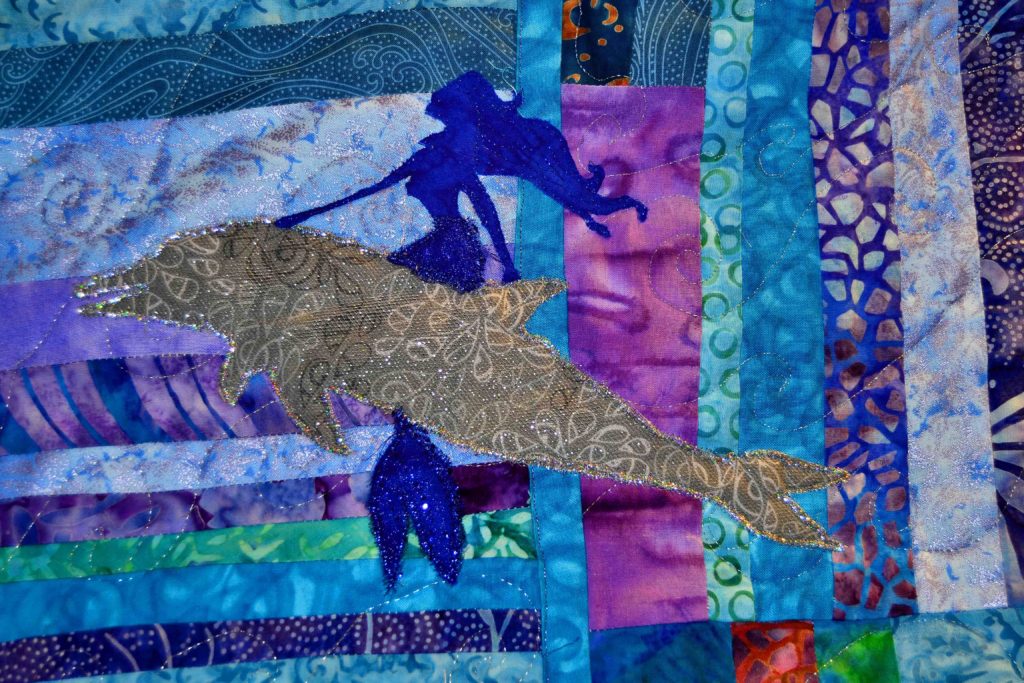
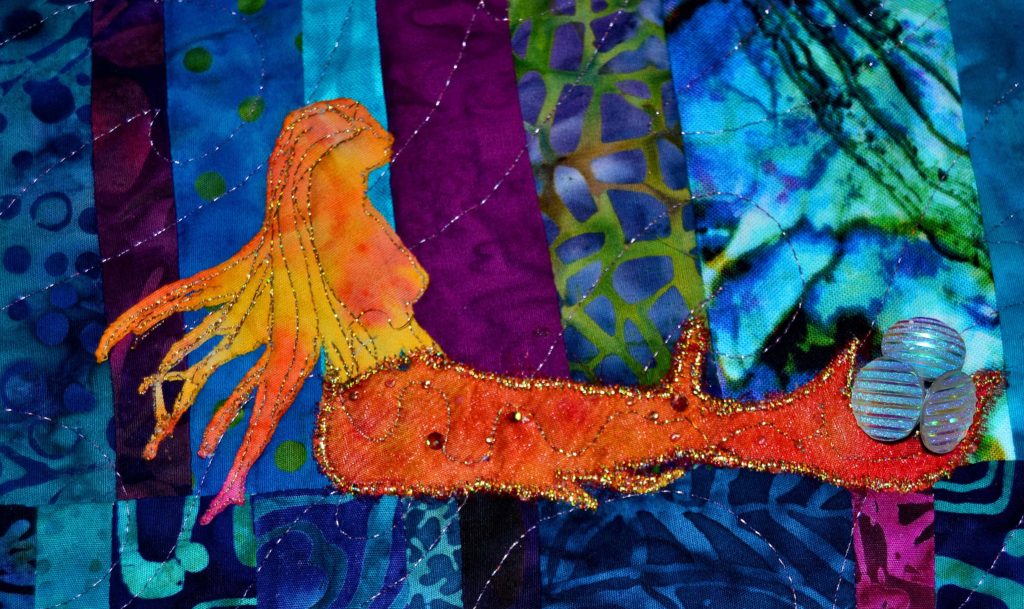
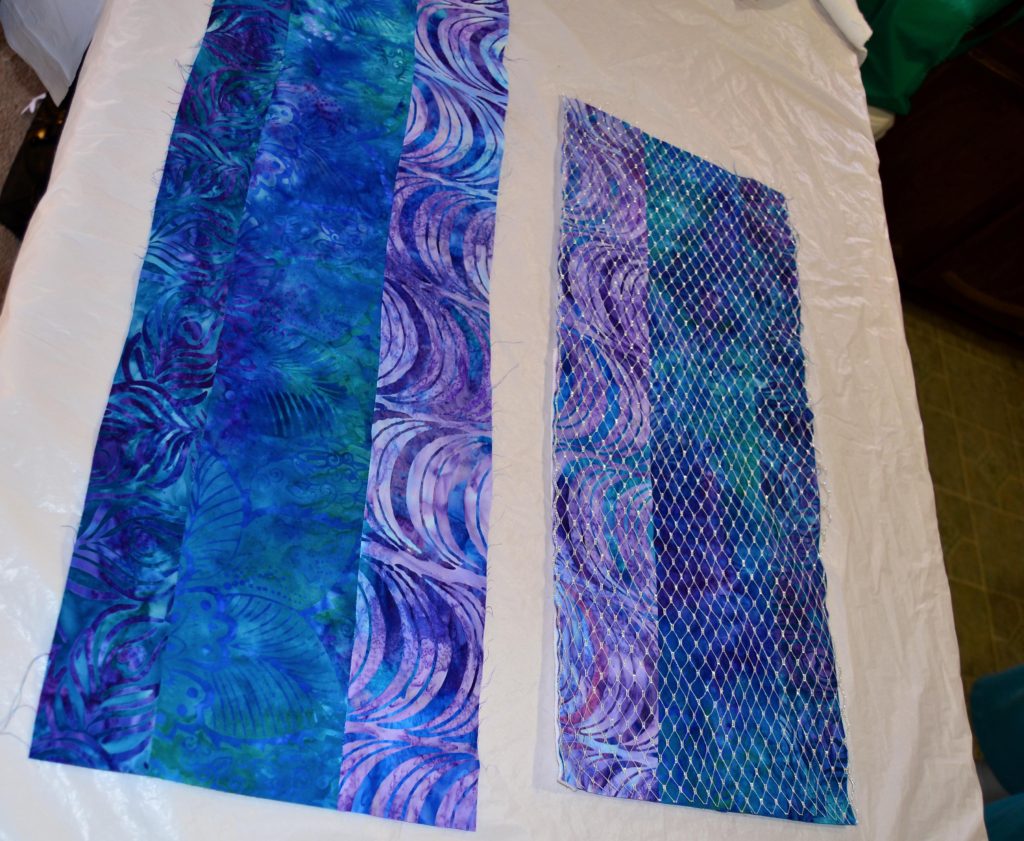
I’ve just finished the Ocean Maidens quilt and Suzanna has lamented numerous times how much she would have adored this quilt when she was young, and the endless stories she could have made up from it.
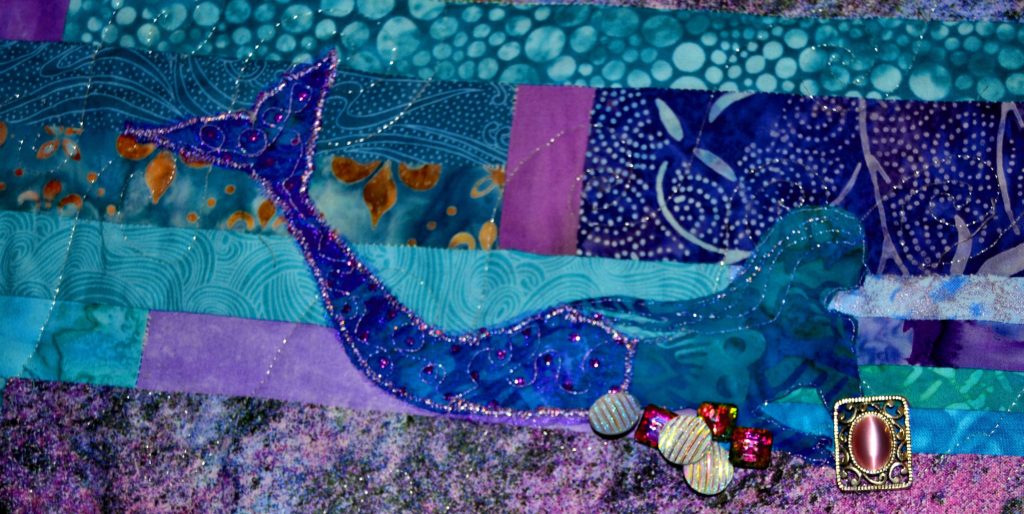
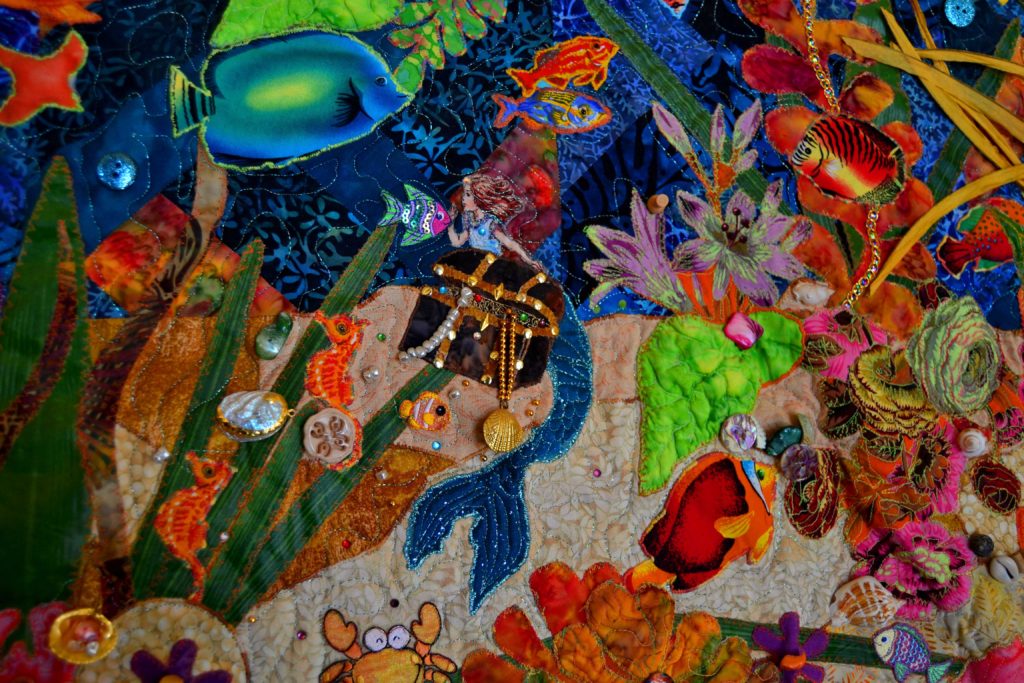
With just a few mermaid silhouettes and accessories, I turned a basically pretty border into a mermaid sea where mermaids swim…read books…have tea parties…ride dolphins…collect jewels…pick bouquets…and blow bubbles. Much more interesting than just a funky-strip border with endless scope for the imagination.
Suzanna’s also made me promise never to sell the Coral Reef panel because she wants to use it to stimulate her future children’s’ imaginations.
Creating curiosity leads in a project is relatively easy to do.
The Easiest Way to Add a Curiosity Point to a Quilt
Start
by taking a good, long look at the project you’re contemplating sewing.
What does it say to you? Is it begging
for more ‘pop?’
More glitter
Something magical?
A story?
Etc.
How
can you improve the quilt without too much trouble? How can you make it completely individual
from the million other Log Cabin quilts or whatever your pattern is?
But if you want to fastest, easiest way to add a character or a curiosity point… I have one word for you – appliques. With the right appliques, you can change an everyday quilt pattern into Shazzam!!!
Appliques
Once you have your hero character, and the corresponding pattern and colors chosen, think about what else should be in this picture.
I was very drawn to the Christmas Delivery panel, because the horse was so beautiful and elegant. I bought it not knowing what I was going to do with it; so I just let it sit there and percolate in my mind until the idea to change it into a unicorn with attendant fairies came to me. Then I appliqued on the horn, fairies, neck ribbon, holly leaves, etc.
The silver & gold ribbon and jingle bells really helped, too, and before I knew it, my panel went from the same as hundreds of others to shazzam!!!
Completely unique and different.
I also added fairies to my ‘Fairies in my Garden’ panel and made it pop. Michael Miller Fabrics has a great line in fairies. Check it out. But don’t limit yourself to just those embroidered appliques you get in packages at the quilting store, or to appliqueing on printed fabrics, either.
Appliques can be made from almost any type of fabric or accessory and are only limited by your own imagination.
In
my Coral Reef panel, I used some super bright, large floral fabric from Kaffe
Fassett to construct my coral reef. Some
of the reef I made from fussy cutting the existing flowers, and some I just
made up my own shapes for.
It
all works.
I
have found a little fake fur stole at the thrift store, and I’m going to use it
to make animal appliques for bears, dogs, cats, etc. Your own imagination is the only limit here.
Here are a few other suggestions for adding “wow pops” and stories to your quilt:
Fabric
Sometimes
the only thing you have to do is choose completely different colors than have
ever been done before.
This was the product of a moving day sale from my favorite quilt store – all colors I love, none I need…right now! Tomorrow? Who knows?
Traditional
log cabin quilts, for example, tend to use darker earth tone fabrics. Imagine what would happen if you used fuchsia
pink and turquoise fabrics instead!
You can most often use fabrics in your stash for these types of projects. Especially as I have to admit that I love some fabrics at first sight, and can’t spend another day without having them in my stash, even though I have no project to use them on yet. I put them where I can see them easily and wait – eventually they will tell me what they want to be used in.
Angles
Quilting is all about angles and how they go together. If a pattern calls for all right angles and triangles, study it and see if you can switch some of these out with something totally unexpected.
Remember
that your brain works extremely well with patterns, but it’s the unexpected
that makes it take notice.
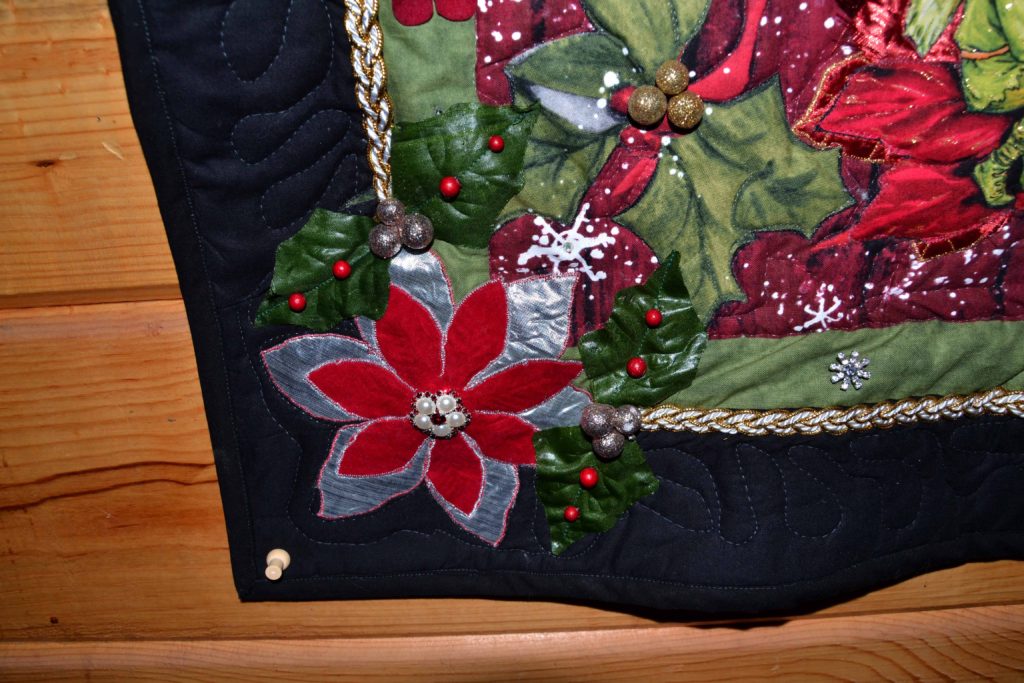
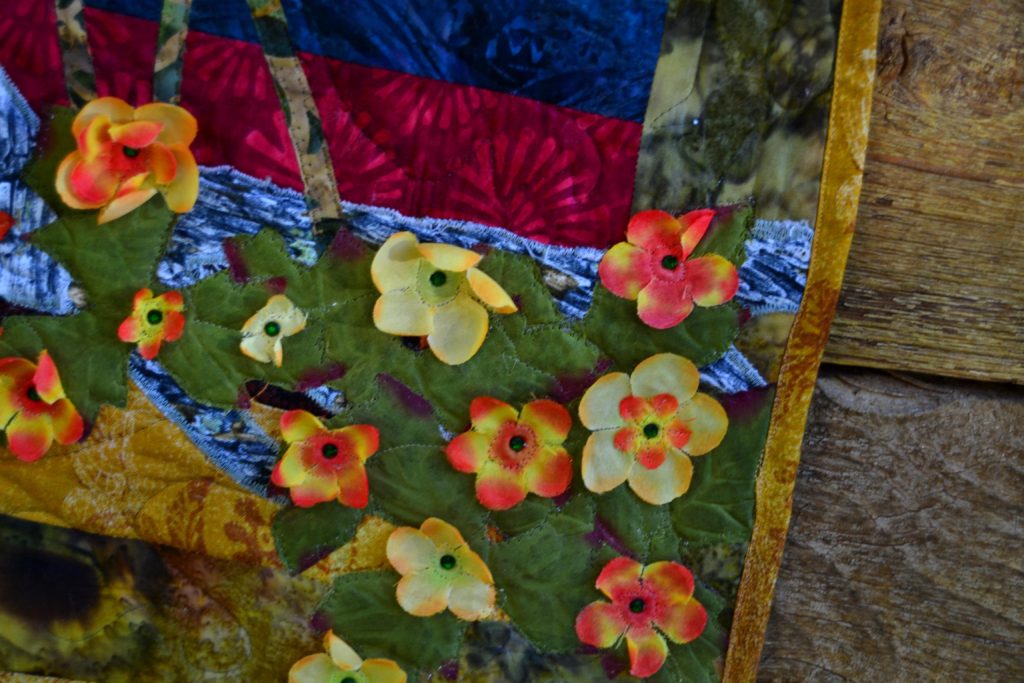
Fabric Flowers and Leaves
These
pre-made, easy-sew, bond-well-with-wonder-under gems can REALLY add a lot of
pop to your project, they’re relatively fast to work with and they’re SO
realistic!
Appliques
do not have to be big and bold to carry a punch.
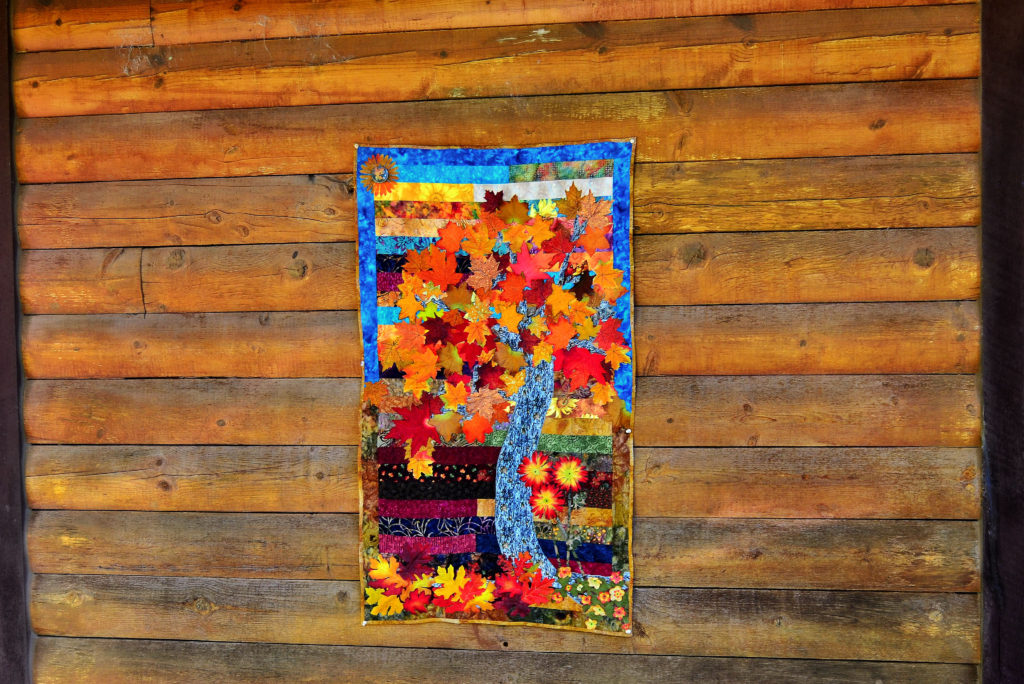
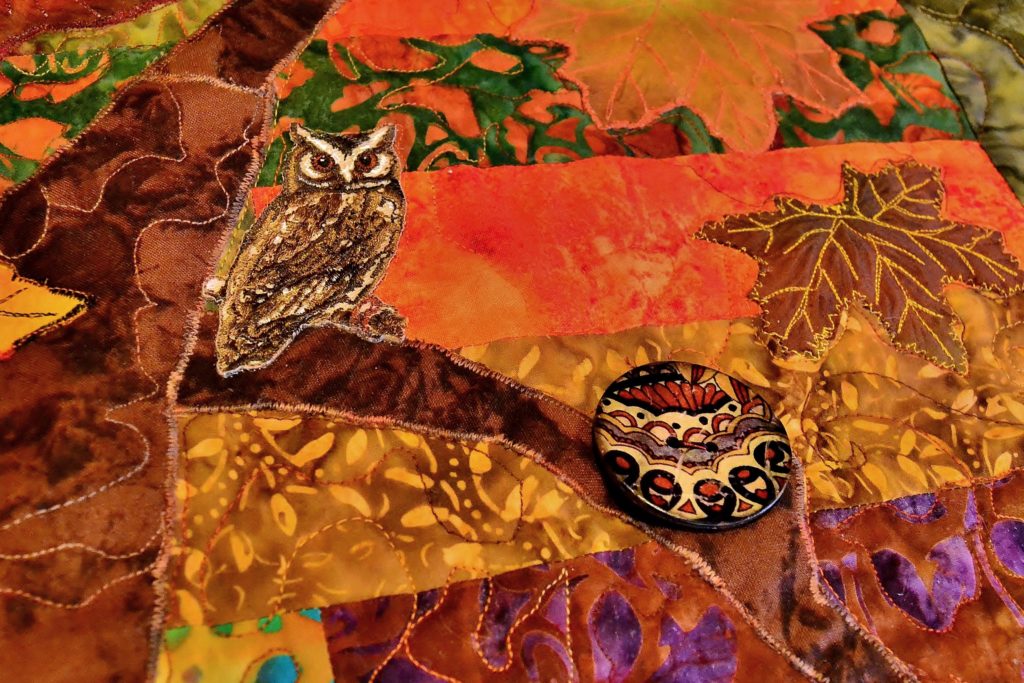
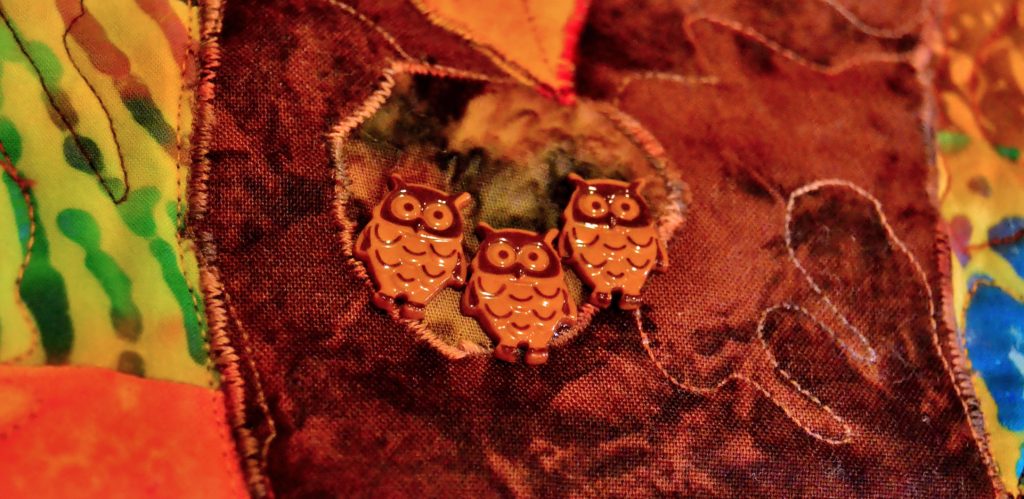
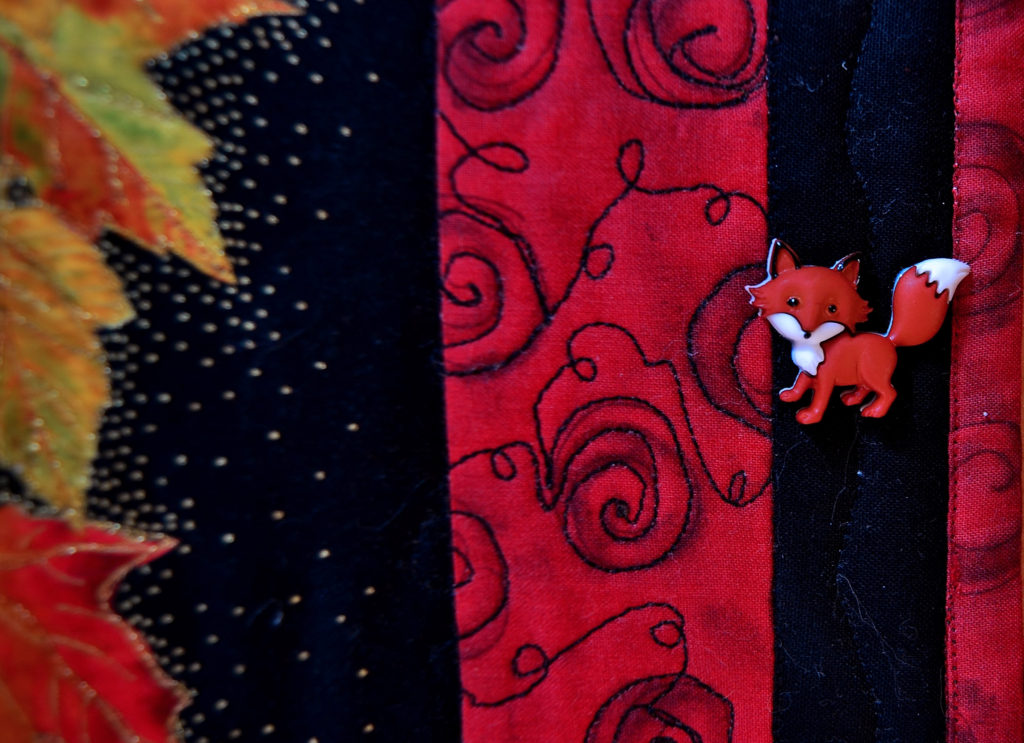
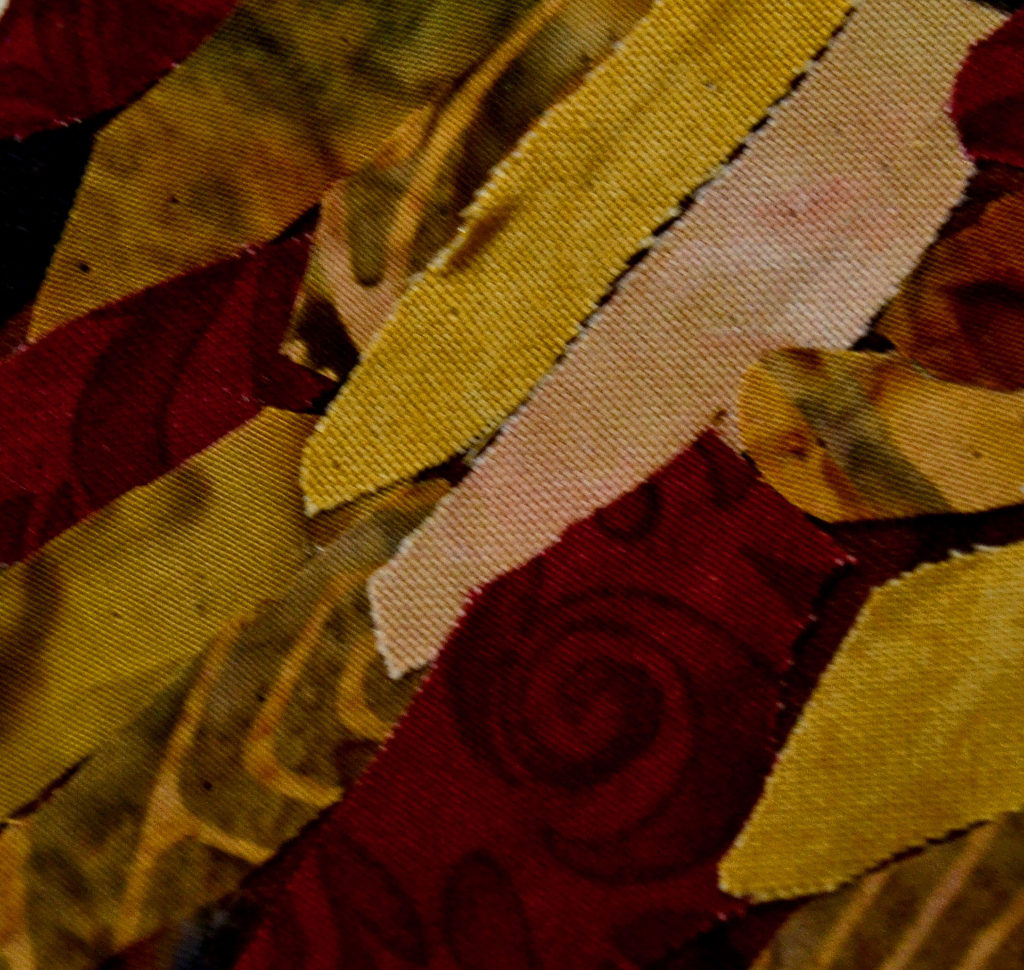
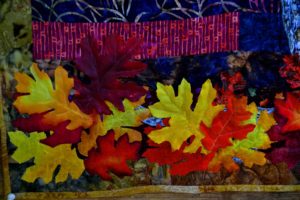
If you look at my Autumn Daze panel, the first thing you see are all the autumn leaves that I appliqued on. They are stunning. But when you look more closely you will find an appliqued owl up on a branch, a few songbirds enjoying the day, and a fox peeking out from behind some leaves; which begs the question –‘Will the owl see him?’
Learning
the art of subtlety really helps when you’re creating quilting stories that you
want people to come back to over and over again for years.
Silhouettes
These
are figures cut from a single piece of fabric – usually black – and appliqued
in place. They can be of absolutely anything, but the genius of them is
even though there are no distinguishing features, they can express every emotion
known to man.
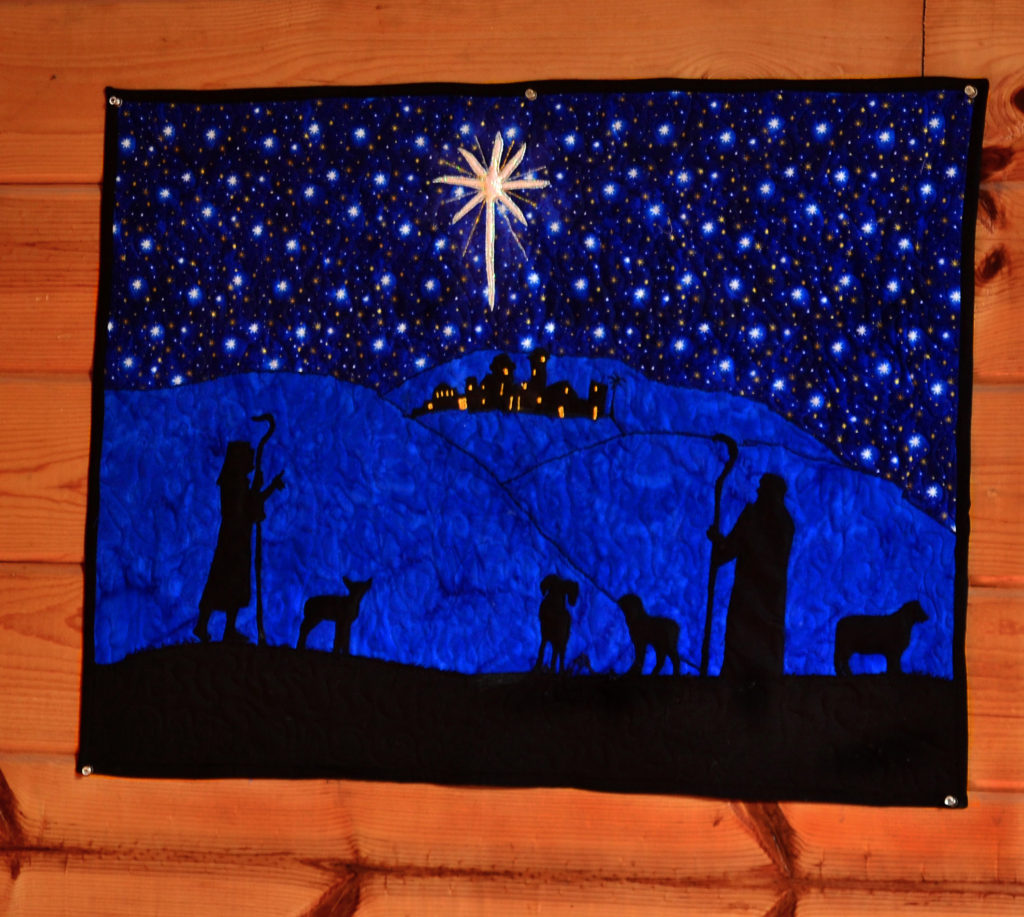
Silhouettes are all about body language and as we all know, that speaks much more powerfully than words or expressions do. Take my ‘Keeping Watch by Night’ panel. You can see nothing of the shepherds’ faces, but by their stance and the one pointed finger you know exactly what they’re seeing, feeling and discussing. Even the sheep – with the exception of one – are paying attention.
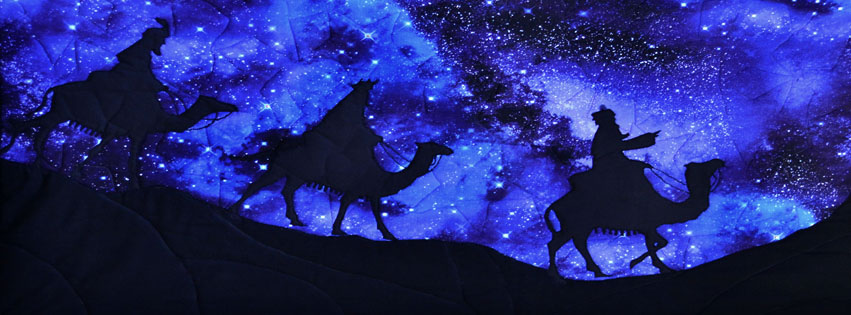
In the ‘Camel Panel’ you can see that the 3 Wise men are tired but determined to reach their goal even though it’s night.
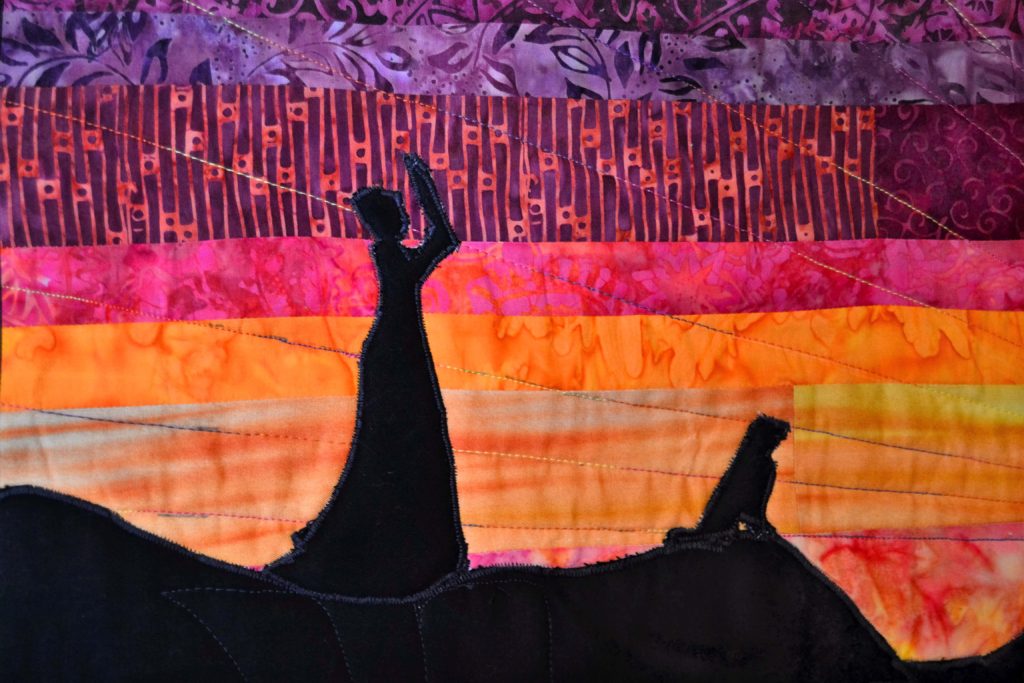
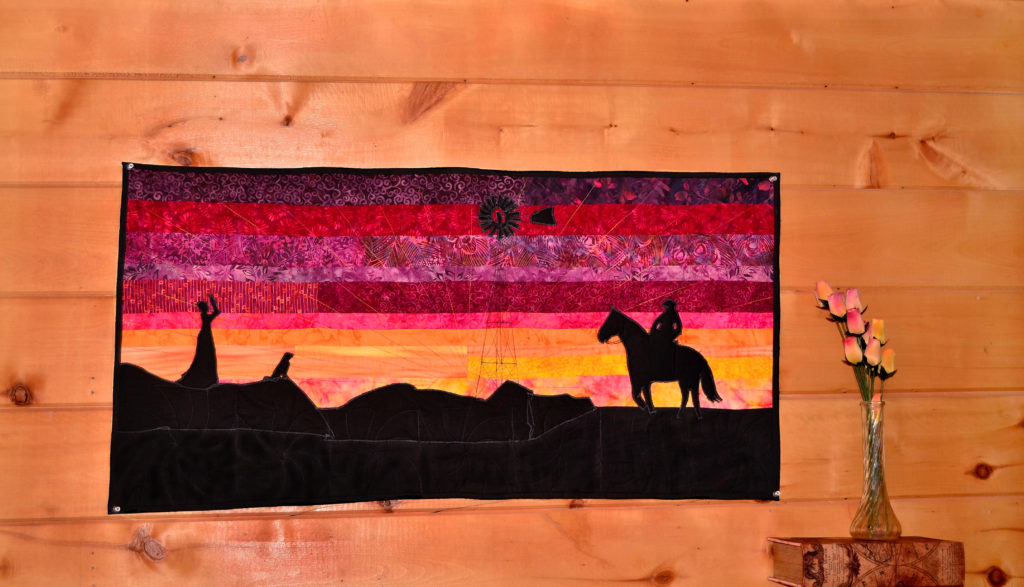
In the ‘Cowboy and His Lady’ you know that he’s coming in tired and hungry after a long day on horseback and 2 true and loyal hearts are waiting and watching for him and thrilled to see him coming. Even though you can’t see it, you know there’s a house just out of sight with light shining through the windows, the good smells of supper cooking, and it’s warm and safe.
Without
saying a word, this panel speaks to the very heart of each of us because it
shows us what we’re all searching for.
Love, acceptance, safety and someone waiting for us to come back.
It speaks to our hearts of the true meaning of home with only 3 simple
silhouettes.
I’m
a major fan of silhouettes, since they’re easy to create and sew, and they
leave such an effortlessly powerful impression.
So
give this option a think when you’re planning to tell a story.
Not All Stories are Created Equal
Some projects work best if they get right in your face, bold and unapologetic – like the Coral Reef and Dragon quilts – while others just need a hint of mystery.
The shamrock table topper invites you to imagine all sorts of things, but it does it very quietly. I’m thinking of doing a corresponding wall hanging to my Ocean Maidens quilt, and it too will whisper very quietly of mystery.
Think carefully about what colors and accessories will convey the mood you’re trying to portray and find what you need. Otherwise, all your effort will be wasted.
If
your main character is moving – and this can be anything, remember – answer
these questions to yourself.
Is it moving to or
away from something?
What emotion will
be evident?
Is there a
predator?
Is it hiding?
Is it doing
something completely out of character?
Does it have any
supporting characters?
What season, what
time of day, hot or cold, old or young?
All
of these kinds of questions should be considered before you make your first
fabric cut.
Allow the Quilt Some Creative
Freedoms
Don’t
panic if you’re planning for your project to go in one direction and it changes
course in mid-stream. It happens – just go with the flow. You often end up with something very
different, and even better, than the idea you started with.
I
like to self-identify as a fabric artist rather than a quilter. Which gets a lot of puzzled smiles, quietly raised
eyebrows, and a question: “What’s the difference between a fabric
artist and a quilter?”
After
all, a traditional quilter creates…a quilt.
A fabric artist creates…a quilt.
The differences may seem small, but they’re there, trust me.
The difference is in intent and outcome.
Ever dangle your legs over a stream? Then let’s do it on fabric!
Do
you want to create a quilt that is beautifully sewn, has all its points
matching perfectly and wins a blue ribbon at the local quilt show?
Or
do you want to tell a unique story that shows passion, humor, and beauty?
Fabric art isn’t so much about traditionalism and winning blue ribbons at fairs. Although as Isaac Newton famously said, “If I have seen further it is by standing on the shoulders of giants.”
We
like to embrace the traditional beauty and influences, but build on it.
So, if you intend to create a story, you may use traditional techniques – but achieve an entirely different outcome.
Defining Fabric Art by Creating
Movement
The fabric art that we create is mostly movement and accessories. I spoke about the accessory angle in my Bling Blog, and I touched on creating movement in my Backgrounds First blog but I want to go into it in more depth here.
Just to clarify; when we say we’re creating movement, we don’t mean physical movement.
What we’re referring to is any aspect of a quilt that draws your eye from one section to another. I, for one, much prefer to view a project that tells a story and pulls you in, inviting you to become a part of the conversation, rather than a beautifully crafted, point-perfect masterpiece.
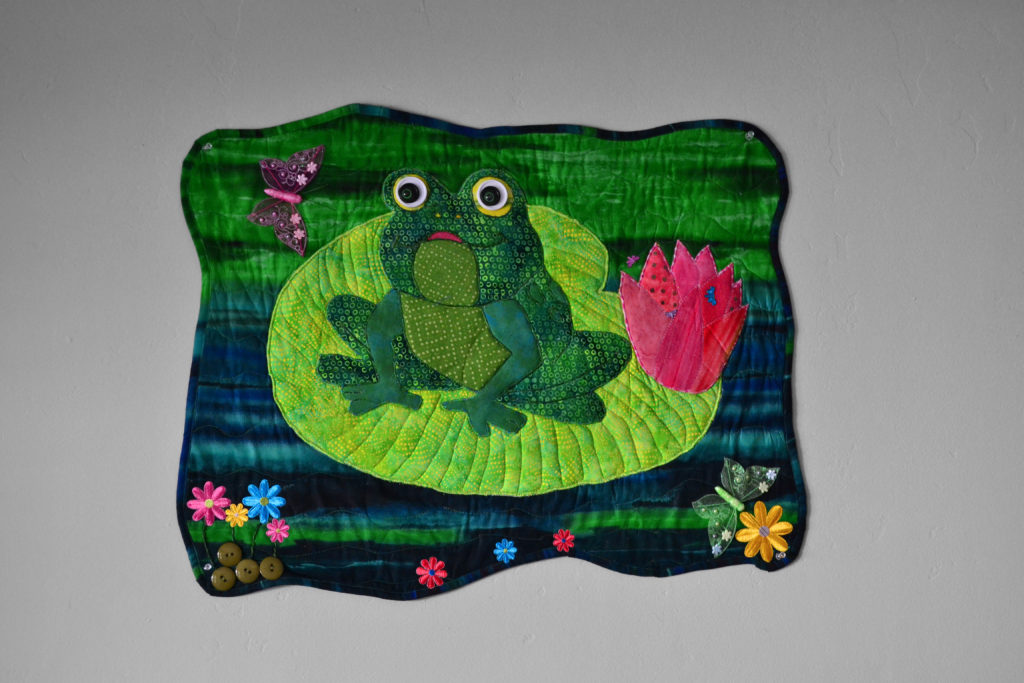
Here we have two moving elements; water, which always moves, and the butterflies. There’s a suggestion of potential movement from the frog – but that creates tension rather than movement.
You
may sense a little bitterness here towards what I like to refer to as the ‘Quilt
Nazis.’ If you’ve gone to a quilt store
of fair where everything runs on rules, you know what I mean.
Or
maybe it’s even a little bit of quilter’s envy, since many great traditionalist
quilters achieve levels of mastery that I can only envy.
But
what it really is, is a superior attitude on my part. I, like many human beings, like looking down
at the poor quilting robots trapped in their “this-is-the-pattern-and-I-have-to-follow-it-religiously”
rut.
Genesis of My Quilting Rebellion
It
started for me way back in the day when I made my kids’ first baby quilts.
I’ve got a real low boredom threshold. So rather than just make a quilt with blocks of the same Scotty dogs or bunny rabbits, I decided that I had to enliven things. I did this by adding variety:
Different fabrics for each block
Colored ribbons
Yarn embellishments
Different colored threads
And squishy bunny tails
These were a great hit with my babies, so when they were ready for regular beds, I made them each a twin quilt.
Instead of sewing a basic Sunbonnet Sue or Suspender Sam quilt, I went to Walmart. And there I found all the little girl/boy appliques they had and added one to each block.
Each
block of these early quilts featured a quaint little cutout engaged in a
different activity.
A
Sunbonnet Sue may be seen picking flowers or flying balloons, and in my son’s
quilt a Suspender Sam could be driving tractors or playing with a dog. I knew this was the way to go when I
overheard Suzanna telling her siblings a story about what was happening in the
quilt.
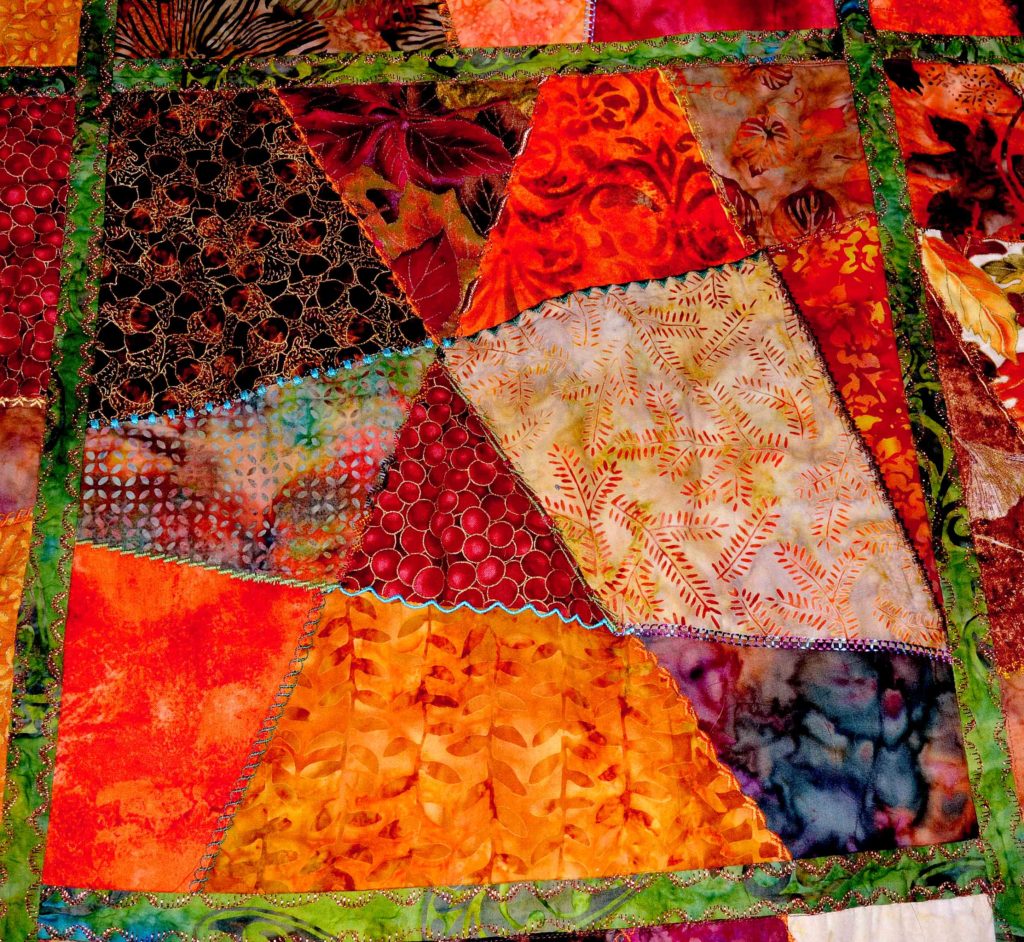
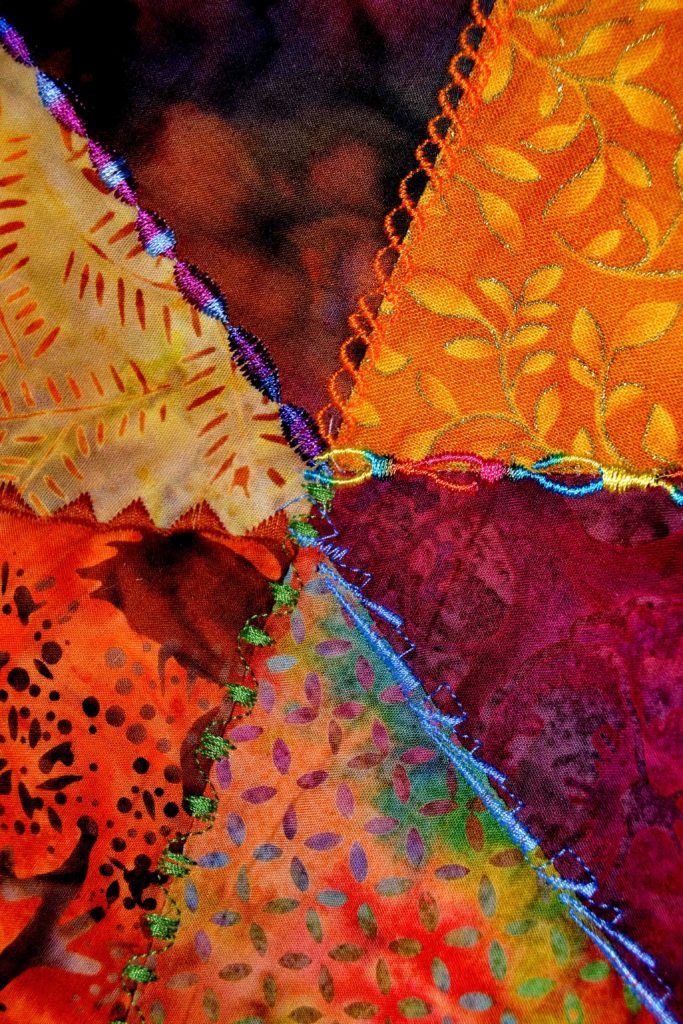
After that I explored the whole crazy quilt genre which I liked exceedingly because of all the different fabrics and colors and varying angles they’re sewn at.
When
everyone I knew or was related to – and their dog – had a quilt from me, I
started looking around for something different to create and gradually ended up
where I am now. Just let me say that the
fabric art I create and sew is not that technically difficult.
What
it can be, however, is extremely creative and often time consuming.
To
the way my mind works though, it’s a perfect fit. And for a project to “fit”
for me it has to move and say something.
Here is how I go about creating movement and stories in my fabric art.
Critical Questions to Ask Before Creating Movement in Fabric Art
Is my character
moving or is it the background?
I
have discovered that it is both too difficult and too time consuming to try to
accomplish both in the same panel. Plus
its way too complicated and actually accomplishes the opposite of drawing a
viewer in.
Do
one or the other, but not both.
In my ‘Christmas Delivery’ panel the unicorn is standing still; it’s the fairies that are moving. In my ‘Coral Reef Panel’ the fish are moving so much that you don’t really notice the water.
As
an aside, water, air, and fire are background elements that break the general
rule. In Coral Reef the water’s moving,
but it’s so subtle that your mind sees it and dismisses it because what’s going
on in the foreground is just so interesting.
Once
you’ve got your what, it’s time to move on to creating movement with non-moving
materials.
What materials
will accomplish movement?
Execution
matters.
If
it’s your background that will be moving, you have 3 options – fabric, thread
and accessories.
If it’s the character that’s moving you have the same 3 options, but to these you can also add batting, foam, appliques, and specialized quilting techniques.
We’ll
talk about these elements next week in the middle installment of this article
series.
Hey,
it’s movement. And creating movement is
the very basis of fabric art – it can’t be talked about in just a few short
lines. OK, a few long lines, but
still! That’s why we’re here.
In the meantime, please sign up for our FREE newsletter. We’ve got some very exciting developments coming up in the next few months, and we can’t wait to share each update with you personally.
If
you are the least bit observant, you may have noticed that as life goes, so
does quilting – or any other project you undertake. The beginning is exciting and challenging,
the end is – hopefully – rewarding
and satisfying, but the middle of a quilting project drags you down and hits
you with every negative emotion known to man.
The
middle of a quilting project is where you’ll discover evil “D” emotions:
Discouragement
Disappointment
Depression
Delusion
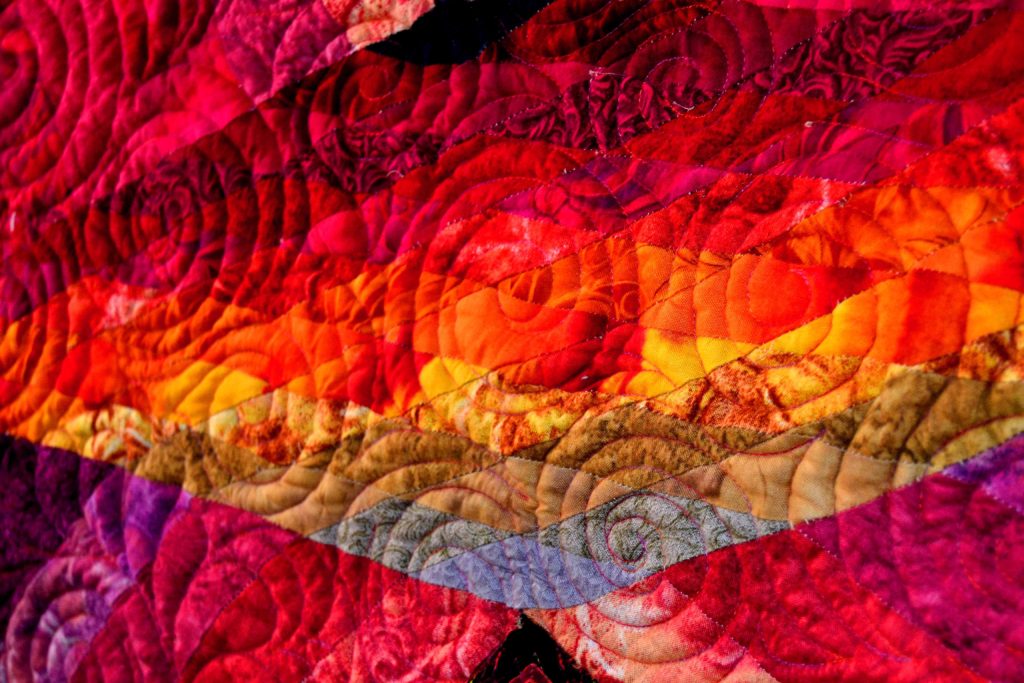
When your project looks like this – it’s hard to remember what it will look like in the end…
All of which usually leads us to ask, “Why am I even bothering with this?”
Quilters Have Great Need of
Endurance
My
friends we have need of endurance. I
really hate that word, endurance, but it is as completely essential in quilting
as it is in life. I’m thinking about
this right now, because I’m in the middle of my mermaid quilt and I am SO DONE
with it!
Unfortunately,
the quilt is not done with me.
I’ve
felt this way about a number of my projects – the dragon quilt comes to mind,
as well as my Lily Quilt Disaster. At
one point, I threw my lily quilt into a drawer and left it there for a year
before I could stand to face it again.
The good news is most of my little fabric art adventures don’t generate this kind of hatred, but when the middle of a quilting project is dragging me down like an extra hundred pound weight, I shift into survival mode.
Tips for Surviving the Middle of a
Quilting Project
As
with most other aspects of our lives that demand endurance from our souls, it
becomes easier to endure if you’ve got a few tricks up your sleeve. Some of these tips are practical, born from
experience, and some of them are psychological tricks to buck you up.
Either way, it’s essential to have a plan for when the going gets rough, because, my creative brothers and sisters, it will get rough sooner or later.
Tip #1 – Start another project
Having another quilting project – a much smaller project – that will take only a few hours or days of your time is a great way to relieve the boredom and tedium to be found in the middle of a quilting project.
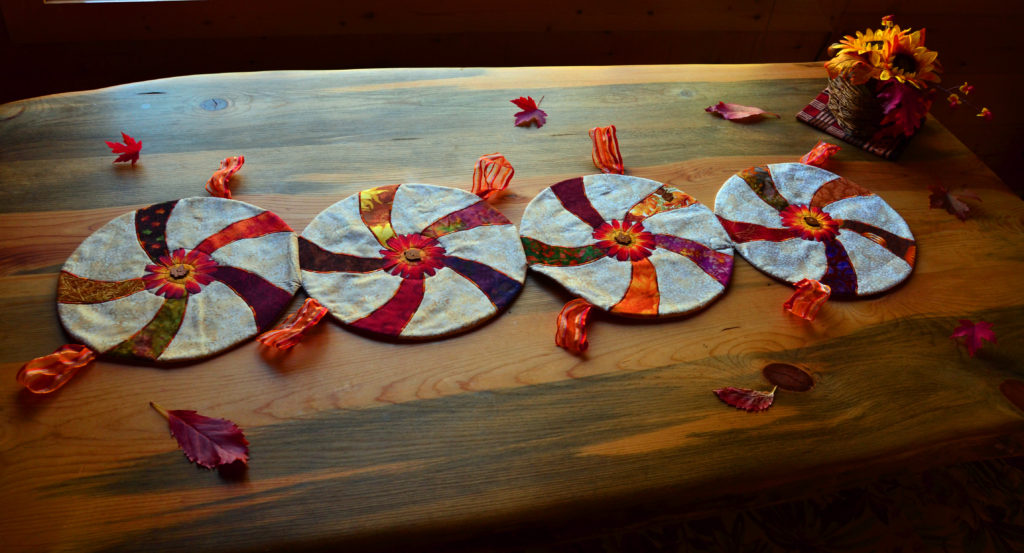
Potholders is one project that you can get very creative with and finish in the course of a morning or two. Being able to finish something, anything, will help you feel positive about your skills again and regenerate your enthusiasm.
Tip #2 – Big projects and hard
deadlines don’t mix!
Never
start a big project when you’re under any kind of deadline. If you want to give your brother a double
wedding ring queen sized quilt for his wedding, for example, consider giving it
to him on his second anniversary.
All
the extra pressure will just exacerbate those negative “D” feelings that inevitably crop up in the middle of a quilting
project, and those emotions make it even harder to finish on time.
Tip #3 – You’re not making the whole
quilt, just this one section
I
recently read that “a man, having one backside, cannot sit two horses.”
Beyond the hilarious visual image – this is actually quite true. You’re not sewing the whole quilt in one morning. All you’re doing is attaching this applique, or stripping this section, or cutting this strip of binding.
So
try breaking your project up into manageable sections and only do one section
at a time. That way, if you find
yourself falling into the “middle of the quilting project doldrums” you can
just leave it and sew something else in between.
This
way, you won’t feel guilty about having an unfinished project because you
planned it that way!
Tip #4 – Be a show off
Show
the parts that you have finished to family or friends and bask in their
praise. Oftentimes you’ll be seeing a
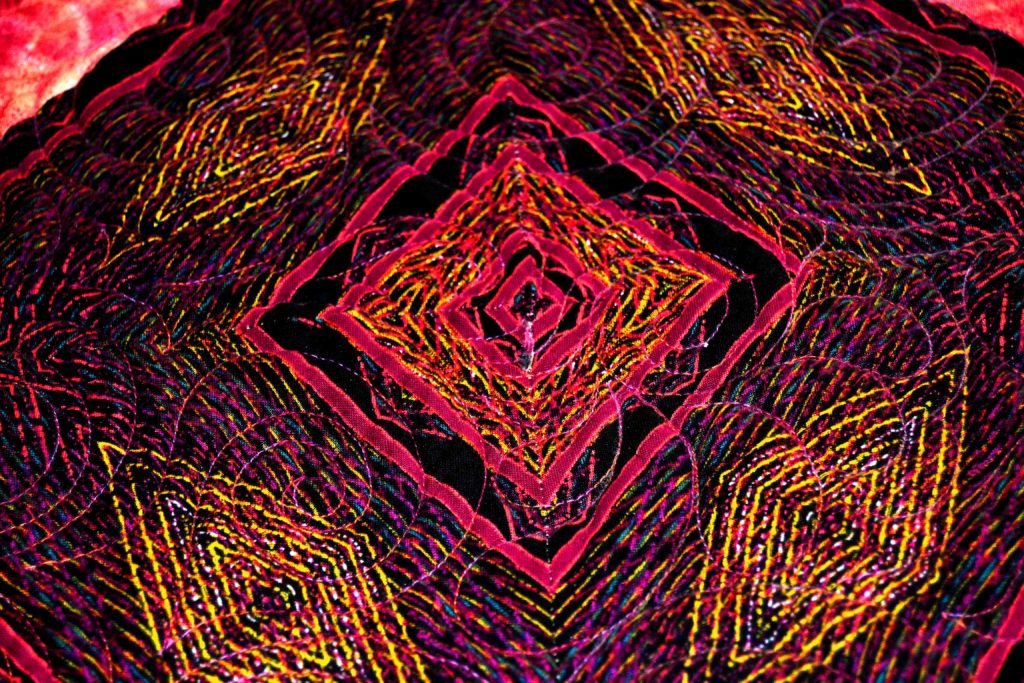
mistake or problem in your quilt which a third party won’t even notice.
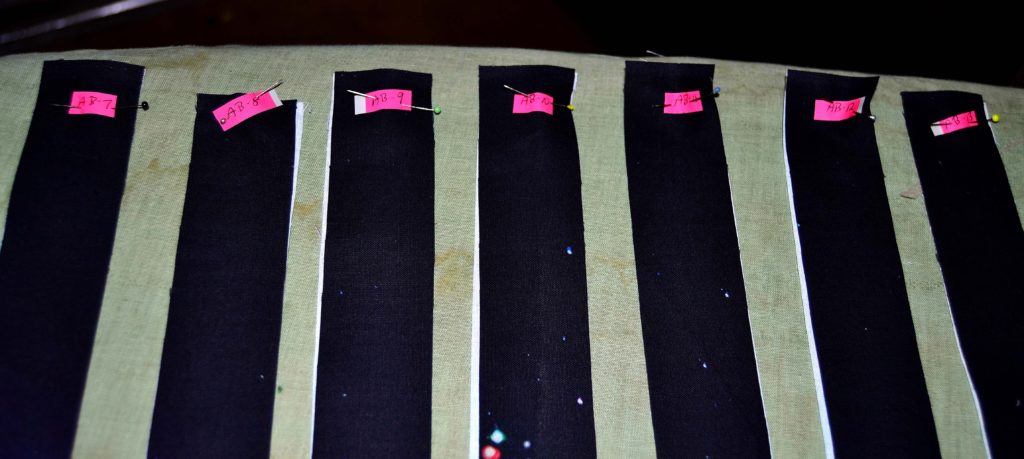
I
recently showed a project of mine to Barb – it was a fractured panel center,
and I had sewn all the horizontal strips upside
down! She didn’t notice, and
couldn’t see it when I pointed it out.
All she saw was the gorgeous twisting colors.
These reactions will really help re-up your enthusiasm for the entire enterprise.
The first Seam Ripper Champion ever – Karyl’s Summer Lily Quilt – was a great example of horrific struggles through the middle of a quilting project that yielded amazing results!
Tip #5 – Give yourself permission to
go slowly
The
more beautiful a quilt the harder it will be to get just right.
Keep
reminding yourself that fabric art – versus just quilting – is much more
involved and will automatically take a lot more time to complete. It’s much more important to do it right than
it is to do it fast. So give yourself
permission to be slow.
Tip #6 – Out of sight, out of pain
Put
your project away for a while. Make sure
it’s completely out of sight so that the nasty little guilt tripper that sits
on your shoulder and whispers in your ear will have nothing to say.
Tip #7 – Take a long look back
Look
back at some of the other difficult projects you’ve completed but thought you
never would.
Years
ago I made a double wedding ring quilt that my kids named ‘The Never-Ending
Quilt’ because it took me so long. But
now it has lived on our bed for 9 years already!
And
if you’ve never made a quilting project before – look back on another hard
moment of your life that you overcame with some patience and perseverance.
Just
keep reminding yourself that this too shall end and it will be worth it! Remember – Patience is not only a virtue, it’s
an essential in fabric art.
Special Announcement – Open Submissions!
Patience,
endurance, perseverance, and hard-won successes are the driving forces behind
our Seam Ripper Championships. Princess
YellowBelly is all about sharing rough experiences, not-funny-at-the-time
disasters, struggles with evil “D”
emotions, and that all-consuming battle in the middle of a quilting
project.
That
way, you can overcome the next struggle more easily.
Right
now we’re holding the first ever “open submissions” for our Seam Ripper
Championships. That means you don’t have
to be a member to submit your story of struggling with and overcoming fabric
hardships.
But we’re only holding this open till the 23rd.
To find out more about this opportunity, read the submission guidelines, and send us your tale of tragedy and triumph, go to the Seam Ripper Championships page! I can’t wait to hear your story.
Most of us think
of our quilt backings as necessary – after all, a quilt is a fabric sandwich –
but boring in a sort of: “ho-hum, who
will ever look at this” way.
This is an understandable attitude, and, as only a few people will look at your backing, it’s also a truism…up to a point.
But just because most of the initial WOW factor is on the front doesn’t make your quilt backings any less important. And there is one very important class of people who who will look at them – other quilters of course!
The first thing another enthusiast does is to flip your project over and look at the back. This same principle applies to other crafts, like embroidery, as well.
We do this because only by looking at the “hidden” side can we really know how much work went into a project. Quilt backings tell us other things, as well, like the skill level of the quilter, the value of the quilt, and even if the quilt is a viable winner in a quilt show.
Why Your Quilt Backings are Just as Important as Your Fronts
Creating a Firm Foundation
Think of your
backing as the foundation of your quilt.
While it is mostly out of site, it is vitally important to the each
quilt’s overall appearance, strength, and durability.
Square Footage
Despite
its apparently subtle role in the appearance of a quilt, the backing is
actually the single largest area of any quilt.
This
appears to be a no-brainer but it would surprise you to know that to a vast
majority of quilters, the backing is an afterthought. Our miserly or lazy justifications go
something like; “since it’s only covering
the back and no one’s going to look at it, any old thing will do.”
WRONG!
Not only is your quilt backing the largest in terms of square footage and coverage, it also will take the brunt of wear and tear during the lifetime of your quilt.
Strength & Durability
While
your beautiful quilt top is exposed only to the air, and is usually protected
from people and pets, the quilt’s backing will rub up against anything and
everything. If your quilt backing starts
to wear or develop holes, it means you have to patch creatively – which is
painfully time consuming – or your quilt may eventually be destroyed.
Also,
your quilts are works of individual, unique, and powerful art. You want your quilts to last as long as
possible, even long enough to be handed down to future generations.
For
these reasons the quality of the fabric for your quilt backing needs to be carefully
considered.
This means
durability and that comes from the strength of your fabric.
I used to buy much
of my fabric at Walmart (when they still had a large fabric selection), and I
was always pleased with how much less they cost than the fabrics at the quilt
store. However, as I sewed and quilted
with these fabrics, I began to notice some serious downsides:
How quickly these cheap backing fabrics faded…
A tendency to wear holes through areas that were frequently handled…
Frayed through seams…
And generally just did not wear well at all!
That got me to
thinking about the quality of my fabric versus all the work that goes into a
quilt, and I came to a surprise conclusion.
I was wasting both
my time and my money by trying to quilt on the cheap.
Pricing
Not that anyone
from Princess YellowBelly Designs – and least of all thrifty me – would
recommend spending exorbitant instore prices for anything, especially backing.
Shopping around
and getting the best deals possible just makes good sense, but compromising on
the quality of your fabric is not.
One of my earliest
– and most embarrassing gaffes – was in trying to use a brand new, flat cotton
bed sheet as a backing! Most sheets are
14 count cotton thread, and you all know how quickly they wear out when in constant
use. Sheets are made for beds and are
not woven tightly enough for long lasting durability.
Do NOT use them on
the backs of your quilts!!
How to Choose the Right Fabrics for
Your Quilt Backing
Despite the epic
failure of my bed sheet quilt backing, it turns out that some of the reasons I
had for trying it were actually viable:
Bed sheets are big
I didn’t have to piece my backings, which is a pain
I didn’t have to hand sew the back seams of a king quilt, which is a real pain!
Well, the quilting world caught on to the reluctance of quilters to piece their quilt backings and they came up with a solution – backing fabric.
Ta-da!
Quilt
backing fabric comes at 108” wide, which is wide enough to cover a queen sized
quilt.
The
quality of these fabrics are top notch, which means they have great durability
and strength, and there are a plethora of colors and design options out
there.
And
every time I open a quilt magazine, there are new colors available. At first they only came in boring neutrals
but now these lovely, time-saving fabrics pretty much cover the color
spectrum.
The
cost is an average of $14.00/yd. which seems quite expensive at first, but when
you do the math, it’s usually cheaper to go this way rather than buying the
regular 45” wide fabric and going to the trouble of piecing it.
For
example:
1
queen quilt is approximately 90”x100”.
So with fabric that’s 108” wide, you’ll need roughly 3 yards. At $14/yd. that’s $42.00. If you purchase
regular 45” wide fabric you will need at least 6 yards. At $11/yd. this will cost you $66.00
and you still have to piece it.
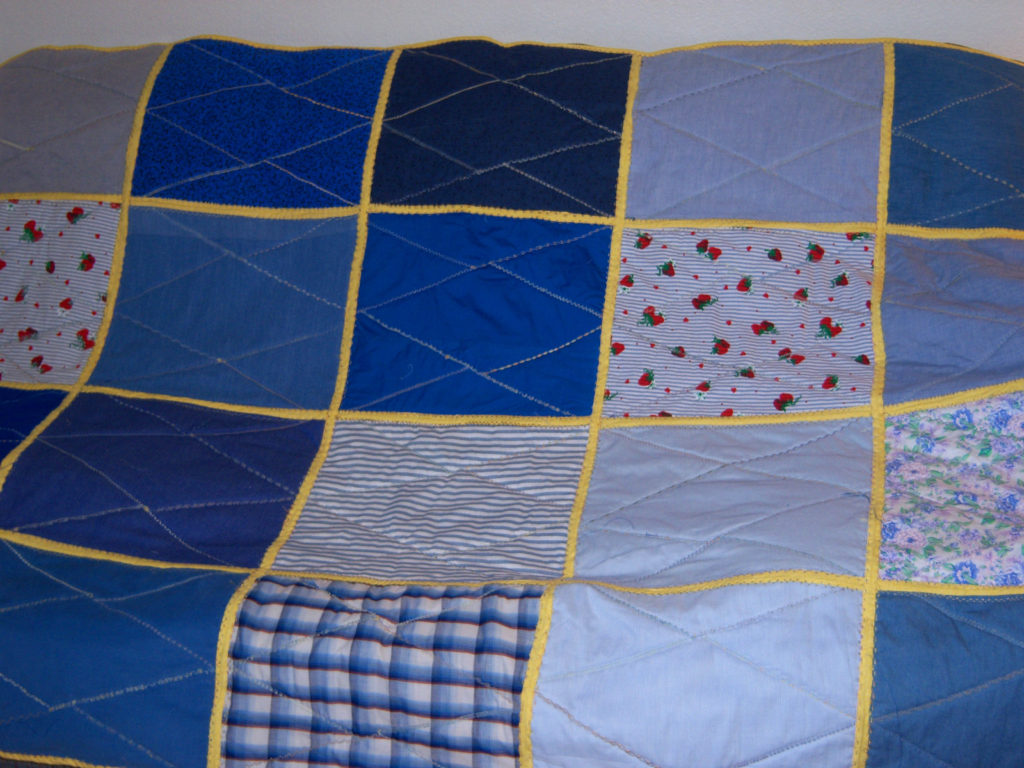
Backing Motivations
This
may sound weird, but bear with me here and you’ll see what I mean. When it comes to backing, I think there are 2
schools of thought. Both sides of the
coin can be right, depending upon the particular project, so it’s worth putting
some thought into your quilt backing needs before laying out any cash.
1.
Functional
Quilt Backings
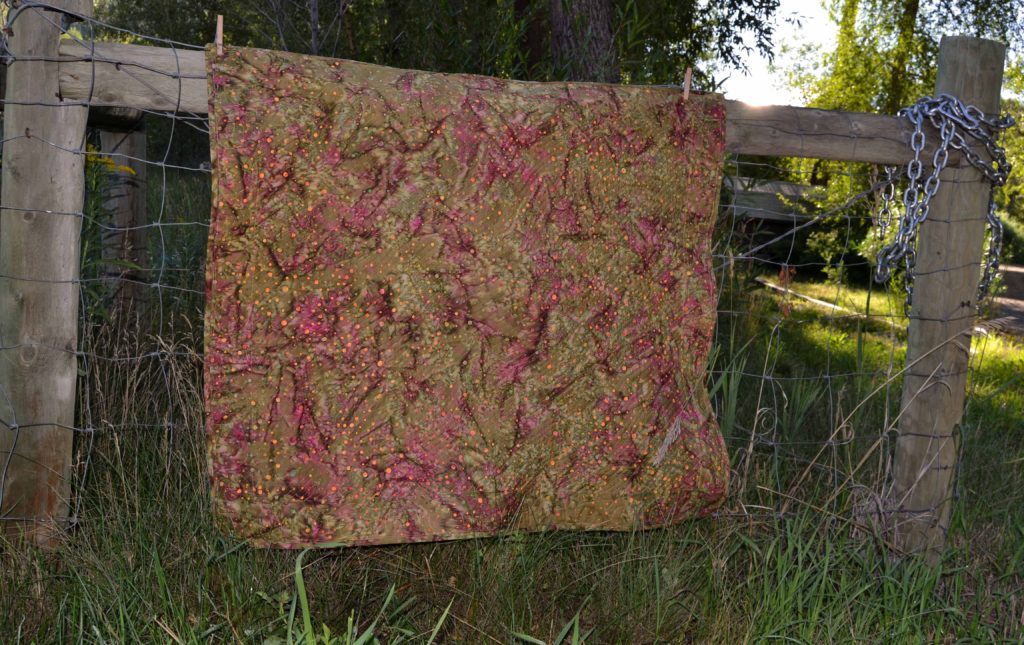
If
you want a purely functional backing that more or less disappears in relation
to the beauty of the front of the quilt, I recommend purchasing a mottled
fabric.
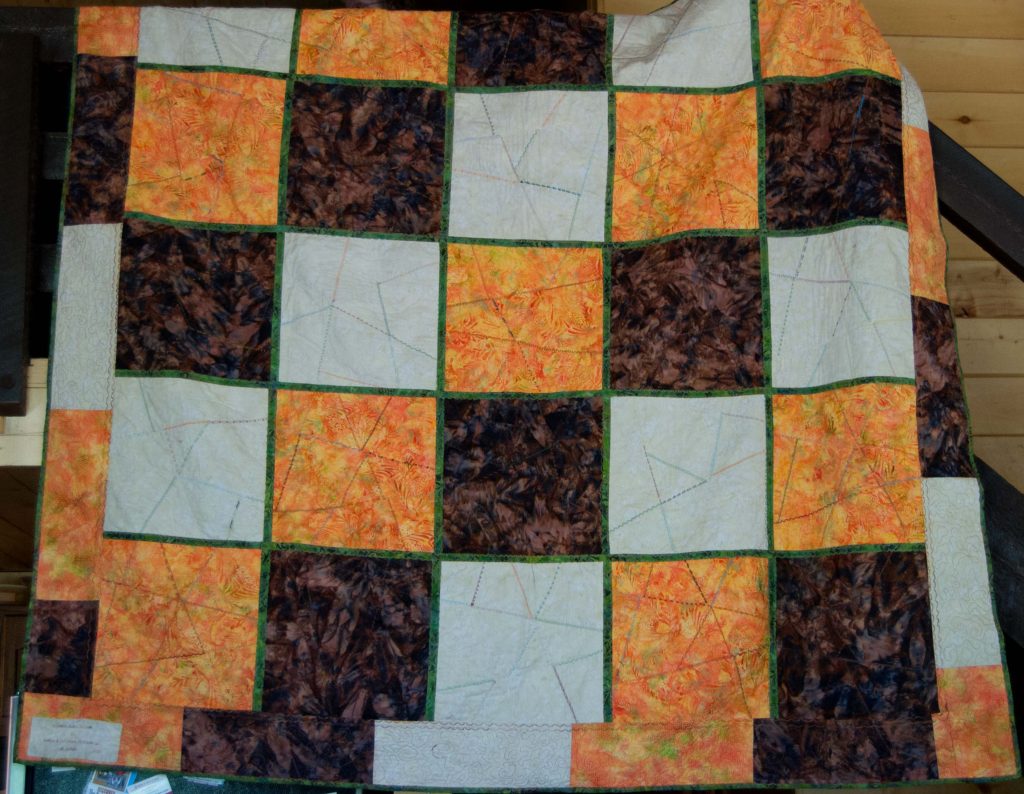
It
really doesn’t matter what color you choose or how bright that color is, the
important part is the pattern. The more
mottled or busy a pattern is, the more the quilting vanishes. This is useful if the pattern you’re quilting
isn’t your focal point, or if it doesn’t make sense in abstract – such as
outlining solid shapes in the front of the quilt.
Mottled
quilt backs also helps to hide all those little mistakes that we’re not
admitting we make. I do this a lot. It’s
the quickest way to getting your backing knocked in the head.
Also,
use a matching thread in your bobbin and the quilting will disappear even more.
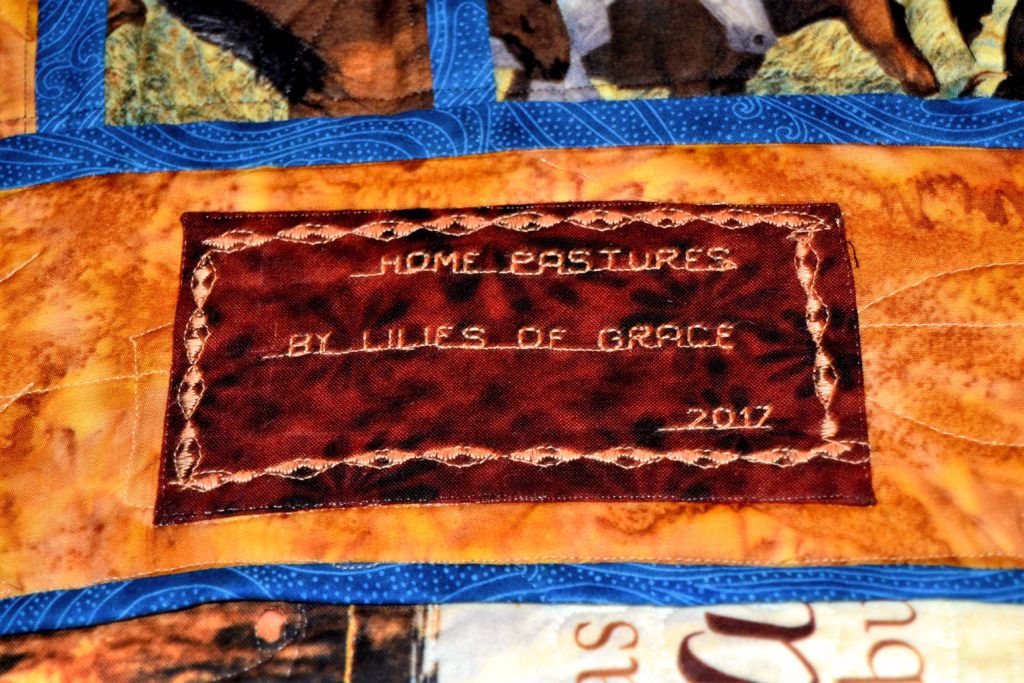
2.
Statement
Quilt Backings
Sometimes,
though, I take me a notion and decide that the backing has to say
something.
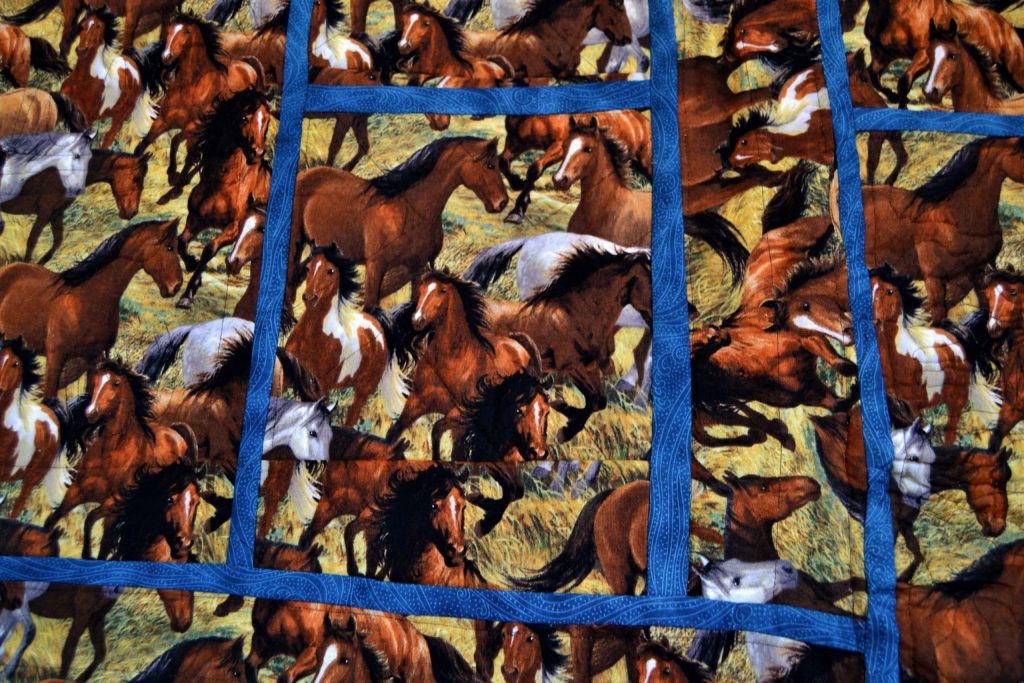
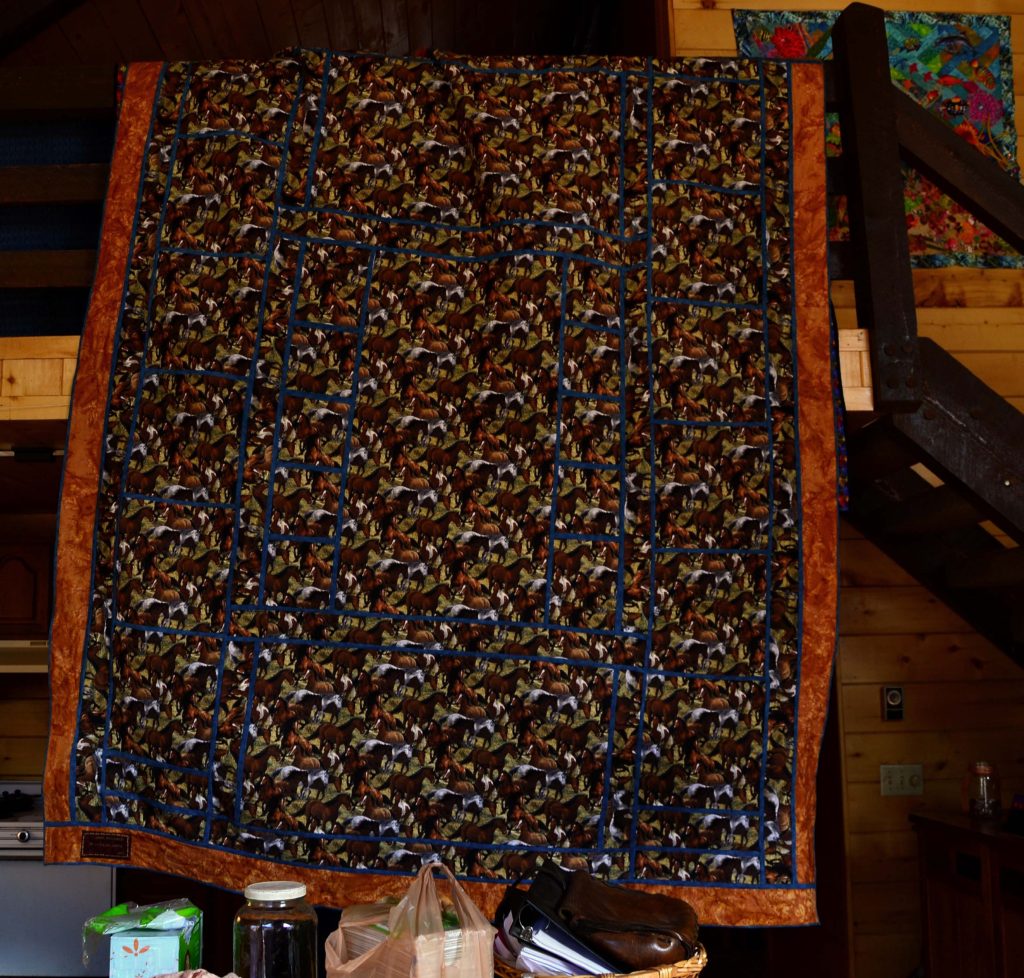
For example, in my Home Pastures quilt – which features horses – I decided the backing needed to look like pastures too. So I used a fabric that was covered with horses in a field, and I “fenced the pastures” by using a strongly contrasting color during the sashing stage.
It was extremely creative if I do say so myself, and it made for a visually effective backing. The best part, of course, was that the pattern of the horses completely draws the eyes, and no one (not even me unless I’m looking very hard) can see the quilting!
If
your quilting pattern is one of the focal points of your quilt, then you’ll
want to choose a backing fabric with little to no pattern.
You
can also use a highly contrasting thread in your bobbin, and voila!
Your
backing is now visually appealing.
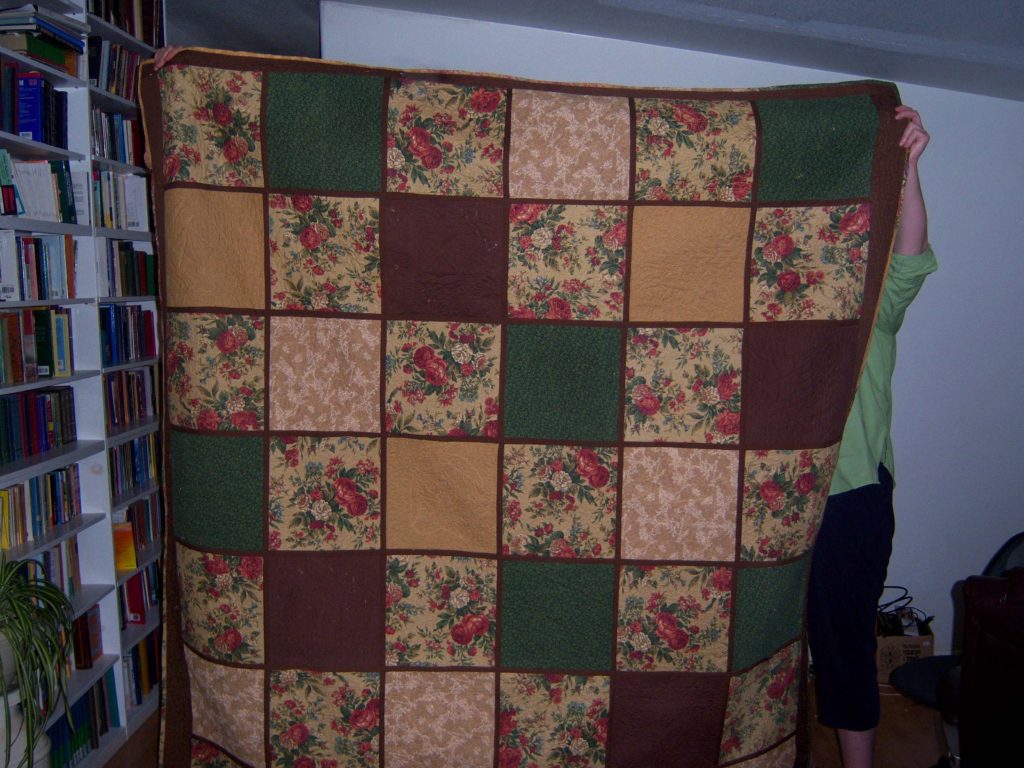
Disposing of Odds & Ends
If you don’t mind
piecing, backings are a great place to get rid of – oops – I mean to say incorporate scraps from your stash. You can sew these pieces together in a
recognizable pattern or just sew them any which way for a scrappy backing. It all works.
I will also often
use the leftovers of a fabric from the front of a project to start off a
scrappy backing.
This helps to pull
the entire project together visually, especially on smaller projects like wall
hangings and table runners, and makes aesthetic sense to everyone.
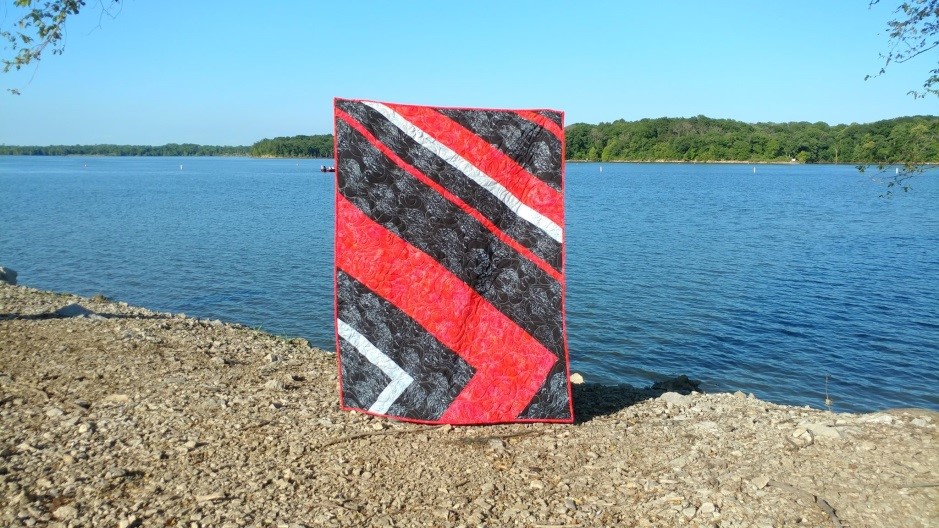
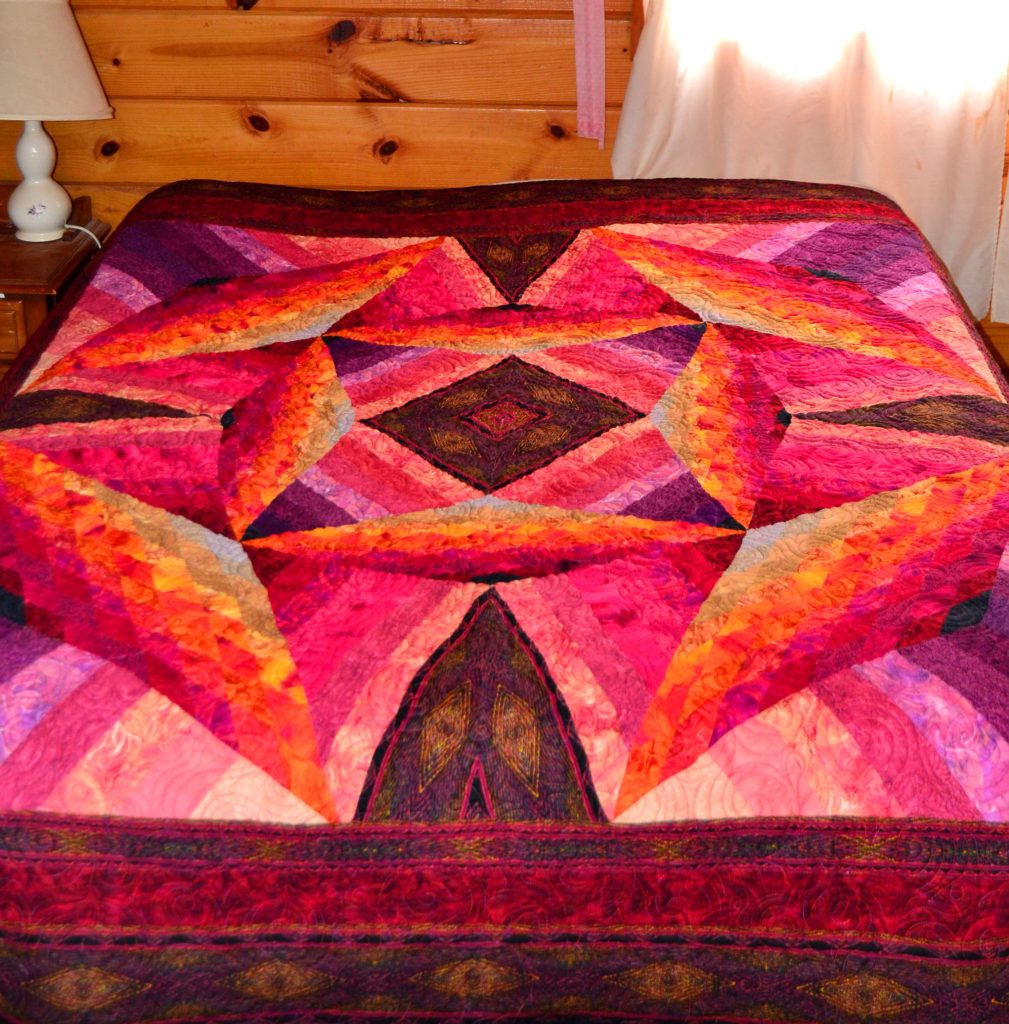
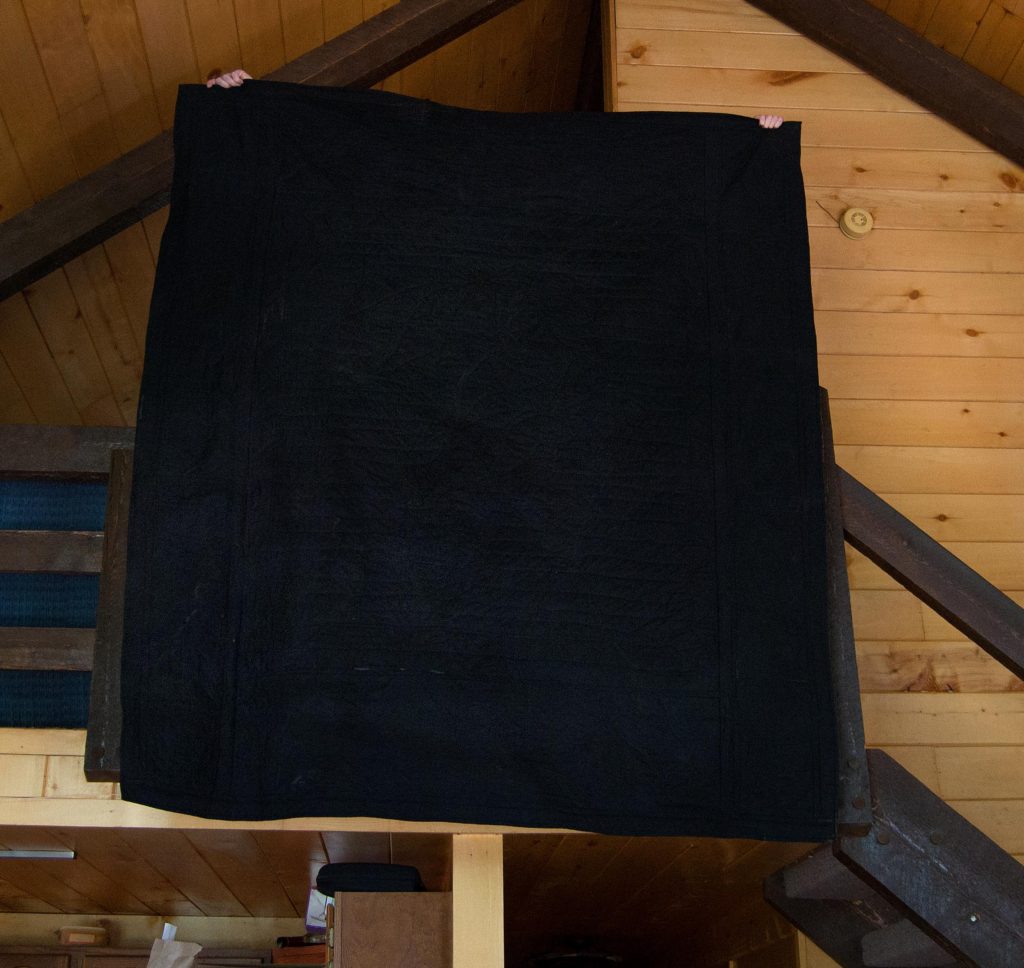
A Word about Black
I use black fabric quite often for my backings, especially on my silhouette panels, or when I really want to make a dramatic statement – like on my dragon quilt. Black is wonderful because it can either highlight your quilting pattern if you use a contrasting thread, or vanish all your quilting, if you use black thread.
But beware! It’s very hard to see what you’re
doing!!!
Michael rigged me
an extra LED light that I can use when I’m quilting on black for this very
reason. It’s mega frustrating – at least
for me – but also well worth the trouble.
Getting Your Backing Flat
Getting your
backing to lay flat and smooth as you quilt is essential, but unless you have a
long-arm quilting machine with rollers to hook your project into, you’ll have
to do it the old fashioned way.
Ingenuity.
I tried all of
those quilting “helps” that are supposed to help you hold your project tightly
and they now live in the back of a closet somewhere. I’ll review them eventually…
After a lot of
frustration and wasted money, I finally came up with a fairly simple method
that works well for me. Here it is:
DO NOT trim the
top of your project before layering it for quilting
The quilting itself will distort the edges somewhat and you will need to trim again after your project is quilted. If you trim beforehand as well, you will end up cutting off a good sized edge along the outside of your quilt. I once lost an entire border this way.
Always cut your backing piece and your batting at least 3” wider all the way around
This
is because the quilting process distorts your project slightly. I for one have
been known to quilt myself right off the edge.
Those extra inches give you vital wiggle room.
Spray starch and
iron on the wrong side of your backing.
Occasionally
spray starch will leave behind a weird shiny residue. It’s almost impossible to get this off
without washing the fabric.
Buy a cheap, thin
shower curtain from your local Dollar store.
Basting
spray, by its very nature, is sticky – very sticky. It will stick to anything in the vicinity,
including whatever surface you’re working on and from experience I know that it
is incredibly difficult to remove.
Laying
your new shower curtain down on your working surface before you layer and spray
your project will give you a no-muss-no-fuss clean up. These shower curtains can be used over and
over again. Get one!
Layer your
project, starting with the backing, wrong-side-up, and spray it with basting
spray.
Layer your batting
on top of that.
Smooth this out as
much as possible.
Note: It really
helps if you can get another person to help you hold the batting tight as you
lay it down.
Spray the top of
your batting with basting spray and lay the front of your project down on it
right-side-up.
Get
the top as smooth as possible by pulling and pressing smoothly. Once again, another pair of hands will really
help to keep your panel smooth.
Once the top is as
smooth and wrinkle-free as possible, flip your project over to the back.
Your
backing will now look like elephant skin…but here is how you fix this.
Determine the middle of your backing and gently pull
up the backing from the batting.
The
basting spray allows you to reposition fabric numerous times without having to
re-spray. Have someone press down firmly
on the mid-point while you pull your backing straight and lay it down
again. Smooth out.
Repeat as needed.
When your backing is as smooth as possible, iron it with
a hot iron.
This
adheres the basting spray tightly enough to hold your fabric in place without
pins. Usually. Occasionally I do use a handful of safety
pins to help hold a very large or very heavy quilt sandwich in place during
quilting.
Sometimes
I have to work in sections if my project is very large, and sometimes I have to
lift up, re-spray, and iron again before my backing will behave. But it’s well worth the effort! You end up with a smooth backing and no
pins!!
When your backing is as smooth as you can make it,
flip your project and repeat for the front.
I
always do the front last because that’s the one people mostly look at. Once you have your entire quilt sandwich
smooth and ironed, it will hold that way for about one week, before the basting
spray starts losing some of its moxy.
Don’t forget to finish your quilt backing with a name tag!
If
you think it will take you longer than this to quilt your project, I would put
in a few strategic pins to help encourage it to stay smooth and flat. Pins, used sparingly, are also a good idea if
your project is the size of a twin quilt or larger.
Once your project is ready for quilting, start as
close to the center as possible.
Using your hands, fingers, wrists and elbows, pull gently on your fabric as you work your way to the outside. I have found that with this method, I get a completely smooth front and back about 75% of the time. When I don’t the pleats are almost always on the backing and is never more than a small wrinkle or bubble that is almost impossible to see due to our disappearing tricks.
Since I started
using all these tips and tricks that I’ve outlined above, my projects became a
lot more doable, easier to handle, visually more appealing, and a lot more
rewarding. I really started enjoying the
entire process a great deal but beware – the more you enjoy it, the more
addicted you’ll become!
Here’s to your
future smooth-quilt-backing success.
It wasn’t the first time I’d been there but I sincerely hope it will be the last…and I wasn’t there to get a tattoo either. I’m a good girl, I am!
I went to the piercing parlor to get a Daith piercing in my ear to try to help my migraines. I confess to yelling when he pushed that needle through my cartilage – that sucker hurt.
However, as I sat there quietly bleeding, it occurred to me. I do this to myself all the time – when I sew – and I bet you do too.
Sewing is a physically risky business because essentially we’re working with knives. Of course, we like to give them euphemisms like scissors, pins & needles, and rotary cutters, but any seamstress can tell you…they’re really knives.
Personally, I’d be amazed to hear that there is one seamstress out there that hasn’t had a too close encounter with the sharp end of one of these supplies. They are necessary to our work, but they can be very painful.
Addiction – And How Not to Treat It
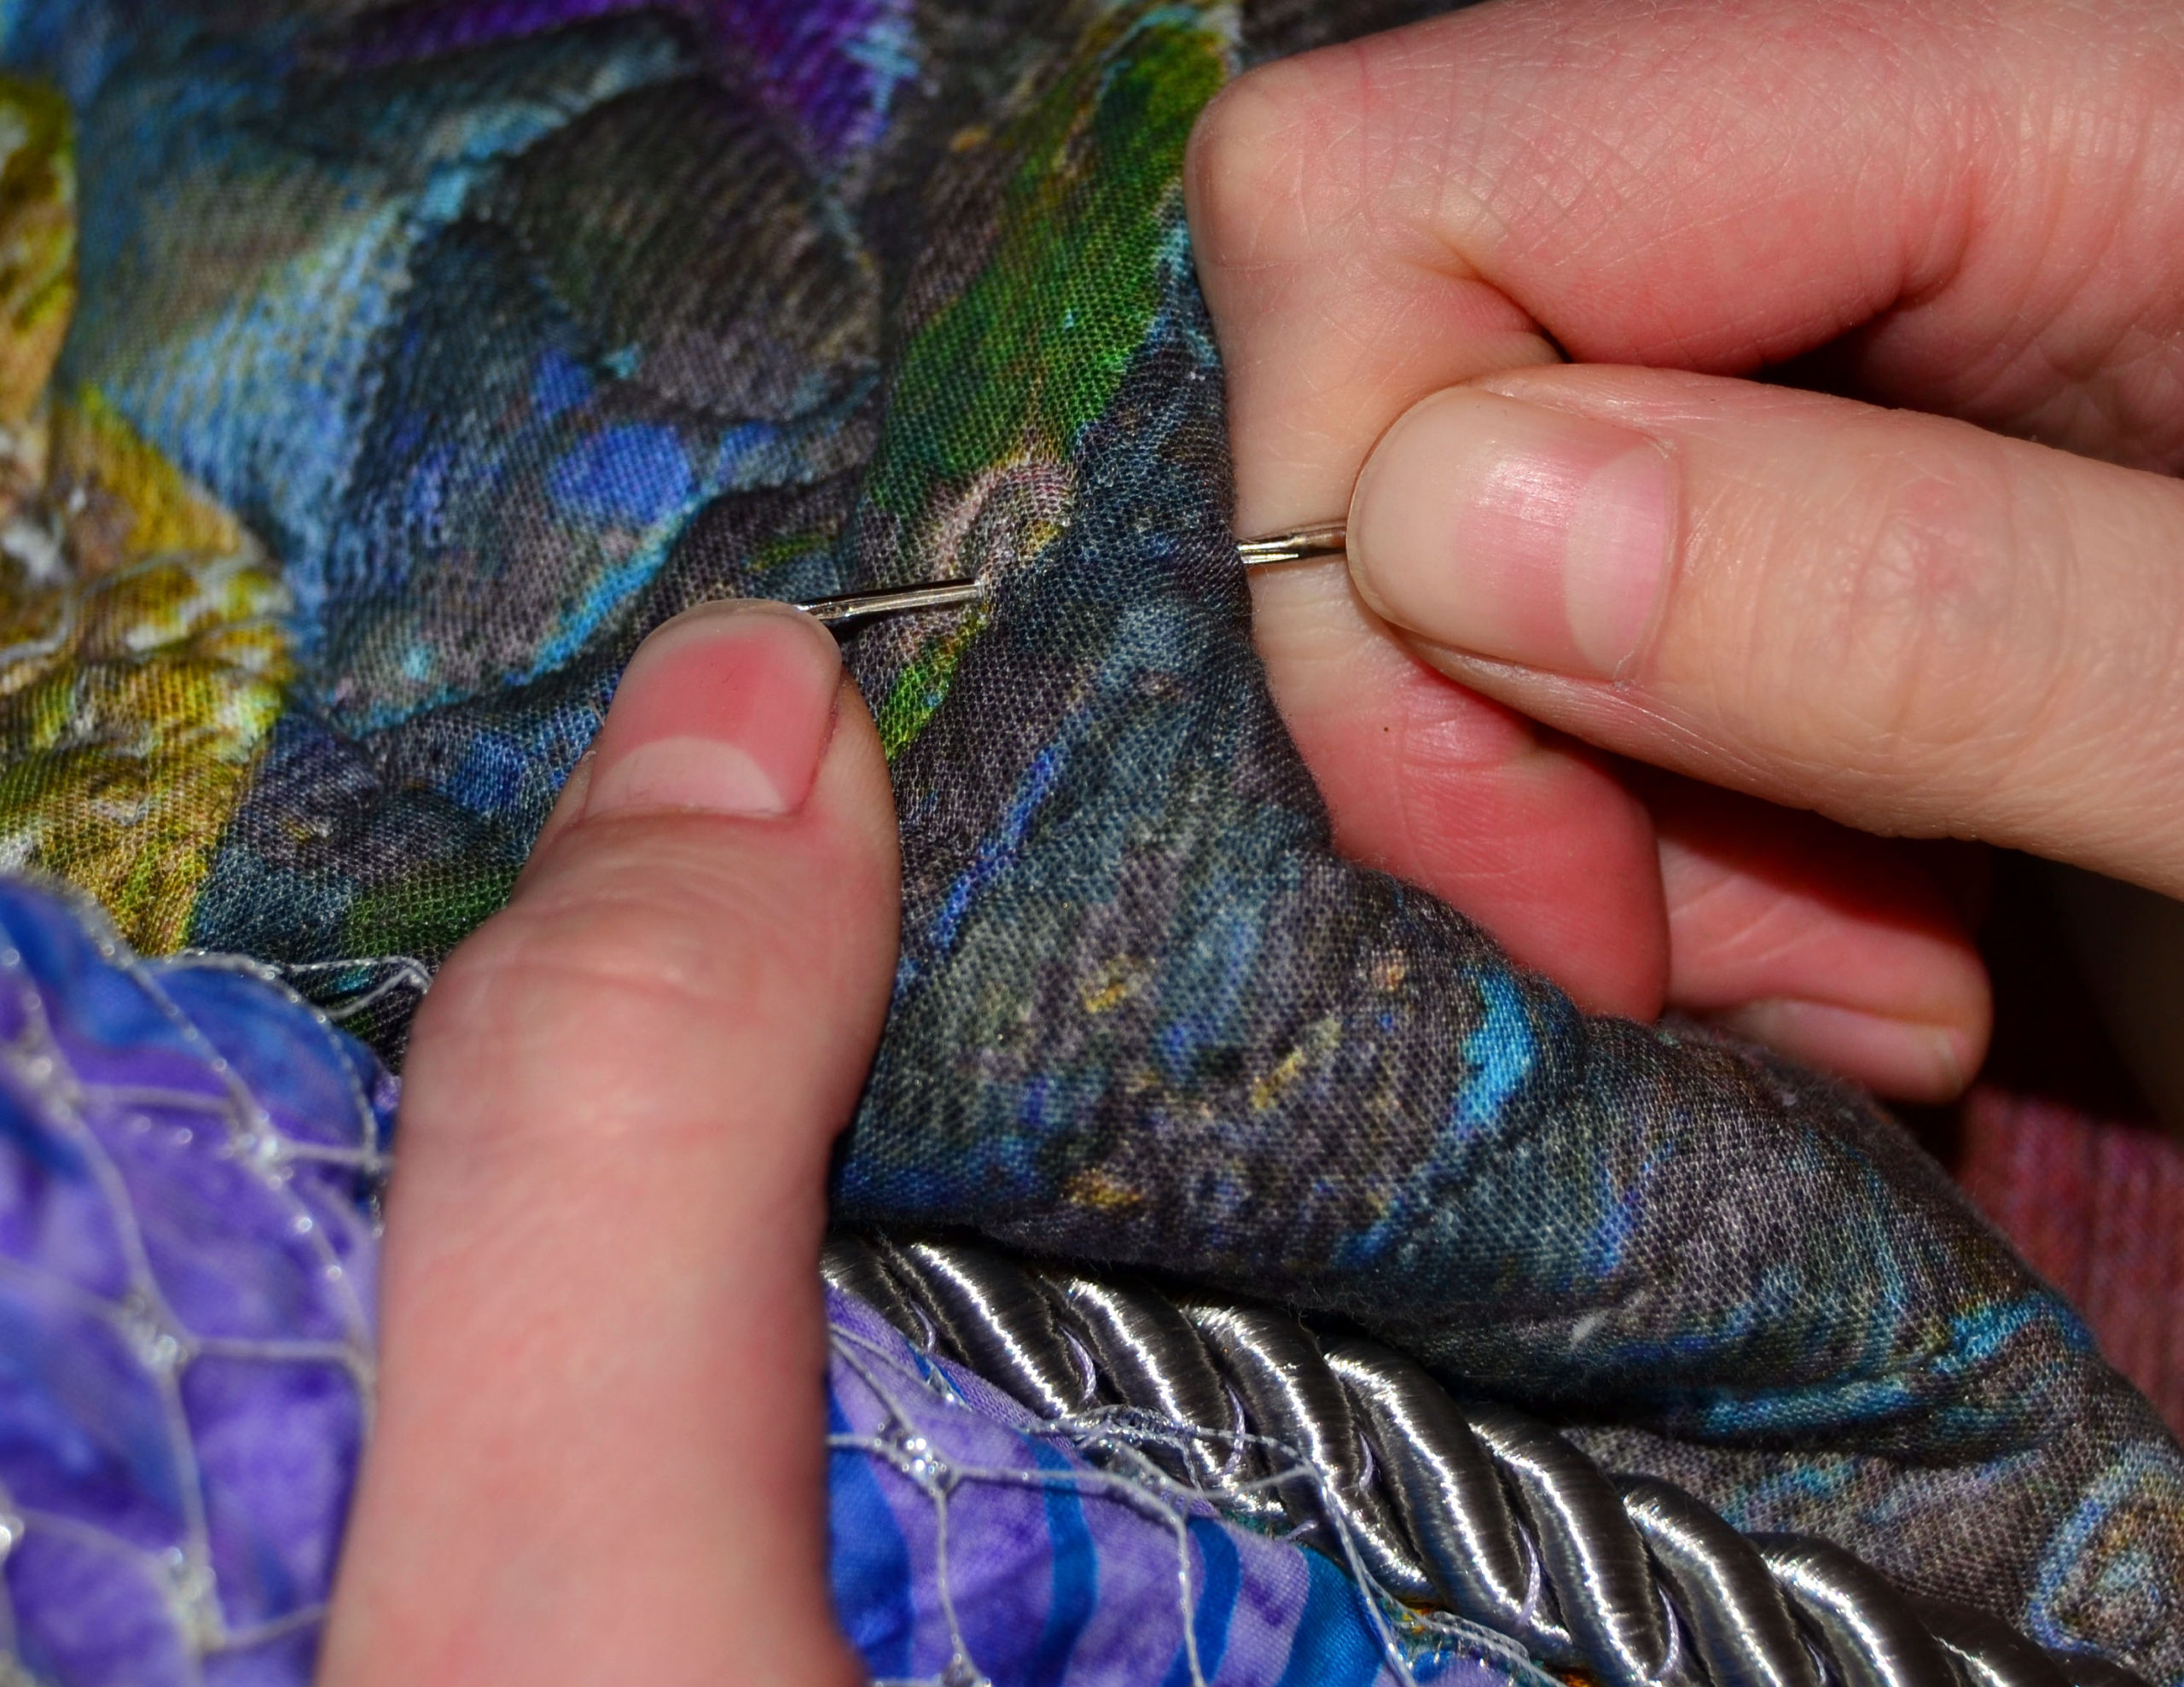
Here again is where the whole idea of addiction can raise its head.
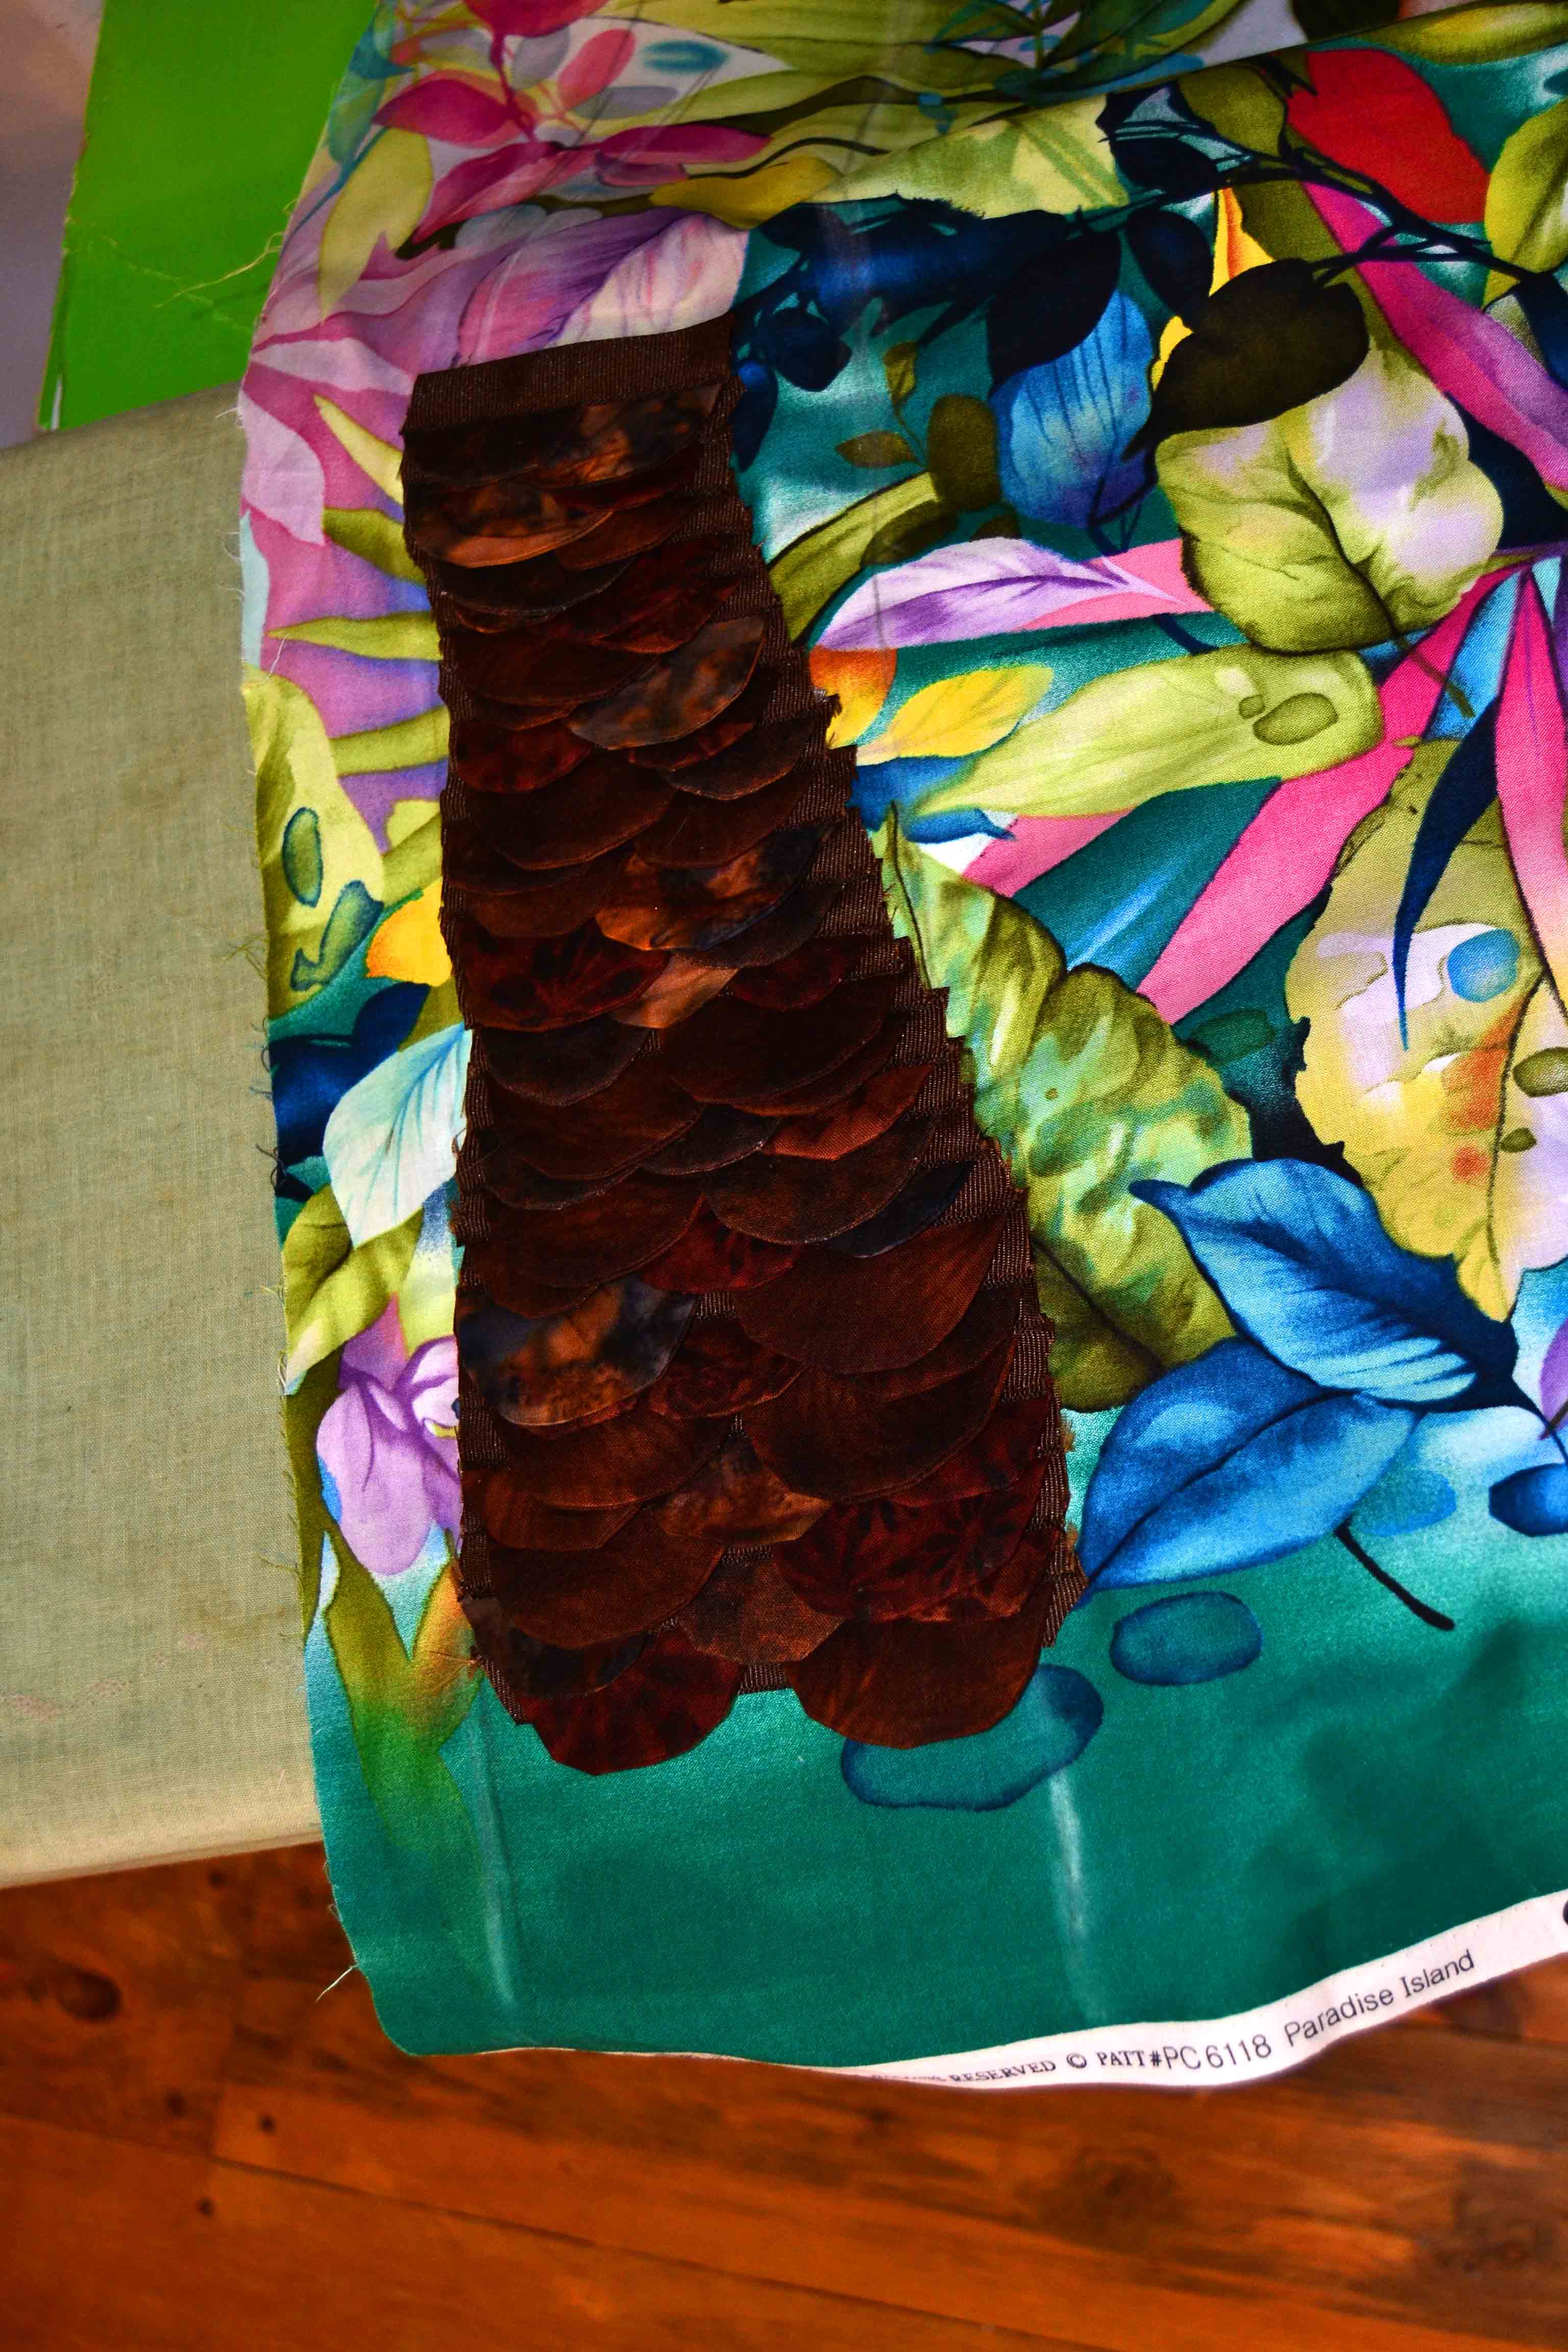
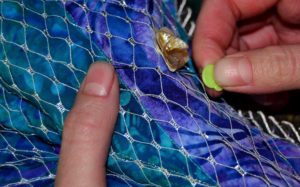
When I was sewing my Peacock Panel, I had to pin every flower in place before I could sew – no handy Wonder Under here.
I used long, sharp quilting pins to secure those slippery leaves to the thick background. Those very helpful pins found no problem scraping along my forearms and jabbing into my chest as I sewed.
I’m pretty sure I yelled more than once, and when I was done, I did look like an addict with needle tracks all along the insides of both forearms. Talk about quilting dangerously.
But it was worth it.
Michael thinks I’m nuts sometimes, but even he has to admit the end result was beautiful.
That’s the gritty truth of an artist’s addiction to his/her craft. No matter the ill immediate consequences that we suffer personally, nothing will deter us from achieving our goal of adding a bit of beauty to this old world.
Maybe we shouldn’t even want to. Without a bit of pain no one would have ever painted the Mona Lisa, or built the Parthenon, or invented quilting in the first place.
Those Who Love Us
Speaking of my darling Michael, have any of you ever read or heard Hank the Cowdog books? They are positively hilarious – especially the audio book versions – but when you read about Slim Chance, just substitute Michael’s name instead.
This man of mine never moves fast, leans as soon as he stops and takes forever to think things through.
To his credit, his thinking is vastly different from mine and he often comes up with a solution that would never occur to me. He’s awesome, but I digress.
The point is that I’ve only seen him move fast 3 times:
When Suzanna decided an anthill was a perfect place to play
When the kids were playing in the ocean surf and a long dark shape showed itself in an oncoming wave
And when I sewed through my thumbnail
The needle had pulled out of the machine and was sticking out the fleshy side of my thumb through my thumb nail. That was not fun. Michael really jumped that time – I’m pretty sure that I screamed loudly. Being Michael, he promptly got his needle nose pliers and pulled.
Amazingly, while it was the first time I’d sewed through my thumb nail, it wasn’t the first time I’d sewn through the side of my thumb.
Last year, I was having vision problems in my left eye. But I live on the edge and do quilting dangerously, so instead of stopping, I kept leaning closer and closer to see what I was sewing and actually scraped the end of my nose with the needle. Now, that would have hurt!
Consequences of Quilting Dangerously
I have a special set of quilting pins that are about 3” long and sharp as lances, consequently many times I’ve had to wash out spots of blood from being stabbed. On my dangerous quilting journey I also:
Been burned with hot glue
Shoved hand sewing needles under my fingernail
And glued various body parts together
But it’s all worth it to me – because like any true addict I like the results. I read about one quilter who had actually glued her bottom to the floor. I found that hilarious but not surprising.
So there I am getting pierced and looking at the piercing guy. He’s tattooed from neck to ankles and I started thinking about how many needle punctures THAT took – and he did it on purpose! Now that’s addiction – of a different kind, but addiction nonetheless.
So maybe we’re not as insane as we may seem – when we keep on quilting despite the hazards – and we have something to show for it at the end of the day. And, at least our needle marks aren’t permanent.
Adding Possibilities to Your Fabric Art Projects with Variegated Threads
Of all the things you need to create a sewing project, thread is the second most important – fabric being the first. This is really great for me, because of all the different things that make up a sewing project, thread is my very favorite.
I’m like a kid with a new box of crayons every time I open my thread boxes. And, if you think I have trouble passing by other notions, thread is the straw that breaks this camel’s back.
Variegated threads = endless possibilities
When you go into any quilt store they have racks of the most gorgeous thread colors ever! And they’re always coming up with new and better types of thread.
A Thread to Rule Them All
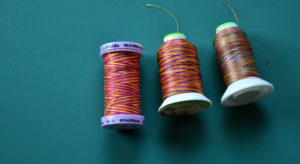
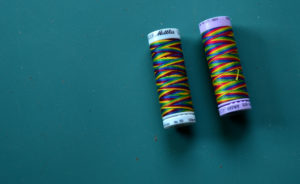
Of all the choices available to me, my very favorite are variegated threads.
The “variegated” part of the name comes from the color variations on each spool. Some variegated threads come with only two-tone variations, others have as many as ten different colors fading back and forth.
These threads are fairly new in the quilting world, so the options available in this category are more numerous every time I go to the quilt store.
The girls actually had to pry some spools out of my hand on Wednesday, and physically drag me away from the thread displays. They very logically told me I had nothing to use these particular colors on at the moment – and I had too much other stuff to do – before I could come up with a project that would utilize these threads.
I’d like to know what logic has to do with anything when you’re in love.
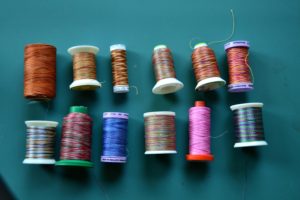
These are all great color blends that work well on a surprising variety of projects and color schemes. Second spool from the end is the turquoise/lavender variegated blend I managed to snag the other day!
However, since I’m supposedly the voice of reason and common sense (because I’m the Mom you know, and therefore the most mature – ha! – and still setting an example), I reluctantly put those gorgeous spools back.
I did manage to get one spool that’s variegated in soft turquoises and lavenders – which will work beautifully with the mermaid quilt I’m making. Also, since I sew with turquoise and purple a great deal, I’ll be able to use it on different projects as well.
What Variegated Threads Cost
Knowing how much I love these threads, you’re probably assuming that I have a plethora of them in my thread boxes. Sadly, this is not the case because variegated threads are fairly pricey.
Think of variegated threads as being the “1 percenters” of the thread world, and metallic variegated threads as the “1 percent of the 1 percenters.”
So I’m very careful that what I buy is within my means.
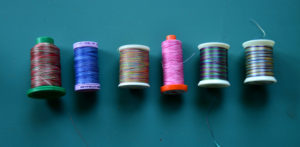
These are my spring and summer collection – although I have also used these bright and attractive colors on fantasy panels, and to top-stitch quilt my one and only Jinny Beyer beauty.
My advice to you is to be very sparing with how many variegated thread spools you purchase, and think carefully before you buy.
One good rule of thumb is that a new spool has to be usable in at least 3 different projects that you’re thinking of. If I can’t match it to 3 things, then, as much as I hate not to, I don’t purchase it. Of course the exception is if a thread is perfect for a large and elaborate project – like my mermaid quilt.
Two-toned spools where one color is white (these work on a surprising number of projects)
Metallic variegated threads (because I also love metallic threads, so I double my buck-bang)
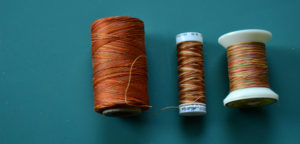
My three favorite “autumnal” variegated threads – these have made their presence known in probably 15 different projects over the last 3 years.
Many variegated threads can also cross “theme lines”. For instance, my orange/yellow blends can be used in autumn projects, sunset projects, and flower appliques.
Also, these threads come on different sized spools. If I’m only going to be using it occasionally, I buy the smallest spool available, but frequent use spools, like autumn themes, I buy in the largest spools available.
Available Types of Variegated Threads
Remember Forrest Gump’s famous line: “Life is like a box of chocolates; you never know what you’re going to get.
This is the reason I am so enthralled by variegated threads – even though you can see some of the different colors on the spool, you never know exactly what it’s going to look like till you sew with it. It’s a surprise every time.
Not only are there color variations on a single spool, there are different types of variegated threads on the market these days, which is totally awesome!
Due to the expense and because of their beauty, I never use variegated threads for regular seam sewing. Variegated threads are made to be noticed, so my advice would be to use them where they can be easily seen:
Top stitch quilting
Panel outlining
And appliqueing
I especially like to use variegated thread when I’m appliqueing with a satin stitch. The tighter the satin stitch, the more your variegated thread will shine, because only then can the variations in the colors truly be appreciated.
Variegated thread is also one of those rare items where brand and thread quality is of secondary importance. If you’re going to use variegated thread, then use it for the color and how it compliments your project – not by how expensive the spool is.
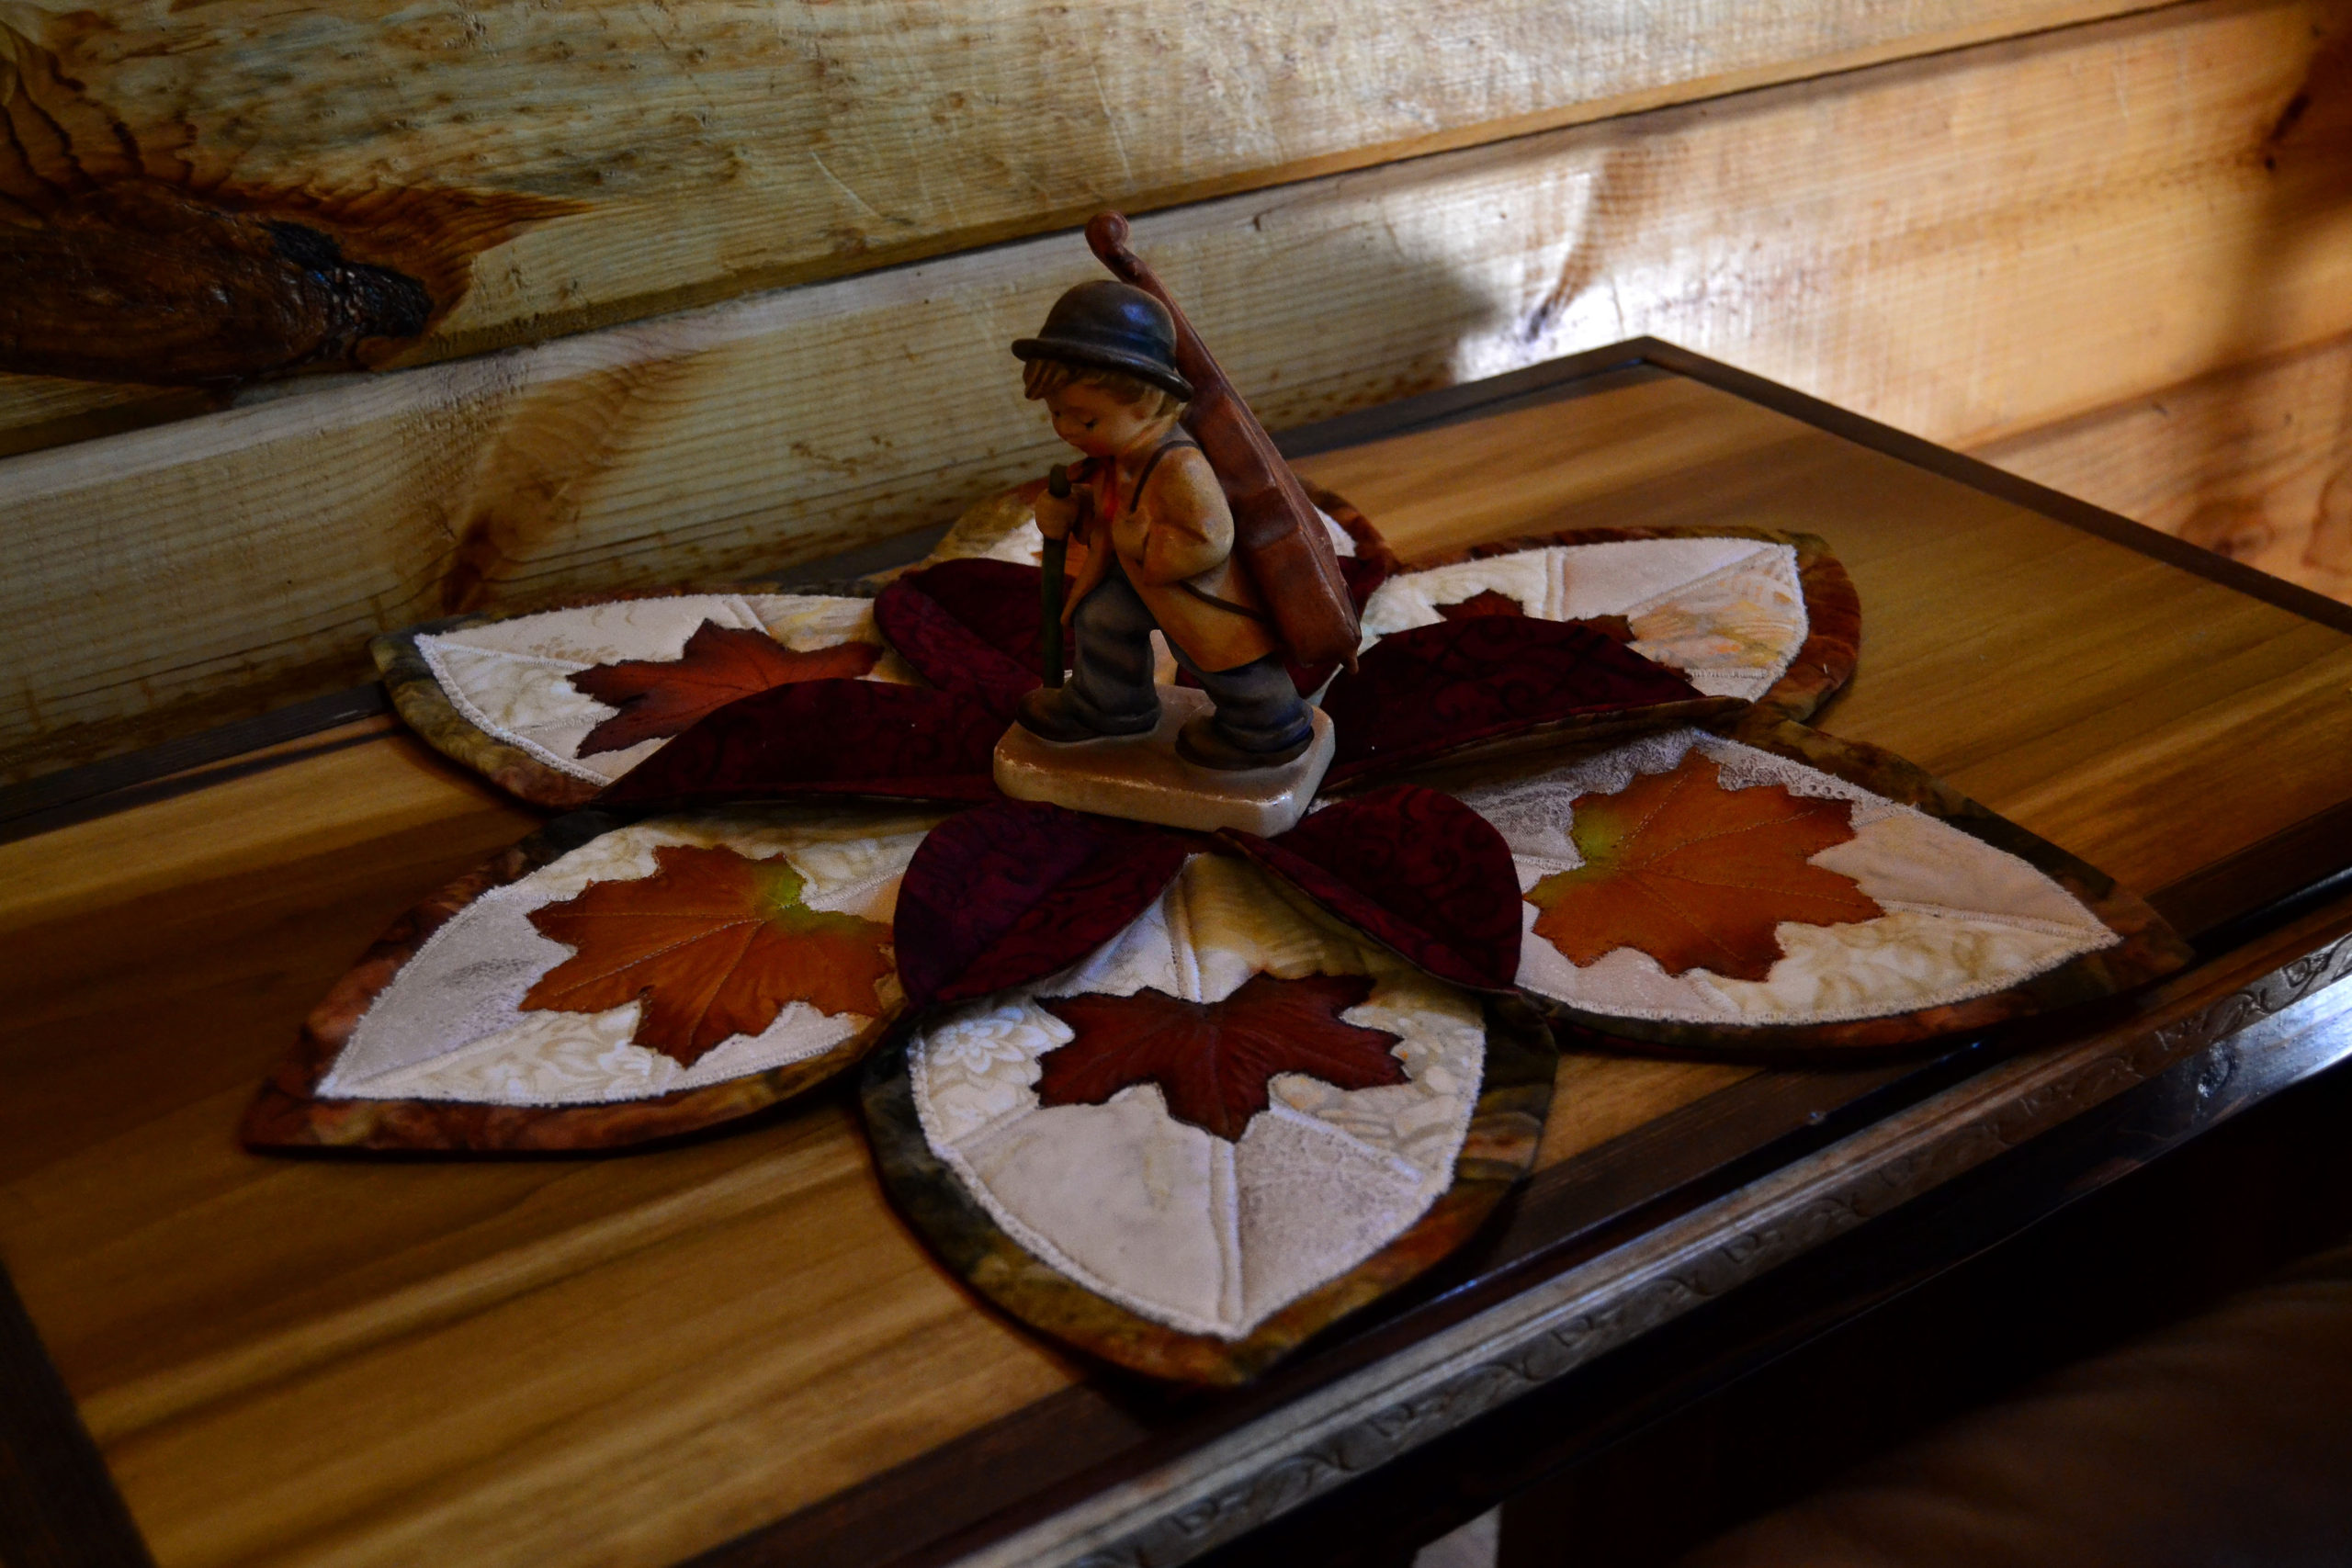
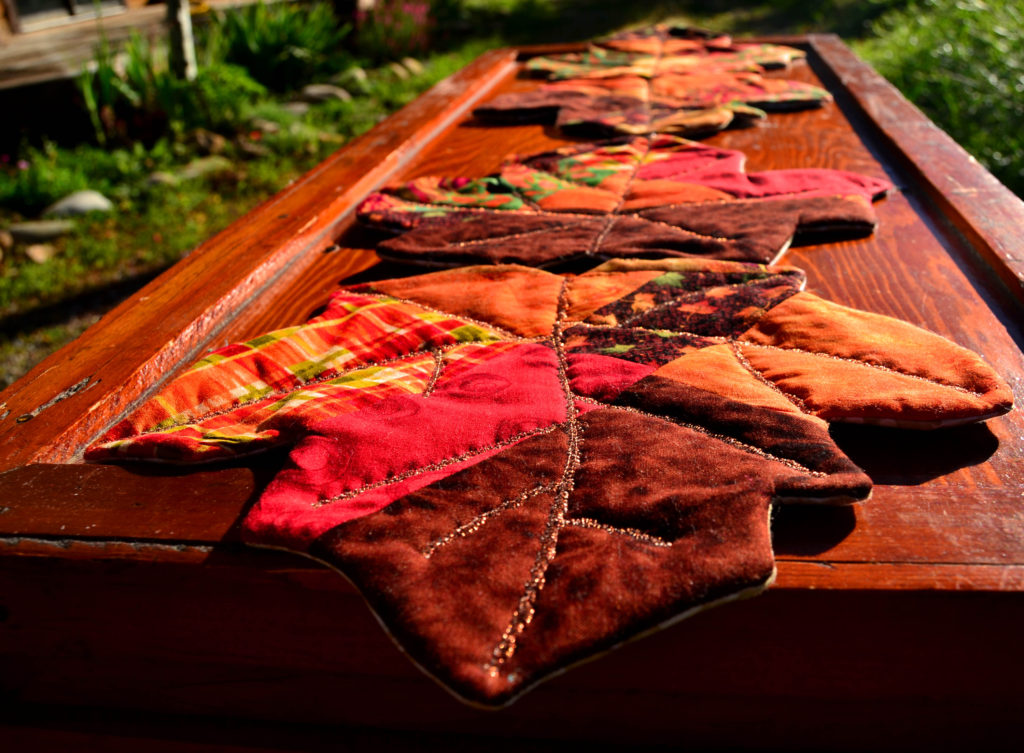
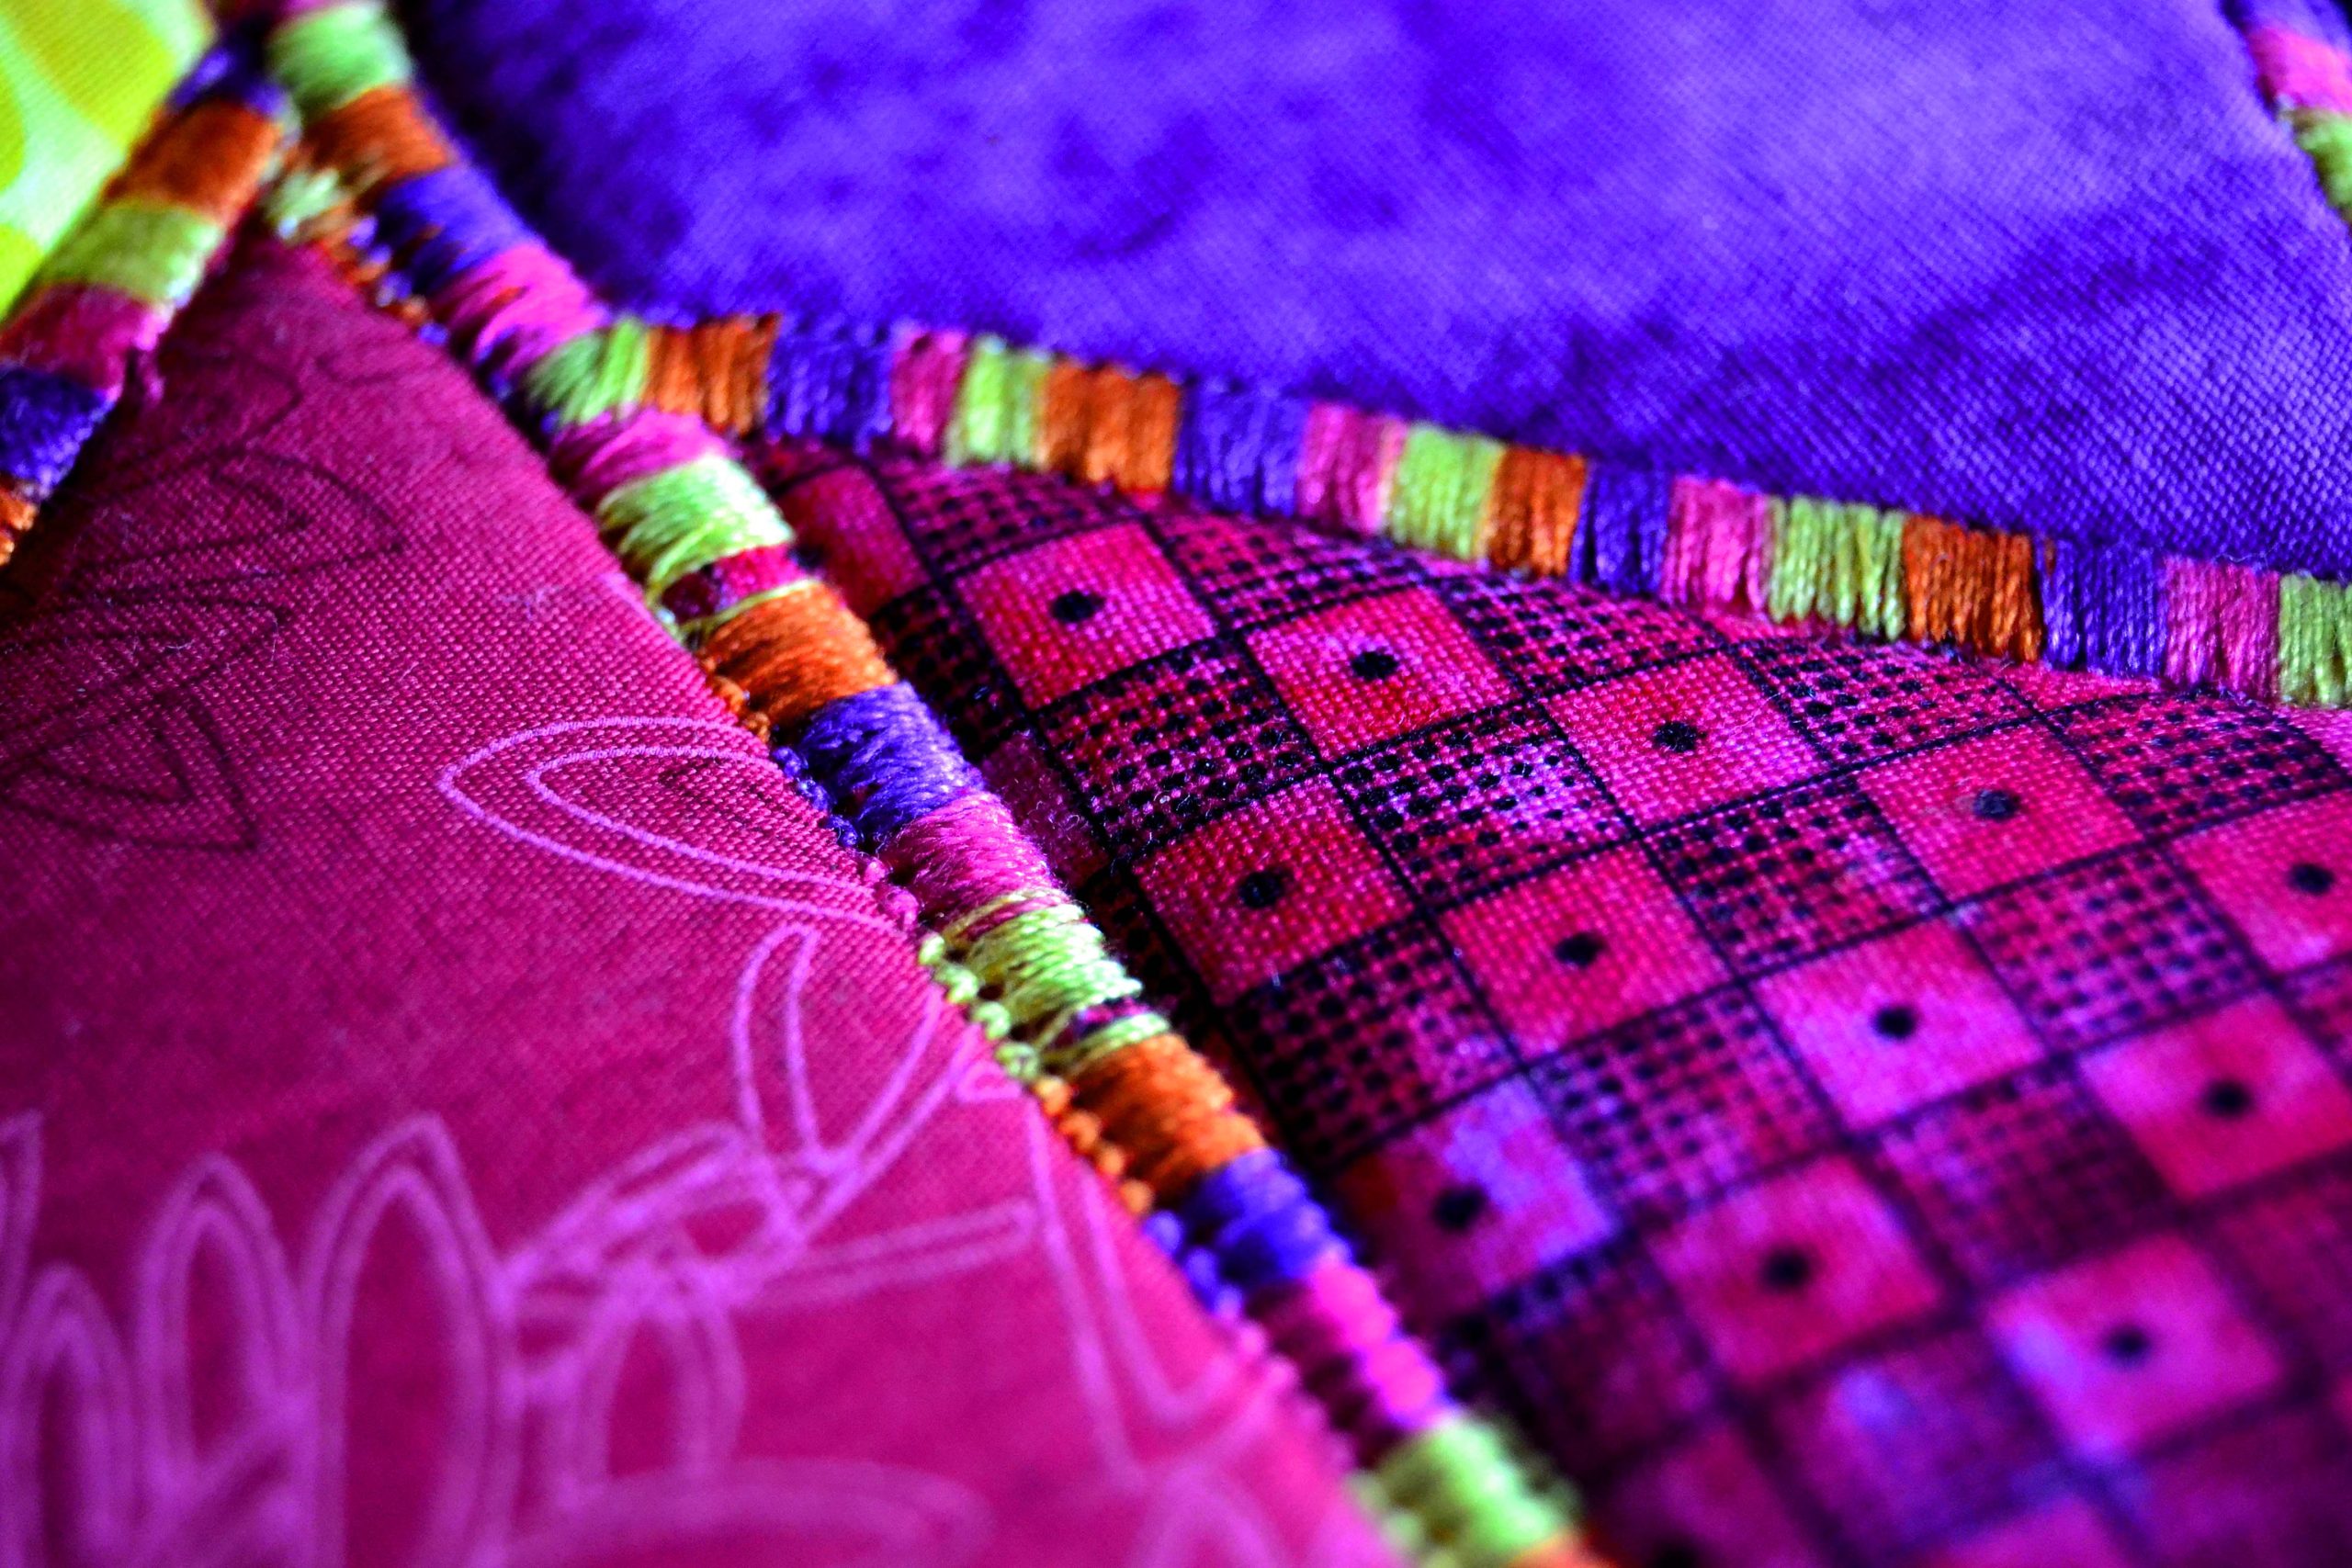
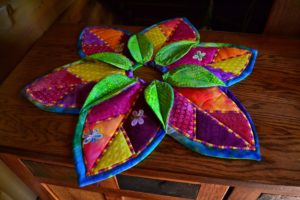
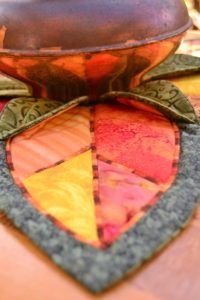
This is one instance where variegated thread really, really shows up. We liked this project. Then we added the dragonfly appliques and the variegated thread stitching. Now, we love this table topper.
This is a perfect example of how variegated threads can take you to the next level. This particular table topper was an experiment – we used all scrap materials, and leftover batting pieces. When we had it together, it was really nice. Then we decided to do the seam stitching with thick variegated thread. We discovered that not only did it look fantastic – but that it was the way to make these leaf table toppers. Incidentally, this item sold out within a few months…not bad for an experimental design!
With that being said, these are some of the brands that I have used:
1. Amann Group-Mettler
They carry a nice line in Silk Finish Multis with spools from 100yds. – 500yds.
2. YLI Corp.
This is made in Rock Hill, S.C. This is their 100% cotton quilting thread with 500m a spool so it lasts almost forever. And yes, those are my autumn spools.
3. King Tut Superior Threads
Also 500yds/spool. They’re made in Japan and are great to sew with.
4. Coats
They’re carrying some 200yd. spools for machine embroidery, but they work great in regular sewing machines as well.
5. Isacord
They come on those bigger green spools that are bell shaped and hold 1000m/spool so make sure you’ve got a lot of projects you can use that particular color on.
If you remember to use these threads as the icing on the cake, rather than the cake itself, you’re projects will really shine and the extra expense will be well worth it.
I honestly don’t know which spools of variegated thread in these pictures belong to which brands – the labels come off easily with these threads, and I forget.
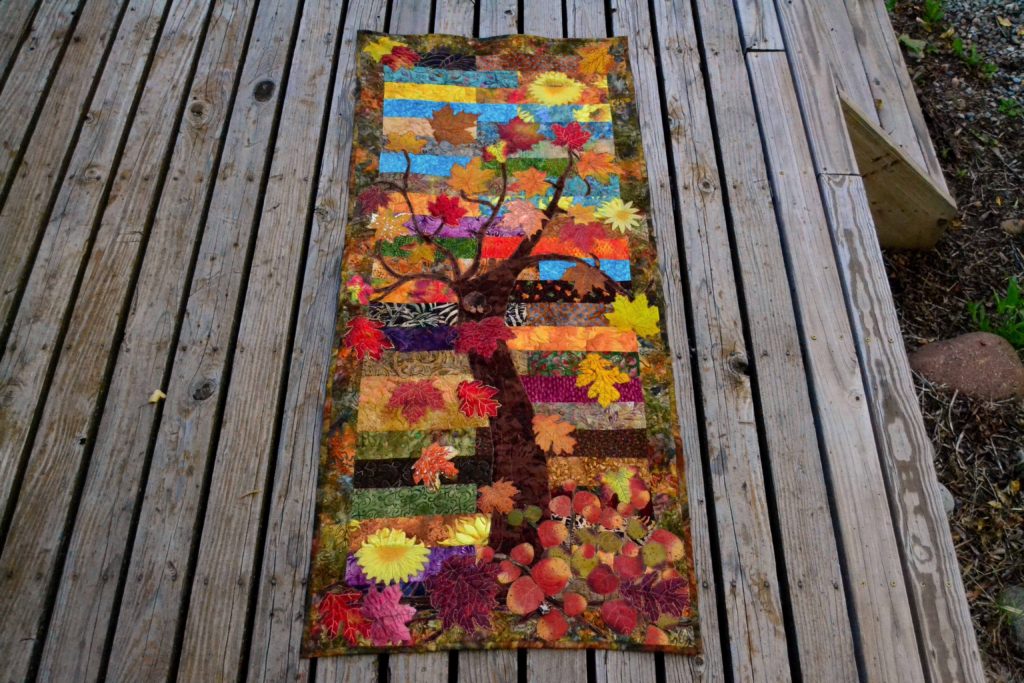
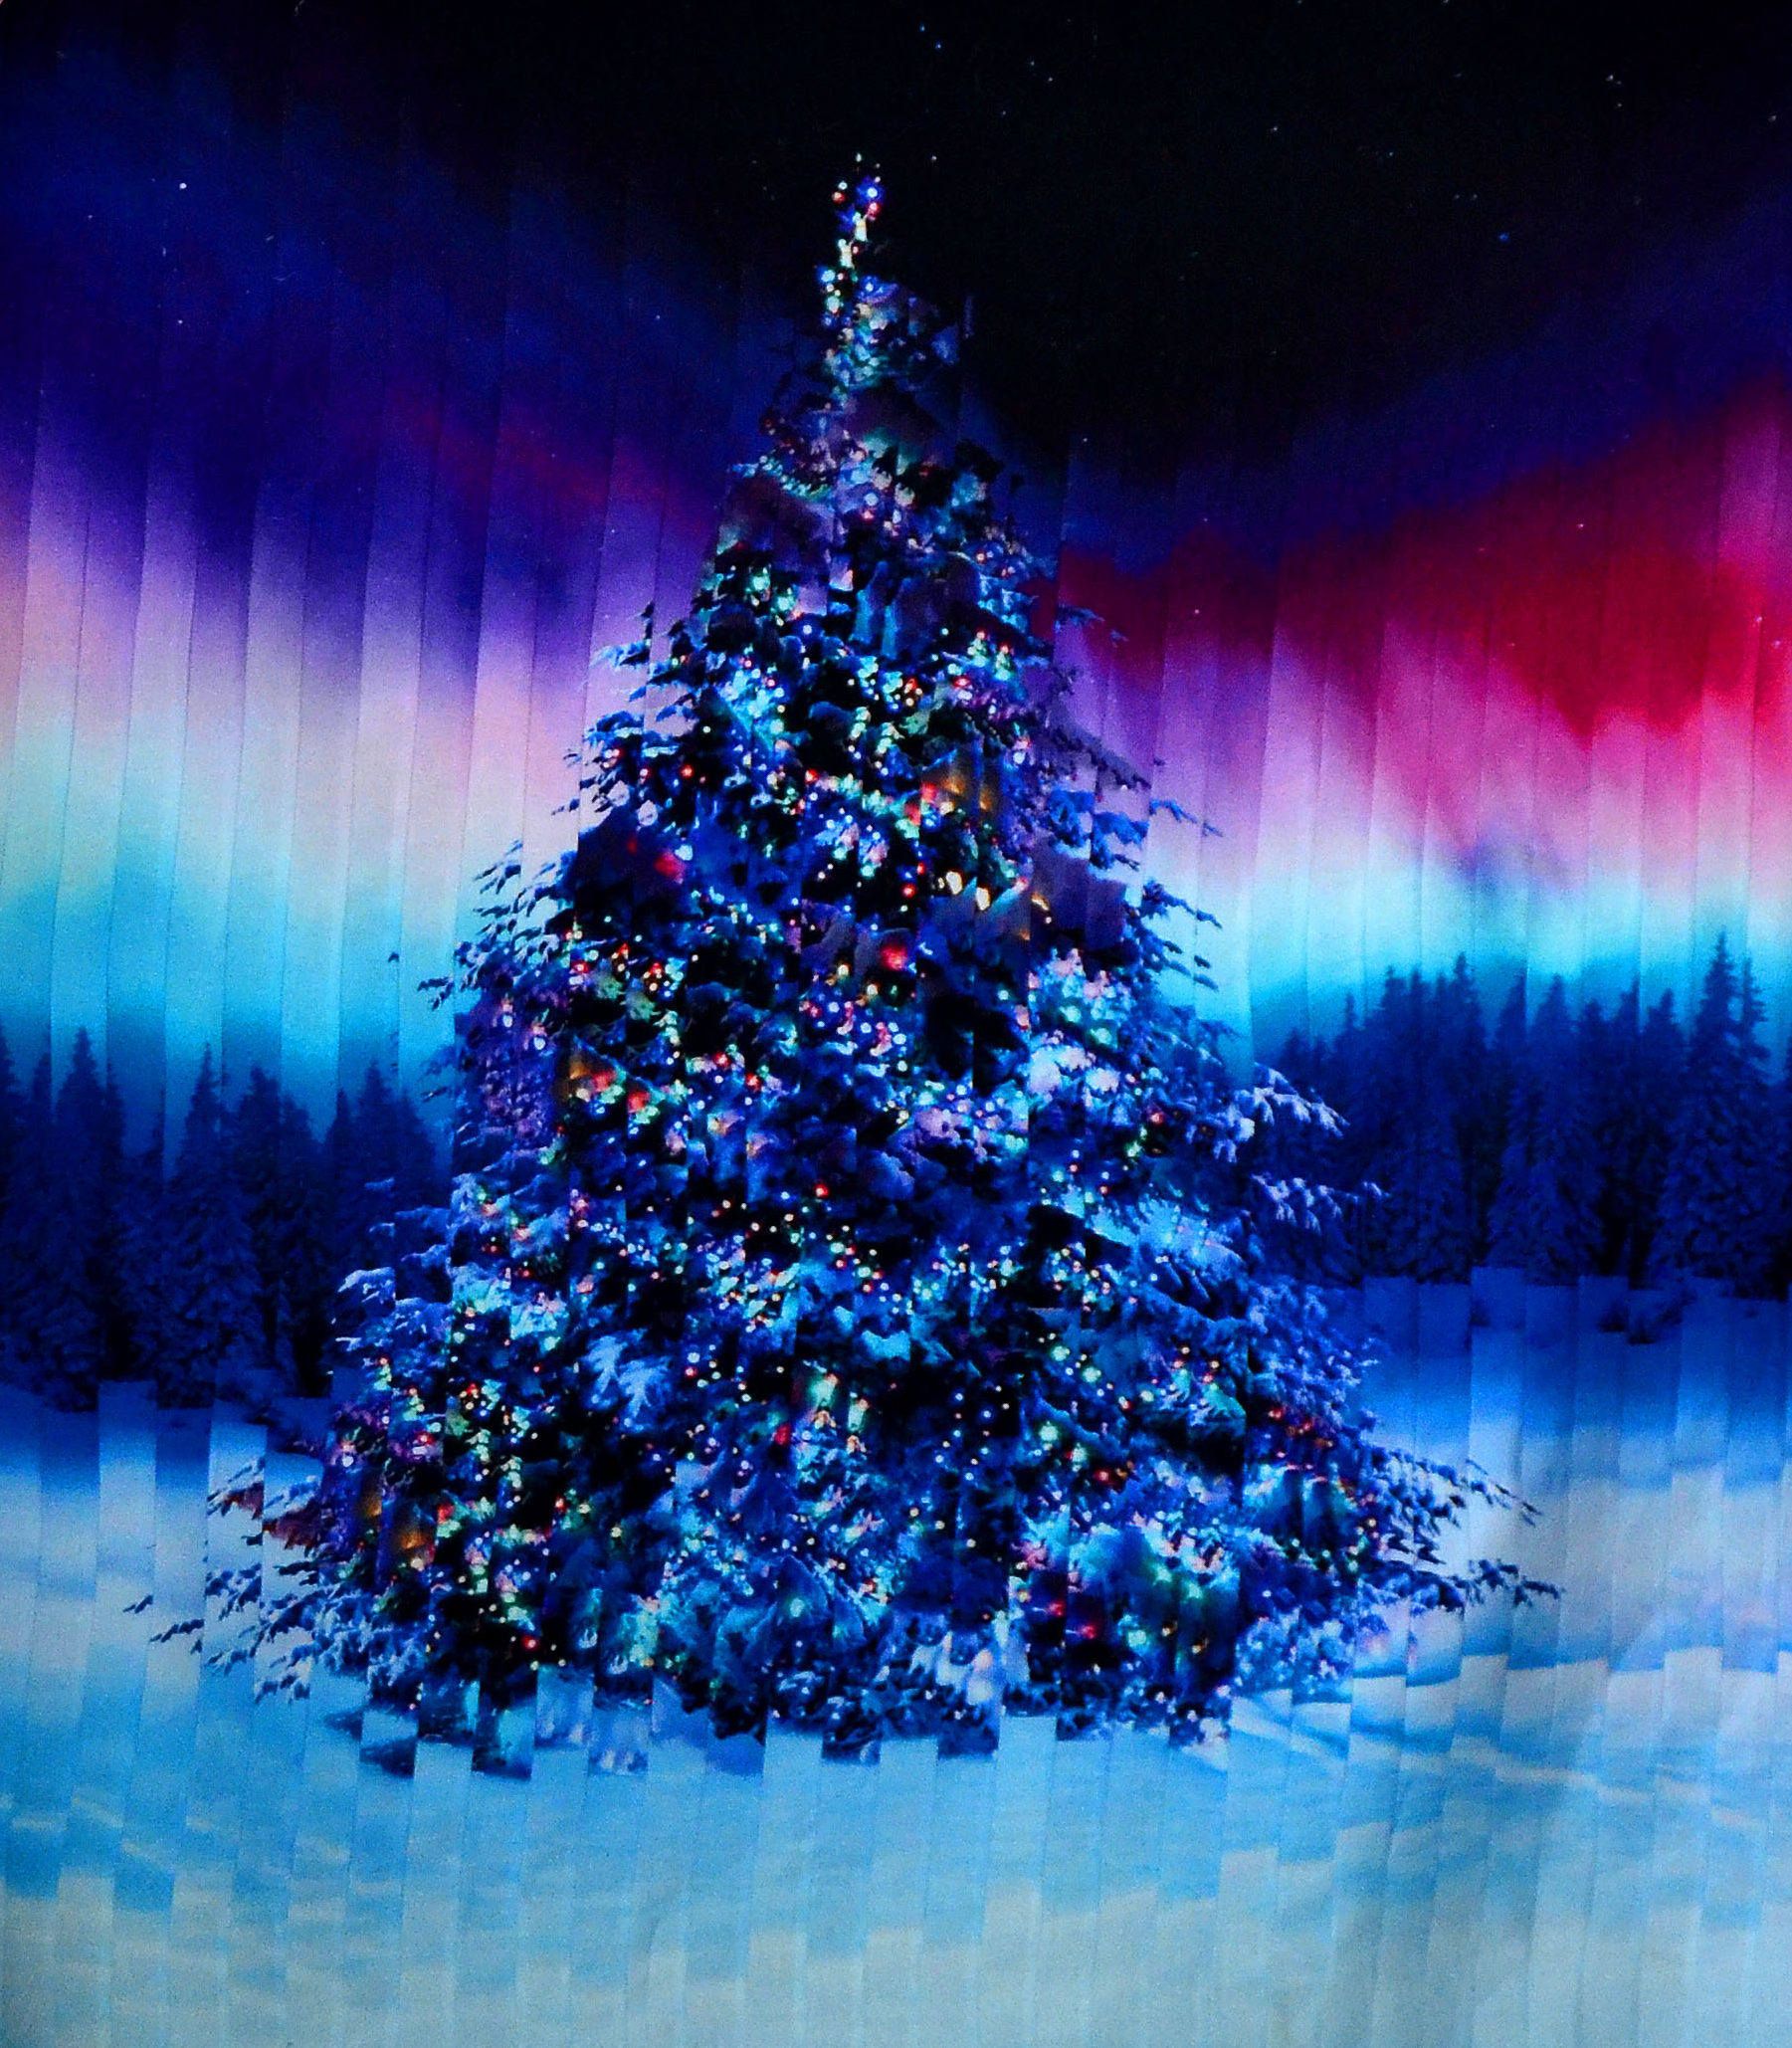
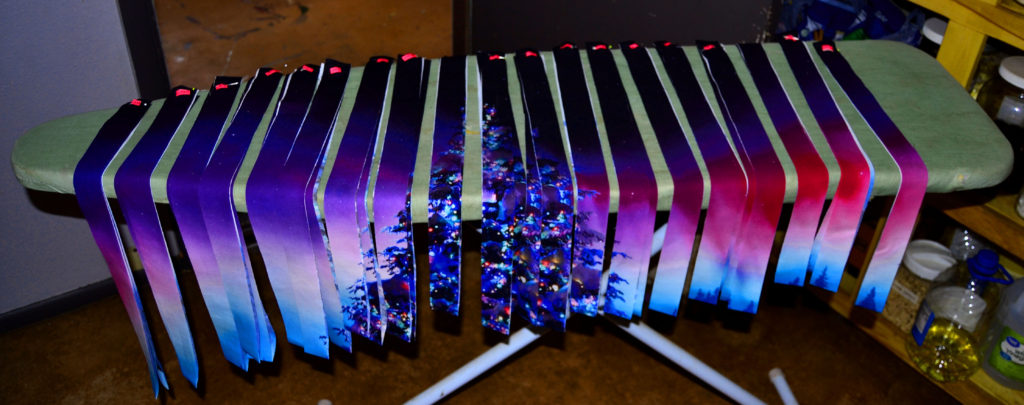
Bonus Tip! Variegated threads can also be used for blending in. Although you can’t see it, this bright autumn tree panel was heavily quilted with variegated thread in the top stitching line.
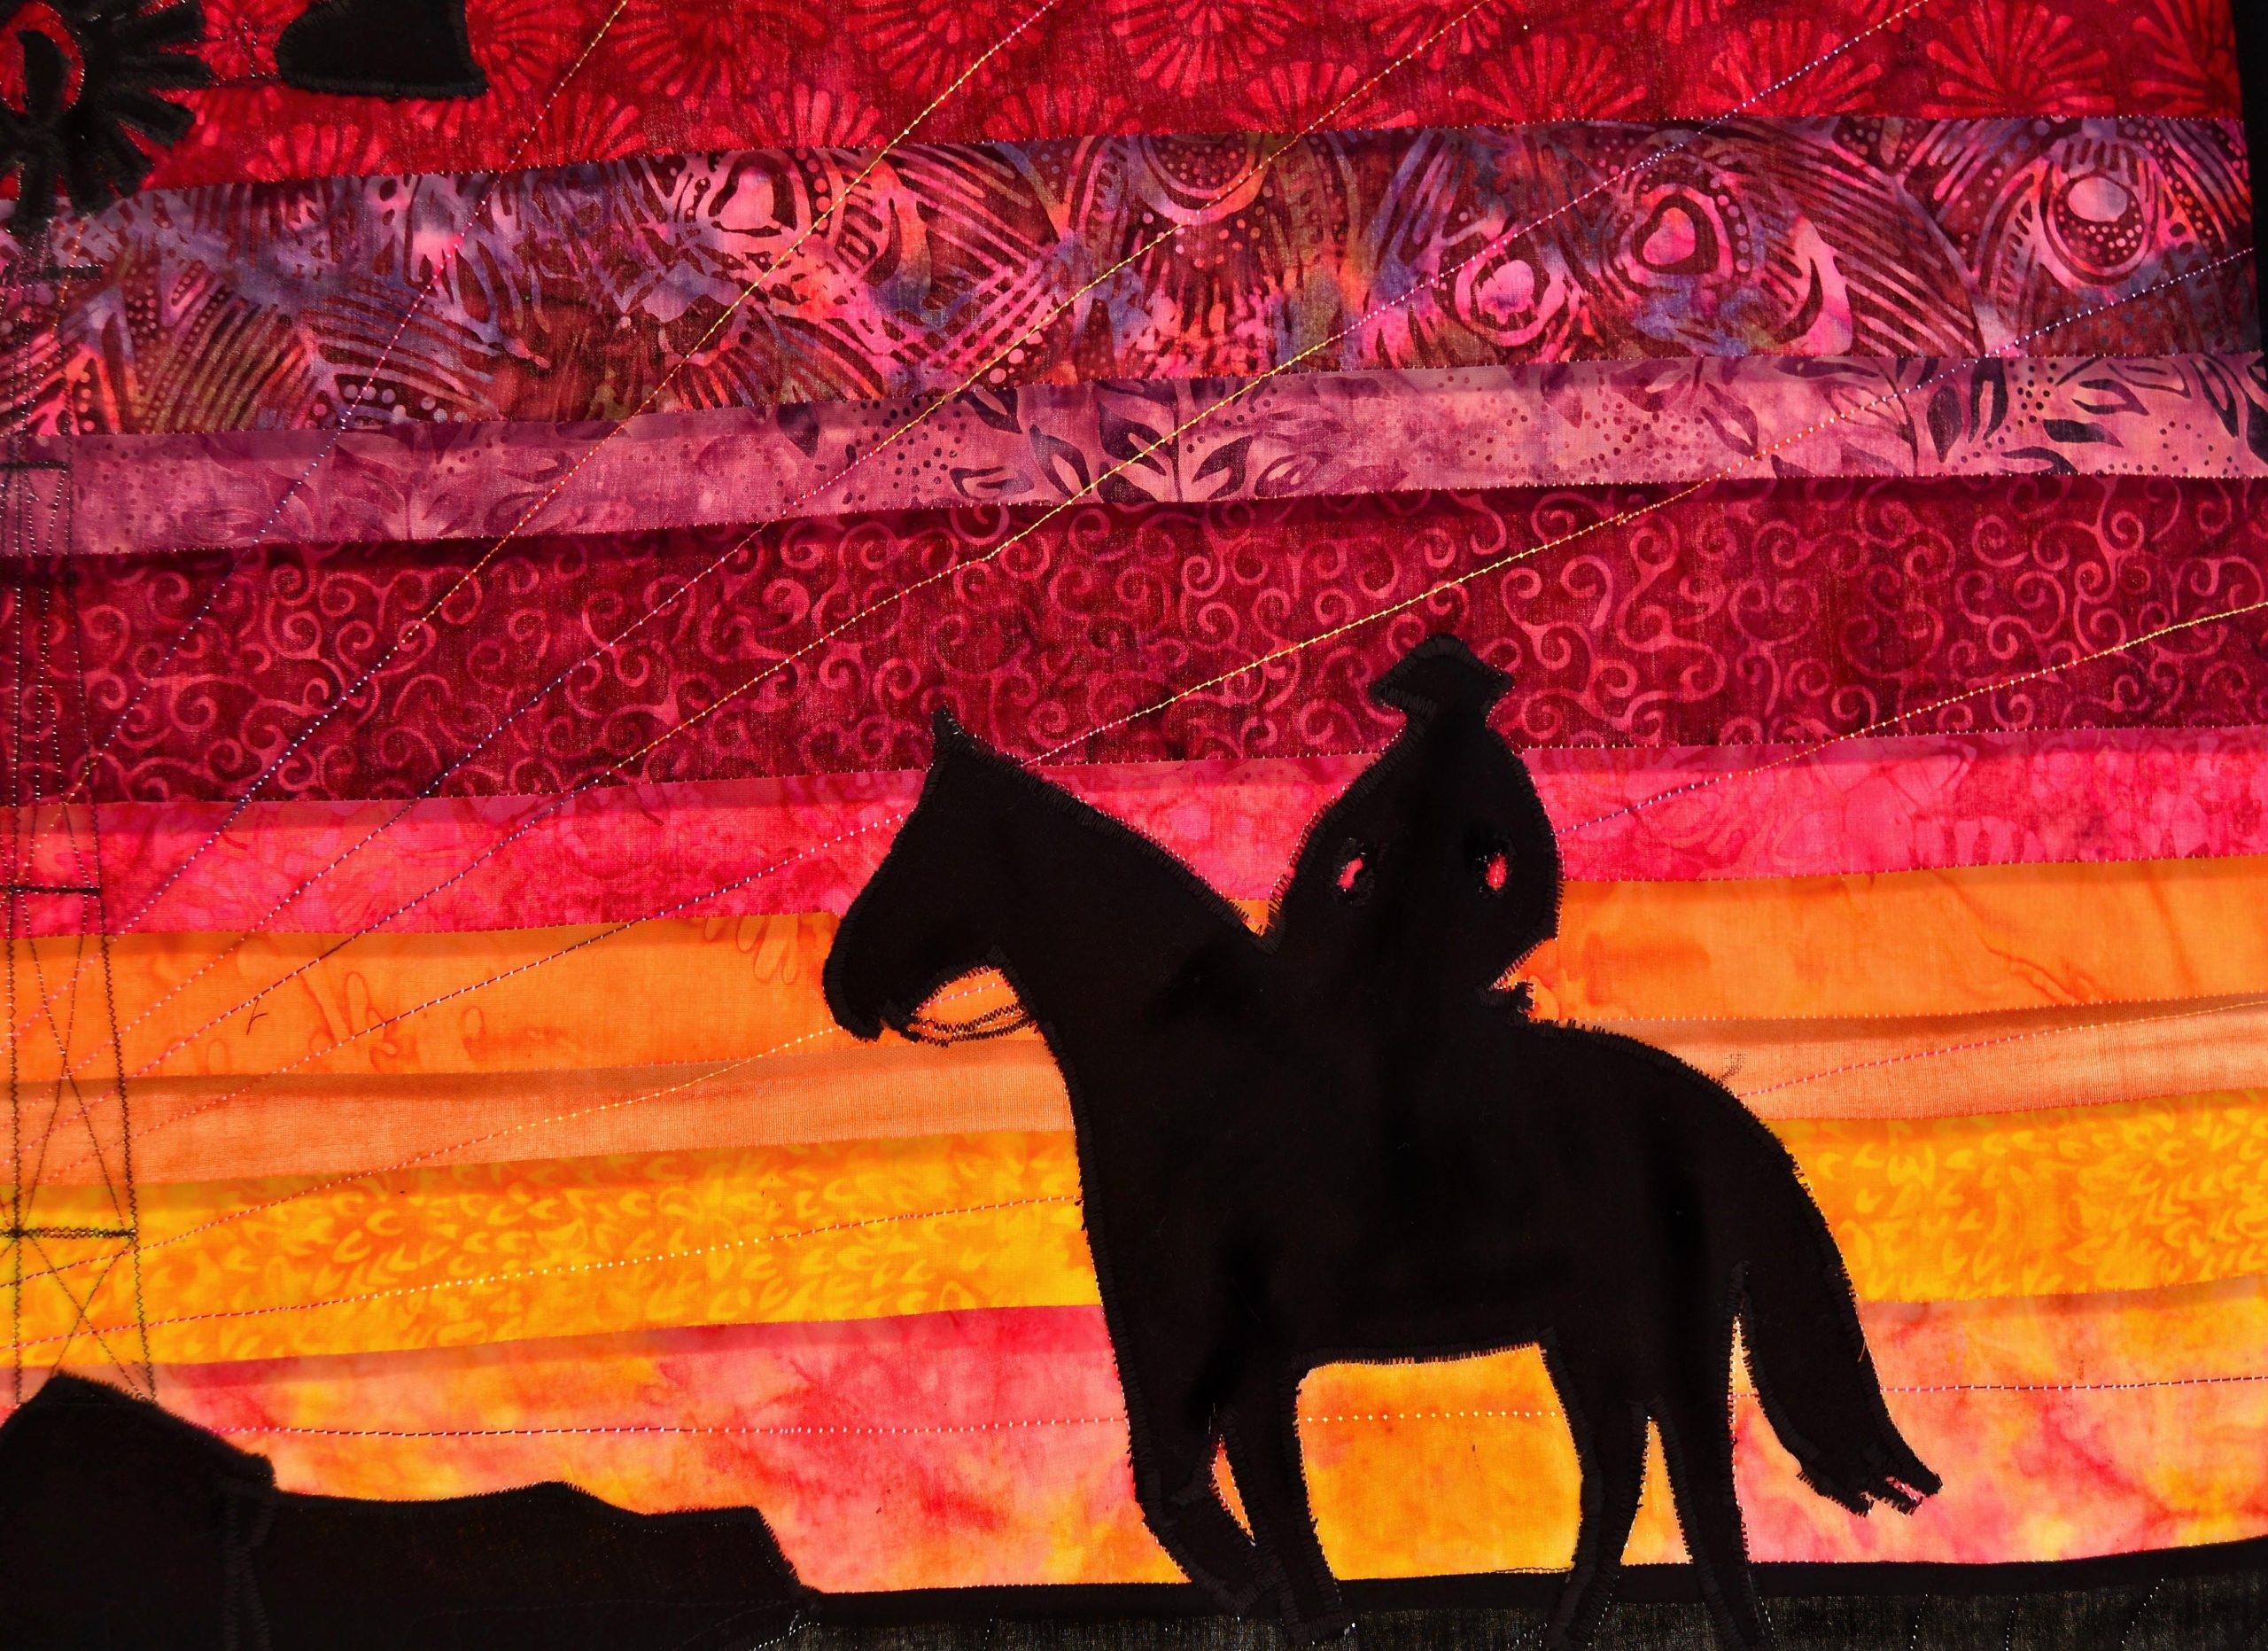
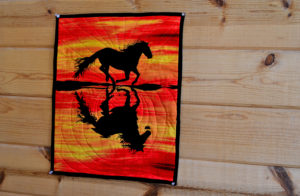
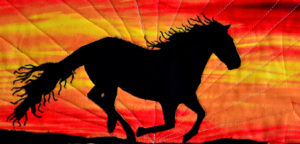
Remember the massive horse that charged across the theater of your imagination as a child? Now he’s back, forever running free on a sunset beach. Princess YellowBelly’s new black stallion quilt brings the incredible romance of the past together with quilting techniques.
Center your home with a framed picture of a black stallion quilted wall hanging.
For anyone who ever loved the Black Stallion books or movies this is the chance to relive the experience every time you catch a glimpse of our nicely sized (17 ¾” X 22”) fabric art décor piece.
Princess YellowBelly and her friends used a variety of styles and quilting techniques to create this piece:
Silhouette Landscape Quilting
The scene is constructed with fiery orange and yellow quilting material to recreate a sunset beach.
A narrow strand of black material makes a solid beach, setting up the baseline for the black highlights and powerful drama that this piece entails.
Applique Quilting
Both the beach and the black stallion are separate pieces of black fabric that have been appliqued to the gorgeous sunset background of the quilt.
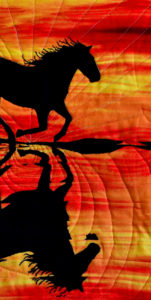
Fractured Quilting
This black stallion quilt features an extra bit of amazing! A reflection of the horse and sunset is perfectly captured in the water.
This is done using a technique called fractured quilted – where two or more images are cut apart and sewn back together to create the displacement optical illusion.
Fabric Marking Pen Enhancements
The black stallion quilt is made realistic by the addition of fabric pen markings on the horse’s mane and tail. These carefully replicated markings make the hair on the mane and tail appear to be truly flying free.
Tailored Quilting
Running Wild is quilted in two different sections – and styles.
The top, or single image, is quilted in sun rays and by outlining the black stallion, popping him out of the rest of the quilt. The bottom, or inverted fractured image, is quilted in uneven concentric circles to replicate rippling water and add to the magically realistic qualities of the black stallion quilt wall hanging.
One-of-a-Kind
All in all the sunset & black stallion quilt “Running Wild” is a fabric art experience not to be missed.
You can purchase it on our Etsy.com seller platform – Lilies Of Grace – or read more specific product details below.
Princess YellowBelly and her friends (human and magical) love this piece so much that we’re turning it into a pattern and kit. This will soon be available, keep a sharp eye.
Material & DimensionsCare & DisplayCustom Orders & Layaway
Princess YellowBelly’s black stallion Running Wild panel:
Measures exactly 17 ¾” inches wide X 22 inches high
Predominant colors are solid black, vibrant orange, fire red, pale yellow, and rich gold
Running Wild shows a black horse running along a beach at sunset. His image is “reflected” in the water
Is back with true black batik fabric (same as the image of the horse)
Running Wild is tagged or named
Weighs very little
Folds into a surprisingly small and flat package
Is a vividly realistic wall art panel
Sunset material is from a collection called “Tuscan Poppies Sunset” and is a batik-quality quilter’s fabric.
The black fabric is solid Kona fabric (sometimes known as true Amish black).
Running Wild is quilted with warm and natural quilter’s cotton batting.
Care & Cleaning
Running Wild is an easy-care piece.
Recommended care and upkeep with a lint brush
Machine wash (cool, delicate cycle with a gentle detergent) if needed
Can be tumble-dried, although air-dry is recommended
May be cool-ironed (cotton settings) to remove packing wrinkles. Safe to iron with water or spray-starch
Display Options
We use regular household thumbtacks to secure our fabric art panels for display. They hold the panel tight and fabric is self-healing, once the tacks are removed the holes will close up again.
If you would prefer to use a hanging or curtain rod to display Running Wild, we offer hanging sleeve options.
Hanging sleeves are only attached upon your order and your selection of your preferred choice –
Top Hanging Sleeve for normal hanging
Top & Bottom Hanging Sleeve if you would like to weight the panel as well
Hanging sleeves are made of the same material as the backing fabric, and are about four inches wide each (although this can be adjusted to custom requirements). They are attached under the binding seam line, and are secured with hand stitching to ensure that the seam won’t show through on the front of the panel.
If you would like to discuss customized options, please contact us directly!
Custom Orders
We are always happy to talk about a new piece with your ideas! If you have an idea you would like to see developed, or if you would like to have us make you something specifically please contact us.
You can talk to us at our Etsy.com shop – or you can use the contact form below to submit your questions & ideas.
Layaway
Sometimes the prices on our artwork can seem a little out-of-reach, which we understand! We try to charge very reasonable fees, but if you really want Autumn Rondelle, but don’t think you can afford it in one go, please contact us via the form at the bottom and request a custom layaway program.
Buy Now
Thanks for getting all the way to bottom of this piece! Please let us know what you think in the comments below, or contact us.
*Photographer’s Note: Due to the intense oranges and red of the background sunset fabric, Running Wild proved difficult to photograph accurately as the color confused the camera’s sensors.
While every effort was made to clearly capture the colors of this fabric art wall hanging, some color clarity was lost in the photographic process. The sunset-to-black ratio is much clearer and true-color than the photographs represent.