Unique Uses for Geometric Quilt Designs

Unique geometric quilt designs by Kate Brown @ SparkleStash Designs - rainbow colored geometric design quilt

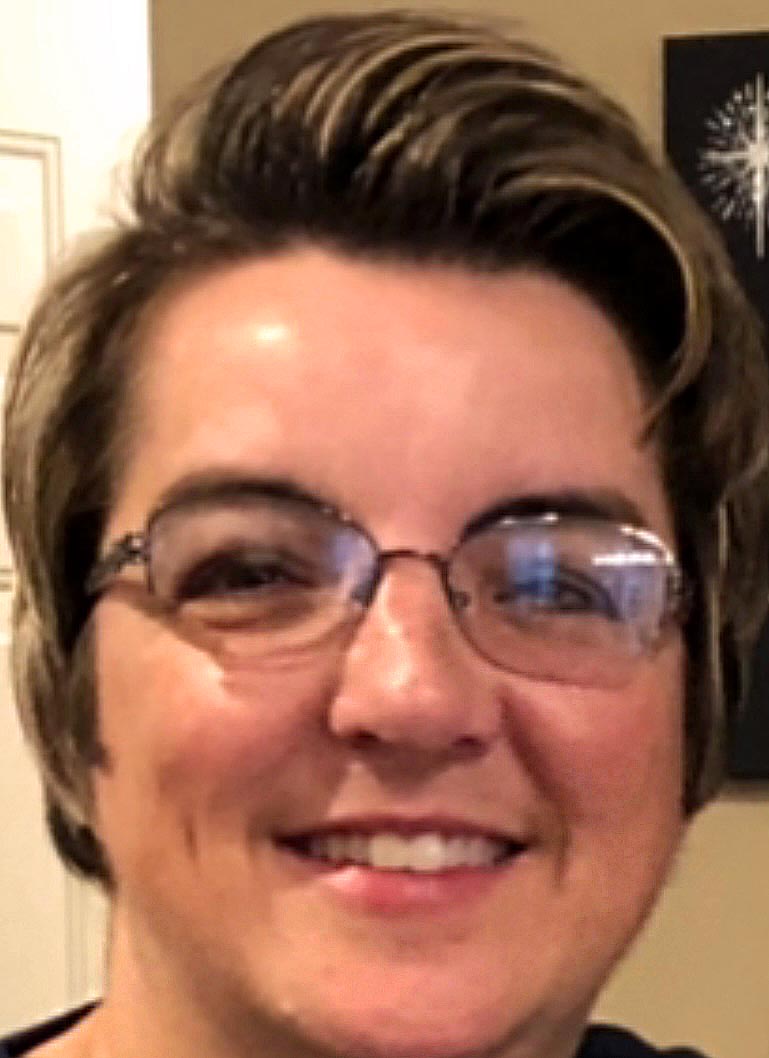
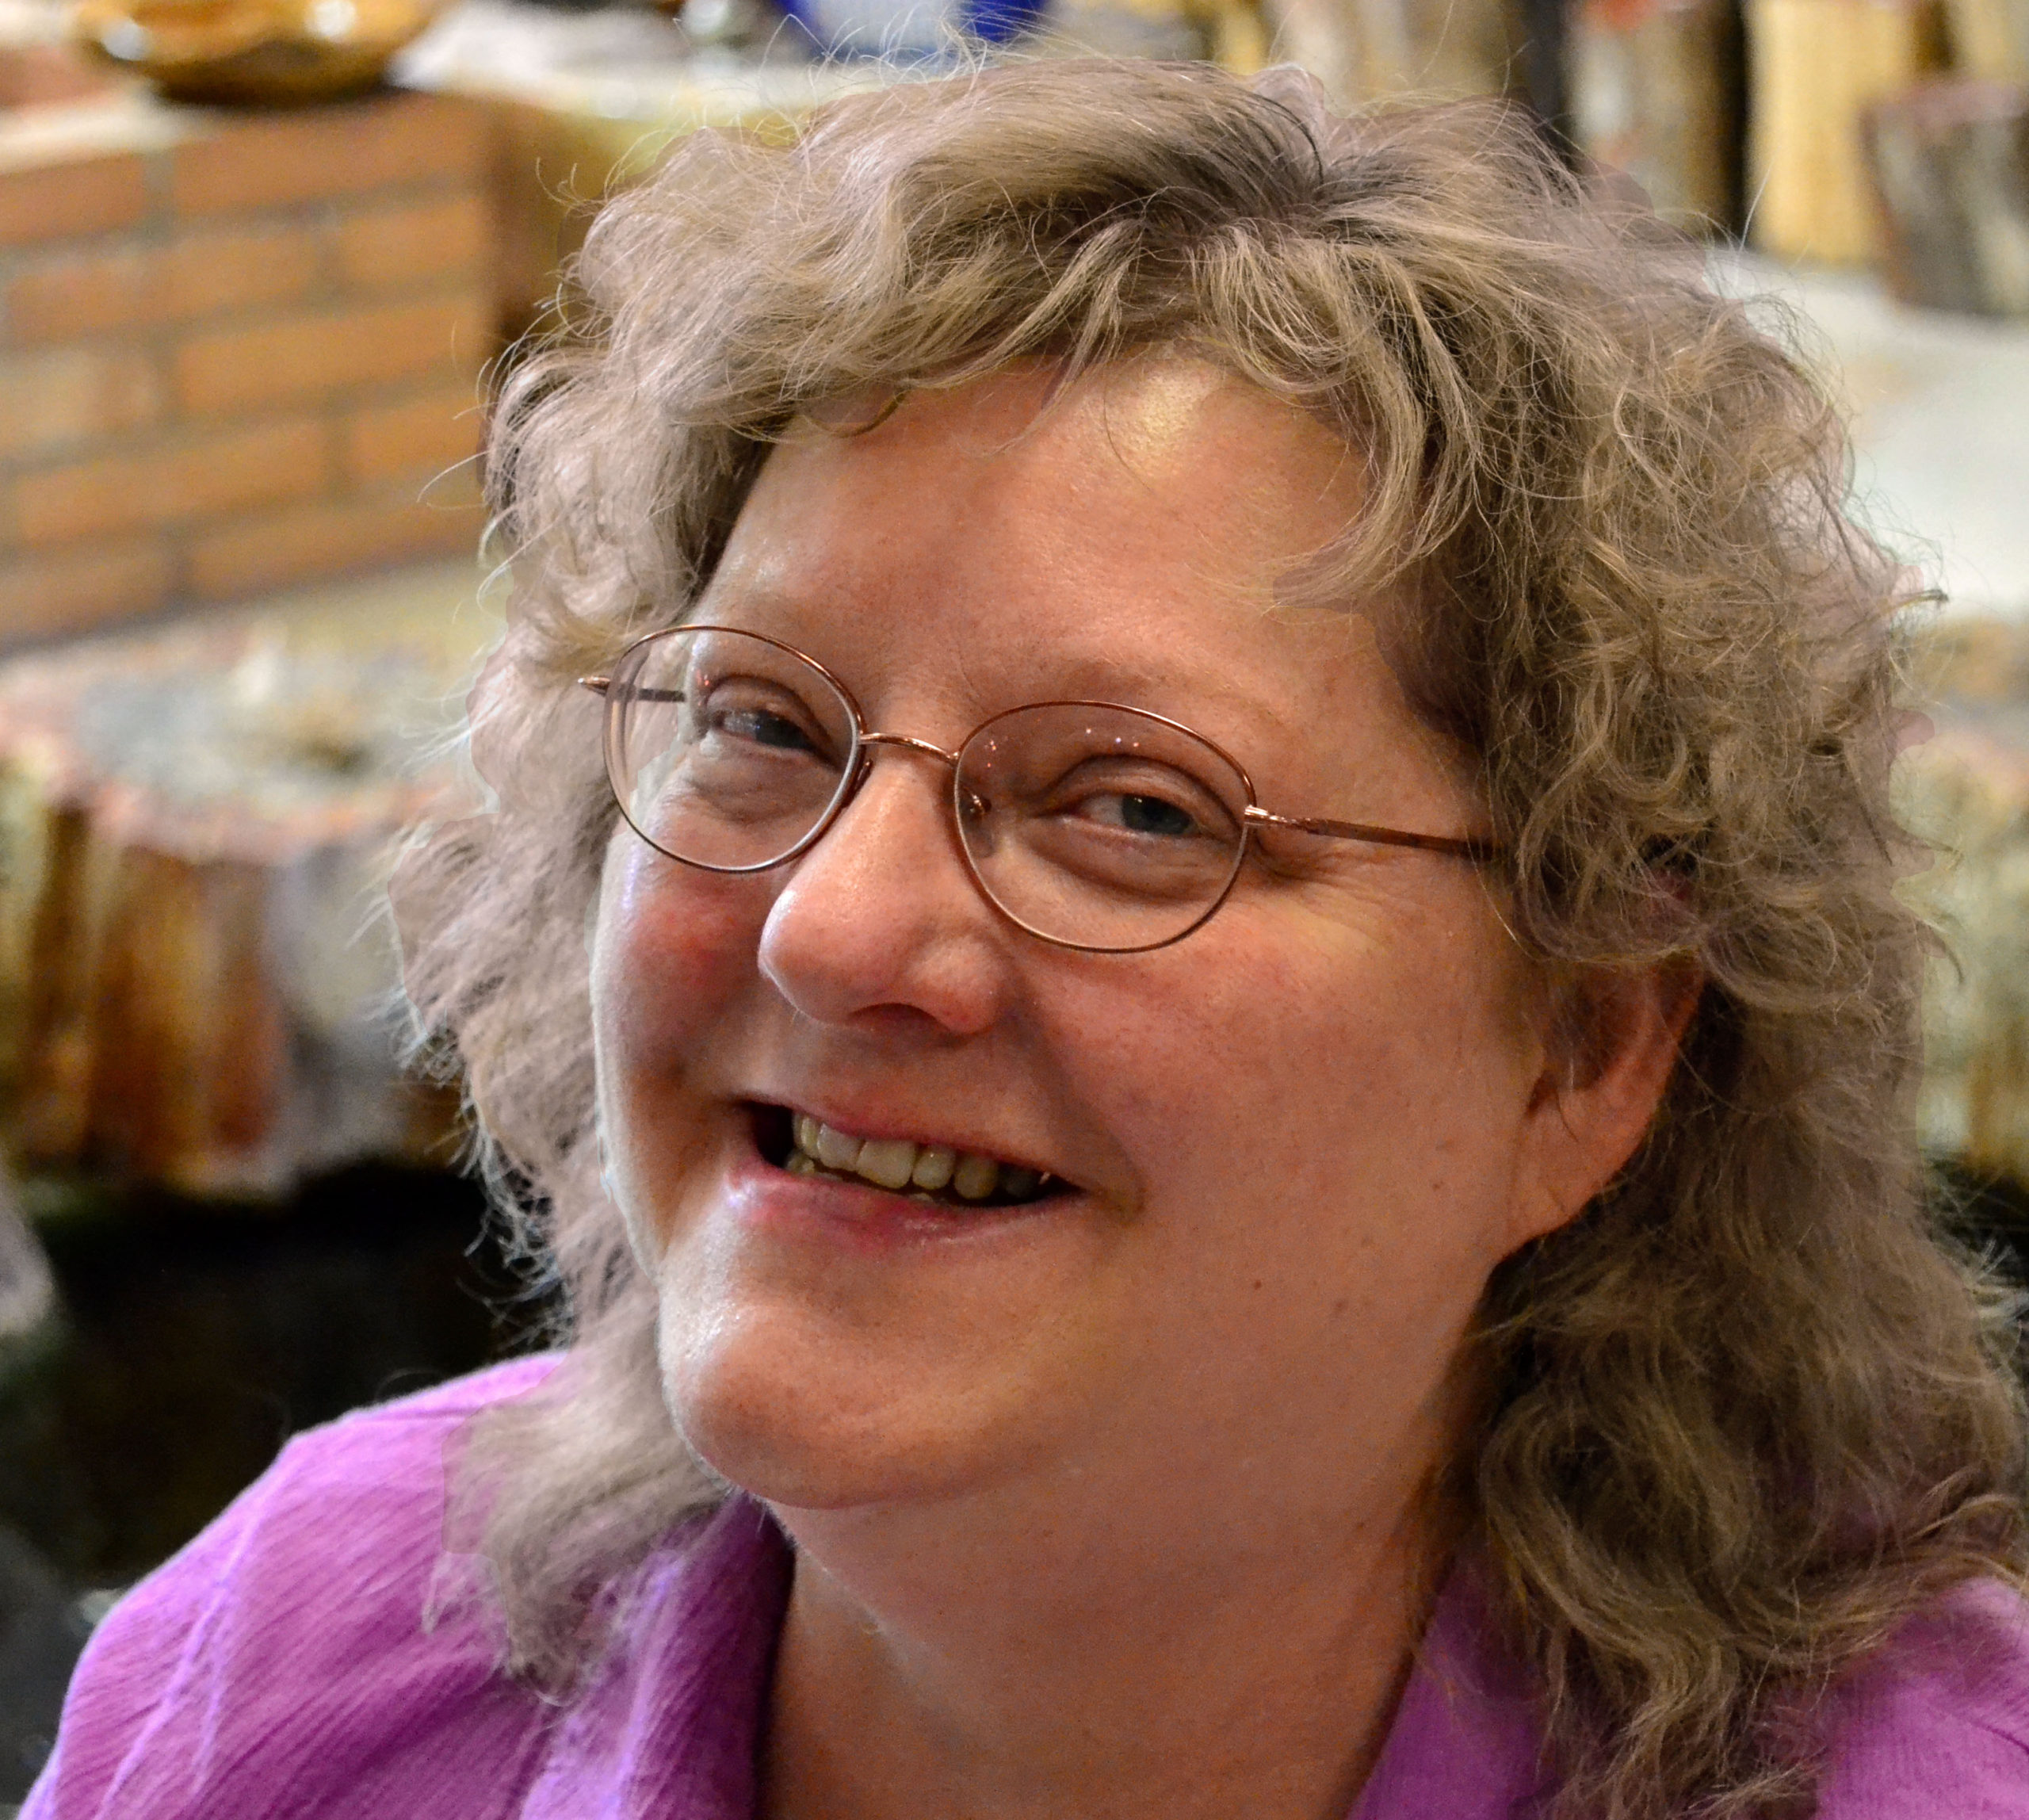
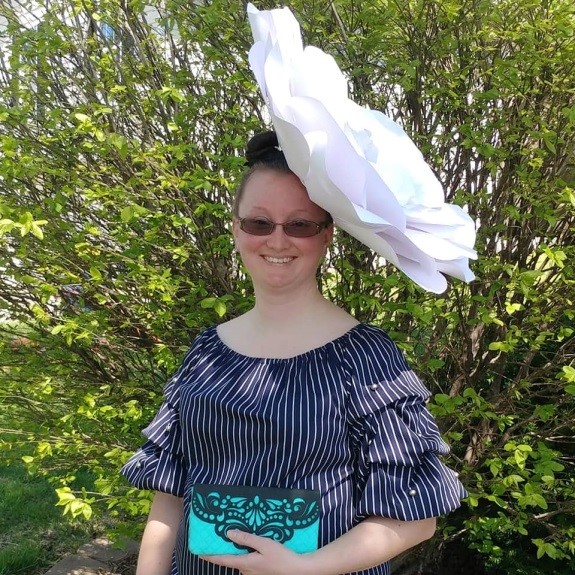
Today we here at Princess YellowBelly Designs are honored by the company of a very special guest, a great and unique creative fabric artist, Kate Brown.

Princess YellowBelly Designs logo

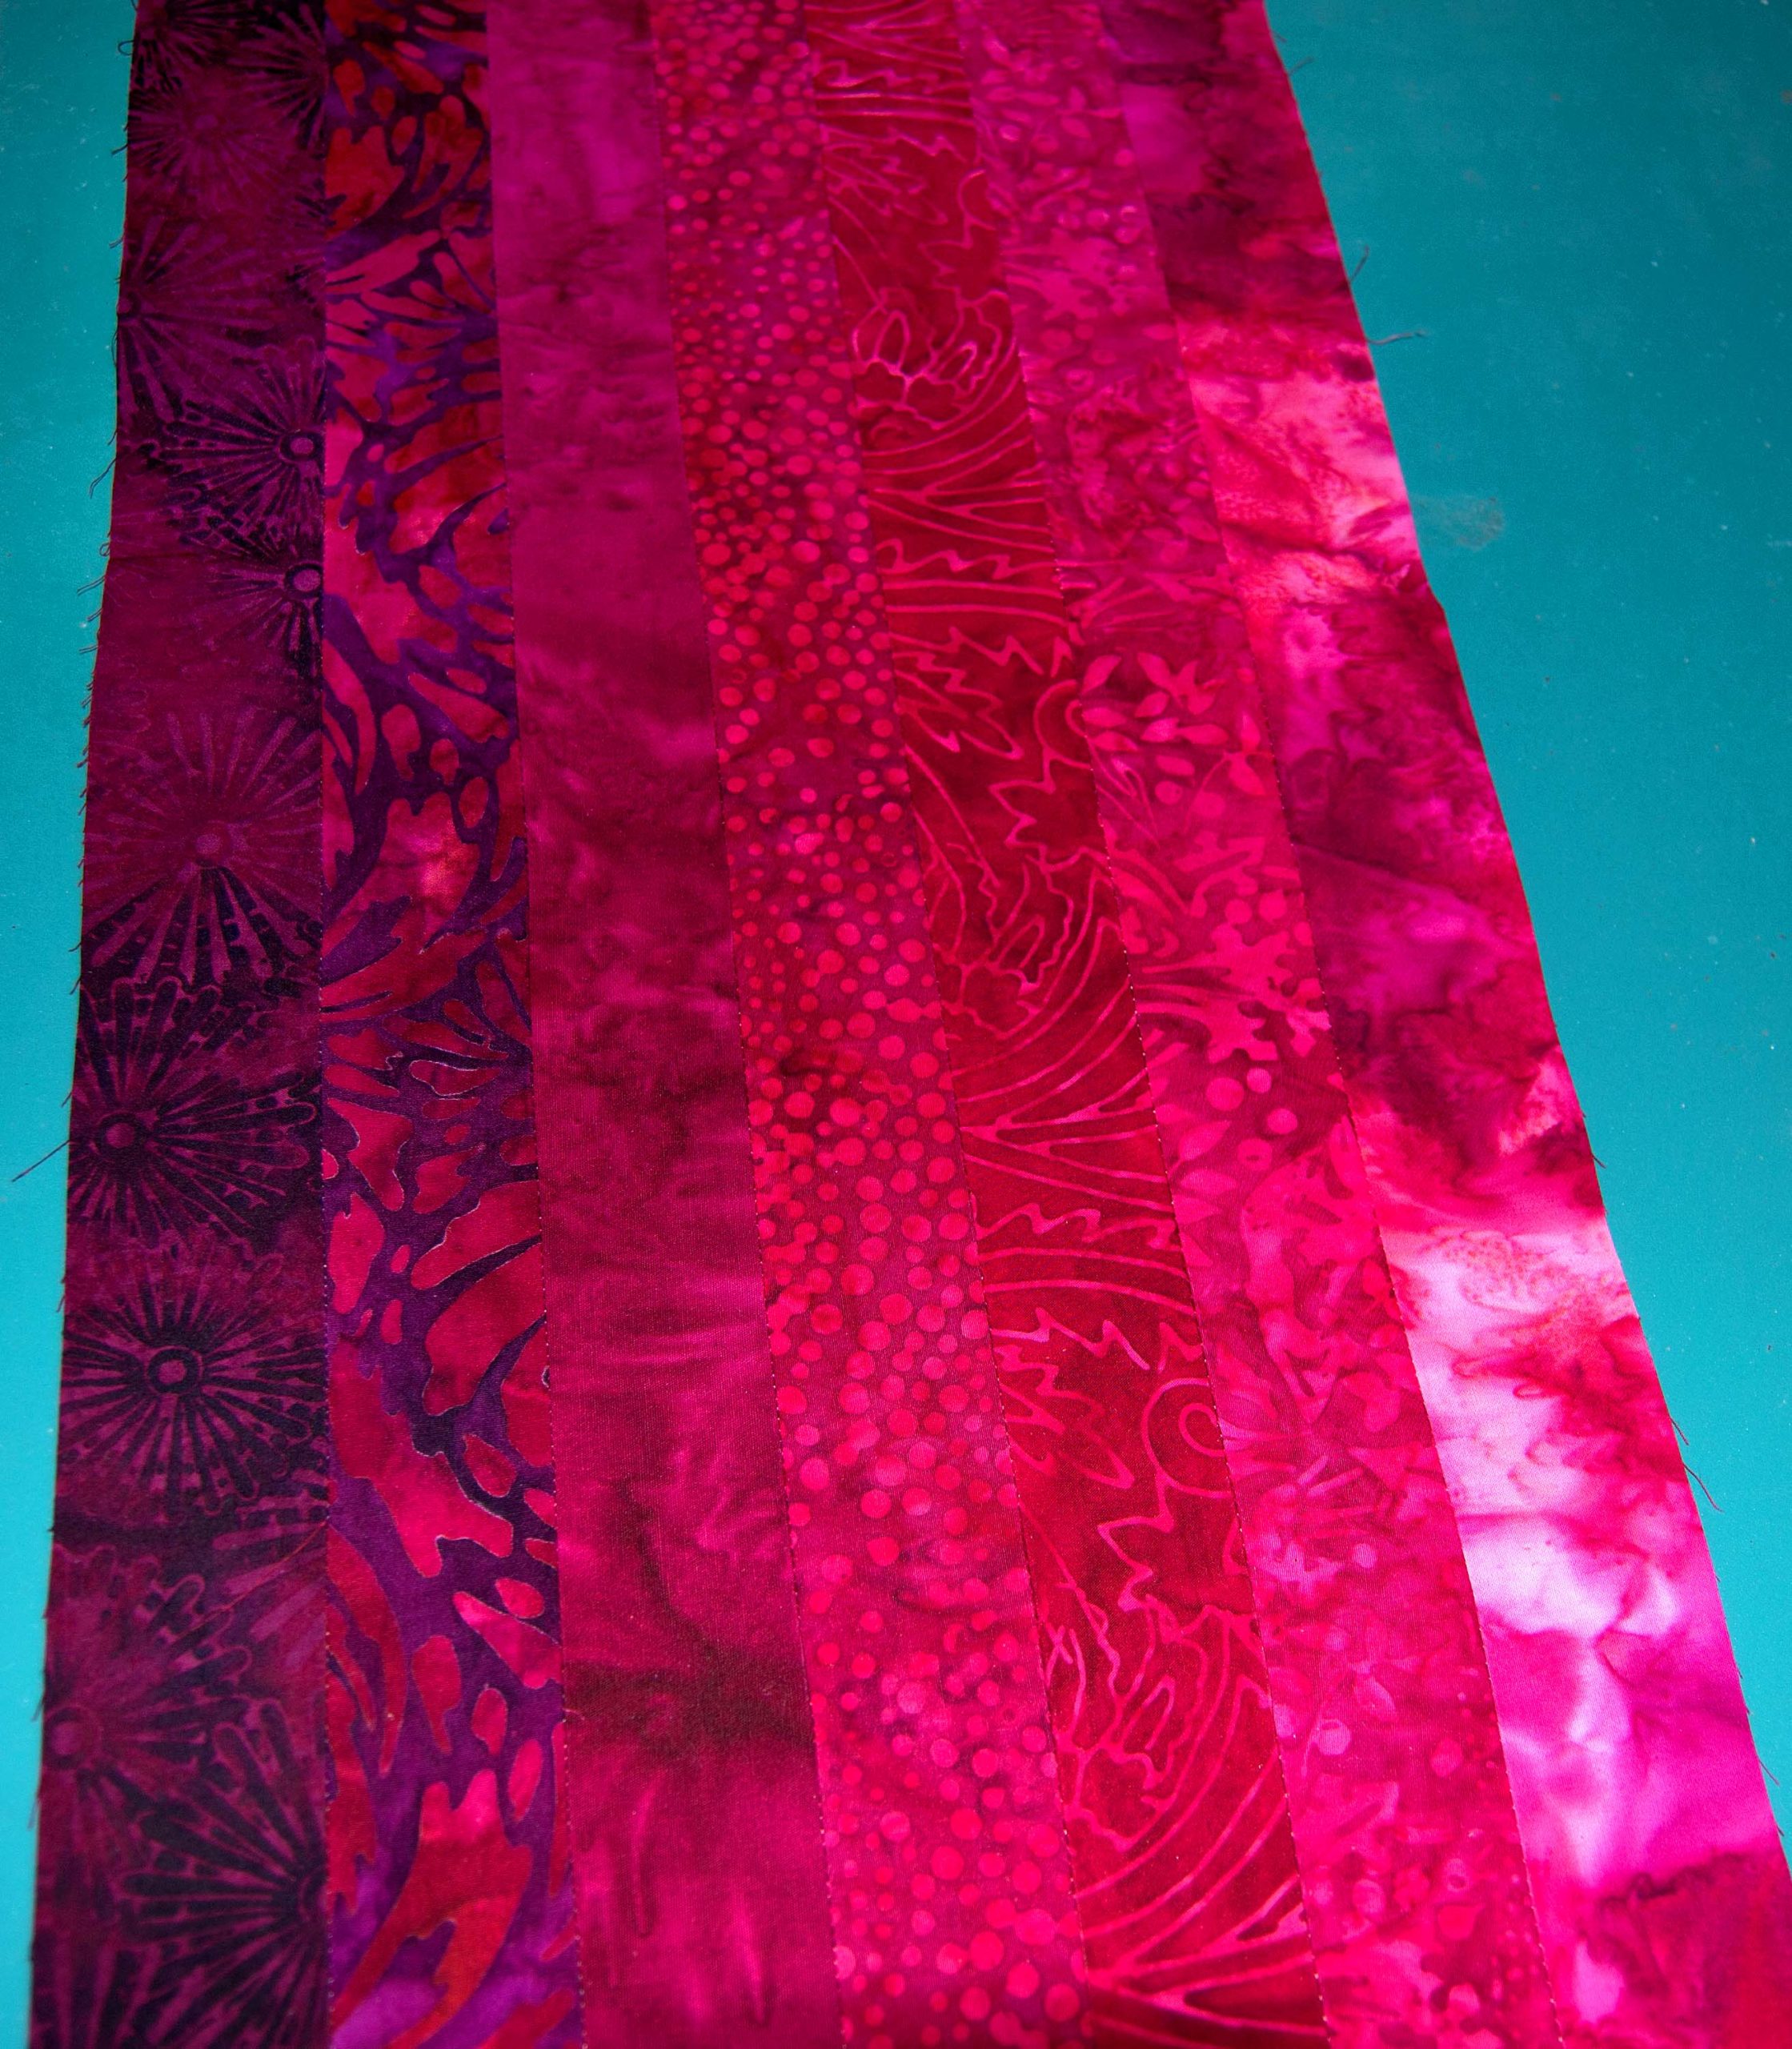
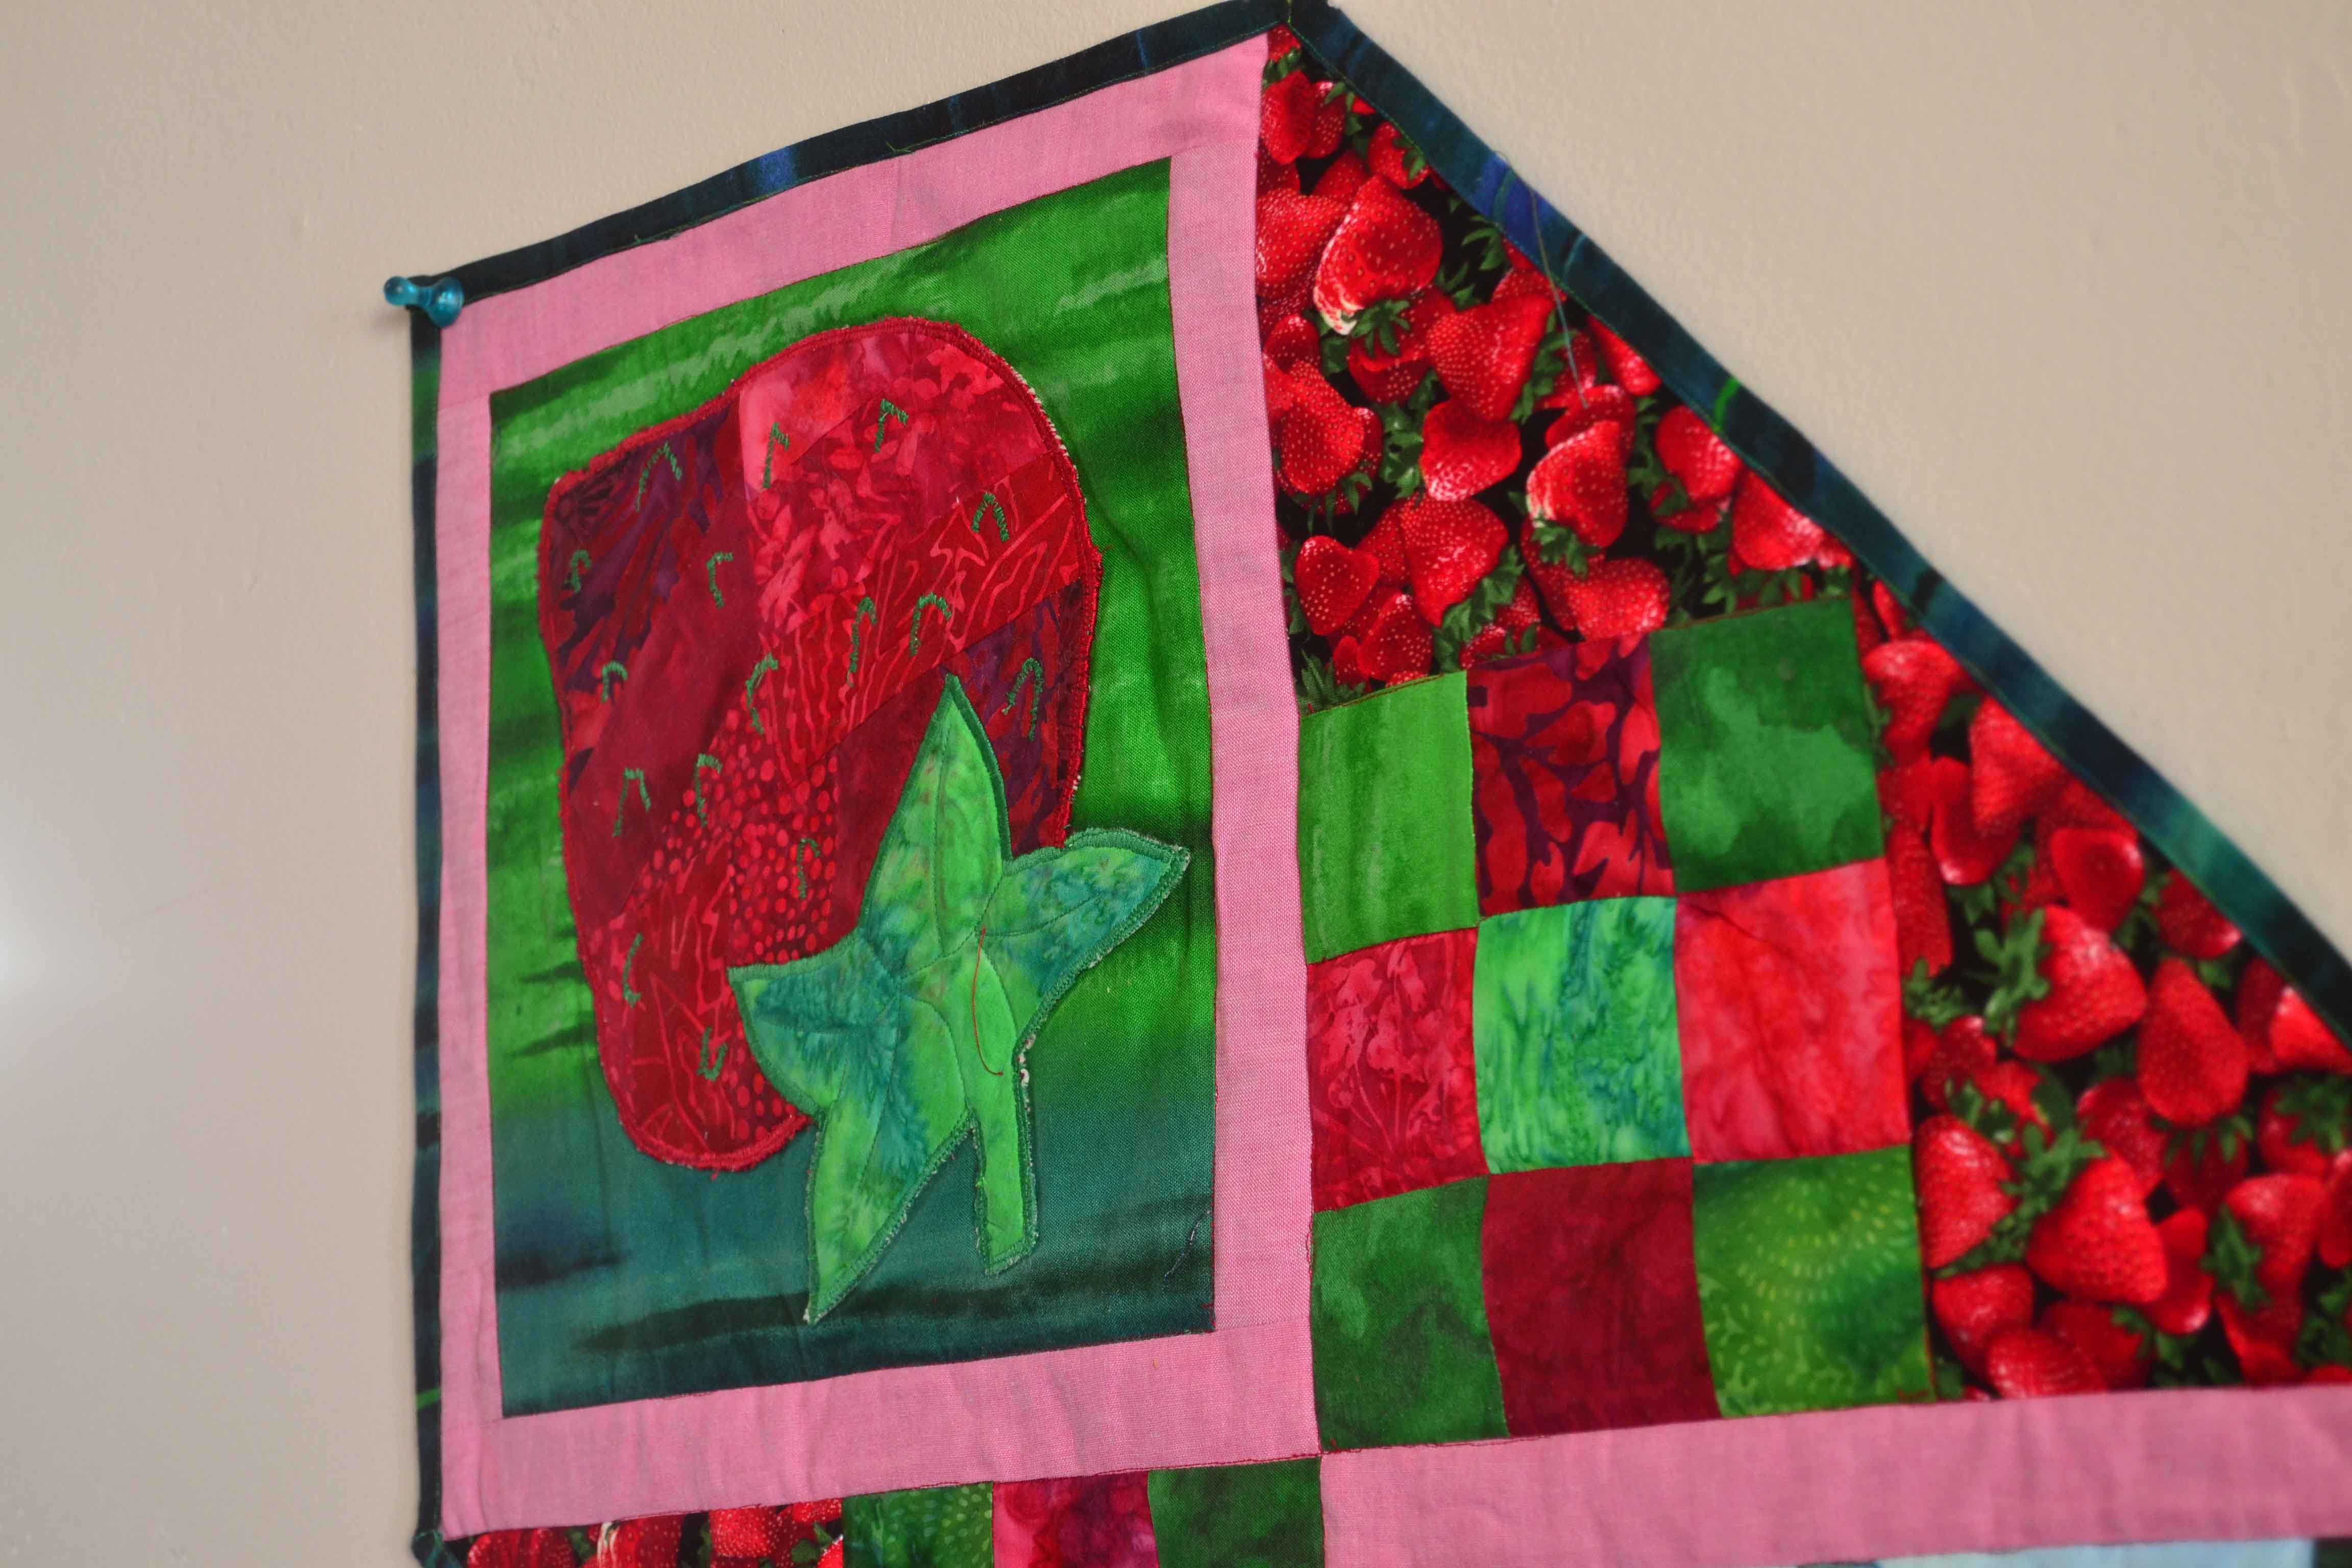
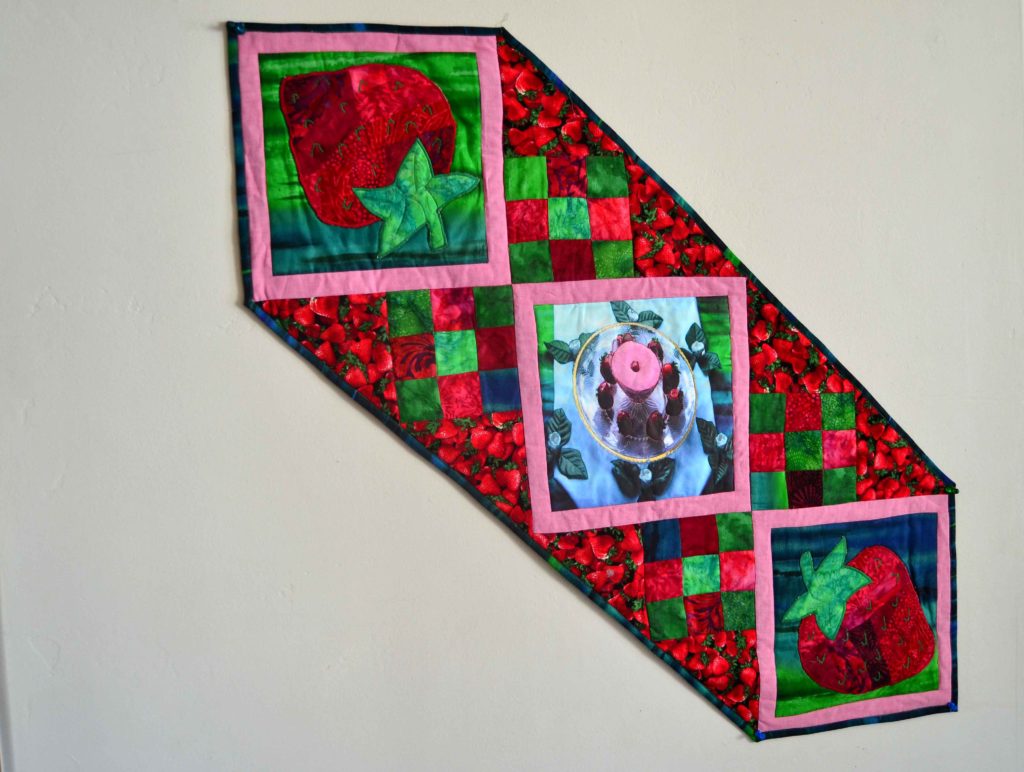
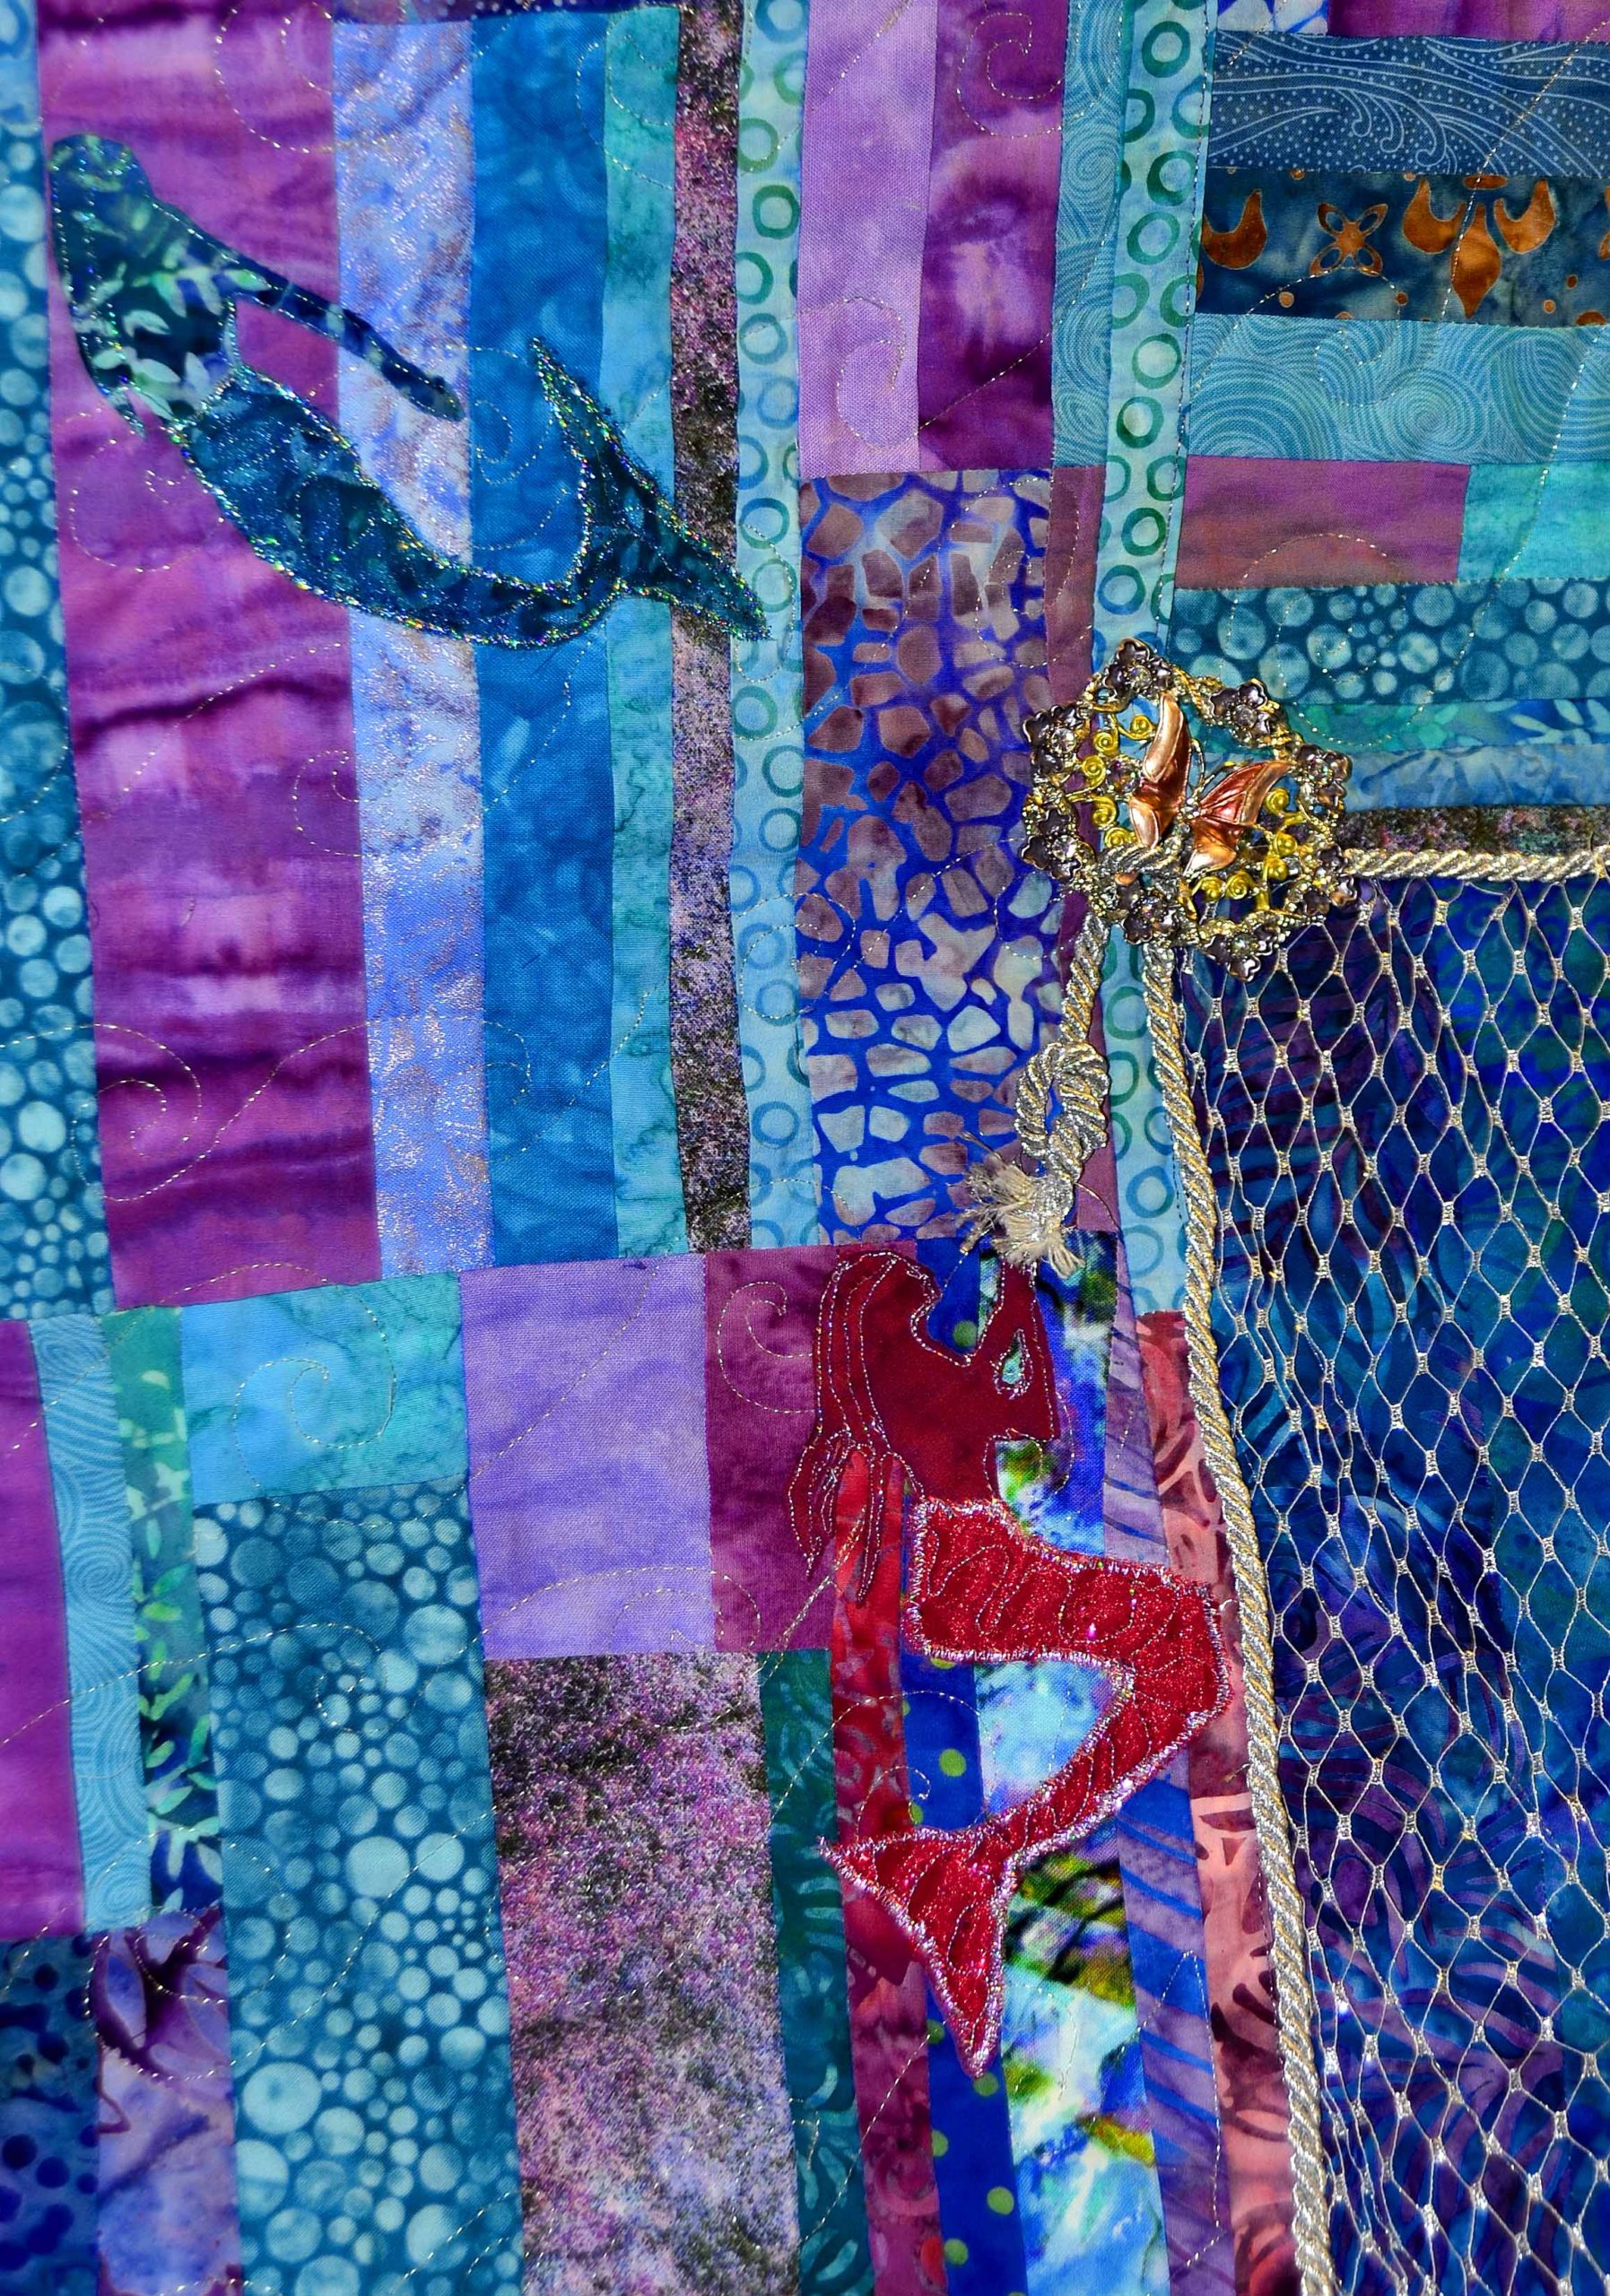
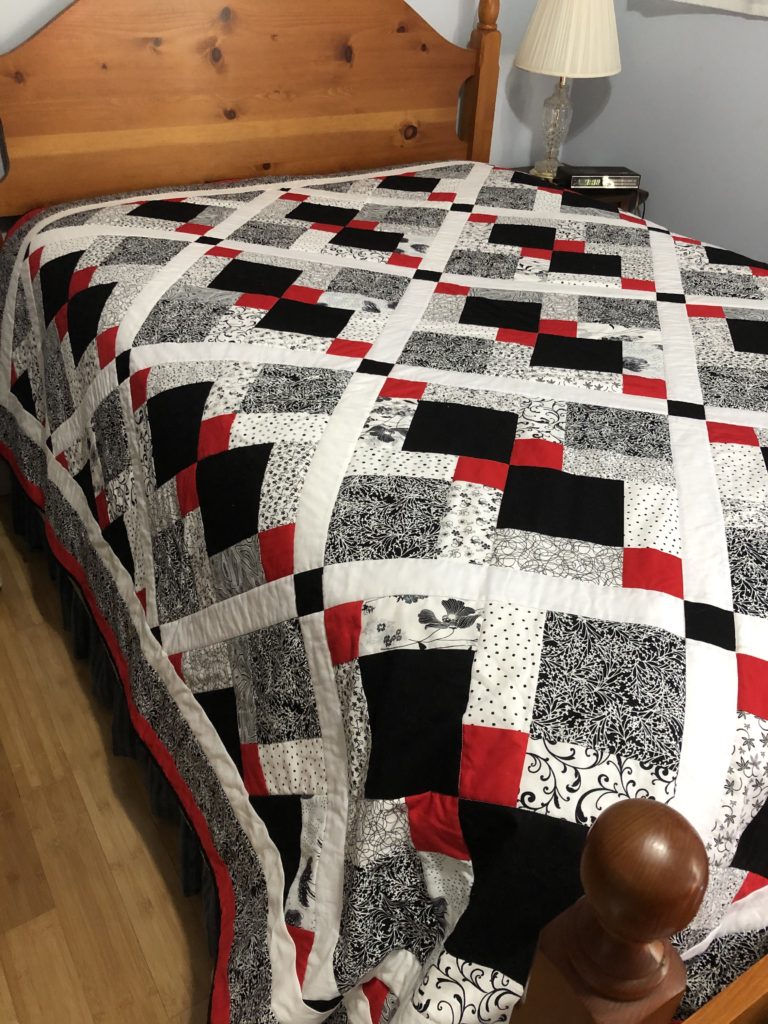
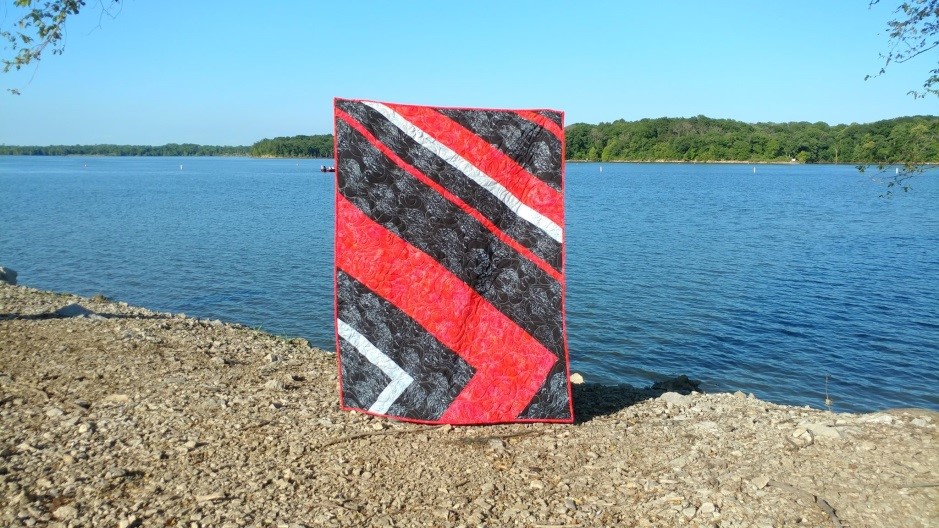
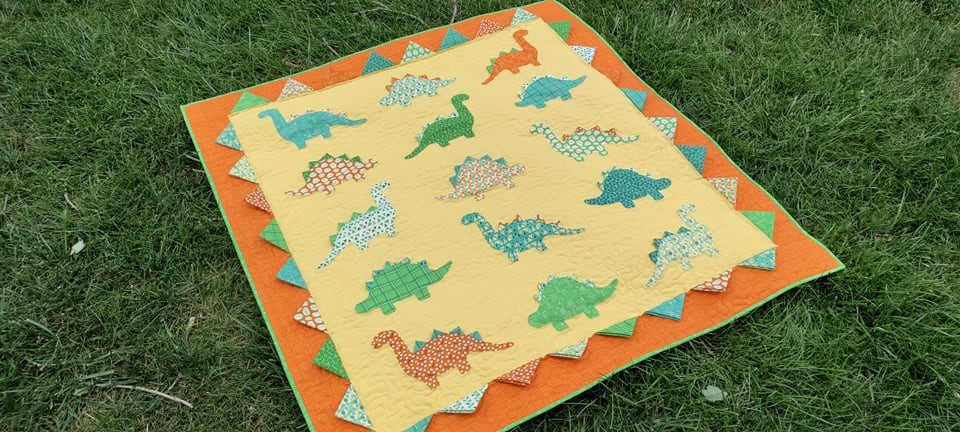
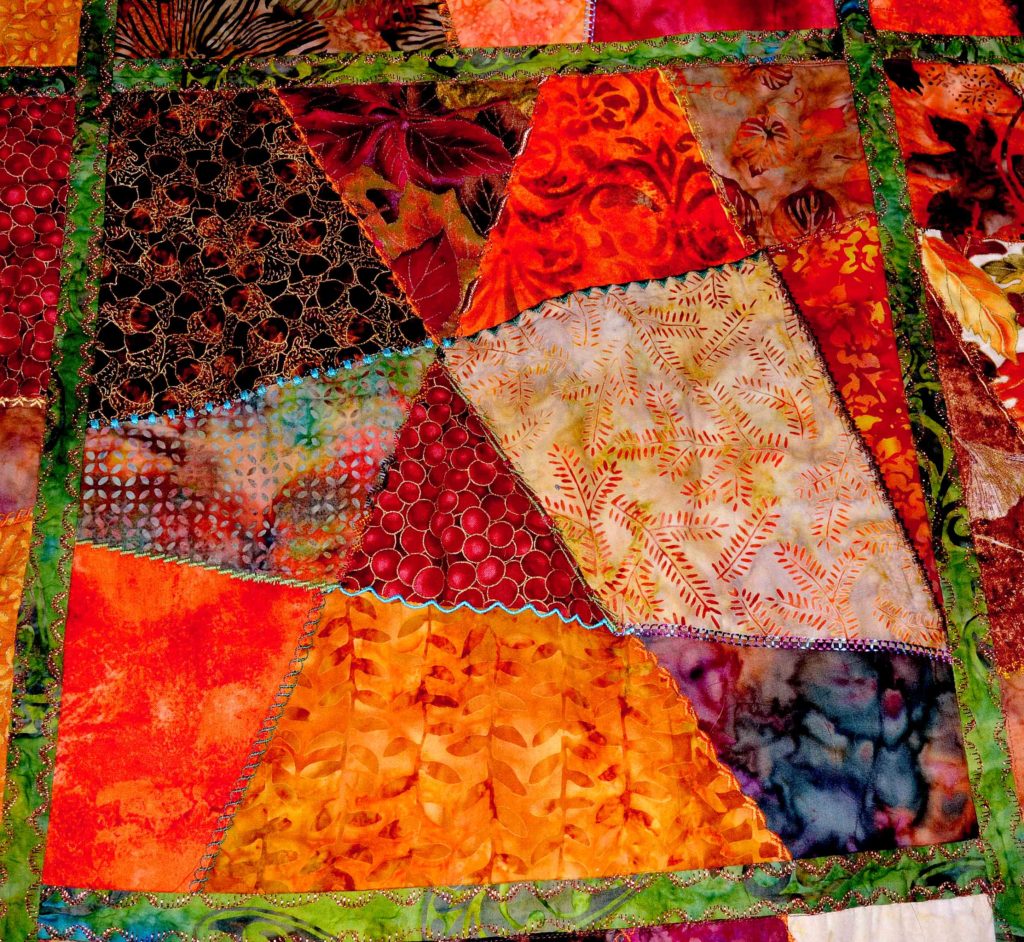
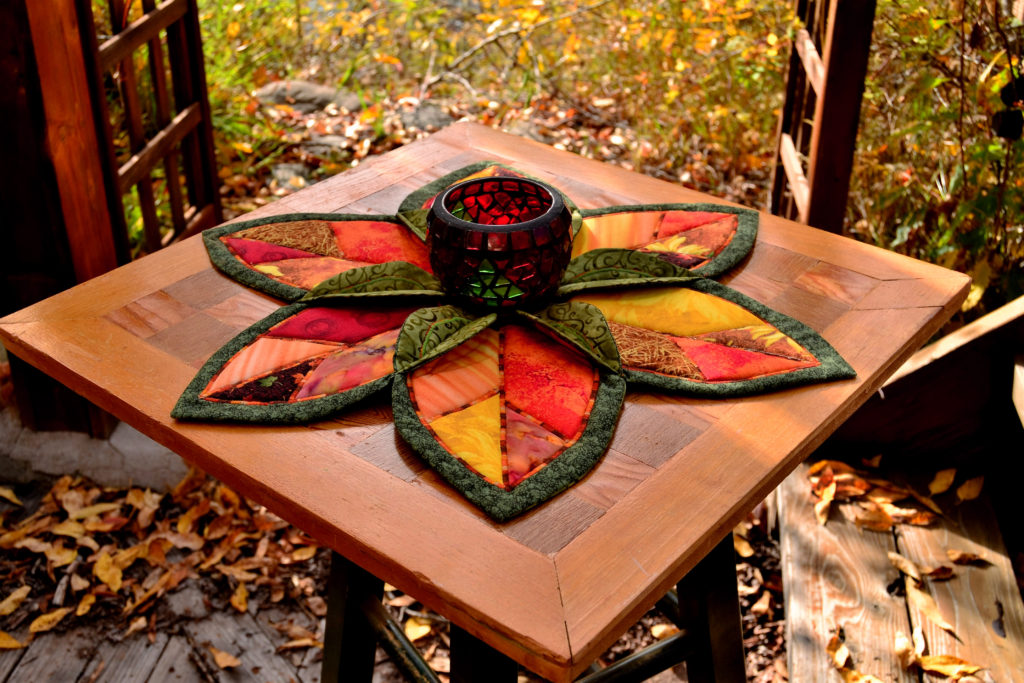
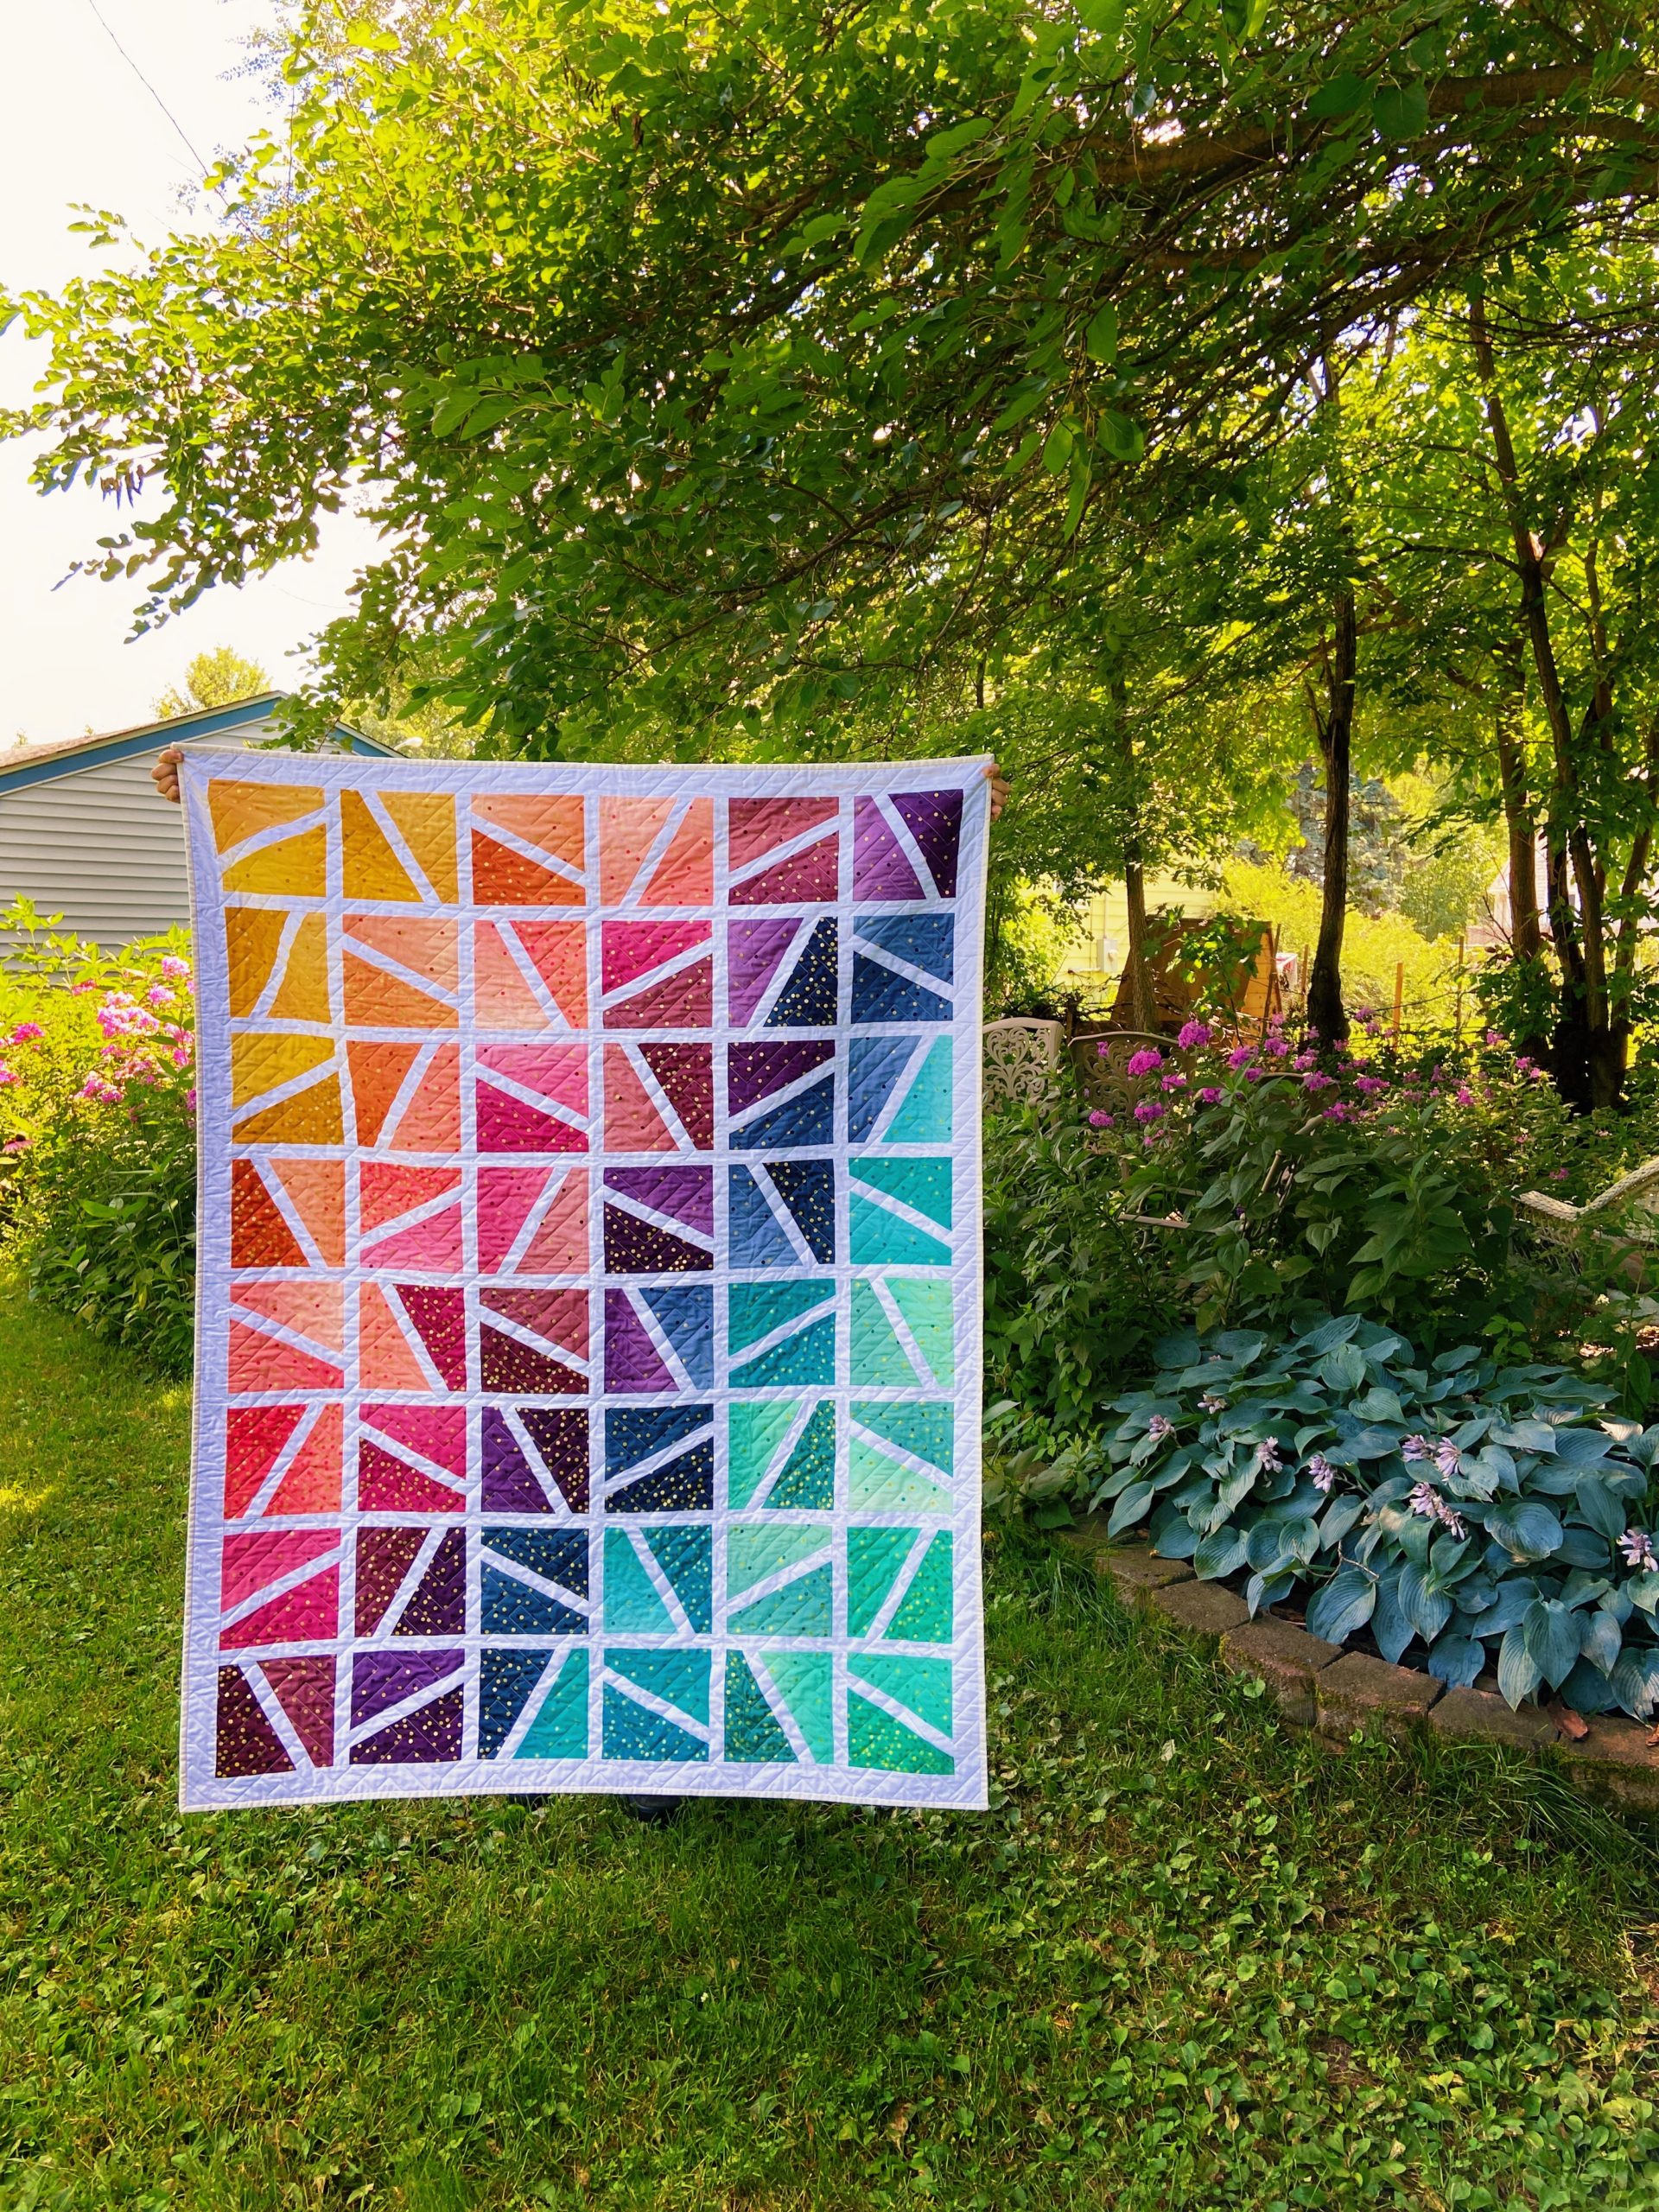
Under her brand, SparkleStash, she designs bold, modern quilt patterns, specializing in making absolutely stunning geometric quilts in miniature:

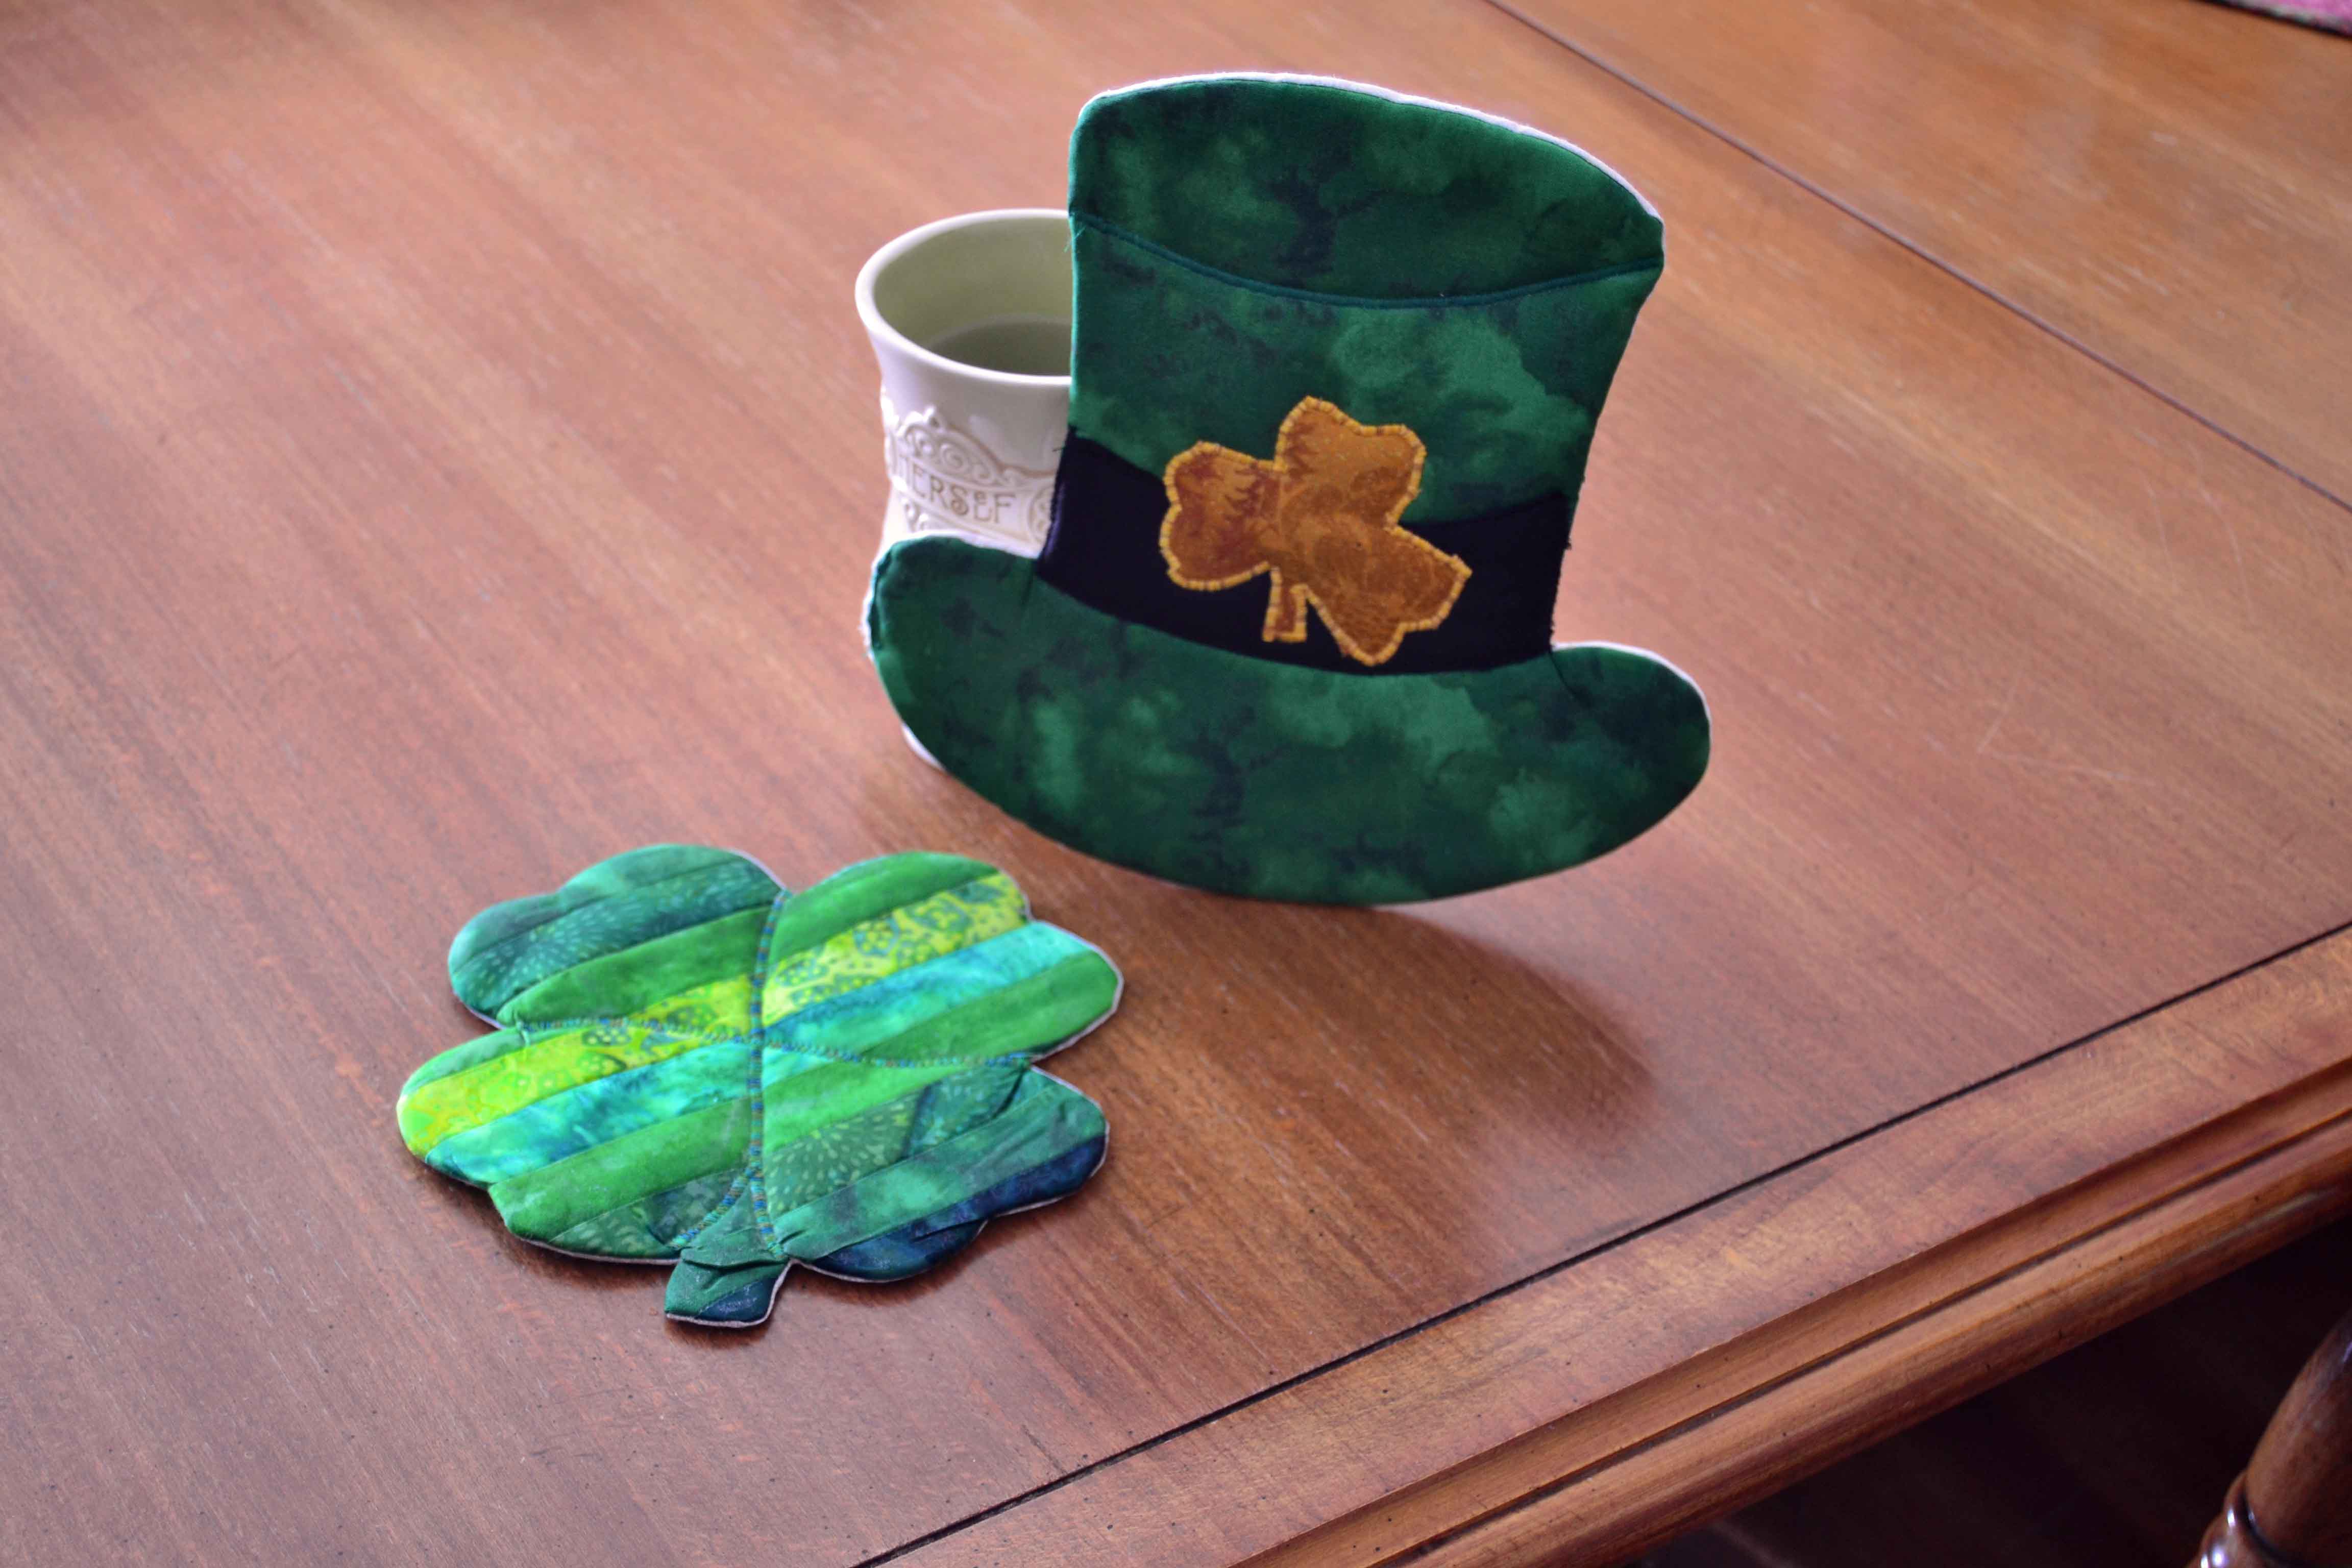
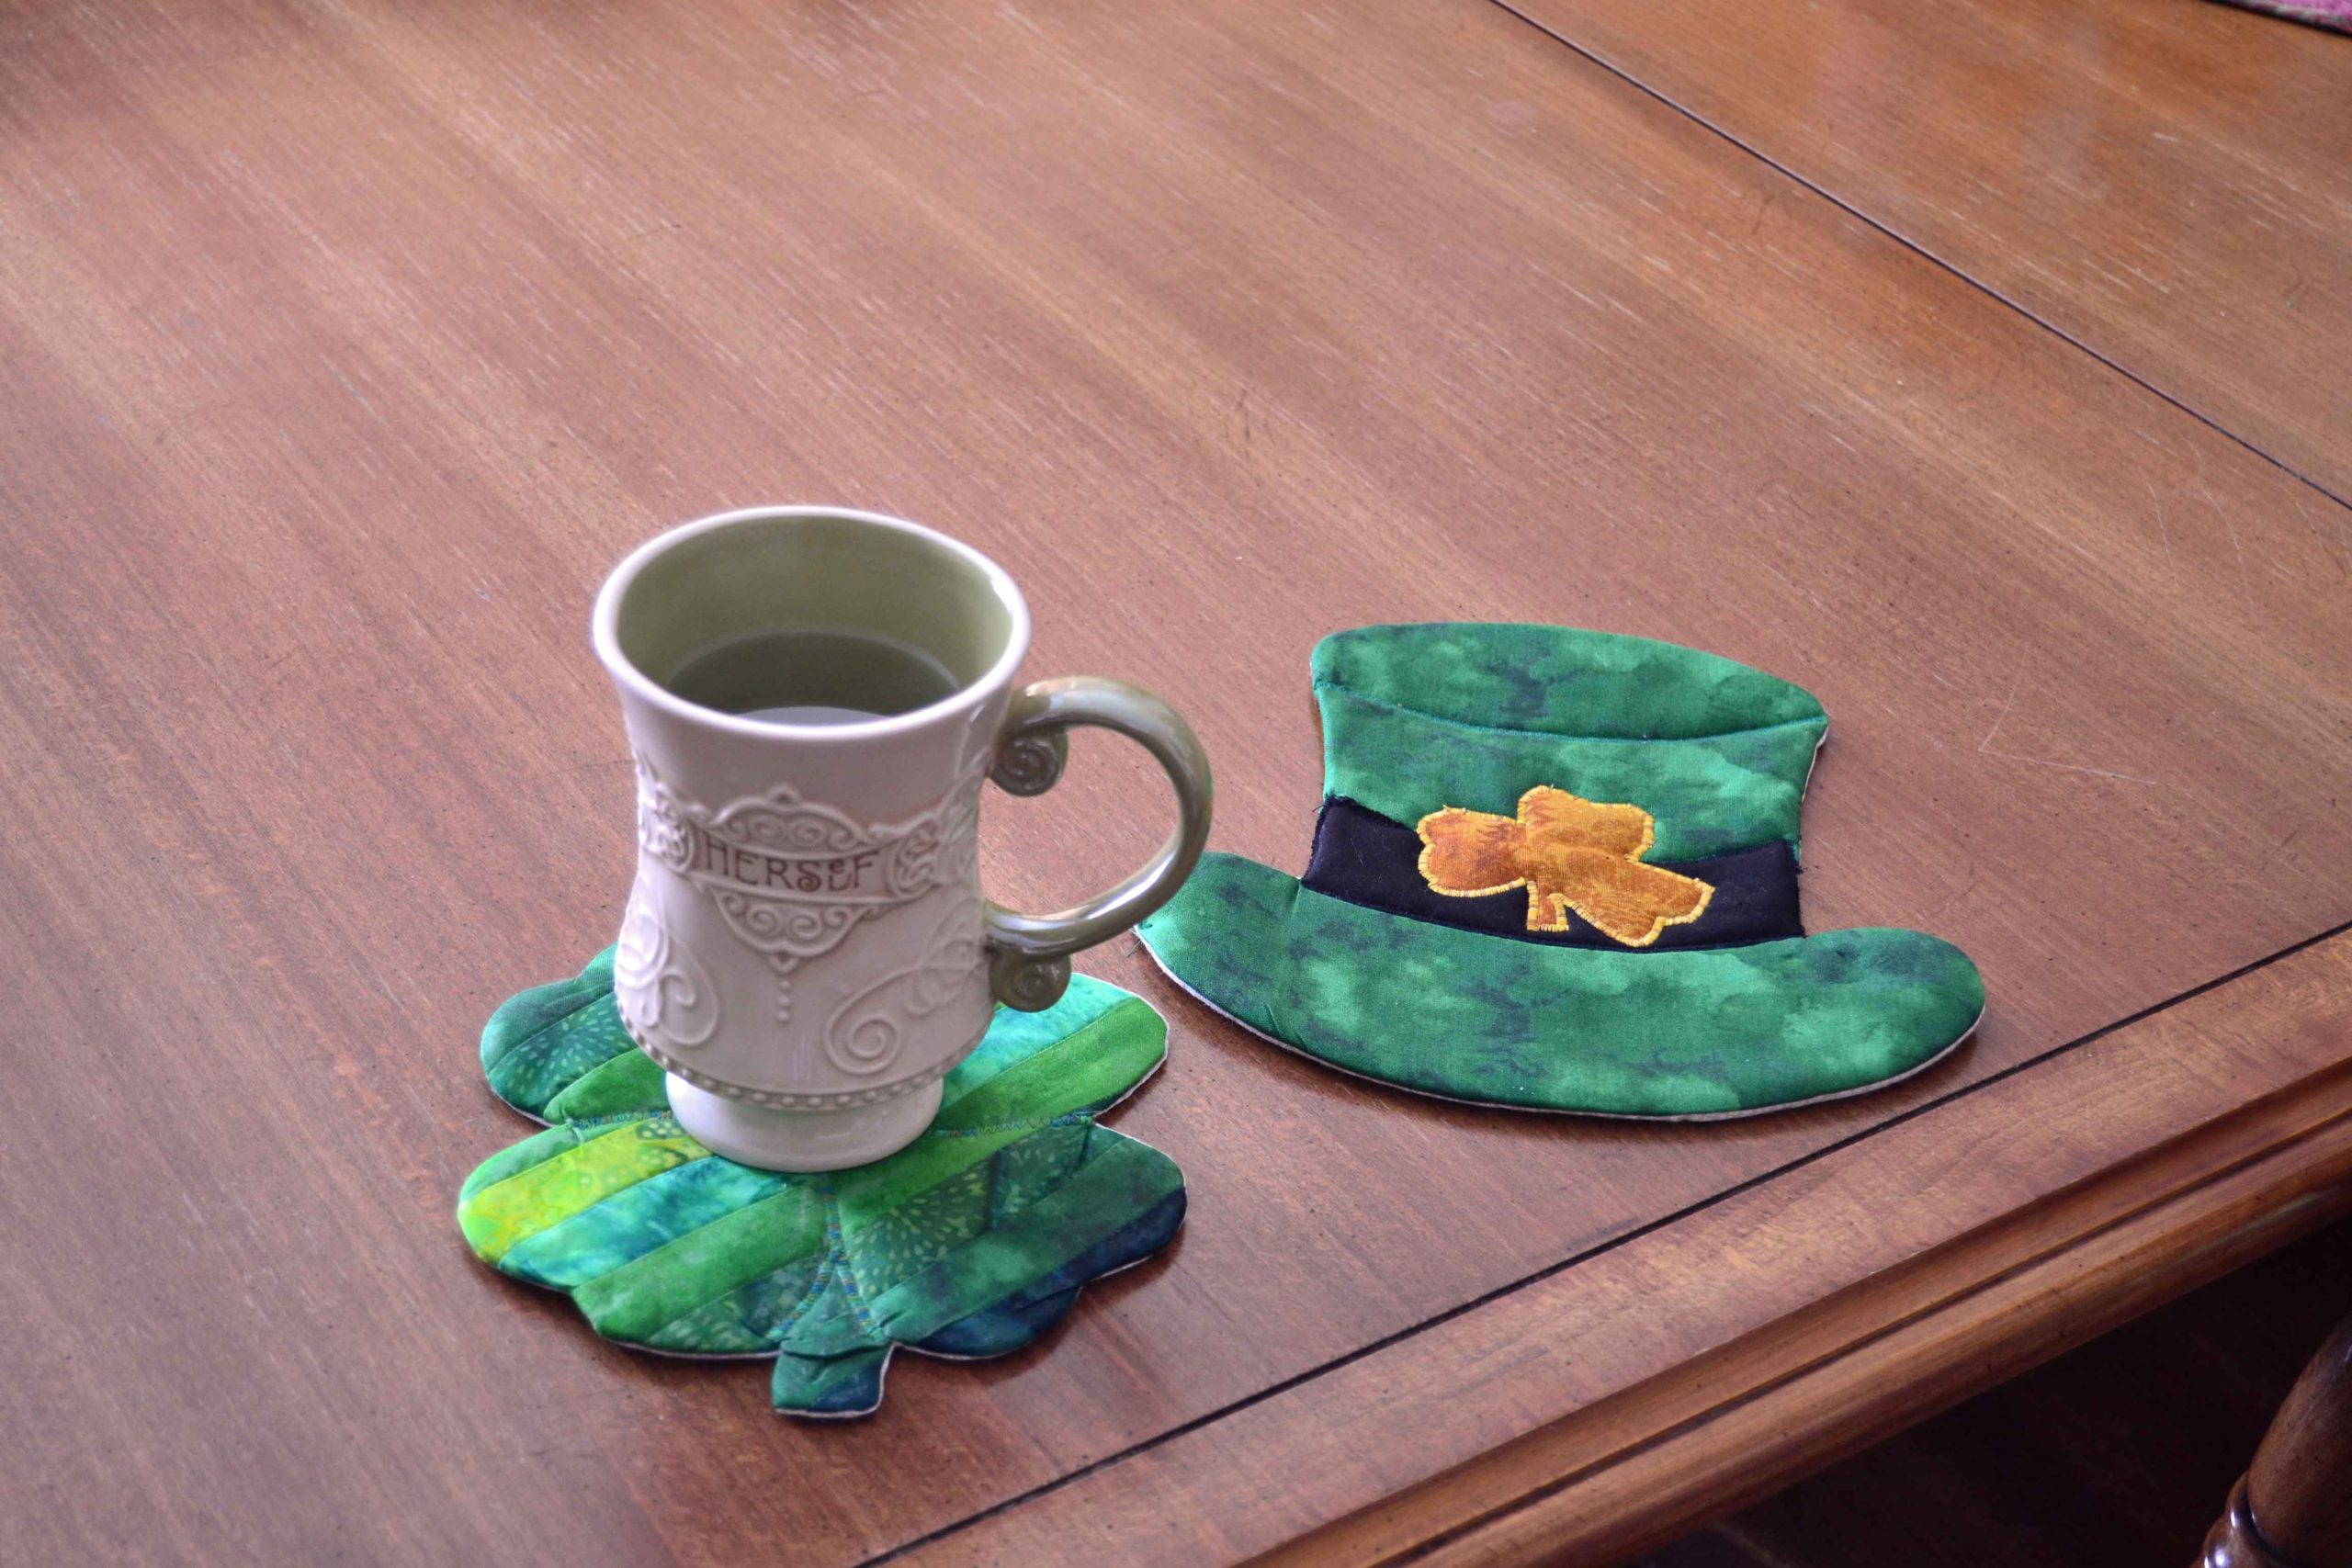
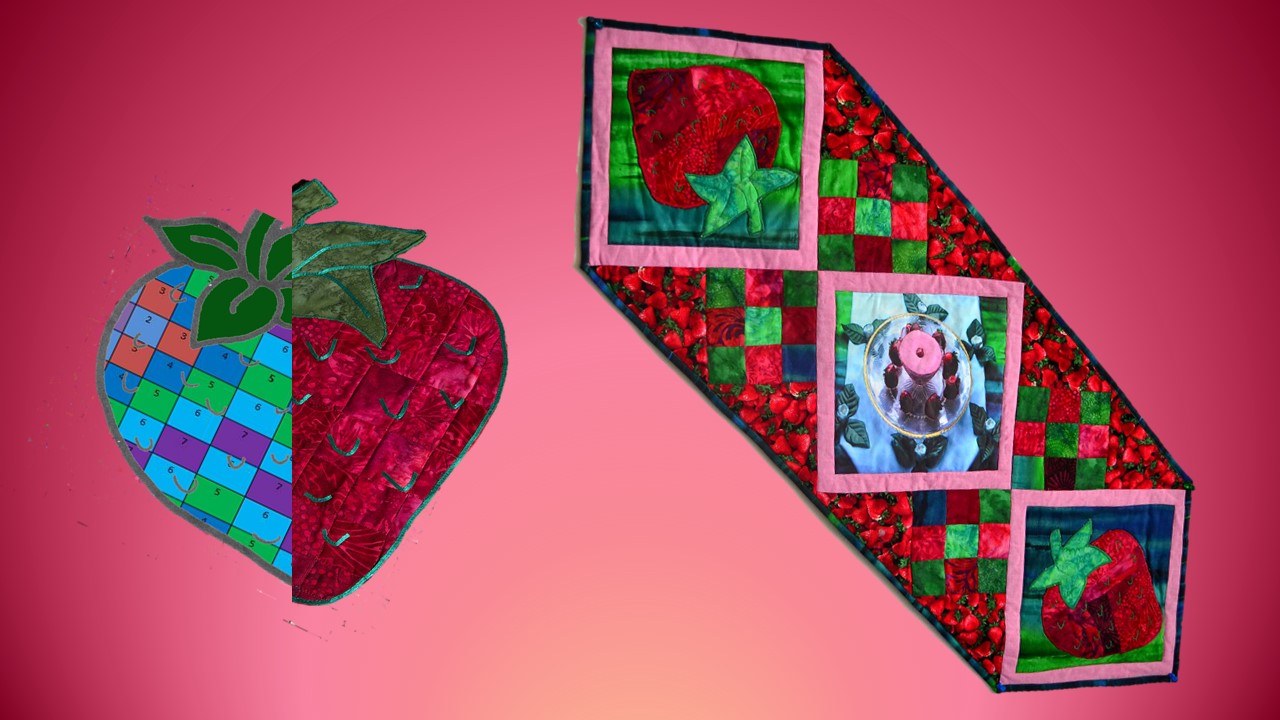
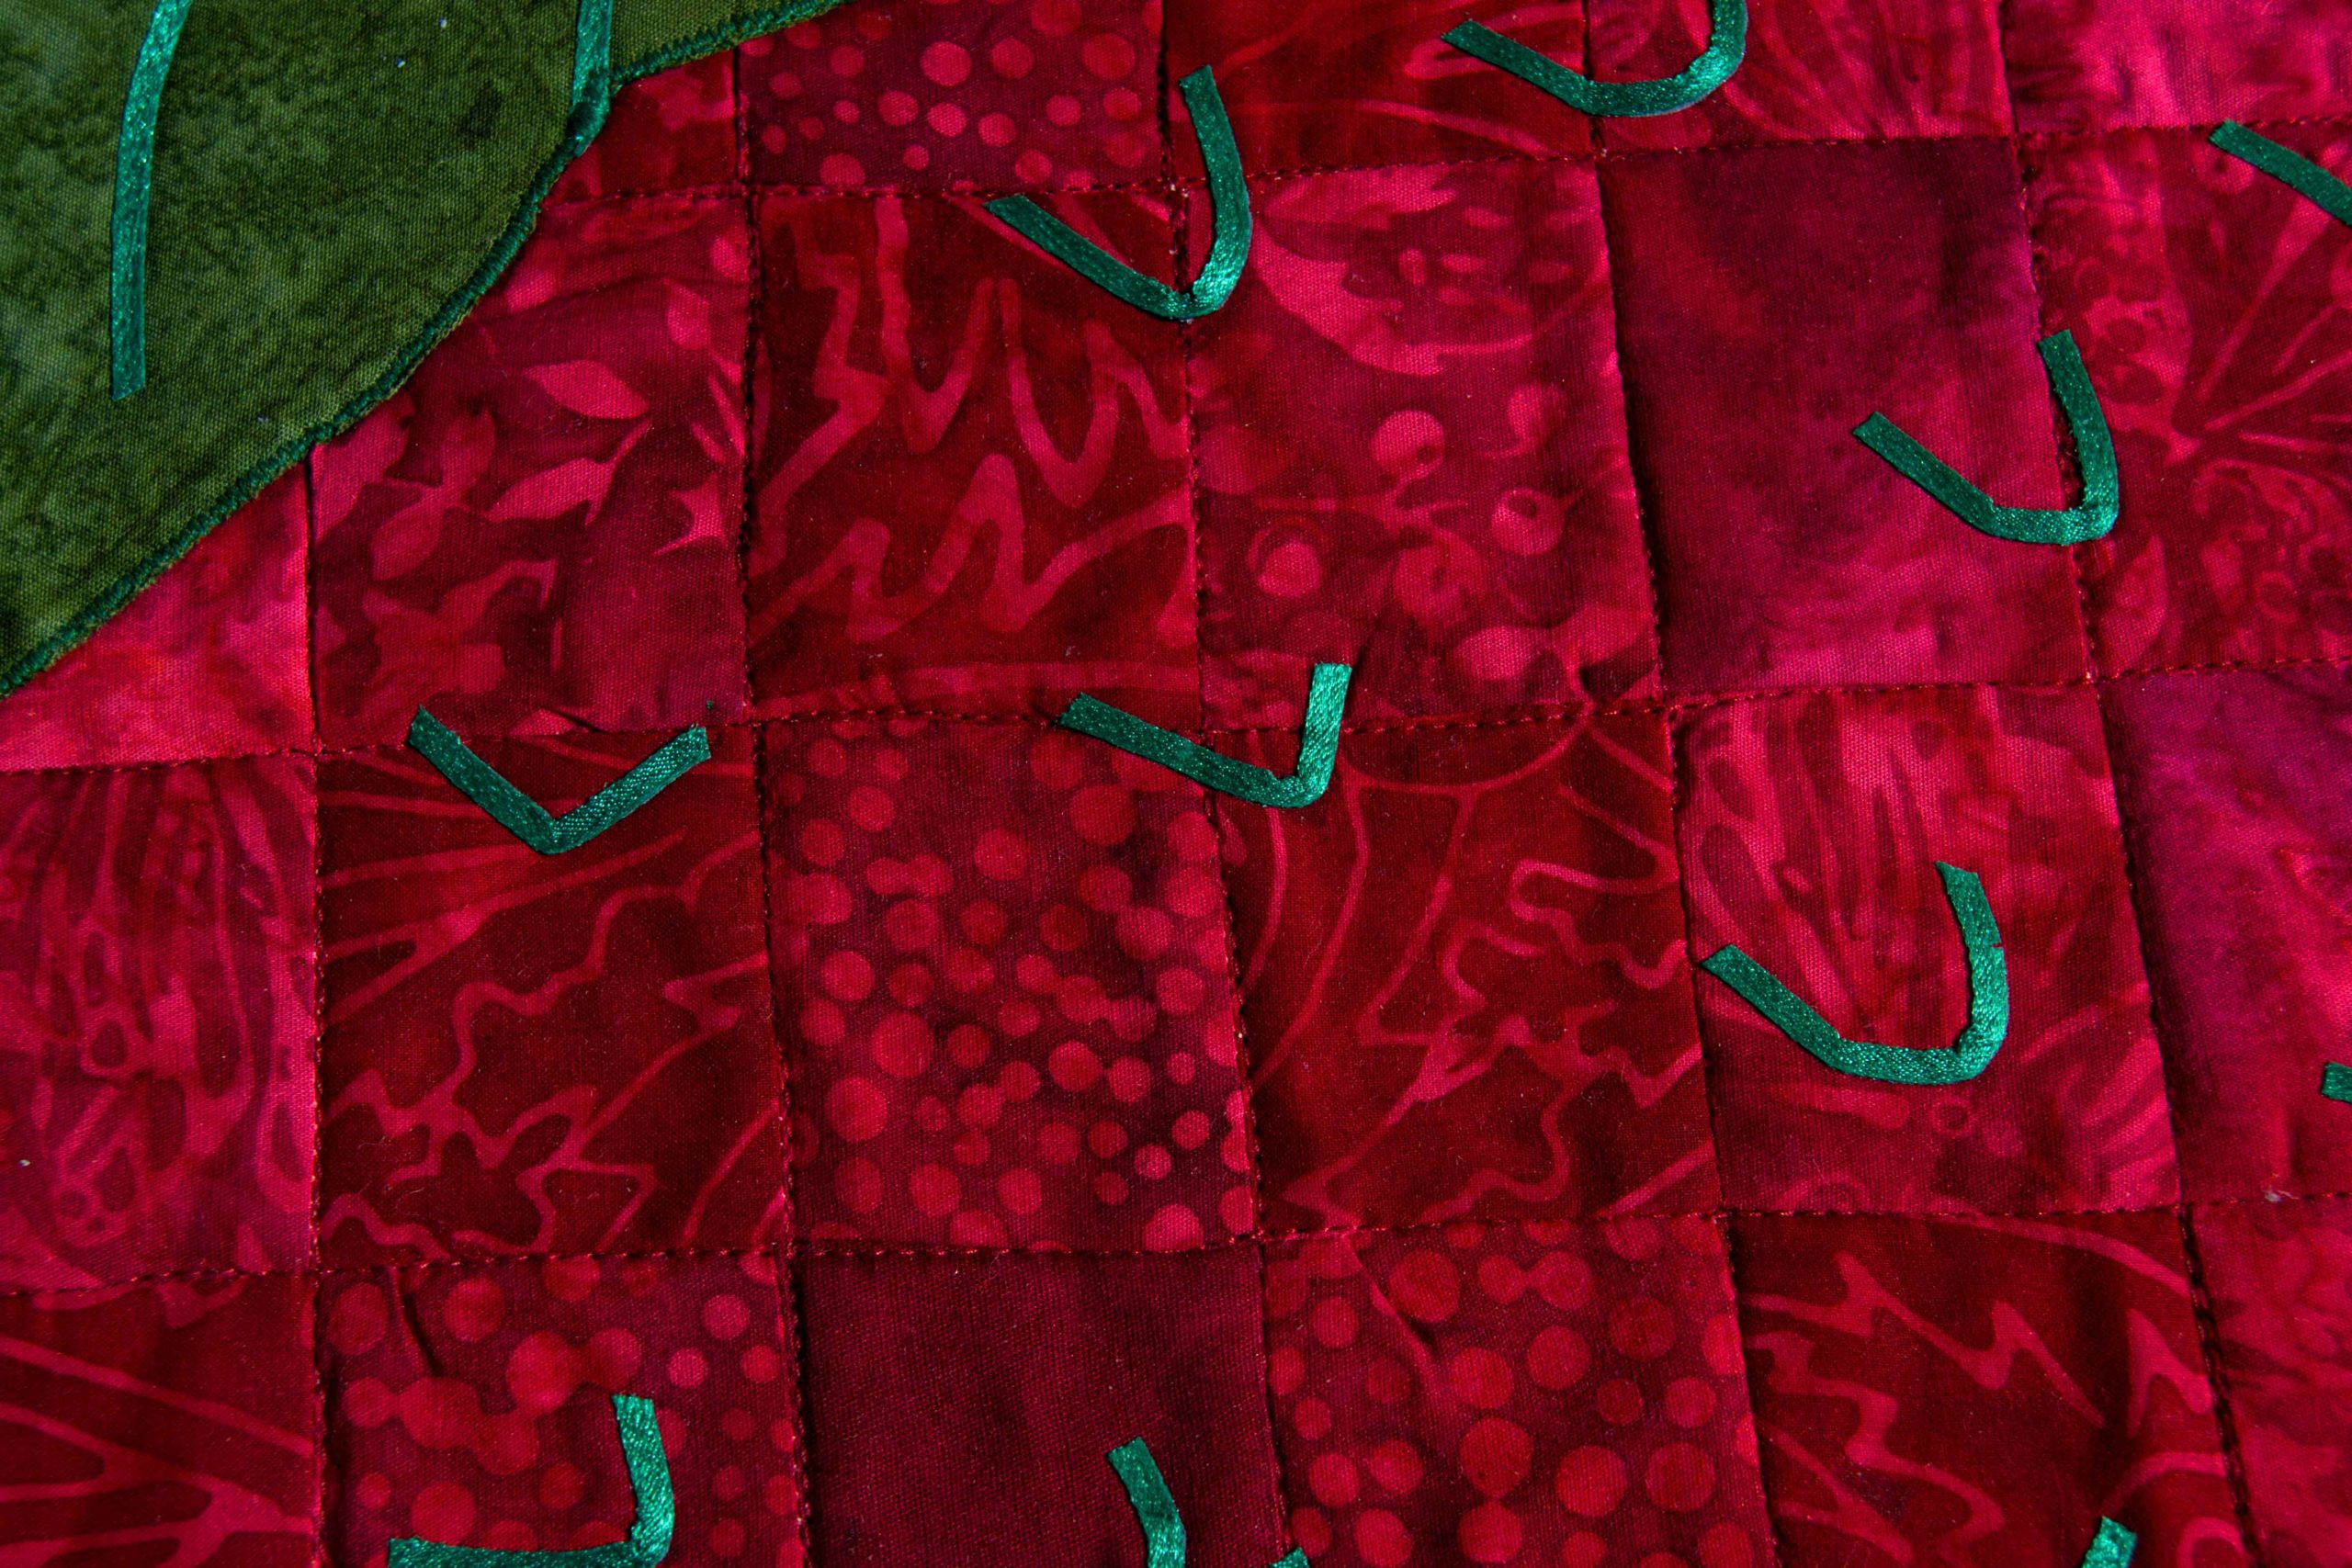
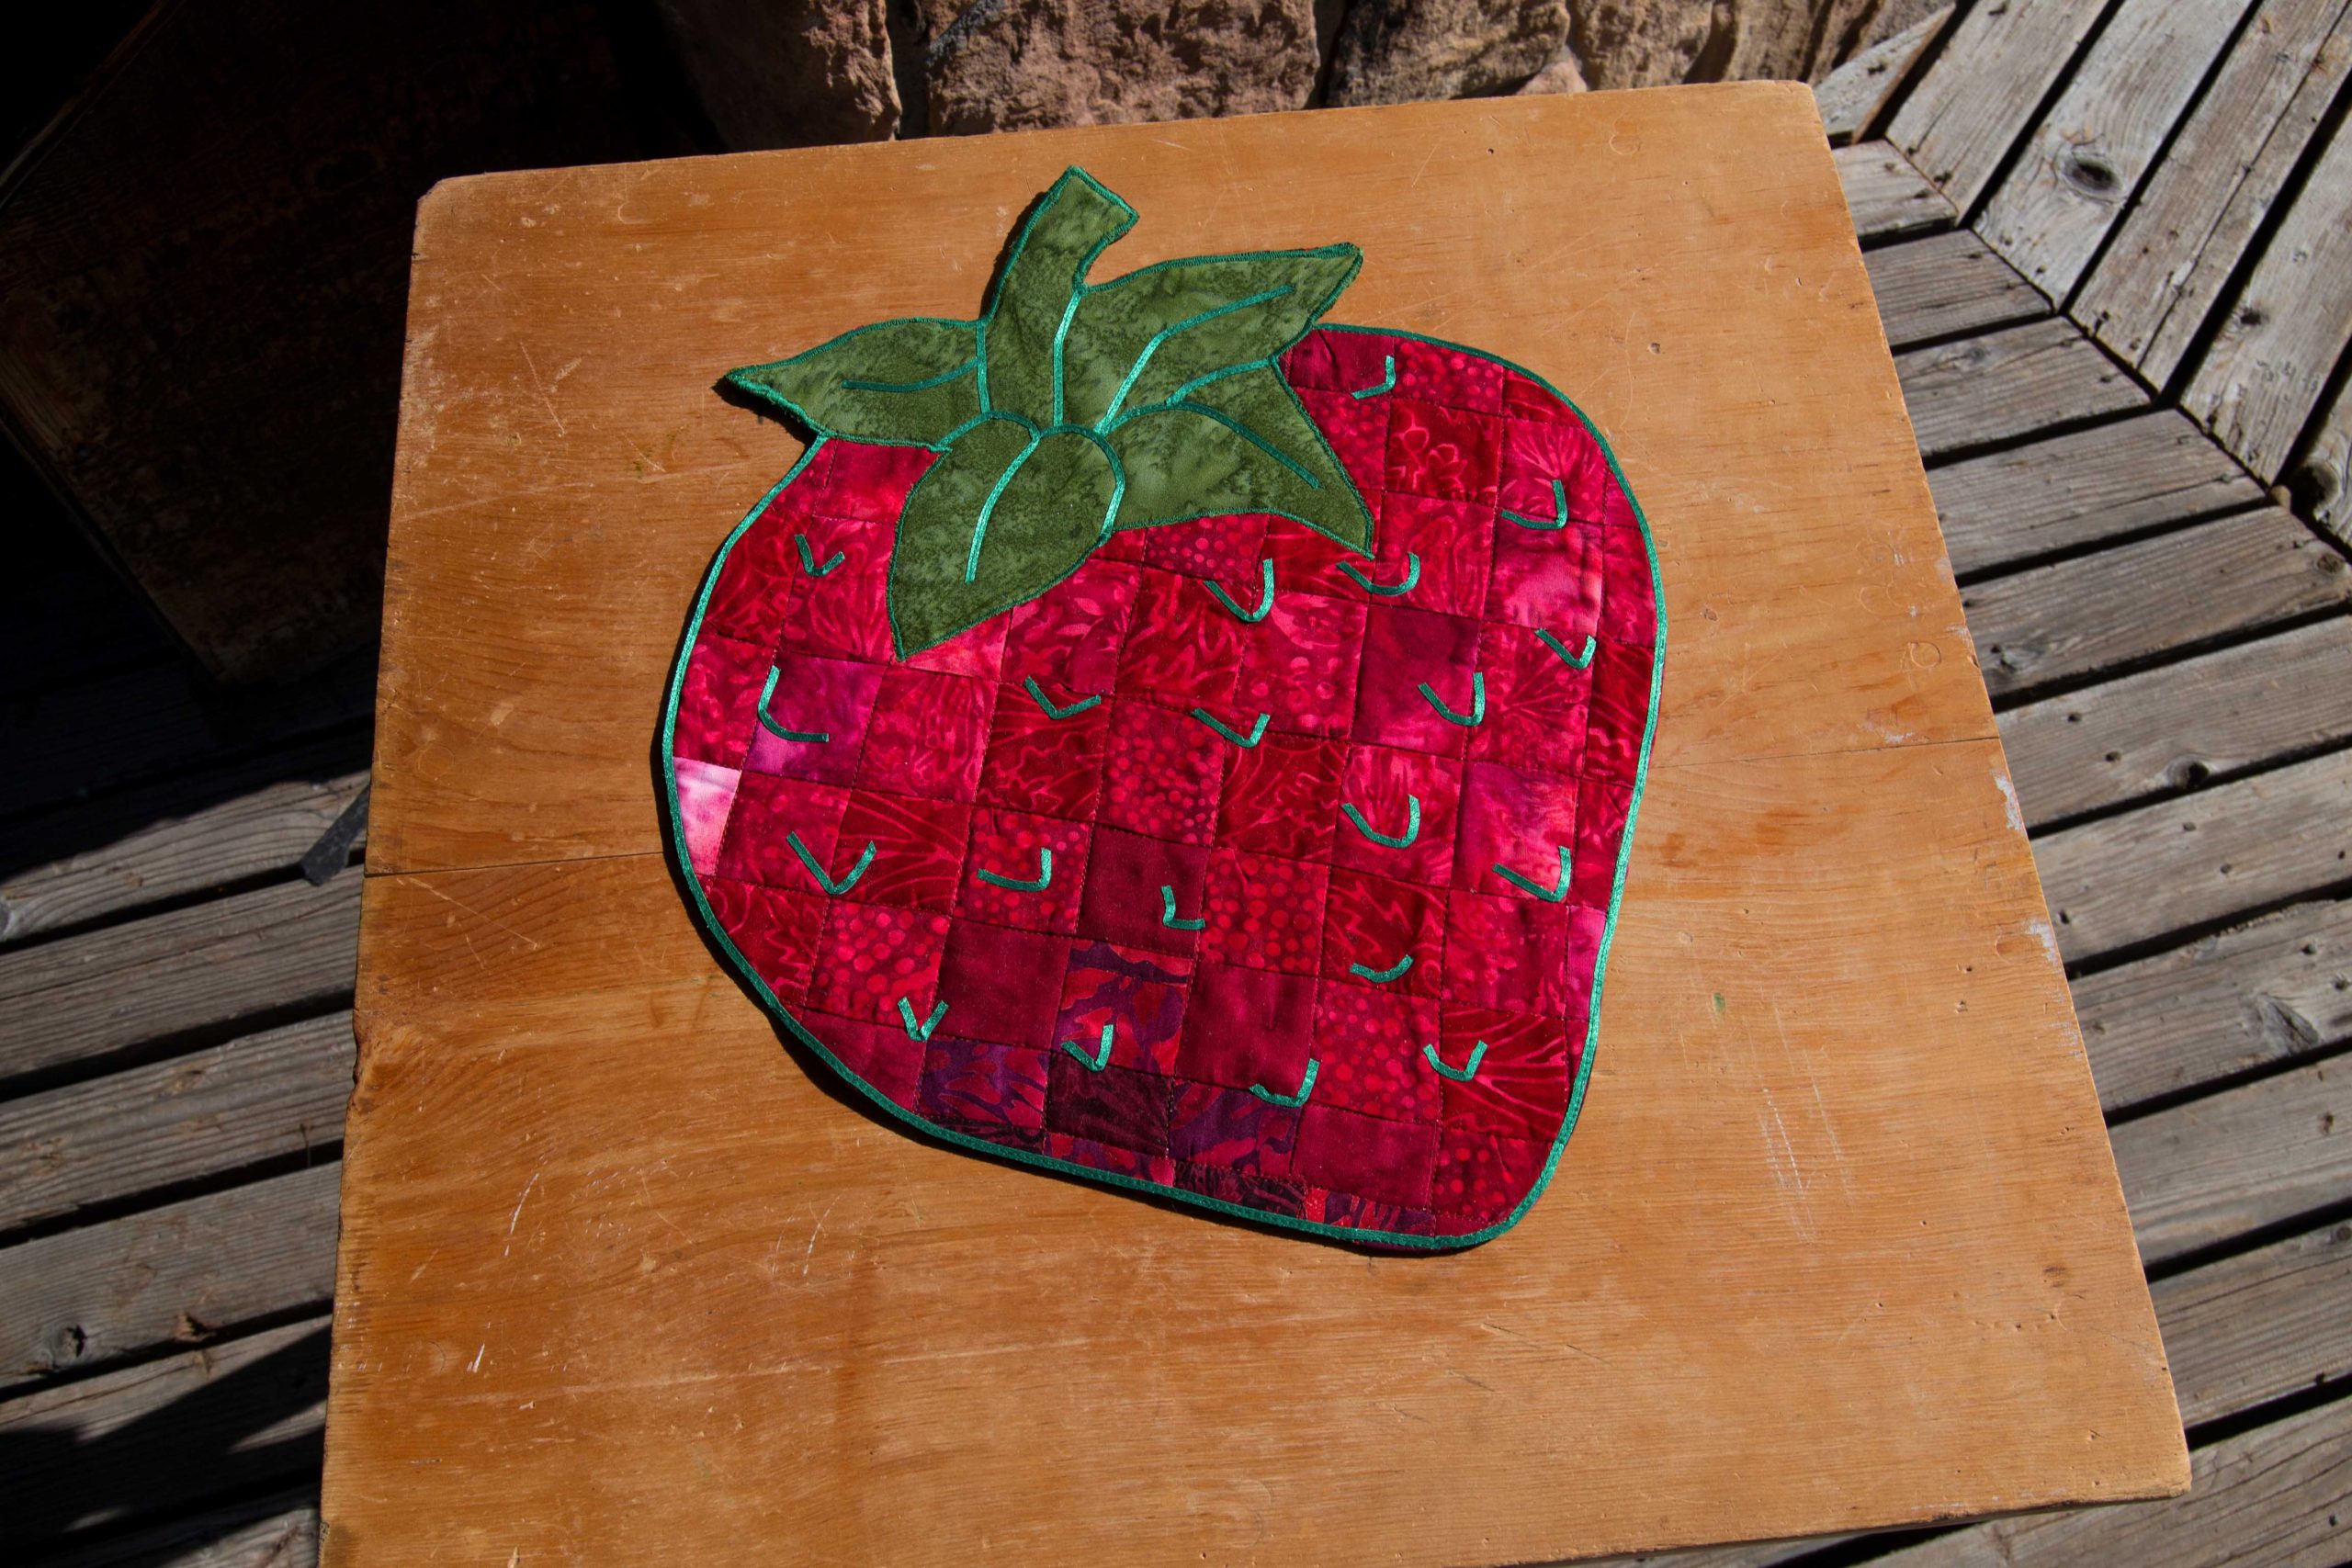
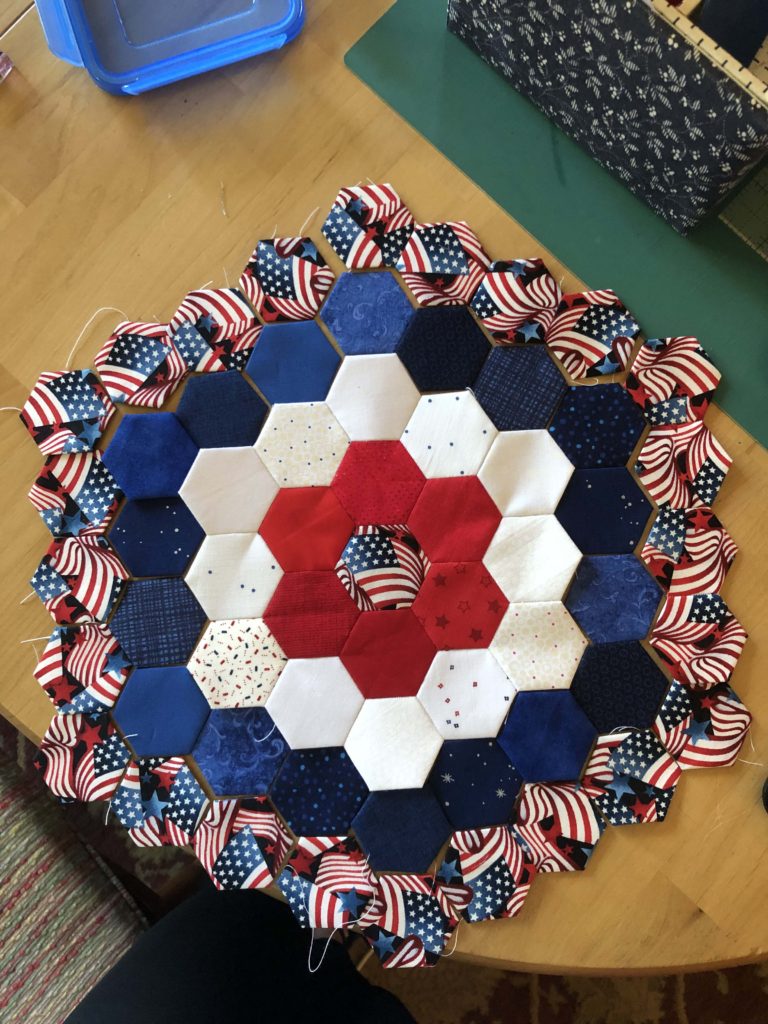
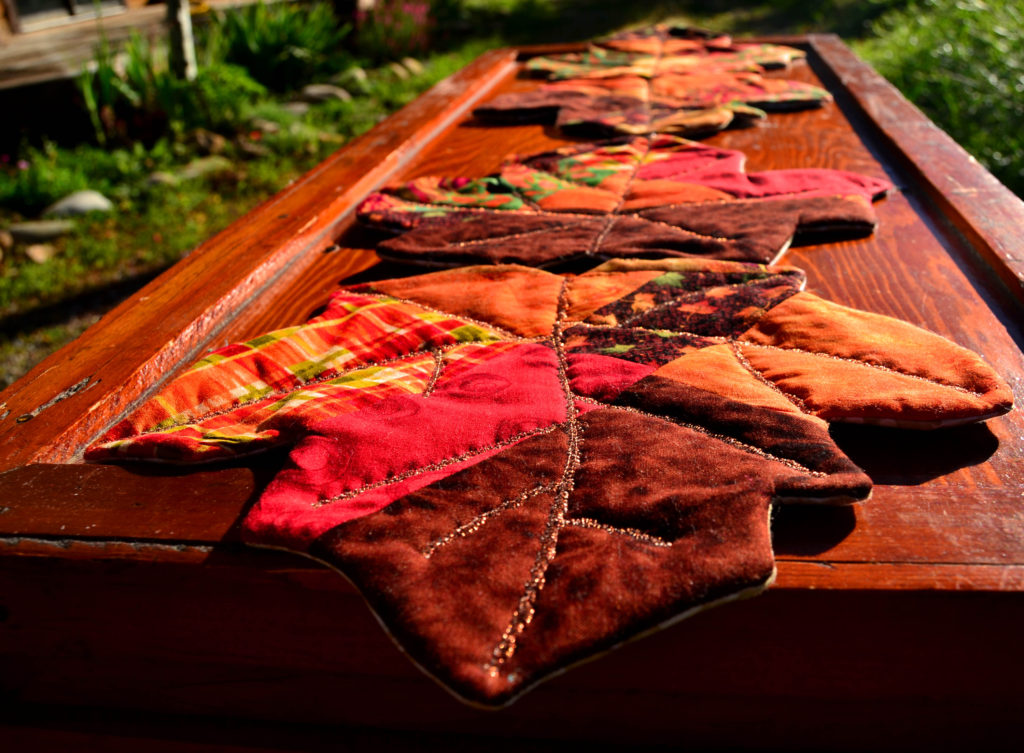
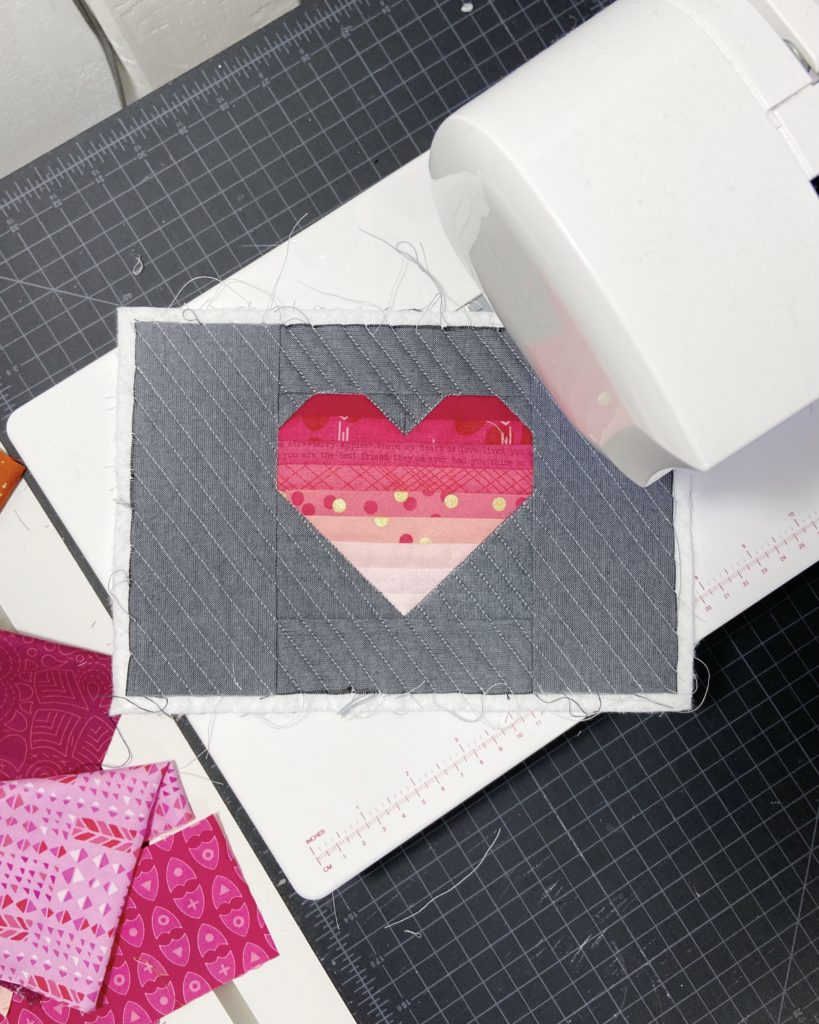
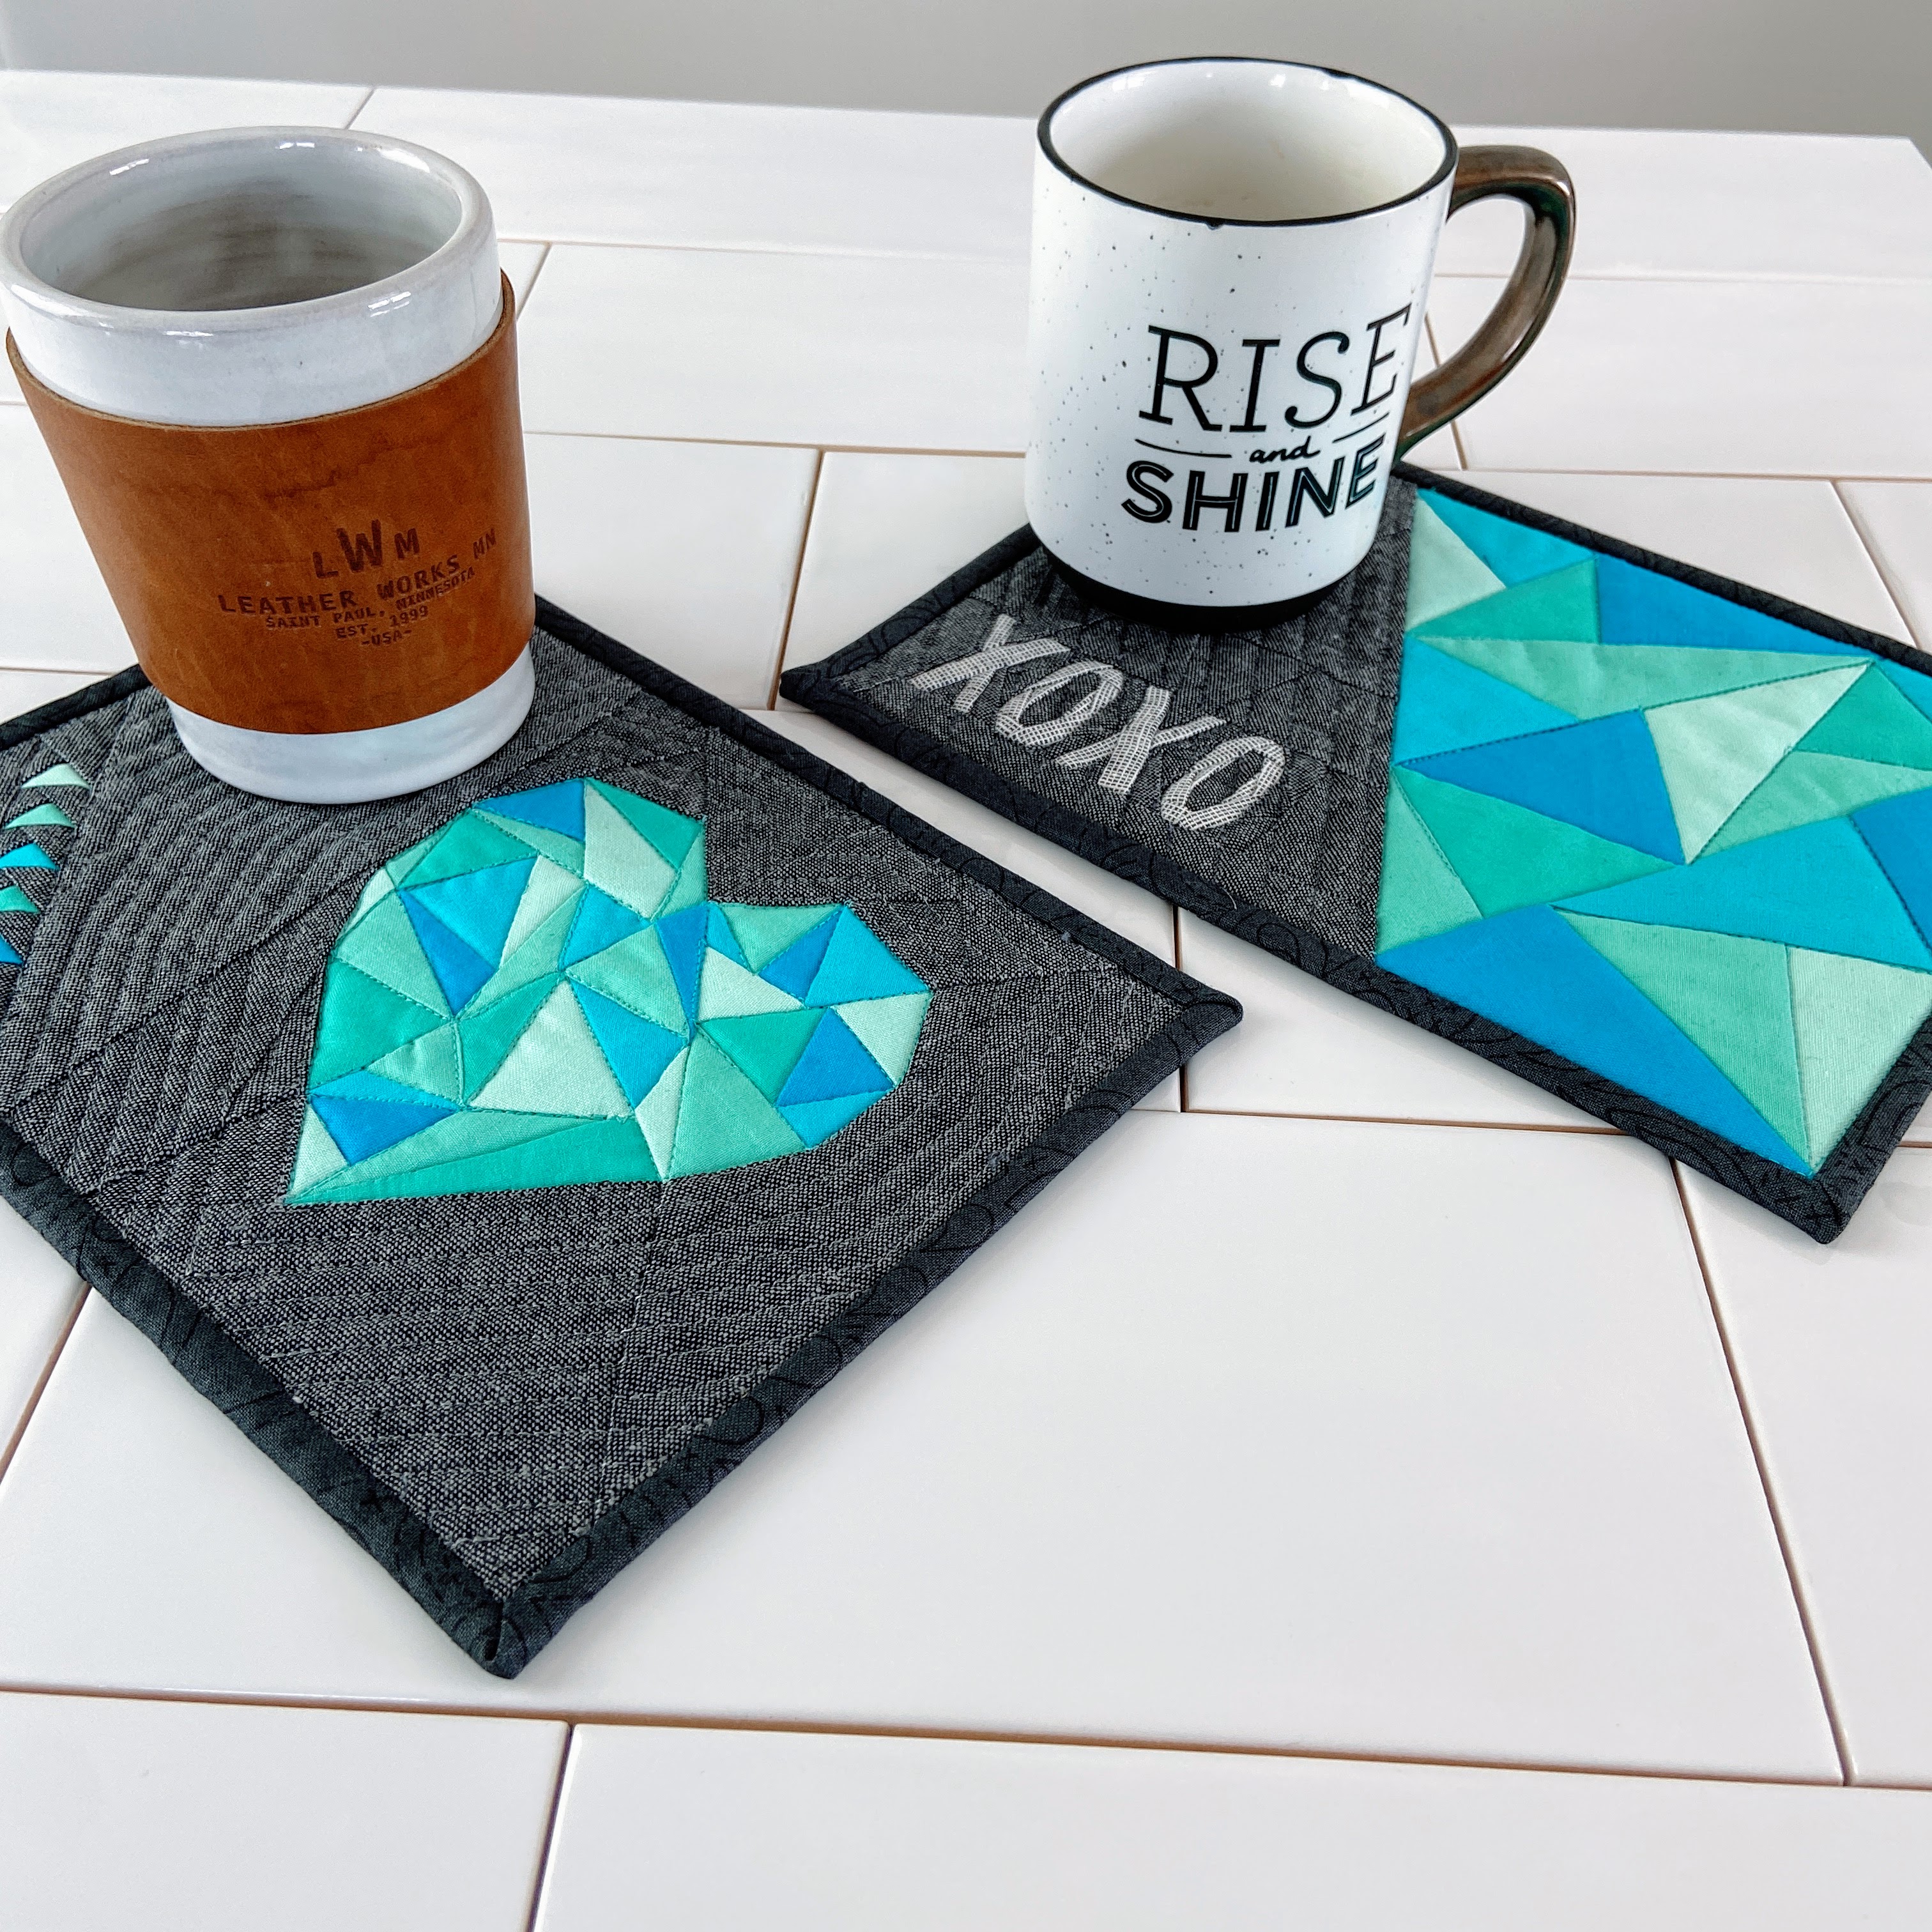
  • Little tiny mug rugs (also called pot holders or hot pads)
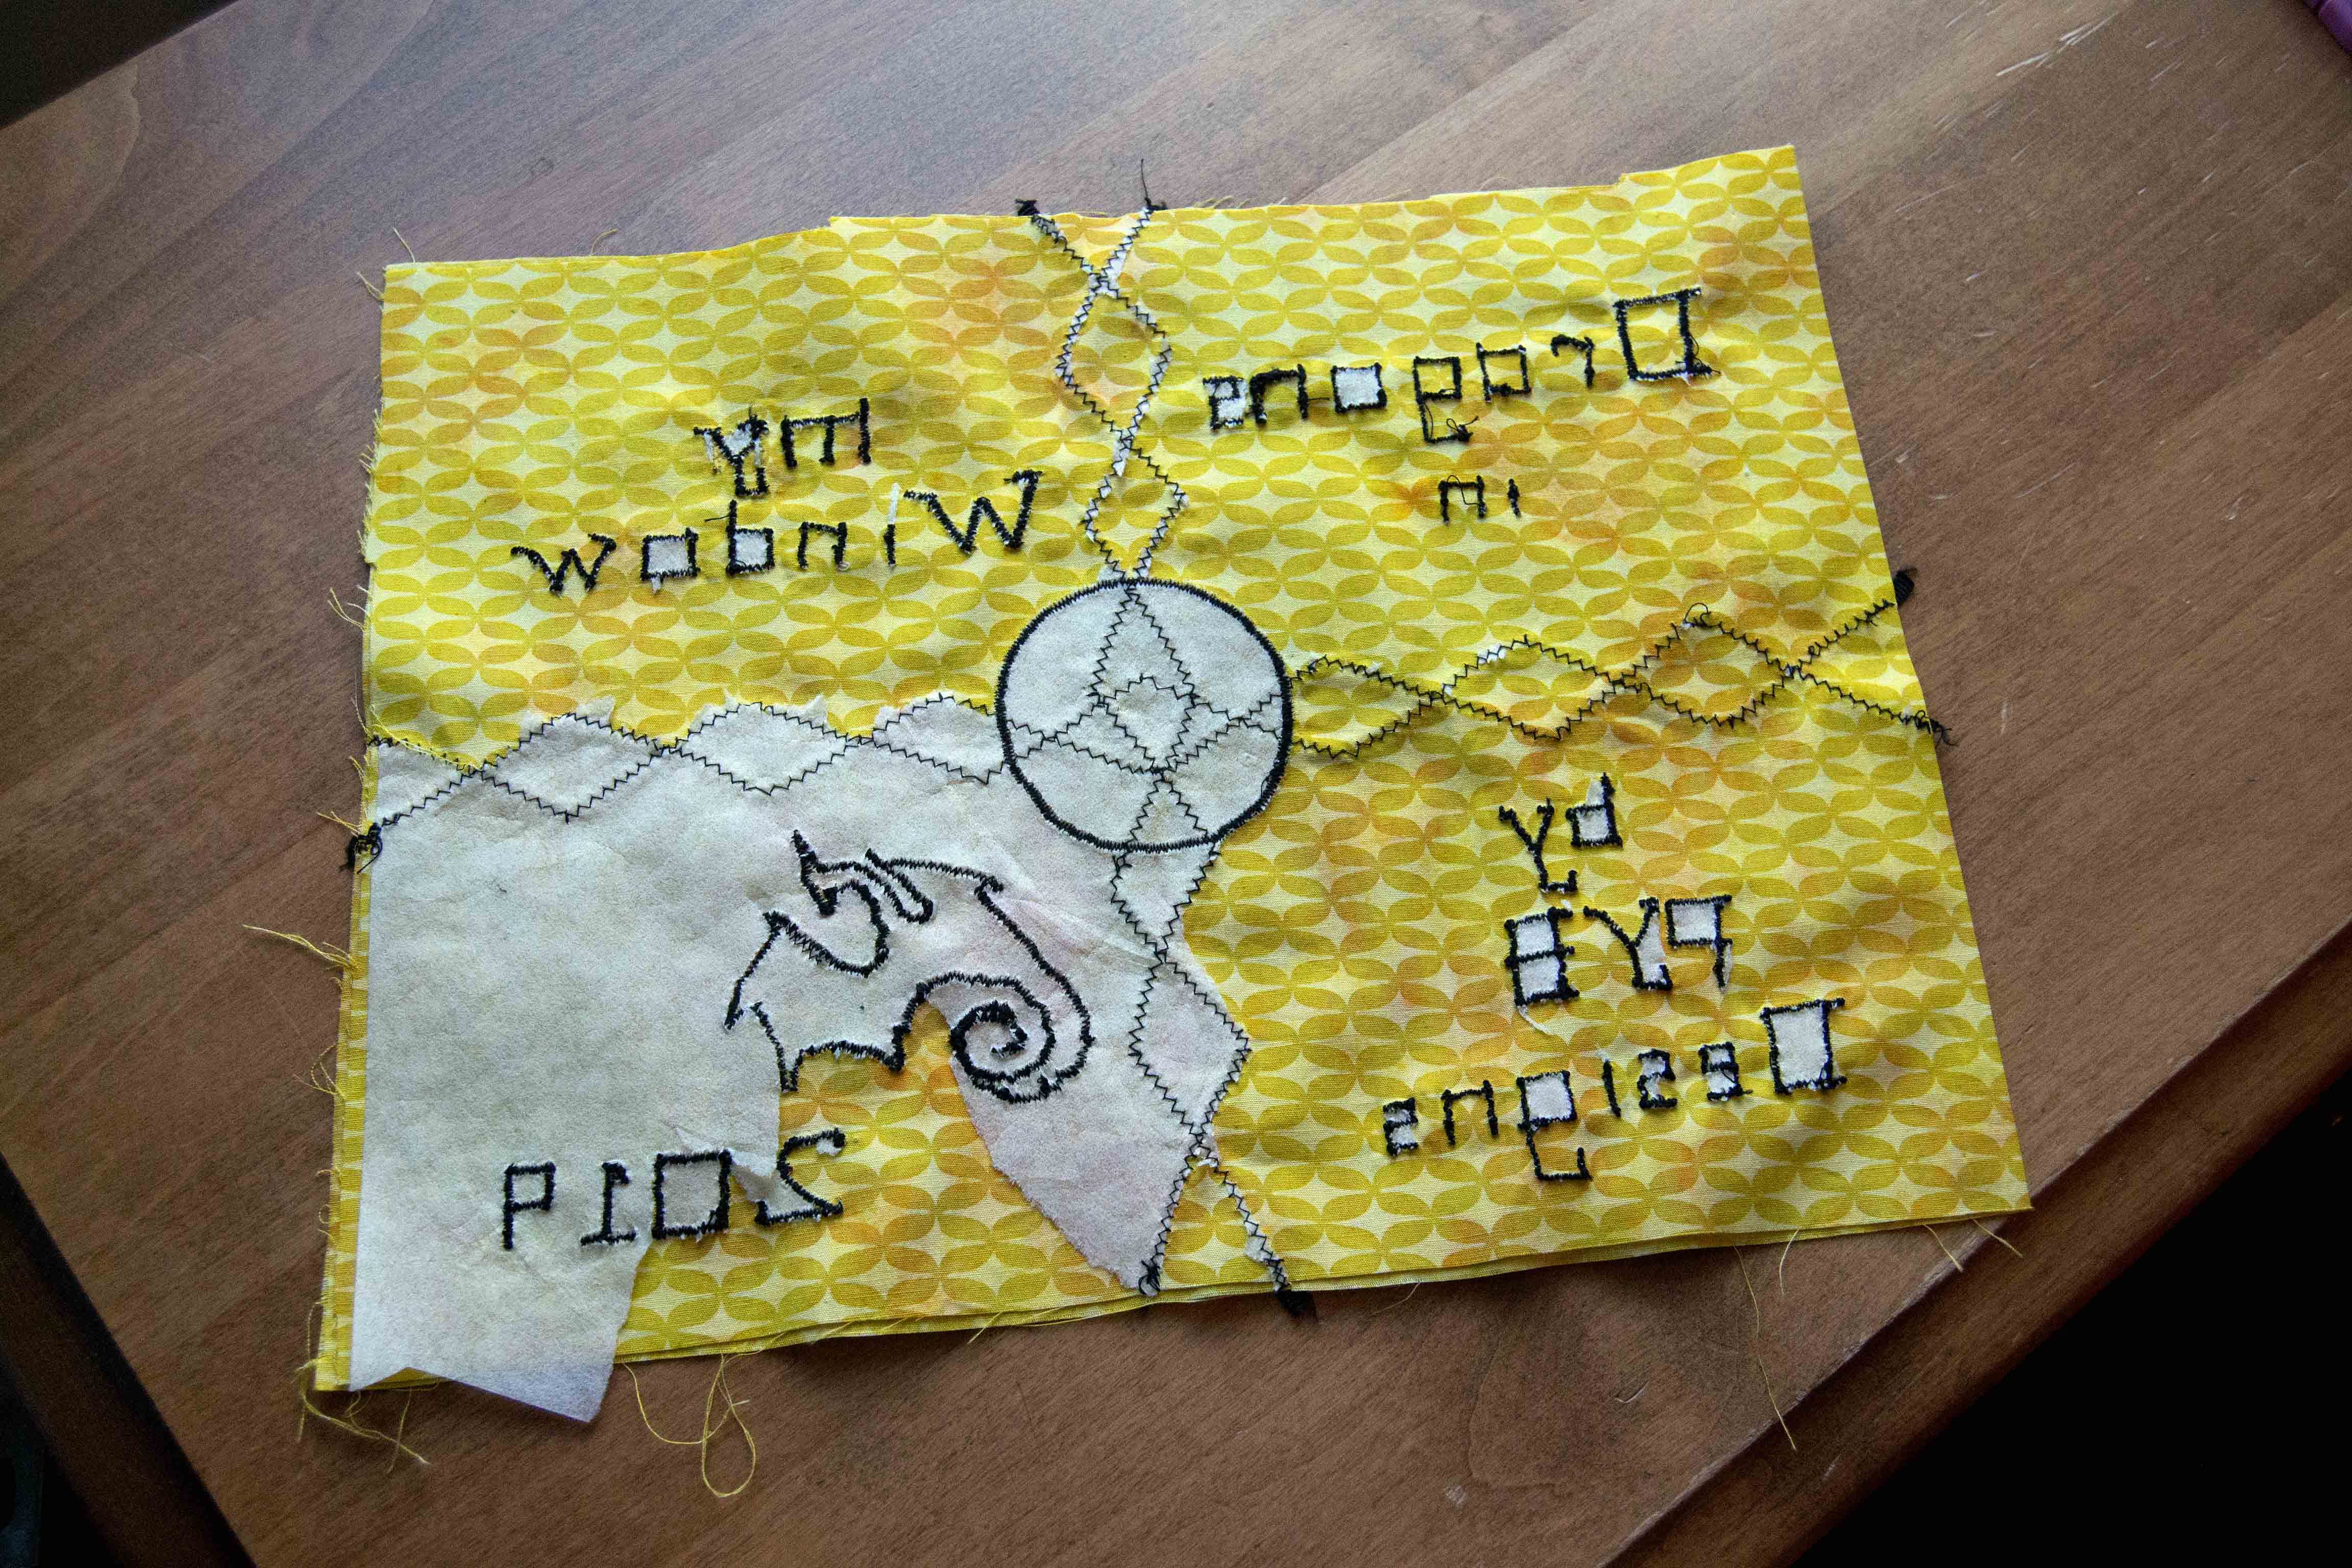
  • Post cards
  • Throw quilts

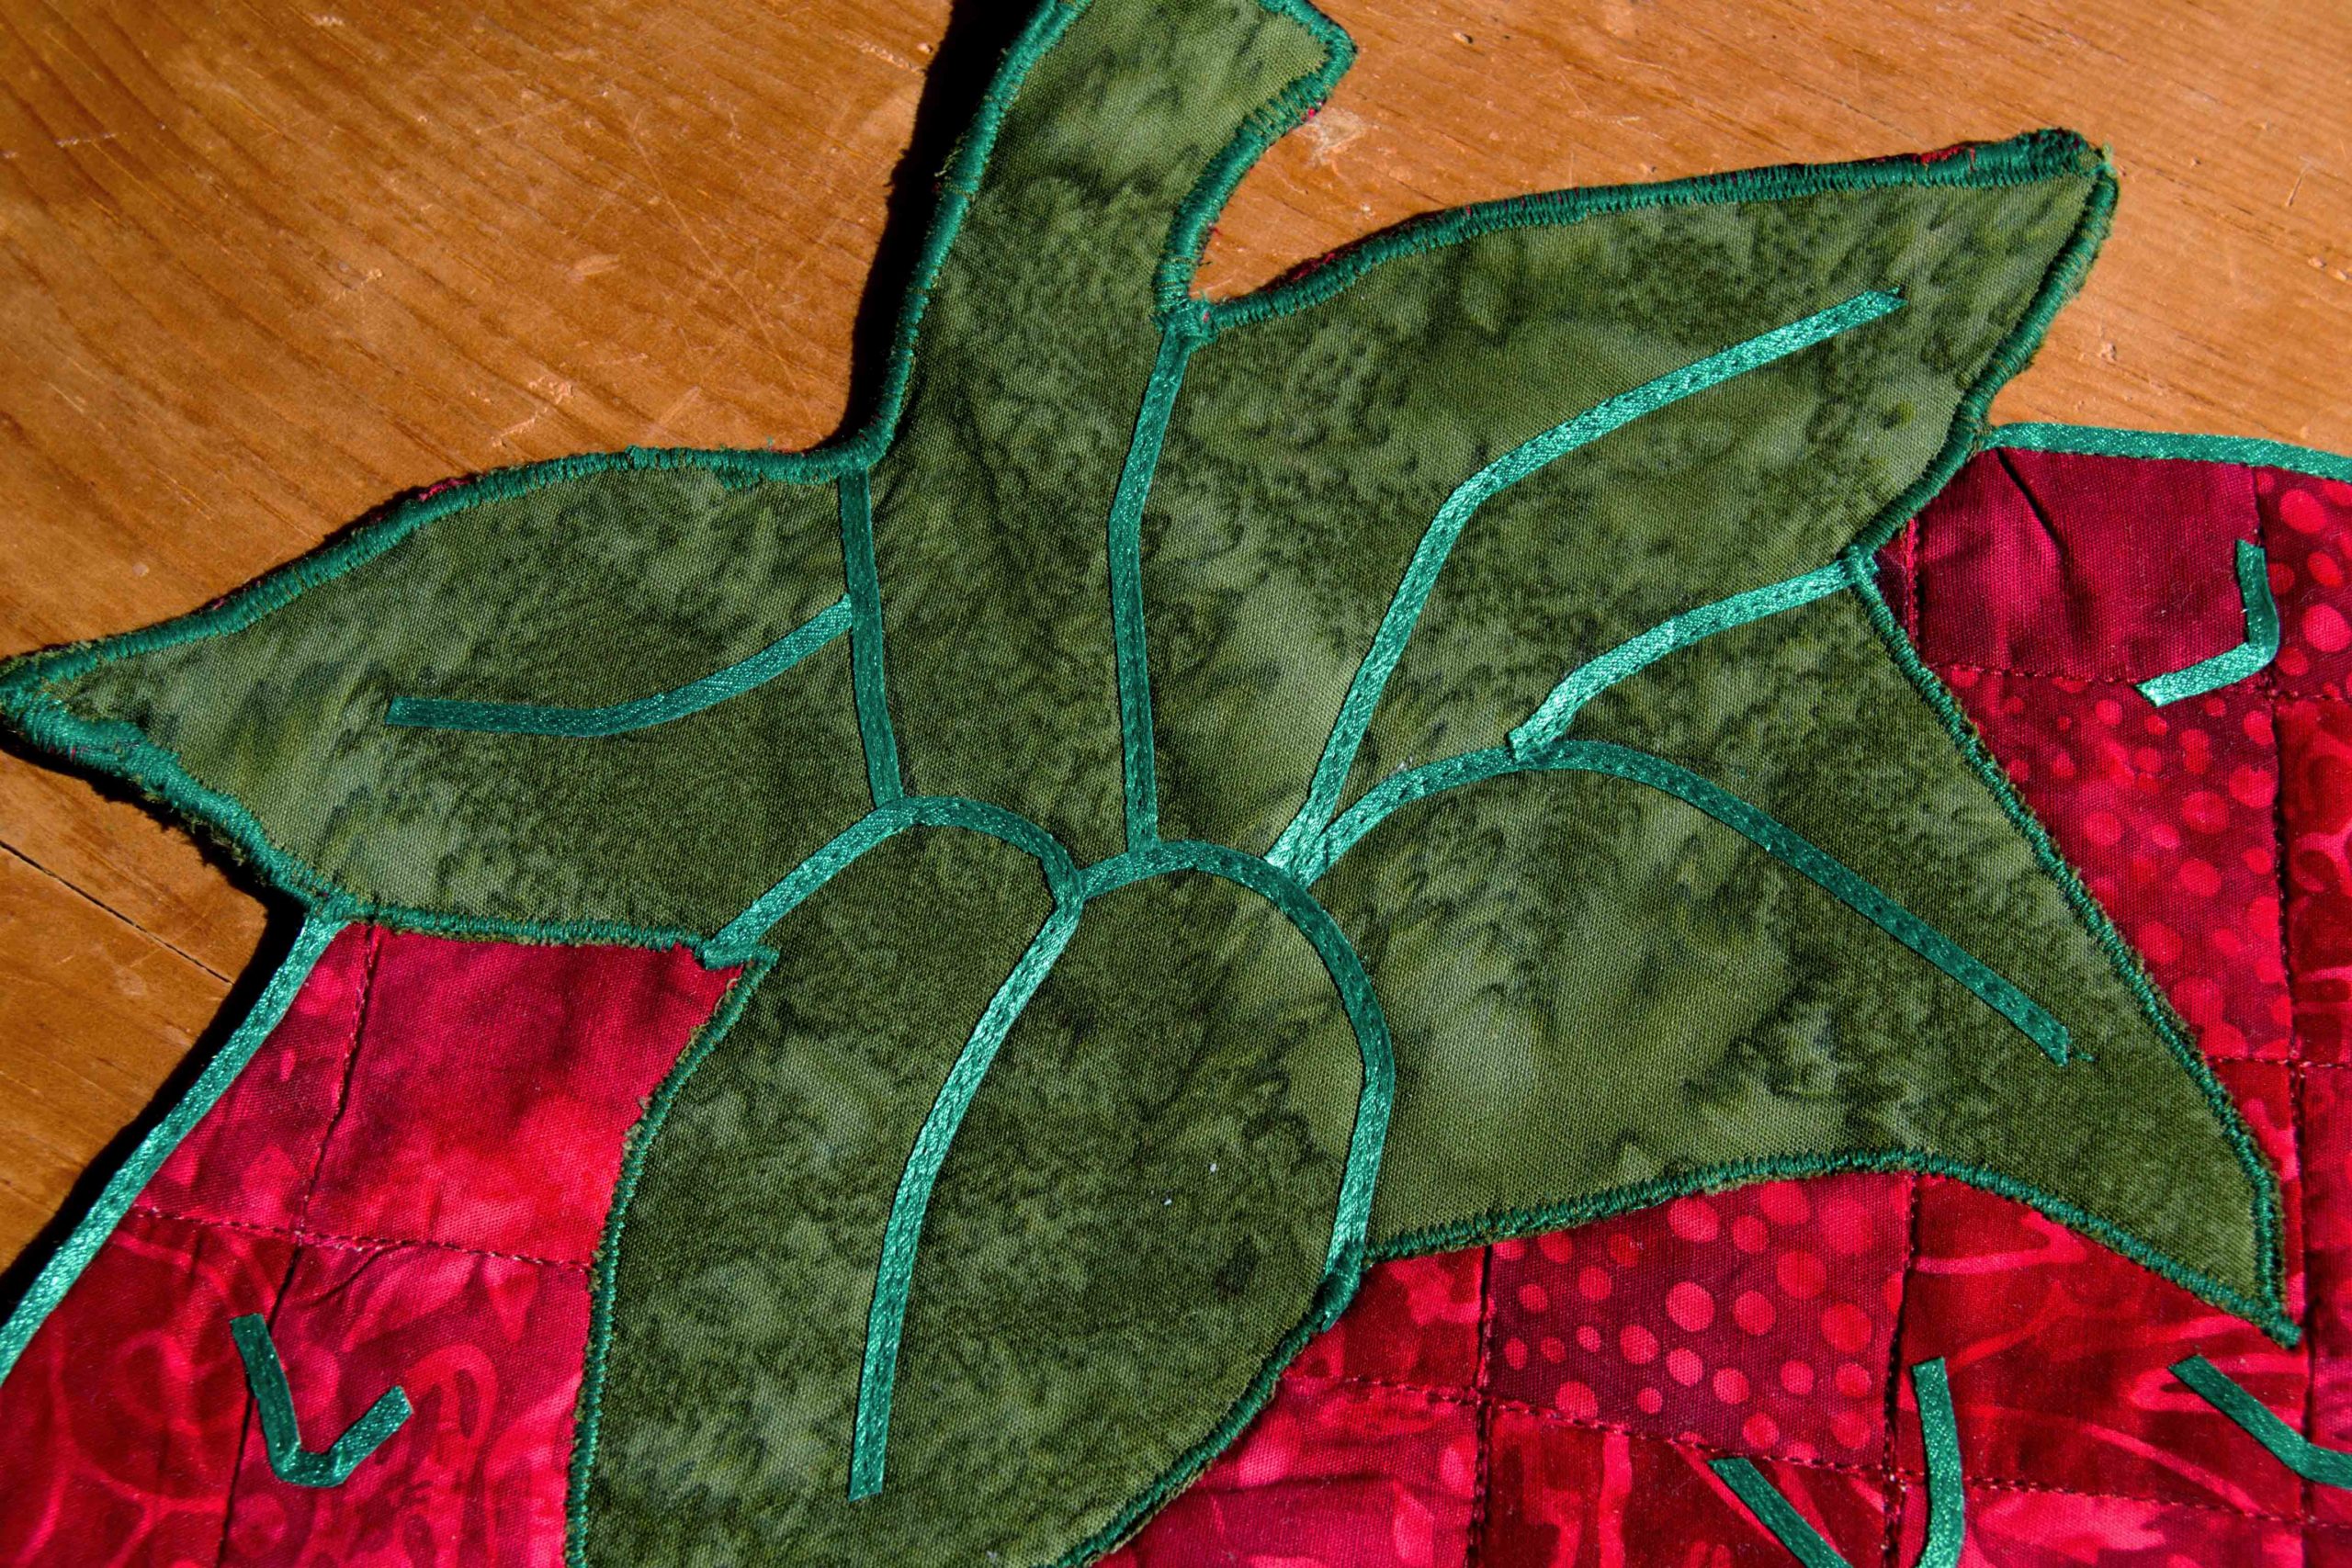
Her designs are beautiful, bold, dramatic, and a true celebration of the color and life and joy that is unique and creative fabric art.

So without further ado, please help us welcome Kate Brown!

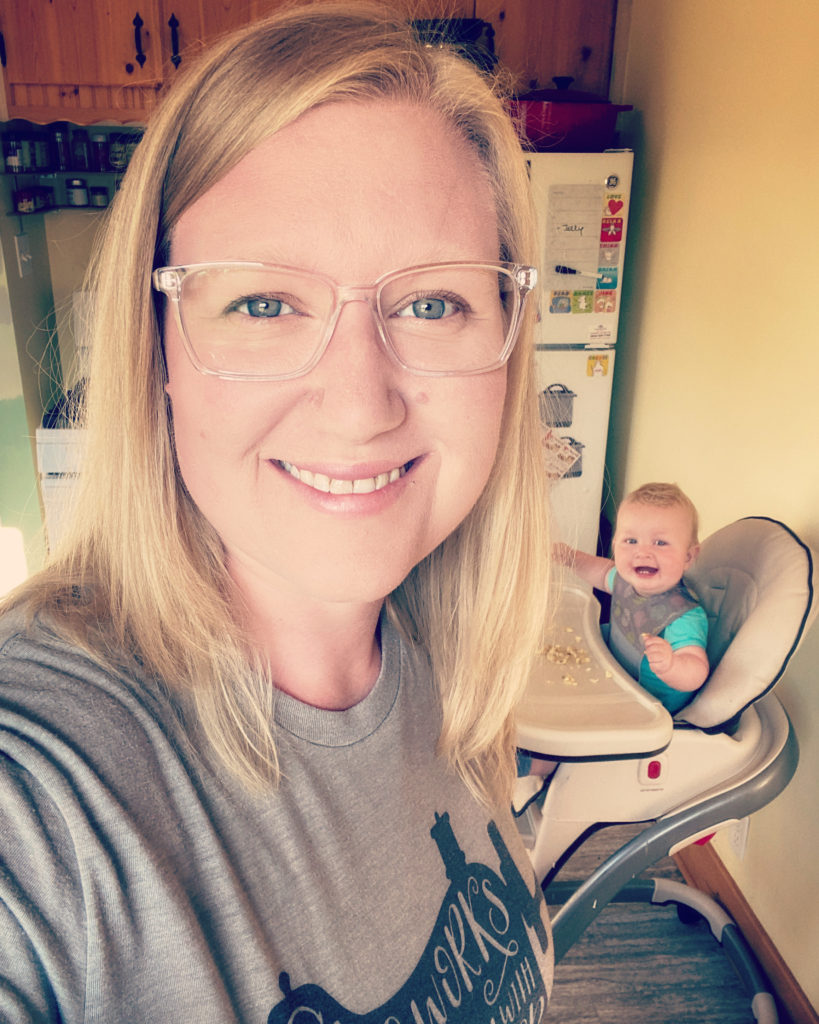
As a wife, as a mother – a pretty new mother right now!

What drew you to quilting in the first place?

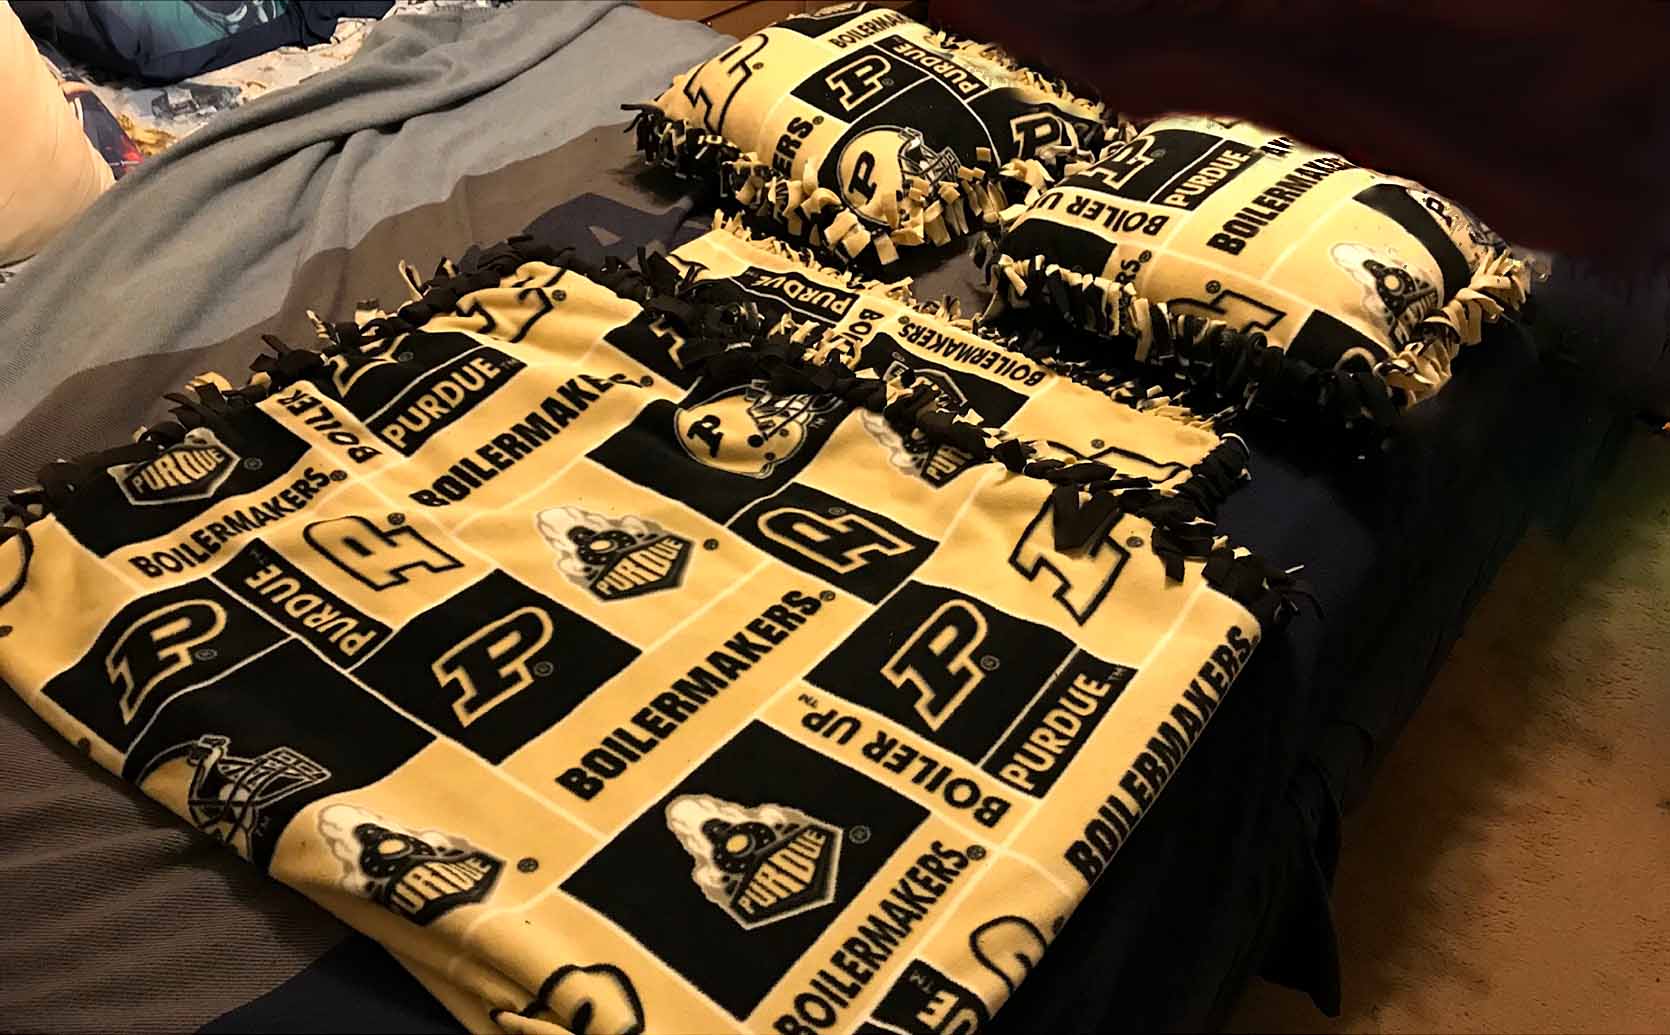
It all started with my husband’s birthday. Well, he was my fiance at the time. He works for a coffee company and gets lots of coffee ‘swag’ (t-shirts!) from other coffee companies. They’re often beautiful and soft, but he gets them in all kinds of crazy sizes that don’t always fit. For his birthday I decided to make a t-shirt quilt for him in a throw size. I pulled my mom’s sewing machine out of her basement (complete with frilly sewing basket), watched some youtube videos for instructions, and got to work. Seven years and countless other quilts later, that first t-shirt quilt is still one of the most used of our quilts and definitely the softest. It has become one of ‘my’ prized possessions. There’s nothing more comforting when you’re sick and recovering. Or just for cuddling up under on a cold Minnesota evening!

unique geometric quilt designs in miniature - pink pieced heart on a gray background / fabric postcard
Unique Encounter with geometric quilt designs artist Kate Brown

Biography:

I started quilting about seven years ago. I started (as so many of us do) by making a quilt for someone. But once I’d experienced the unique mix of creativity and structure required to think through and execute a quilt, I was hooked. Other than a few breaks when I’ve had new babies in the house (including the last seven months!), I haven’t stopped since. I love every stage of the design process–from the first spark of inspiration, to sketching, to computer mock ups, to the endless rounds of math, to pulling and then re-pulling fabrics, to actually piecing. My youngest son is transitioning into daycare over the next few weeks and I’m excited to get back to my machine and bring to life some of the ideas that have been marinating during all of those late night feedings.

*Where do you live?

We live in Minneapolis, Minnesota. There’s a good chance that the months of frigid winter here contributed to my quilting. When you can’t go outside for half the year, you tend to find things to do inside!

So, like many quilters, it quickly became an addiction! 

What turned you from making coffee t-shirt quilts to the beautiful geometric quilt designs that you now create?


After making t-shirt quilts for about a year, I started doing quilt swaps on Instagram. In the process I discovered paper piecing and that’s what really unlocked my creativity. I’ve always been someone who loves both the creative aspects of pure art – designing something, choosing colors, etc. – and the technical aspects of actually building things. Quilting and making home decor are the perfect combination for me. I love that everything I create is unique and that these pieces of art don’t just sit in my house and accumulate dust but go off to brighten up someone else’s space. My most popular quilt pattern–a throw-sized quilt called ‘Color Jolt’–is a beginner-friendly paper piecing pattern and I absolutely love seeing other quilters fall in love with paper piecing.

Are you a solo artist or do you work with other people to create your designs?


I do all my own design work, but I do love working with others. A few years ago I ran a huge postcard swap and designed a series of paper pieced postcards for that specific event. So all the design work was mine, but the enthusiasm of the quilters in the swap provided important fuel for the process. I also have a group of talented pattern testers that test my final full designs. And I love hearing from quilters who have used my patterns and reach out to share their final results!

What type of fabric art do you most enjoy?

My patterns are modern and tend to start because there’s something I want to have in my home, and so I create it.  Then I generalize that into a pattern. I’m redecorating my house right now and the next pattern I’m releasing started because it was something I wanted to make for one of our bedrooms.

Can you describe your generalization process a bit more?

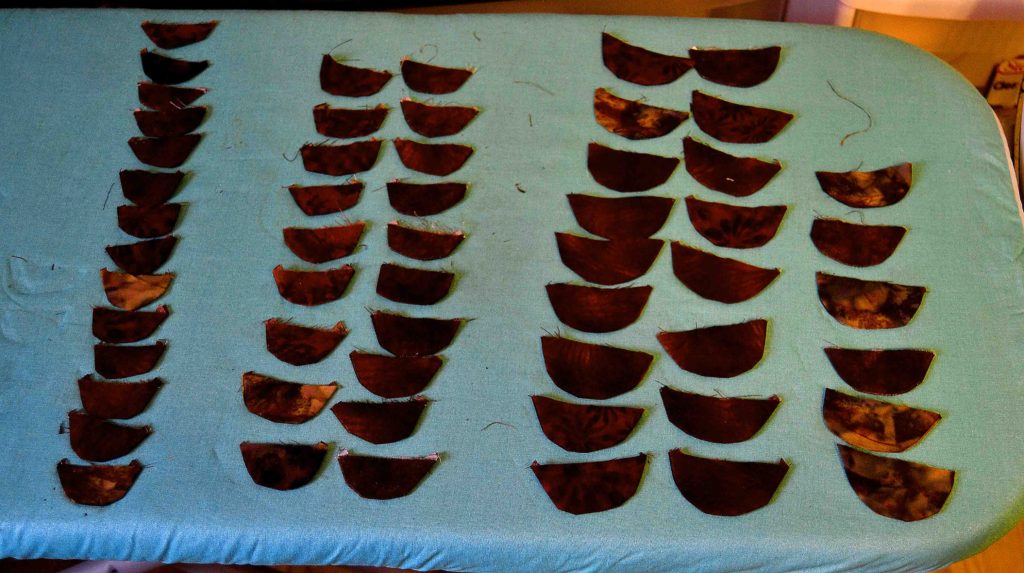
This has changed a bit over the years. I used to do a lot more planning before I got to actually cutting into fabric, but as I’ve gained experience I’ve felt more freedom to experiment. Now I usually go from a sketch to roughing in some math around the sketch to pulling fabric and cutting into it. Once I’m a little ways into things and made any adjustments along the way, I circle back and do all the computer work–mocking up the design, making any templates, and doing the endless math required to compute fabric requirements for multiple sizes of the quilt. Then I write up the pattern, send it off to my lovely testers, and start whipping up sample quilts.

I love the effect of beautifully done geometric patterns, but I don’t have the patience for it!  

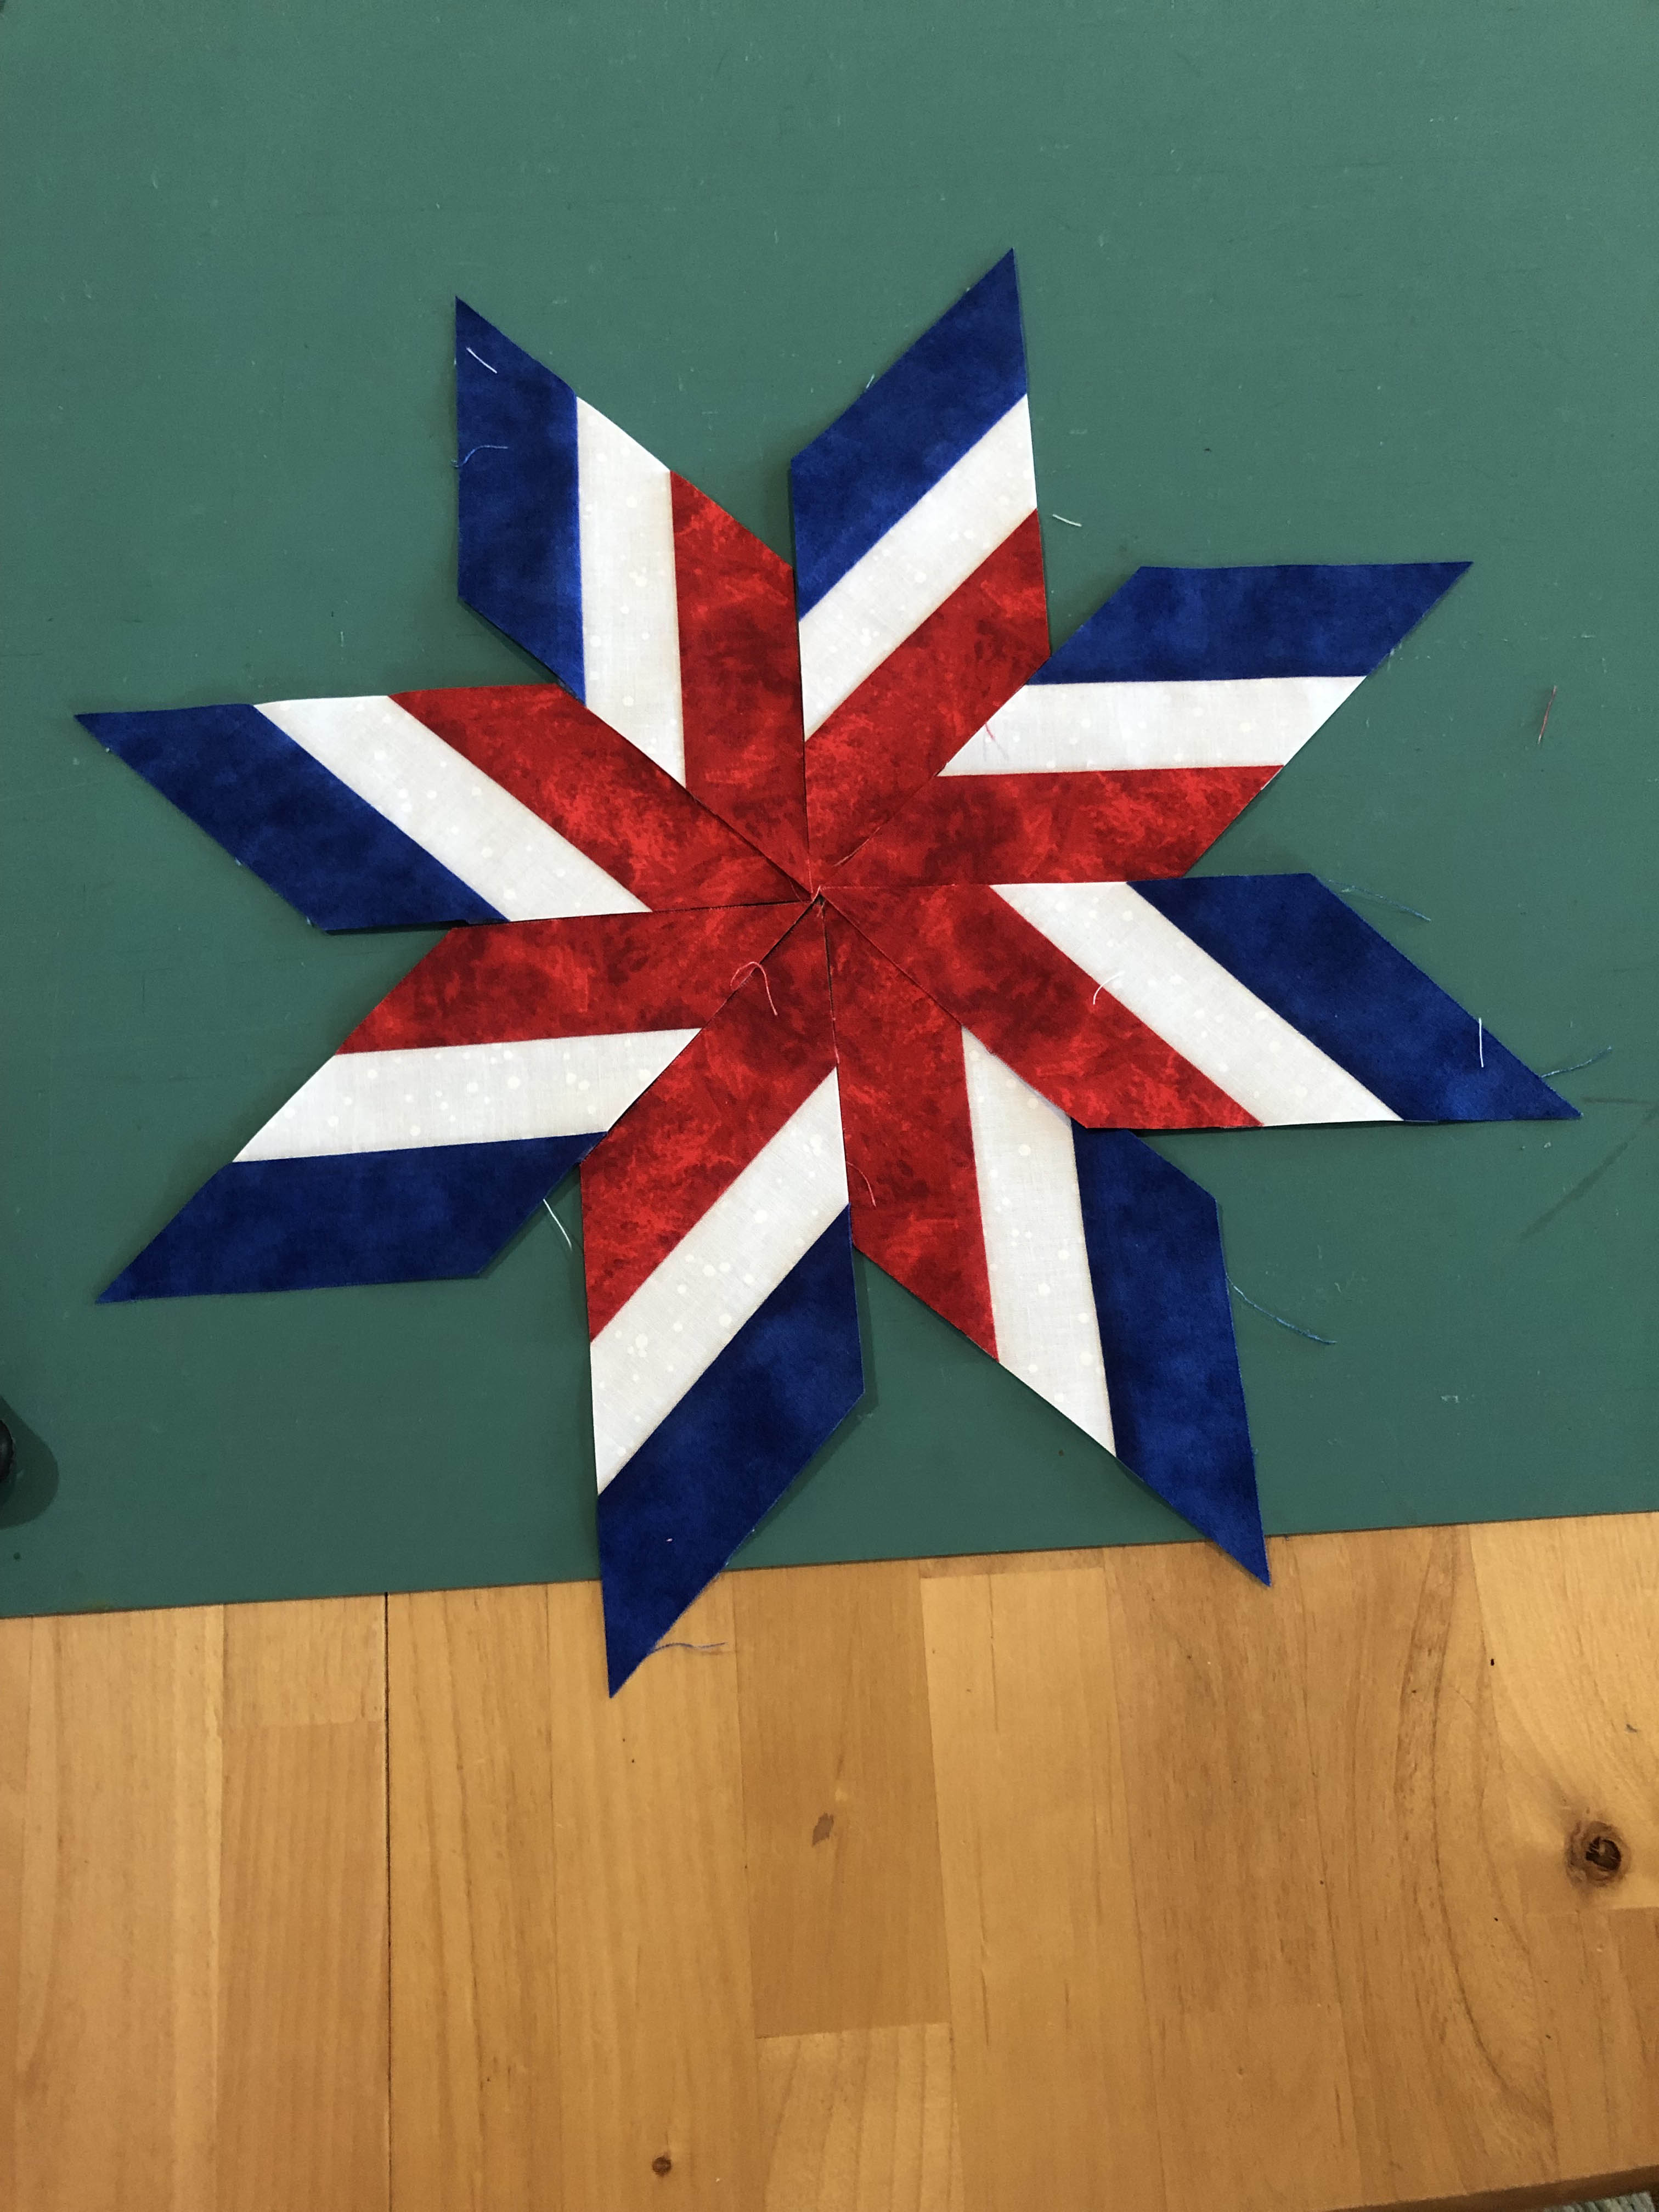
What is it that you love most about these types of patterns?

My favorite thing about paper piecing is actually how easy it is to make striking, geometric patterns. The paper templates do all the work for you! Unlike traditional piecing, there’s no difficult seam-matching and infinite perfect pressing. You can print your templates, pull your fabrics, turn on your favorite music or show, and zone out while you work through the methodical process of adding your fabric to your templates. If you haven’t tried it, I can’t recommend it enough!

What’s your favorite type of project?

Color Jolt quilt geometric quilt designs with little boy holding it

I did a lot of mug rugs and smaller paper pieced patterns before I started designing larger quilts. I still love both and have been tinkering with a new collection of mug rugs / postcards (and a quilt pattern at the same time, to be honest). I’ve always got about 10 things going on at once. I think ultimately quilts are my first love, but being able to go from concept to finished pattern in a short period of time makes smaller projects a satisfying change up in between those larger design projects.

Do you have a piece or project you’re most proud of?

My ‘Color Jolt’ quilt was my first quilt pattern and still one of my favorite designs. It’s also my most popular and I love hearing from new paper piecers who tried it and got results they love.

I see more and more of these fabric/quilted postcards, and I’ve got to ask:

How does that work? 

  • Are there specific standards (Post Office) that you have to adhere to? 
  • How do you make it so your customers can fill out the back?

That is a great question and one with a lot of answers, to be honest. Generally you combine a fabric front with a stiff inner layer and then use either fabric or a thick cardstock for the back. You can use traditional binding around the edges but many people use a tight zigzag stitch or other material around the edges. The sky is kind of the limit on this part. I like using cardstock on the back so it’s easier to write on. You can attach postage directly to the back. Postage will vary depending on the size of the card. Usually you can’t actually use a postcard stamp (the lower rate stamp) because your postcard will be too thick or too big. I actually send mine in envelopes because I’m a little too paranoid about them getting dirty in transit.

Geometric quilt designs fabric postcards/mug rugs

Your kids are very young!

As a mother of three myself, I know that raising children while sewing is a unique challenge. 

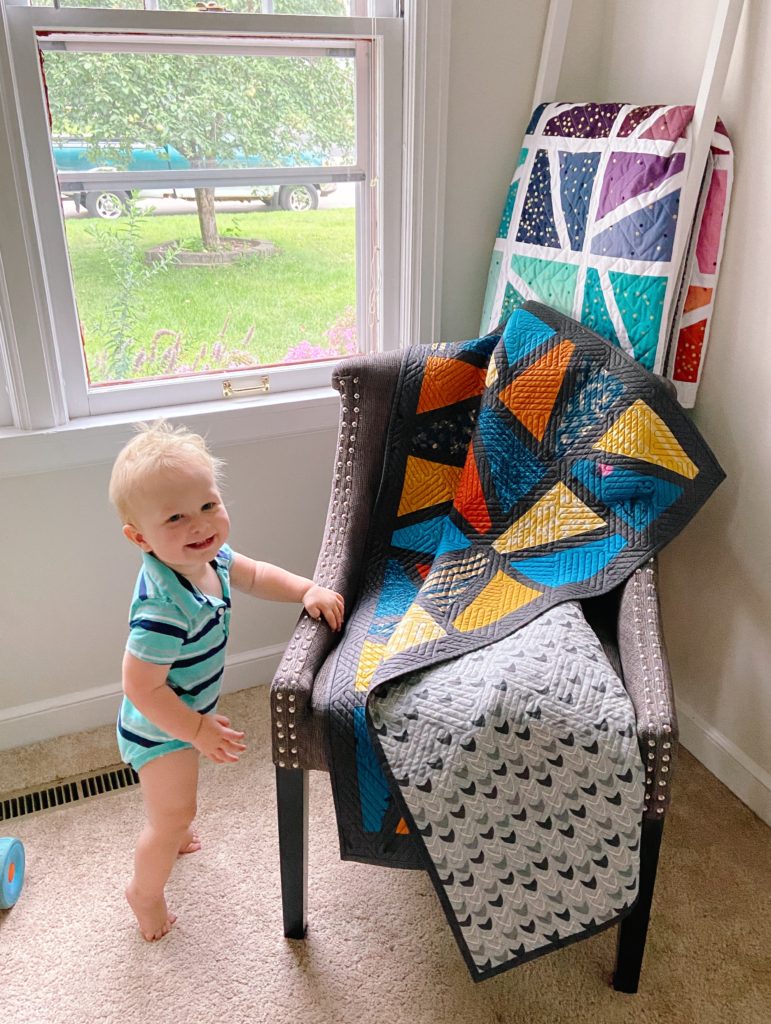
Haha, that is very true. Quilting itself is fine because I can just spend the five or ten minutes I have at a time at my sewing machine, but the actual design process and math involved is much harder to pick up and put down over and over. That’s why I took an actual break this time around with my youngest. Designing takes more mental concentration than a newborn allows. I’m excited to get into the years where they’re big enough to entertain themselves but small enough that they can’t climb up on my sewing table and mess with anything yet. On the other hand, babies do make quilt photos extra cute.

Is there a type of quilting pattern or design that you’d like to try, but haven’t yet? 

I work with a lot of color but I’ve been toying with the idea of making a black and white or grey and white quilt sometime this year.

Do you do any public displaying of your geometric quilt designs, like at fairs?

Nope!

I love your honesty! I don’t either, but so many quilters do that it sometimes feels like a necessity.

How can our readers reach or follow you?

You can follow me on Instagram @sparklestash

unique geometric quilt designs in miniature - pink pieced heart on a gray background / fabric postcard

I for one loved that unique insight into paper piecing (a technique I’ve never tried before) and the creative ways that Kate Brown has used geometric quilt designs to create all sorts of delightful and unique projects, like fabric postcards and mug rugs!

Want More Paper Piecing & Unique Geometric Quilt Designs?

If you answered yes, you’re in luck! Kate has generously agreed to join us for a live webinar on May 3rd @ 3 PM Eastern Standard Time. If you want to join, you need to be subscribed to our newsletter list:

Subscribe FREE

Want to receive bi-monthly updates, tips of the week, specially answered questions, and more? Please subscribe today!

I accept the Terms & Conditions

We hate spam, and will never give away, trade or sell your email address. You can unsubscribe at any time.

How-to Recommend Another Unique Artist

Being able to showcase unique artists like Kate is one of the best parts of being Princess YellowBelly Designs. We love discovering new artists, learning about their techniques, and getting to experience their amazing works of art. If you know of someone – or are someone – who practices a unique form of fabric art, please use the form below to let us know!


Please enter your email, so we can follow up with you.
Please remember to include a link where we can find, contact, and/or connect with your unique artist

How to Make a Leprechaun Hat Pot Holder Step-by-Step

Make a leprechaun hat challenge slide with Irish symbols

A traditional way to celebrate the fun and festive holiday of St. Patrick’s Day is to wear something green.  Here at Princess YellowBelly we want to take it a step further, and challenge you – and ourselves – to make something green.  

We’ve made two mug rugs [aka potholders or hot pads] that are green, Irish-inspired, and just plain fun!  

All the details on the Shamrock Mug Rug creation process is in this article. In this article, we’ll be sharing how we made the leprechaun hat pot holder – which is just a teensy bit harder, but can still be finished in just 1 Hour!

Or make up your own green piece of Irish magic!  Table toppers, your own mug rug design, crochet, knitting, felting…let’s just have some fun with it!

Make a Leprechaun Hat Pot Holder Steps 1-5

1. Spray starch and iron a nice green fabric

  2. Iron 2 layers of batting flat.

  3. Build your mug rug sandwich:

  • Bottom – 2 layers of batting
  • Middle – strip set right side up
  • Under-top – backing fabric right side down
  • Very-top – Leprechaun hat paper template
  • Pin all the layers together

  4. Sew all around template leaving a ¼ inch allowance with the outside line and your stitching line.

  5. Remove template – gently! If you can pull it loose from the stitching line without tearing it, you can use it again and again.

Make a Leprechaun Hat Pot Holder Steps 6-12

Now it’s time to do the beautiful details:

6. Cut out shamrock. Leave a ¼ inch seam allowance between where you cut and the stitching line. Snip the points – it’ll pucker if you don’t.

  7. Turn shamrock right side out, gently, through the turning slit.

  8. Gently push out the seams and points using a corner turner

  9. Iron flat, front and back

  10. Sew turning closed by hand! Use a hand sewing needle, matching thread, and a whipstitch.

  11. Cut apart your paper template; the top oval of hat, the band, and the shamrock

  12. Pin shamrock template on gold fabric, band template on black fabric, and cut out.

FINISH Making a Leprechaun Hat Pot Holder! Steps 13-15

  13. Place top hat oval on the top of the top hat, and trace the bottom edge in chalk – then quilt this line as you like (straight stitch or satin stitch)

  14. Pin black band to the hat, and sew it down using a tight, narrow satin stitch.

  15. Place shamrock on the band, quilt all around the edge with a satin stitch using the thread you like best – we usually use matching thread for already pop-out detailing

And You’re Done!

Take a second to celebrate and enjoy your new Irish-inspired mug rug – mug rugs if you’ve also made our lucky shamrock potholder! Let us know about your experience in the comments below, and make sure to subscribe so you can stay current with all our great content.

Happy St. Patrick’s Day!

Artist Challenge: Make Something Green & Celtic to Celebrate St. Patrick’s Day

Make Something green & Celtic for St. Patrick's Day - Artist Challenge

Learn How to Make Cute & Easy Irish-Inspired Mug Rugs / step-by-step green & Celtic tutorial

A traditional way to celebrate the fun and festive holiday of St. Patrick’s Day is to wear something green.  Here at Princess YellowBelly we want to take it a step further, and challenge you – and ourselves – to make something green.  

We’ve made two mug rugs [aka potholders or hot pads] that are green, Irish-inspired, and just plain fun!  

These mug rugs are super-easy to make, and if you want to follow along, we’ll be posting the steps in the days before St. Patrick’s Day (March 17, 2022), if you want to follow along.  Or make up your own green piece of Irish magic!  Table toppers, your own mug rug design, crochet, knitting, felting…let’s just have some fun with it!

Princess YellowBelly Designs logo

Shamrock Mug Rug Day 1: Steps 1-4

Of the two mug rugs we designed to celebrate St. Patrick’s Day, we chose to start with the Shamrock, because it’s the absolute easiest!

  1. Select 5-8 green fabrics ranging from light-dark
  2. Spray starch and iron green fabrics and your backing fabric
  3. Cut 1 ¼ inch strips from fabrics – you need 8 total strips at this width to create the right size for the shamrock, so if you only chose 5 fabrics (like we did), you need to pick a couple of colors to repeat. We chose to start at dark, go to light, and then build back up to dark for our shamrock strip set.
  4. Sew strip set together and iron seams flat

Shamrock Mug Rug Day 2: Steps 5-10

5. Construct turning slit in backing fabric (mark a 2-inch line down the middle of your backing fabric. Sew a narrow satin stitch all around this line, then cut the line open.)

6. Iron 2 layers of batting (these are mug rugs, so you’ll need the extra insulation)

7. Choose a shamrock template

8. Build your mug rug sandwich:

  • Bottom – 2 layers of batting
  • Middle – strip set right side up
  • Under-top – backing fabric right side down
  • Very-top – Shamrock paper template
  • Pin all the layers together

9. Sew all around template leaving a ¼ inch allowance with the outside line and your stitching line.

10. Remove template – gently! If you can pull it loose from the stitching line without tearing it, you can use it again and again.

Or, BUY Something Green & Celtic

Shamrock Mug Rug Day 3: Steps 11-14

11. Cut out shamrock. Leave a ¼ inch seam allowance between where you cut and the stitching line. Snip the points – it’ll pucker if you don’t.

   12. Turn shamrock right side out, gently, through the turning slit.

   13. Gently push out the seams and points using a corner turner

   14. Iron flat, front and back

FINISHING the Shamrock Mug Rug Day 4: Steps 15-17

15. Sew turning closed by hand!  Use a hand sewing needle, matching thread, and a whipstitch.

  16. Following the template lines, draw in leaf lines with chalk.

  17. Quilt on lines (you can do this with a straight stitch for a quicker finish, or with a satin stitch in a brighter thread for a more stand-out statement)

Taking the Bargello Strawberry from Farm-to-Table Runner

Bargello Strawberry quilting pattern transformed into a Farm-to-Table Runner
Princess YellowBelly Designs logo

How the Princess YellowBelly team accepted our own challenge and transformed a Bargello table-topper into a stunning (if we do say so ourselves) farm-to-table runner.

We’ve heard the most dangerous words in the world are “we’ve always done it this way.”  

Here at Princess YellowBelly Designs we take a certain amount of pride in the fact that we don’t allow traditional quilting “rules” to define the limits of possibility.  Just because quilters have always done it one way in the past doesn’t mean that we won’t try doing something completely crazy just because it might be: 

  • Easier
  • Faster
  • More beautiful
  • More unique

…Or all of those things at once!

Thinking outside the box is a lifelong challenge, and recently we found ourselves challenged to get out of a box we hadn’t even realized we were in.  

Freedom Flight pattern and finish product overlay

When one artist wanted to re-imagine one of our favorite original quilting patterns as a more traditional quilt, it kind of shocked us.  Somehow we’d gotten into the habit of believing that we were creatively stretching our limits just because we were making new patterns. 

What we weren’t asking ourselves was, “are we taking these original patterns to their full potential?”

Taking a Strawberry from Farm-to-Table Runner

One original PYB quilting pattern that we’re very fond of is the “Bargello Strawberry Table Topper.”  That one was a lot of work in terms of figuring and technical difficulty – pretty standard for any Bargello design. 

It came out beautifully, and we love hanging it on our wall every spring and summer. 

After taking a second look at many of our patterns through the lens of “could we do this a different way,” the strawberry stood out to us as one that would be fairly easy to adapt, and possibly mixed with other patterns. 

Questions to Help Guide Change

If you’re a fabric artist who likes to adapt and change patterns to serve your own purposes, here’re some of the questions that it’s good to ask yourself before setting out to change a pattern:

What are the elements? 

Like a tasty recipe, every pattern is composed of a variety of materials, techniques, and steps.  If you want to go about altering a pattern, you need to understand all the different elements in order to understand what needs to be changed, or not. For something as apparently simple as our Bargello Strawberry Table Topper, for example, there’re 4 distinct elements involved:

  • A Bargello pattern
  • A shaped outline
  • Inside-out turn over style
  • Appliqued (leaves and seed pips)

What – if any – elements are changeable? 

Some elements can be altered with barely any thought or effort, and others are extremely precise in terms of measurements and outcome.  

A Bargello pattern is one of the hardest to make any individual adaptations to because the size, width, and color layering is extremely precise and creates incredibly distinct optical illusions.  

On the other hand a simple shape – strawberry outline – can be shrunk or enlarged, flipped, and adapted in dozens of ways without too much figuring. 

How much do I want to change this?  

If you’re starting with something like a quilting pattern – a rail-fence or pinwheel for example – it’s not too terribly hard to think of shrinking it.  We make all different sizes of pinwheel blocks for backgrounds, borders, and table runners.  

On the other hand, changing a small, contained pattern – like a shaped wall-hanging – into a full-size quilt requires quite a bit of creativity. 

What do I have that would look good with this?

In our case, we had a printed panel of an original photo that we’d had made up for our shop.  The strawberry fruit smoothie in a fine-dining setting makes for an eye-catching piece, and we’ve always wanted to do something more with it. 

How well do the new elements match up?

We realized that the sizing of the two elements we had that were easily adaptable – the strawberry outline and the printed photo panel – were very close in size already.  So we decided not to get too crazy and make a whole quilt, just a table runner. 

How much time do I want to spend?

Making a big quilt takes time.  Making a super-complicated wall hanging takes time. Making a table runner / table topper / baby quilt doesn’t take nearly as long – usually.  We’ve got a lot of big projects already planned out this year, and we didn’t feel like adding a whole other quilt – and the 1-4 months investment in time. 

So, we decided to change the Bargello Strawberry pattern from a single large table topper to a printed photo panel & shaped applique table runner. 

What do I not have to figure out on my own?

As quilters and fabric artists we have a tendency to collect patterns.  We’re especially fond of those that come in the little baggies at the quilt store, with a unique pattern and a simple style with as few specialty rulers as possible.  

Lo-and-behold, we had a table runner pattern that was very generic, diamonds, triangles, 9-patch squares, and half-square triangles, that fit the measurements of our printed photo panel nicely. 

Bringing the Strawberries from Farm-to-Table 

It took us about a week of mornings, an average of 4 hours a morning for 5 days, to figure out how we wanted to transform the pattern to our own design.  

Some of the challenges we faced included:

“Cropping” the strawberry smoothie printed photo panel to the right size (without losing any of the detailing that makes it so special)

Re-sizing the strawberry outline to fit the same size background panel as the strawberry smoothie block

Changing the Bargello pattern on the interior of the shaped strawberries to be reasonably easy and quick without sacrificing the visual effect (the whole point of using the Bargello pattern in the first place was to create the illusion of a “real” strawberry)

Figuring the 9-patch blocks to best fit in with the colors of the strawberry printed fabric we used for the outer triangles 

Finding the right color big-block sashing strips to separate the jewel-tone greens and reds of all the different strawberry elements.

Overall, it was a simple and entertaining project.  The result was better than we’d originally envisioned, and we discovered a much, much simpler way of creating the optical illusion effect on the shaped strawberries alone! 

Once we were done tweaking our strawberry pattern, the table runner pattern, and our original printed photo panel, nothing looked much like it had to start with. 

Strawberry Farm-to-Table Runner

The result was – if we may be allowed a bit of a brag – stunning!

Want to Know How to Make Your Own “Farm-to-Table” Runner?

We took careful pictures and videos of every step of the process of creating this beautiful, strawberry farm-to-table runner, and we’ve turned it into an easy-to-follow video. 

Join Us for a How-to Save Money Art Salvage Event!

Art salvage button that finishes a red bow on blue Christmas bells
Princess YellowBelly Designs logo

Quilting can be an expensive hobby. Any kind of DIY art – from crocheting to photography to model building – can get expensive.

The good news is that there are a lot of ways to save money on your quilting and fabric art projects without compromising the quality and beauty of the finished projects.  And one of those ways is art salvage.

You Missed the Live Event – but don’t worry! You can watch the full replay NOW!

Art Salvage Mindset for Quilting & Fabric Art

Earlier this year a great writer and fabric artist with an art salvage mindset shared her story with us.

She’s back!

We’re going to be hosting Susan Rusie for an exclusive Zoom interview on how to develop a salvaging mindset while creating fabric art. 

Karyl (our premier seamstress) will also be sharing some of our Princess YellowBelly secrets to salvaging the most unexpected materials to help create and enhance our original quilting designs, like how a broken, 10-year-old bracelet can add to a mermaid quilt!

If you’re interested in learning how to save money quilting with an art salvage mindset from two pros, please RSVP today!

And if you can’t make it, for any reason, please let us know.  This is a limited seating event, and if you can’t attend, we’d like to be able to open up your spot for another quilting artist.

Get a Princess YellowBelly Original Pattern for FREE!

multiple options of PYB's original patterns
Princess YellowBelly Designs logo

A few months ago an enterprising artist had an idea for us on how to change up one of our original patterns.  It was such a fascinating idea that we offered her a series of gifts:

  • A FREE quilting pattern for Freedom Flight (the pattern she was interested in changing)
  • FREE access to the video tutorial series
  • Exclusive access to our help (if and as needed)

In exchange, we wanted the rights to publish her story, and follow along as she worked on adapting it.  If and when she does need our help, we’ll do it via a Zoom call and then publish those videos for your viewing and learning pleasure.

Freedom Flight pattern and finish product overlay

In short, we saw a fantastic, fantastic opportunity to grow our own creative reach. I’m about to tell you that you have an opportunity to:

Get in on the Action!

  • Get any original pattern by Princess YellowBelly FREE!
  • Also get complimentary access to any supplementary tutorial materials – videos, articles, pictures, etc.
  • And get the kind of exclusive access to us that Carrie’s enjoying

That’s right!  If you choose to take advantage of this offer, you won’t have to pay a cent for any one of our unique, tested, hard-won and original patterns that inspires you.  We’ll send you the original pattern of your choice, access to any video tutorials we might have, and give you inside access to our hands-on help and advice, completely free. 

How to Take Advantage of this Unprecedented Offer

I’d love to be able to just offer any-and-everyone this kind of insider access.  Unfortunately, though, we do have to put some limits on this opportunity. 

One thing that we’ve found about Princess YellowBelly is that our creativity grows from the creativity of others.  Each unique artist, each Seam Ripper Champion that we’ve had the privilege of meeting and learning from has made us better.

In short, your creativity is both inspirational and vital to us. 

Most Important: Have a Creative Idea

What we want – what we’re actively looking for – are your ideas of our designs.  How can you think to change, update, and transform the patterns that we’ve spent so much time and love changing and transforming ourselves. 

Take a look at any of the original quilting patterns in our Shop; Freedom Flight, My Pad, The Christmas Bells; and think of how you’d like to do it differently. 

  • Would you like to change The Christmas Bells pattern (coming soon) into a runner, rather than a topper?
  • Would you like to shape the edge of Autumn Daze
  • Could “My Pad” be made into a centerpiece for a (more) traditional quilt like Carrie’s doing with Freedom Flight?

If you’ve got an idea for us, here are the conditions to meet in order to get that FREE pattern, insider access, and supplemental tutorials.

For Newsletter Subscribers

If you’re a newsletter subscriber, congrats!  Not only do you have FREE insider access to our newest content, insider access, and first-look privileges, (not to mention a copy of our 52 Fabric Art Success Tips), now you can take advantage of this offer in four easy steps. 

All you (loyal subscriber) have to do is:

  1. Open your email
  2. Find any one of our newsletter issues
  3. Hit “Reply
  4. And tell us about your brilliant idea

We’ll review your idea, offer any answers or suggestions that we can, and set up your first sharing article and receipt of your new PYB original pattern – and support elements.

For Non-Subscribers

If you’re not a subscriber yet…what are you waiting for?!?

Seriously, though, if you’re not a subscriber you’re still more than welcome to participate in this challenge and win yourself a FREE pattern, plus all the supplemental materials.

All you have to do is purchase something from our Store; anything at all:

  • A finished quilt
  • A table runner
  • Another pattern

Strawberry Patterns Combo Pack

  • 3 PYB Designs original strawberry patterns
  • One original printed photo panel
  • The cost to get all 3 & the photo panel separately is $84.50 – save $12.05!
  • Strawberry Farm-to-Table Runner
  • Bargello Strawberry Table Topper
  • Strawberry Patch Fruit Bowl Holder
  • Strawberry Smoothie Printed Photo Panel

Once you’ve purchased something from us, all you have to do is Reply to one of the confirmation emails, let us know that you’ve got an idea to change one of our original patterns, and Bob’s your uncle! 

Or you could subscribe to our newsletter, and Reply to any of your “Welcome to the Family” confirmation emails. 

Subscribe FREE

Want to receive bi-monthly updates, tips of the week, specially answered questions, and more? Please subscribe today!

I accept the Terms & Conditions

We hate spam, and will never give away, trade or sell your email address. You can unsubscribe at any time.

Your choice.  

We really do hope that you take advantage of this unique and brand-new opportunity to participate in our ongoing fabric art adventure!  We’re all about building a community that supports real quilting creativity (what we call “quiltivity).  We want to both preserve and update the traditions and memories of those who came before us, and impart this artistic passion to a new generation.

picnic crasher original pattern overlay

Please join us!  We can’t wait to see what you come up with.

Evolution of Quilted Flight

Freedom Flight pattern and finish product overlay
Princess YellowBelly Designs logo

 “Can you use a shaped wall hanging pattern as the centerpiece square of a traditional quilt?

If that question sent shockwaves down your backbone, then you’re not alone!  That deceptively simple little question sent ripples out into our curiosity.  It’s inspired our interest, our creativity, and it’s suggested a whole new section that we hope will prove to not only be insightful into the arts of quilting and pattern alteration – but also inspirational for your own quiltivity!

Welcome! 

Join Us for One Pattern’s Journey from Idea, to Wall Hanging, to Heirloom

As of this moment you’re invited to embark on a new journey with Princess YellowBelly and our newest artistic friend on the ever evolving journey of one of our very favorite original patterns.

Arguably our single most popular item ever is our soaring red, white, and blue shaped American eagle wall hanging. 

 “Freedom Flight” was created as a celebration of the Fourth of July several years ago.

Since we first put it up, it consistently has the most views, often by the day, and certainly by the month and year.  And it easily leads the field in our original pattern shop, as well.

An Intriguing New Design Idea

Just a couple of weeks ago we received an interesting question via our Etsy.com store. 

Carrie asked us: “I am thinking of using the pieced eagle as the centerpiece of a quilt. Do you think it would work to piece this onto a base fabric that could be used in a traditional quilt?”

Fascinating.

At Princess YellowBelly we spend an awful lot of time trying to figure out how to turn more traditional quilting patterns into shaped wall-hangings, but we’d never thought of turning one of our original designs back into a traditional quilt! 

Carrie's Family

We sent back an answer that we thought would be useful – and I’ll share that a little later. However, as helpful as we were trying to be, we got to thinking that this question deserved much closer attention, and Carrie’s ingenuity deserved a lot more support from us.   

Let’s Figure it Out Together!

There’s a lot of icky, picky details to try to figure out if you go around adapting other people’s existing patterns.

Especially something like Freedom Flight, which is already “abnormal” to an extent, and which we’ve played with and perfected until it’s a pretty much self-contained pattern.

So after we sent off that early response, we reached back out to Carrie and asked her if she’d like a little bit more help on trying this incredibly interesting – and potentially difficult – creative adventure. 

She Said Yes!

While Carrie goes about re-creating Freedom Flight as the centerpiece of a very, very special heirloom quilt, she’ll be generously sharing her story with us.

A Loving Mother’s Self-Made Trap

Carrie, in her own words, never planned on doing this type of super-creative quilting. 

I’m not really a quilter – I much prefer handwork, crochet, embroidery, stuff I can do in the car or while watching TV!

But I dug myself a hole in 2014, when I made our oldest child a high school graduation quilt (mostly embroidered silhouettes of Paris and hand appliquéd PARIS down the center squares) and thereby set the precedent of having to make the younger children quilts as well for their graduations.

purple and white quilt blocks with PARIS written down the middle

The most recent one was a college graduation for her younger sister last May. I’m now working on brother’s high school graduation – set for May 2022. He wants to go to a Service Academy, so I’m just using a patriotic theme. I’ve hand appliquéd USA onto individual squares and also embroidered words:

  • Courage
  • Discipline
  • Honor
  • Duty

Wow!  In my opinion, that’s brave, and that’s a real show of love – doing something you don’t particularly enjoy just because you want all of your kids to know that you care for them equally, and you want them to have something to remember forever.

I started quilting for the same reason (my kids were little), but I enjoyed quilting to start with.

Getting this Party Started

Which is why I’m so honored that Carrie chose our pattern to complete her journey with.  Especially since Carrie hand-pieces her quilts!

All the while, I don’t have a pattern that I’m following – just kind of making it up as I go. And trying to do as much by hand as I can, since that’s actually what I really enjoy. When I saw your eagle pattern, it looked like something that I could piece by hand and then appliqué onto a background fabric.”

Piecing together a bunch of different squares around a central theme and without a formal pattern is something we do a lot of ourselves.  And while it’s tricky, it also makes for amazing and unique quilts.

At this stage of her project, this is what Carrie is working with:

  • A digital download pattern of Freedom Flight (which includes step-by-step instructions, graphic illustrations, and a master template)
  • And access to a step-by-step video tutorial series, as well
  • She also has the outer-border squares that she’s already appliqued and embroidered
Building blocks of a new Freedom Flight quilt

Access to Our Hands-On Help

In exchange for being able to share Carrie’s story, and pictures of how she adapts Freedom Flight in her heirloom quilt, we’re offering her hands-on help and access to our ideas and brainstorming. 

Depending on what issues Carrie may or may not have, we’ll keep adding updates:

  • In articles
  • Social media posts
  • Pictures
  • Possibly videos

That last one, videos, may come about if Carrie wants to talk to us directly, probably via a Zoom call. 

In our next article we’ll share the advice that we initially gave Carrie – which was basically our personal experience with putting shaped centerpieces onto background squares.  We shared several different ideas, and we’ll see which option she does decide to go with.  (The hand-piecing should add an interesting element).

Appliqued Quilt block with U.S.A.

See you over there!

Your guide to quiltivity,

Karyl (aka Princess YellowBelly)

Unique Product Supplier: Laura Piland

unique product supplier hydra scales pattern
Princess YellowBelly Designs logo

Welcome to a new segment for Princess YellowBelly Designs! We’ve shared amazing artists with you before (and we’re about to again), but we’ve realized that there’s another kind of category.

Really we should have figured it out before, because it’s our own category. And it’s artists’ sharing their creativity so other’s can use their ideas.

It’s a beautiful place to be.

And since we’ve narrowed it down, we’ve realized that a lot of these wonderful artists are in the sphere of Etsy. Again, it shouldn’t have surprised us because we ourselves got our start on Etsy.

Yet we didn’t think of sharing our unique product suppliers – patterns, knickknacks, specialty beads, trims, and ideas in general – until we purchased a very special pattern.

How We Met a Unique Product Supplier

And now we at Princess YellowBelly Designs would like to introduce to our first brave, unique, and wonderful Unique Product Supplier: Laura from Slice of Pi Quilts.

What made you start creating your own patterns? 

Joining Instagram! A friend encouraged me to join the social media platform to share my quilts. Once I did, I found a wonderful community of other quilters that I had no idea existed! Other people began asking for patterns for the quilts I was making, and it turns out, that was my dream job!

What inspires you?

I’m *always* hunting for quilt inspiration! I take photos of floor tiles, tissue boxes, walls, shadows…anything and everything that catches my eye. I keep those photos in a folder in my phone, then I scroll through them when I’m in the mood to start a quilt!

Why do you enjoy making your own patterns – and inventing your own techniques?

When I made my first quilt, I had no idea what I was doing. I watched YouTube videos and called my mom and grandmothers dozens of times to ask questions. I loved the thrill of figuring it out! I promised myself right then that I wanted to try something new with every quilt that I made!


Unique Product Supplier Laura Piland with a big white flower as a hat

Biography

I’m Laura! I’m a quilter, pattern designer, deal hunter, and homeschooling mom of three boys! I’m also an ex-math teacher – and with a last name like Piland – there’s a strong love of pi in our house!

I started quilting in 2010, then started Slice of Pi Quilts in 2016. I have made over 400 quilts in that time! I love inspiring others to quilt and am always trying something new!

I live outside of Kansas City, MO.

*We’ve used your Hydra scales pattern ourselves (and it’s awesome!) In fact, hang around till the end, and we’ll give you a glimpse of just what we did with Laura’s pattern…

How did you come up with that one?  How many different places/ways have you used it?

That’s such a fun quilt! I had just finished making a quilt with prairie points, and wondered if I could make other shapes instead of triangles.

Turns out, you can!

unique product supplier hydra scales pattern

Teresa Coates of Shannon Fabrics made the quilt using their Cuddle! I think that’s a brilliant use of the pattern! Wouldn’t it be so fun to make each scale with a different textured fabric! What a great baby quilt that would be!

What materials do you use? 

I’m always trying new tools and techniques, but I do sometimes use non-traditional fabric too! I have made quilts with selvages, minky, fleece, lace, and even rayon fabric!

How long does it take to design something new?

Sometimes, inspiration strikes and I can’t scribble the design on the back of a napkin fast enough! Other times, it takes months for an idea to simmer long enough to be ready for cutting up fabric.

How many have you made in all (or a rough estimate)?

I have finished 403 quilts since 2010. Yes, I have a spreadsheet! That does not include other projects like pillowcases, zipper pouches, or other non-quilty projects, which I usually have a dozen or so of those each year too.

Unique Product Supplier Laura Piland with a big white flower as a hat

What’s the weirdest thing you’ve ever made?

It’s not sewing, but I recently made a giant white flower fascinator with cardstock and hot glue for a local Kentucky Derby themed party! I even won first prize for it!

Do you do any selling or displaying at fairs?

I teach quilting to kids in our local 4-H club, and they display their quilts at our county fair! I do not sell any quilts, but I will occasionally take quilts to the local quilt show.

How do your boys and homeschooling affect your quilting passion?

Our days are definitely a blend of school and work! While the boys are doing school, I’m often multi-tasking and filling pattern orders or writing a blog post. The boys are also quick to point out barn quilt blocks, quilt shops, or quilts in books and movies!

Coming soon…

What’s new or coming next for you?

I have three new quilt patterns coming out next month! I’m working behind the scenes now on making the samples and finalizing the patterns!

What’s the best place for our readers to find and/or contact you?

If you’re on Facebook or Instagram, I’m Slice of Pi Quilts there.

And whatever else you do, I highly recommend that you sign up for my newsletter on my website!

Princess YellowBelly Highly Recommends Slice of Pi

Laura is, in our humble opinion, a brilliant artist. We can also tell you that we’ve made her Hydra scales pattern for ourselves. Her pattern style is clear, cohesive, easy to follow, and really a lot of fun.

From all those hundreds of little hydra scales, we managed to adapt and change her idea to suit our needs.

*Incidentally, that’s a great metric for whether or not a pattern is good: it should be easy to adapt.

Now that we have the Hydra Scales pattern, I know that we’ll be using it many, many times in the future. Probably – sorry Laura – in ways that our wonderful Unique Product Supplier wouldn’t even recognize.

Hydra scales from the unique product supplier
Palm tree made from hydra scales

If you want to, you can watch the whole interview with Laura, FREE, on our official YouTube channel. If you want to be notified (and reminded) when we next go live with a unique artist like Laura, subscribe to our newsletter! It’s fast, it’s free, and you get a great gift as well.

CHALLENGE: How Would You Use Quilted Autumn Designs in Your Interior Decorating?

A little fiddler boy in the middle of a elegant autumn leaf candle holder
Princess YellowBelly Designs logo

Don’t you just love autumn designs?  I know that Princess YellowBelly does – in her role as my quilting muse she seems to return to autumn designs and elements for probably around half of all my original quilts and quilting patterns.

Which leaves us with A LOT of autumn, harvest, and fall quilts – or at the very least, autumn-interpretative.

For instance, our Tiger Quilt isn’t technically an autumn design, but it can be used in that way!

Shere Khan tiger quilt without borders

Which leaves us with a weird problem.  It’s one of those problems that we’re actually glad that we have, because it’s a problem of overabundance.

We have too many fall-themed quilts, wall hangings, and table toppers!

It’s like Old MacDonald had a farm, and on that farm he had some fabric and some fall leaves and left them alone for a while.  And having hung many of these projects on my walls for my internal “changing of the seasons” decorating efforts, I think my creativity is running a little low.

Please Help Us Get Our Creativity Going this Fall!

Would you please share with us how you decorate for autumn?  Especially if you use quilts, wall hangings, and other forms of fabric art as part of your interior decorating scheme.  But even if you don’t really use fabric art in your home, please share with us how you make a fall-ish look. 

  • Do you decorate more for Thanksgiving or Halloween?
  • Do you do a lot of decorating or minimal decorating?
  • How would you incorporate unique pieces like furniture? 
  • Would you use antique – well, anything – to help display a wall hanging or quilt? 

Please let us know your ideas, your decorating tips, your past experiences!  Fall will be on us before we know it – thank goodness, since I’m done with the summer heat – and I want to do something really unique. 

We’ll be sharing some of our past fabric art decorating methods on Facebook & Pinterest, and there’ll be some fun prizes for anyone who gives an answer!

Name It and Claim It – How to Name a Quilt with a Quilted or Embroidered Nametag

Ocean Maidens by PYB Designs quilting - how to name a quilt
Princess YellowBelly Designs logo

Almost all quilters – myself included – advise that you name your newly finished quilt with a nametag; today we’re going to talk about why we name and claim our fabric masterpieces, and more practically, how to name a quilt.

The second best part of giving birth is that you get to name that tiny scrap of humanity anything you want.  Why do you have that privilege?  Because you produced him/her!  Giving everything a name was the 1st job that God assigned to Adam in the Garden of Eden so, to my way of thinking, naming something is a right, a privilege, and the honor of it naturally goes to the person who produced “it.” 

The same is true of anything you produce during your times of quilivity. 

The Power of a Name

Anything that you sew becomes yours, you are the creator – therefore – you are the namer.  And, once you name something you are actually claiming it. Just the fact of the naming implies the act of claiming.  

The wonderful thing about naming something is that it gives you all the power. 

Not only does the thing that is named have to abide by your decision but so does everyone else!! It doesn’t matter what anyone else thinks about the name you bestow on your creation, you alone have all the power in this equation, so use it to the best effect.  Below are a few ways that you can creatively name your creations.

The most beautiful nametags are often the ones that break the rules

How to Name a Quilt with Pre-Printed Tags

You can purchase pre-printed tags where all you have to do is fill in the blanks.  I’ve seen a few of these available in quilting catalogs, and they seem like a good way to get the job done very quickly, but to my mind there are a number of difficulties as well. 

Grain of Salt Advisory – I’ve never used a pre-printed tag, so these thoughts are based on opinions and guesswork, not lived experience.

Problems with Pre-Printed Nametags

  • What if the name of your project doesn’t fit on their lines? 
    • You will have to make your own tag then.
  • What if there aren’t enough lines? 
    • You will have to make your own tag then.
  • What if there isn’t enough height between the lines? 
    • You will have to make your own tag then. 
  • What if the style of the tag is all wrong and doesn’t correspond at all to the theme of your project? 
    • You will have to make your own tag then.

How to Name a Quilt by Making Your Own Name Tags

Obviously, sooner or later you are going to have to make your own name tags – by this I mean both the background, fabric size, shape, and edging of the tag as well as the writing on it. 

unfinished nametag

So you may as well learn how to make them right, learn how to make your letters the way you want them, how to measure and draw lines for all you want to say, and how to attach them to your projects. 

How to Come Up with a Name for Your Quilted Masterpiece

While you’re doing all of this you should be trying out different names for your project.  Naming something is fun, and so it’s a good idea to get your family involved.  Try out a different name every few days – you will know instinctively when you’ve found the right one.

Use Alliteration 

Words go very well together when they all start with the same letter and they’re much easier to remember.  So, if at all possible, alliterate!

Give Your Creation a Name That Correlates With the Theme of the Project

For instance, since our horse quilt had 11 different panels we decided to name it “Home Pastures” because all of the horses were in their separate, home pastures. We named our frog on a lily pad – “My Pad” – because the frog was on the lily pad but also because he has attitude. 

So think mostly about what your quilt is saying while you think of a name.

Try to Keep it Short!

The longer your quilt’s name is, the more letters you have to sew.  This is not only tedious, but the longer the name, the bigger your tag has to be.  The longest name I ever gave to a project was “Dragons in my Window” and the darn thing took me all morning to sew onto a tag! Brevity is the password here!

Make it Personal

If your project is for a specific person it’s great if you can incorporate their name into the name of your project.  I once made a rose quilt for a girl named Cassidy Rose, and guess what I named it – “The Cassidy Rose!” 

The fact that I named it after her almost thrilled her more than the quilt itself.  Be creative.  I named the Sunbonnet Sue quilt I made for my oldest daughter the “Sunbonnet Suzanna” and she treasures it.

How to Make a Name Tag

Once you’ve settled on a name for your project, you can start thinking about what you want the tag to look like. 

This includes not only the shape of the tag, but also:

  • The color of the background fabric
  • The color of the thread for the letters
  • The shape of the letters themselves,
  • How you’re going to construct the tag
  • And how you’re going to sew it onto your finished project 

Since I don’t usually make my tags until the project is completely done, I have a lot of time to think and all of this thinking usually produces a clear picture in my brain of the name tag by the time I’m ready for it.

How to Name a Quilt by the “Nuts & Bolts”

Every craft has its “nuts and bolts” elements.  A mechanic has literal nuts and bolts.  A cabinet maker has wood and glue.  A quilter has fabric and thread.  And whatever you do, it all comes back to your nuts and bolts.

Making a name tag is back to the fabric and thread, just like everything else.

Background Fabric  

The first rule of thumb here is that your background fabric should – if at all possible – be a fabric that you used on the front as well.  This helps to make the project more cohesive (such a big word!)

But also, on a more practical level, it gives you a chance to use up some of the leftover scraps from your project. The tag is 2 layers of fabric thick, so that you can use one fabric on the back of the tag and a different fabric on the front if you like.  Or you can make the front of your tag a crazy block or a patchwork or whatever floats your boat.

You can also make your tag into almost any shape you like – this is where the creative juices can really flow and why homemade tags are so much more fun than store bought ones!

Outside Edge

Once you’ve decided on the background fabric and the design and shape of your tag you need to construct your tag.  You can do this in one of 2 ways.  

Ocean Maidens name tag

How to Edge Your Quilted Nametag Version #1:

Layer your 2 fabrics with right sides together and sew a ¼” seam all around the outside, leaving a 4-5” gap along one side.  Don’t leave the gap in a corner, as corners are very hard to get straight when you turn your fabric.  Turn your tag right-side-out and press in the edges of the gap with a hot iron so that they match the corresponding edges.  Sew this down with a matching thread right along the outside edge of the tag.  

How to Edge Your Quilted Nametag Version #2:

Layer your 2 fabrics with the wrong sides together and pin.  When you have all the letters sewn down and are ready to sew your name tag to the back of your project, you can finish the raw edge in one of 3 ways.

  • Sew a ribbon such as grosgrain just along the edge of your tag so that it hang off the edge approximately ¼”.  Grosgrain ribbon has a nice finished edge, and with the raw edge covered you can sew the outside edge down quickly and easily. I did this with the tag for Dragons in my Window.
  • Sew a nice, wide satin stitch all around the edge of your finished tag.  Depending on how well your machine does this, you may have to go around the edge twice – I often do.  Sewing the edge like this will make it curl up but all you need to do is steam iron it or spritz it with spray starch and iron to make it lie flat again so that you can sew your tag on neatly.  I used this method to sew the edge of my Ocean Maidens quilt.
  • Make a short length of binding and sew it around the edge to finish it off before you sew the tag on. Check out my blog ‘Binding Tips & Tricks’ if you’re not sure how to do a binding.  

Measuring & Marking for Your Nametag

Once you have decided how to finish your edge, you need to mark your tag and draw lines so that your lettering will be straight and centered.

You’ll want to get everything on 3 lines if at all possible but if you can’t, use 4 – no more! 

If you can’t fit everything onto 4 lines then you need to re-think, because there are 3 things that should go onto each tag that you construct:

regency cameo name tag

If you can’t fit everything onto 4 lines then you need to re-think, because there are 3 things that should go onto each tag that you construct:

  • Name of the project
  • Your name
  • And the date

That’s it!  Anything more is superfluous.

Measuring the Distance (it’s more important than you’d think)

To start, measure the length of your tag.  Starting 2” down from the top, draw your first line all the way across. 

This is the name line.

Measure how many inches you have left and divide it evenly in two.  Remember, you have to leave enough space between your lines for the height of the letters.  I like to leave at least 1 ½” if I can because it makes it so much easier to read.

If your fabric is dark, draw your lines with chalk but if it’s a light-colored fabric a black erasable pen is always a good choice.

Measuring by the Math

Next, count the letters in each set of words and divide them by the length of the line you have drawn.  Remember to factor in an empty space at the front and back of each line, and, if your name has two words or more, a space between each word. For example, if your line is 8” long and you have 5 letters in the name of your project, you should make your spacing marks 1-1/4” long each.  This gives you a place for all 5 letters, an empty space plus an empty space at the front and back end of the word.

If your machine has an embroidery feature that you can program to sew letters and words that’s great – my Bernina did that till it quit working – it takes all the figuring out of the equation for you. 

But honestly, measuring your spacing for your letters isn’t rocket science.  It sounds complicated on paper, but it goes pretty quick in practice.

Stabilizer

In order for the stitching and appearance of your letters to be smooth and even you will need to pin a piece of Tear-Away Stabilizer to the back of your tag. 

Simply cut a piece of stabilizer a little larger than your tag, iron it flat and pin it to the back of your tag.  This helps to stiffen your tag and helps your fabric to move smoothly and evenly over the feed dogs. 

Once you’re finished stitching you simply tear it away from your letters. 

It’s easy to do and will make a world of difference to the final appearance of your tag. 

You can find Tear-Away Stabilizer in any store that sells fabric – it’s usually in among the batting and interfacing packages.

Sewing Your Letters

Once your measuring and marking is done, draw in your letters if you’re doing it by hand.  I prefer using cursive because the letters join naturally and you don’t have to start and stop at the beginning and end of each letter to tie off. 

It all depends on what I want my tag to look like.

Once again, use an erasable pen on the light fabrics and chalk on the darker ones.

HINT: Only draw one word or line of letters if you’re using chalk because it tends to rub off quite quickly. 

HINT:  I discovered that a pink glitter permanent fabric marker works real well for marking black fabric as well and lasts a lot longer than the chalk!

Once you have your letters marked, set your machine to a narrow, tight satin stitch and follow along your marks slowly.  There is no way to do this fast if you’re sewing your letters by free hand.

HINT:  Practice on a scrap piece of fabric first so you will get the stitch width, thickness, and feel of how the thread will work and look before you sew on the real tag.  Make sure that your practice piece is constructed the same way as the tag – 2 pieces of fabric and a piece of stabilizer so that you will know exactly how your machine will handle this.

Sewing on Your Name Tags – The Final Step in “How to Name a Quilt”

Name tags are usually sewn in either bottom corner of your project – right or left doesn’t matter.  Just make sure it’s in one of the bottom corners and is right-side-up.  I once sewed one in upside-down, and I did it by hand so I learned my lesson – always double check!

Ocean Maidens by PYB Designs quilting - how to name a quilt

There are three ways to attach a name tag to your project/

The First Way to Attach a Nametag is to Sew it by Machine

This option only works if you have a large section of very dark fabric on the front of your quilt where you’re planning to attach your tag.  Preferably black.  If it’s any lighter the stitching will show and mess up your pattern on the front.  Sometimes, like on Dragons in my Window, I sewed the bottom and outside edge of my tag by machine, and the top and inside edge by hand. 

Sewing your tag on by machine is much the quickest option, but unless you do it before you sew the backing down it is almost impossible to achieve.  So give it a think before you completely finish your project.

The Second Way to Attach a Nametag is to Sew it by Hand

I’m anti-hand-sewing nine times out of ten, but this is the option that I choose most often because I rarely have a section on the front that will not show extra stitching coming through from sewing on the tag. 

I don’t actually mind hand sewing tags since I did hand embroidery and cross-stitch for years. It’s actually a very soothing activity for me.  Use thread that matches whatever color edge you put on your tag and your stitching will be almost invisible, especially if you use a smaller whip-stitch.

The Third Way to Attach a Nametag is to Glue it On

If, for some reason you can’t hand-stitch it, fabric glue is your last option and it’s a good one.  Simply spread the glue – make sure it’s permanent – lightly over the entire back of your tag, lay it down on your project and then lay something heavy like a book on top of that and leave it for 24 hours.

Voila! A permanent bond and no hand-stitching involved!

I truly hope that you’ve enjoyed this article.  As a last note, please consider naming your smaller projects as well – like table runners and wall hangings.  Not only does a named, dated, claimed piece have more value in terms of money, it has more value in terms of human connection.

Until next time!

Your Guide to Quiltivity,

Karyl Fitzgerald

Princess YellowBelly Designs’ “original-pattern-designing, straight-seam-sewing, seam-ripping-mistake-fixing, verbose-wording, how-to-do-it-funner-faster-easier-instructing, quilting-artist”Resident Genius

P.S. You can contact me with questions or ideas for articles, patterns, whatever, at my personal email: karyl@pybdesigns.com.