Don’t you just love autumn designs? I know that Princess YellowBelly does – in her role as my quilting muse she seems to return to autumn designs and elements for probably around half of all my original quilts and quilting patterns.
Which leaves us with A LOT of autumn, harvest, and fall quilts – or at the very least, autumn-interpretative.
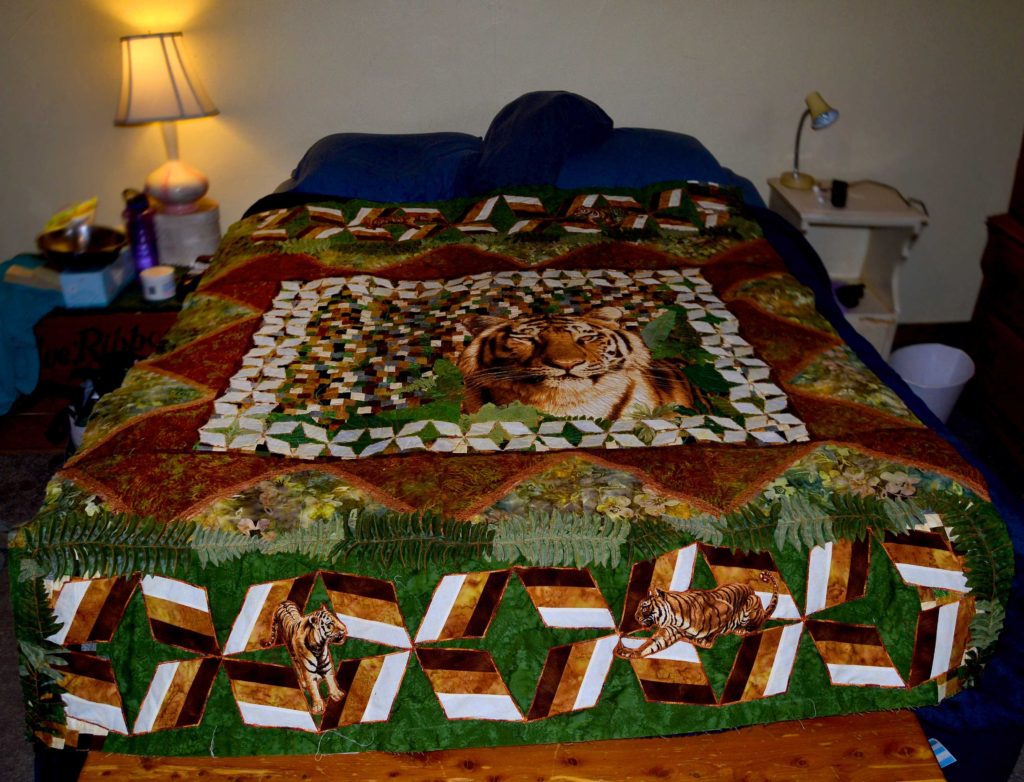
For instance, our Tiger Quilt isn’t technically an autumn design, but it can be used in that way!
Which leaves us with a weird problem. It’s one of those problems that we’re actually glad that we have, because it’s a problem of overabundance.
We have too many fall-themed quilts, wall hangings, and table toppers!
It’s like Old MacDonald had a farm, and on that farm he had some fabric and some fall leaves and left them alone for a while. And having hung many of these projects on my walls for my internal “changing of the seasons” decorating efforts, I think my creativity is running a little low.
Please Help Us Get Our Creativity Going this Fall!
Would you please share with us how you decorate for autumn? Especially if you use quilts, wall hangings, and other forms of fabric art as part of your interior decorating scheme. But even if you don’t really use fabric art in your home, please share with us how you make a fall-ish look.
Do you decorate more for Thanksgiving or Halloween?
Do you do a lot of decorating or minimal decorating?
How would you incorporate unique pieces like furniture?
Would you use antique – well, anything – to help display a wall hanging or quilt?
Please let us know your ideas, your decorating tips, your past experiences! Fall will be on us before we know it – thank goodness, since I’m done with the summer heat – and I want to do something really unique.
We’ll be sharing some of our past fabric art decorating methods on Facebook & Pinterest, and there’ll be some fun prizes for anyone who gives an answer!
The warmth, comfort and security that quilts generate are, quite frankly, priceless.
For some of us quilts have been there from our earliest childhood as symbols of warmth and love – gifts from Mom or Grandma; the quilts that kept us warm and safe for years.
Or, for those of us who are active quilters, our most poignant memories of quilts often involve the first quilt we made, and the events that surrounded it. The hopes, dreams, smiles, and tears that we stitched into each line of that carefully pieced coverlet.
Quilts are Tangible Links to Our Past
Whatever it is, that quilt is a part of our history, a living and impressionistic link to our personal past.
So without further ado, please welcome back our Unique Artist friend, Shawnna Casazza, who’s here today to share her own personal link to quilts that came from her Grandma, a woman whose incredible passion and dedication to the art of quilting still lives on today in Shawnna’s home and heart:
“My Best Quilt Memory“
When I was a child, my house was two short blocks away from my grandmother’s home. Her name was Wanda Morton, but being from the south, I called her Granny. I have many fond memories time spent at Granny’s house. The art of quilting runs as a common thread through my memories of Gran.
Granny was always working on a quilt.
Sometimes she would be cutting out fabric pieces using patterns she made from old cereal boxes. She patiently cut each patch of fabric by hand with scissors.
On my next visit I would see her piecing. Her needle, thread, and thimble were always close at hand beside her favorite chair. Eventually the quilt would take shape and be ready for quilting. Granny would load it onto her trusty lap quilting frame.
That frame would sit in the corner of her tiny living room, waiting for her to return to it after she was finished spoiling me.
Many of Granny’s creations ended up in our home. Some quilts were kept as special keepsakes, while others were in constant use in our daily lives.
Granny’s Quilts are Still Show-Stoppers!
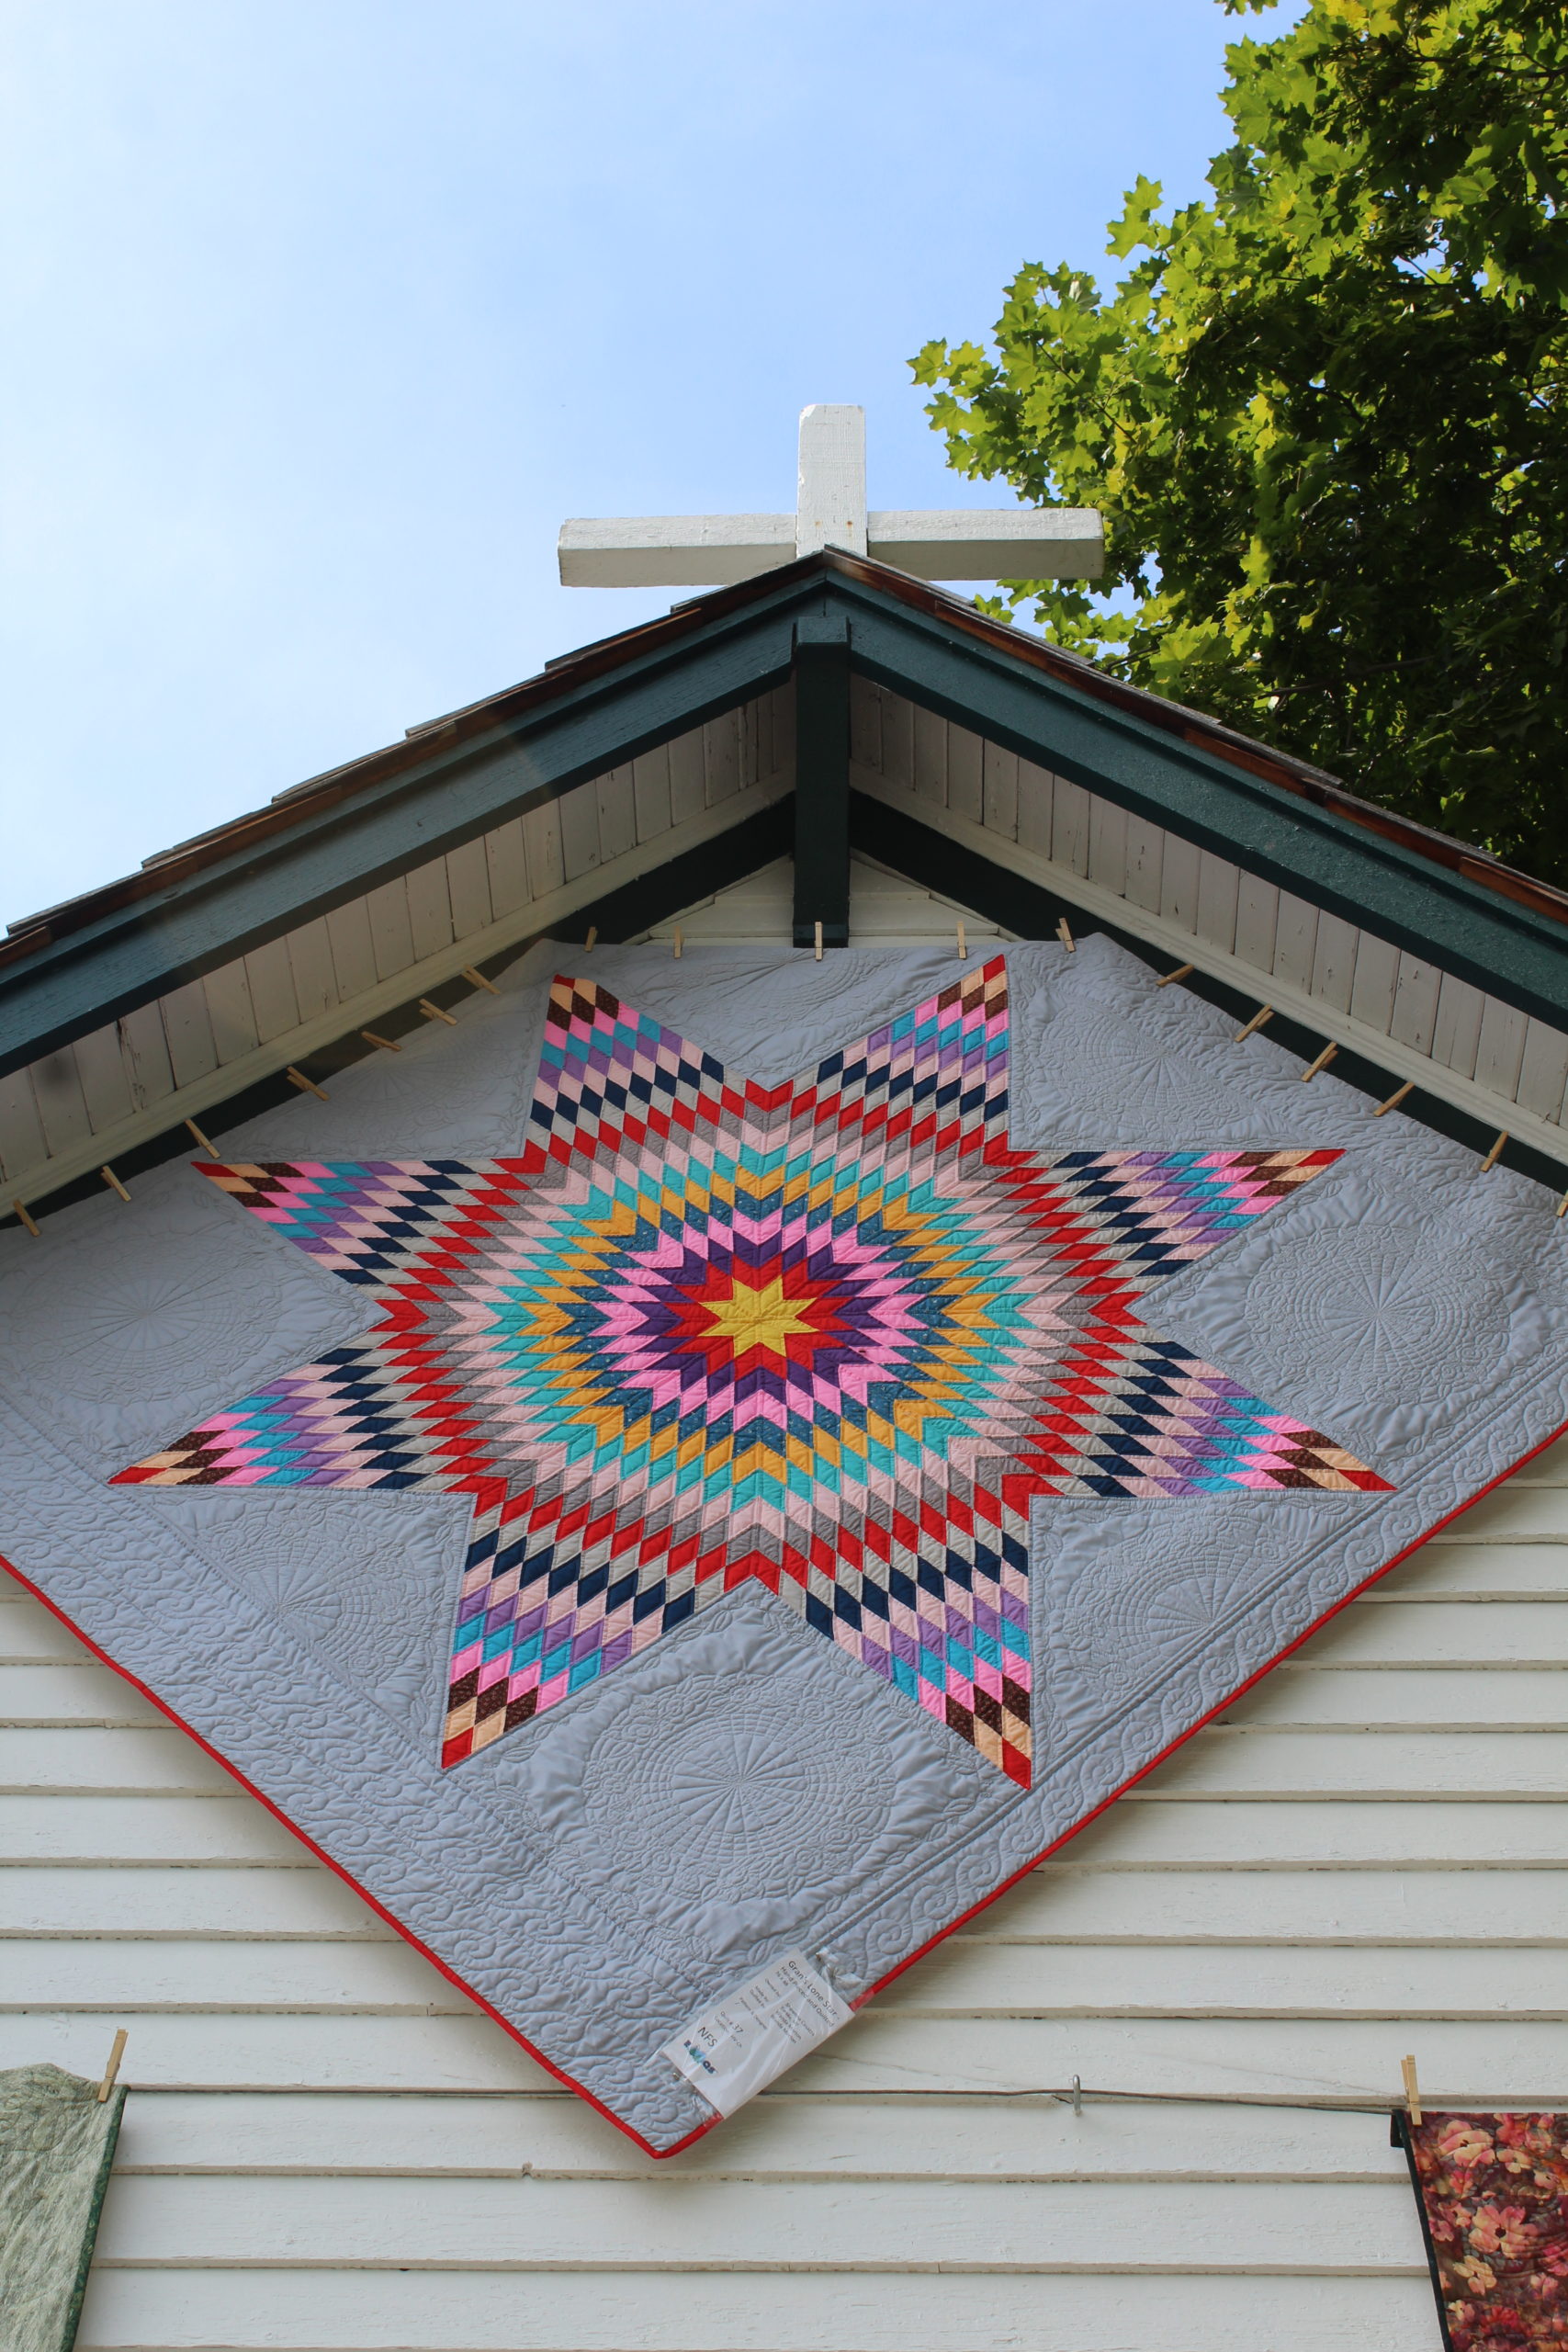
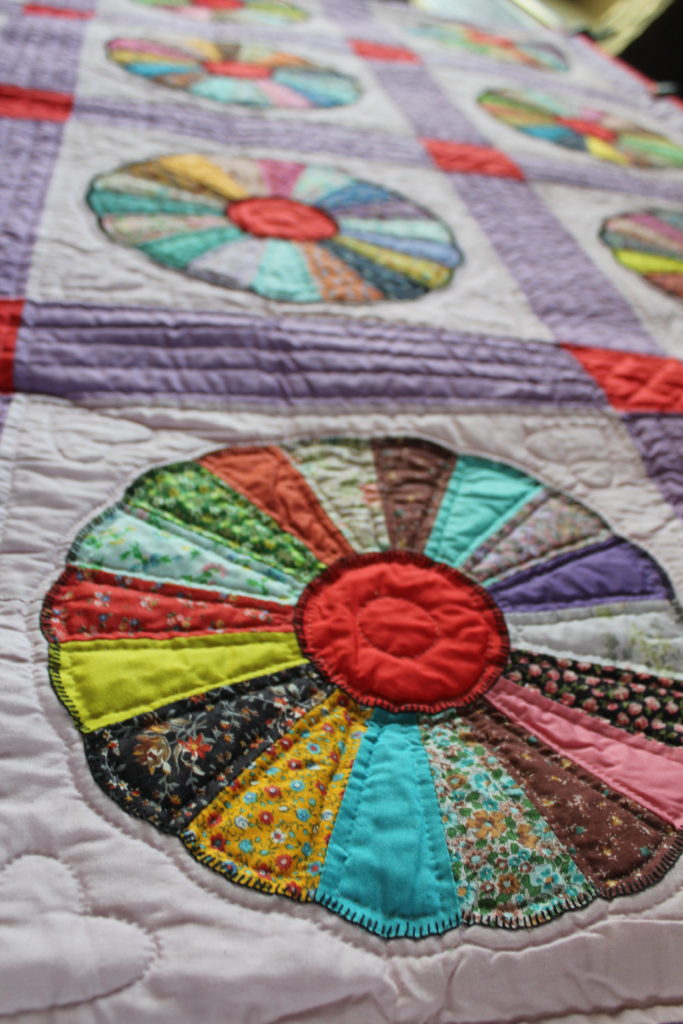
I took the pictures of Granny’s treasured “Lone Star” quilt at the 2016 and 2020 Eureka Montana Quilt Shows. This was a huge outdoor quilt show we used to have in our town every August. The show had over 500 quilts entered on most years. The quilts were displayed on the buildings all throughout town – it went on for nearly a mile and was truly amazing.
That Lone Star quilt is what I consider to be Gran’s best quilt. I loved seeing it displayed on the church in our town’s Historic Village.
What a Quilt Memory to Leave Behind!
Granny’s Continuing He/Art Legacy in My Home
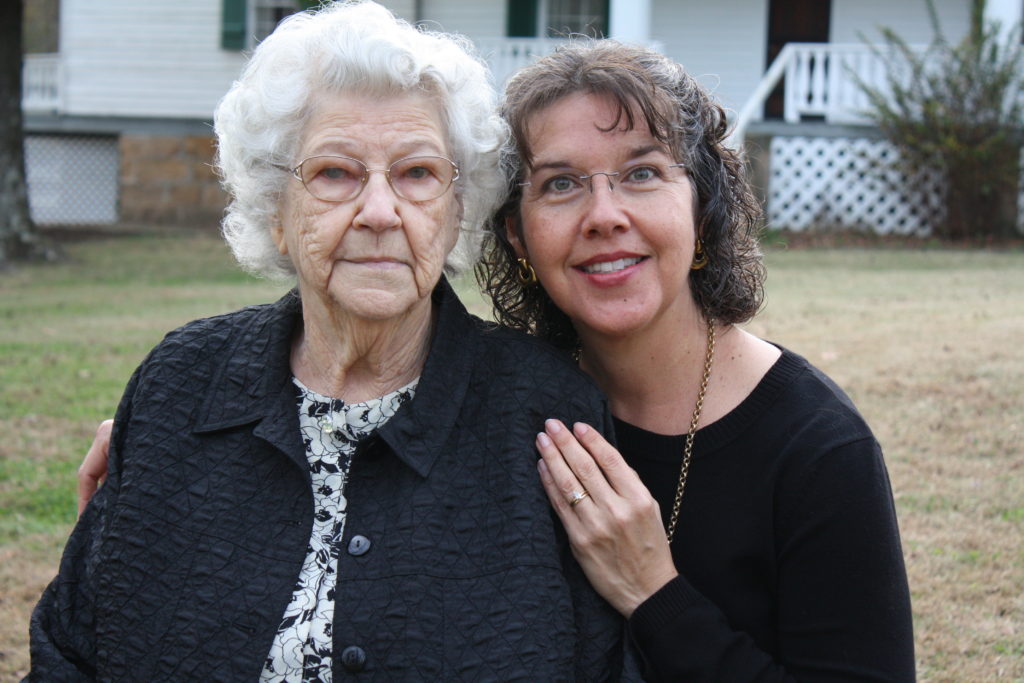
I can’t believe I don’t have any pictures of her actually quilting, but we rarely gathered at her house. (She had a very small house.) All of my pictures of Gran were taken at our house or on an outing.
Like this treasured picture I have of the two of us together about a year before she died.
Gran’s Best Quilting Achievement
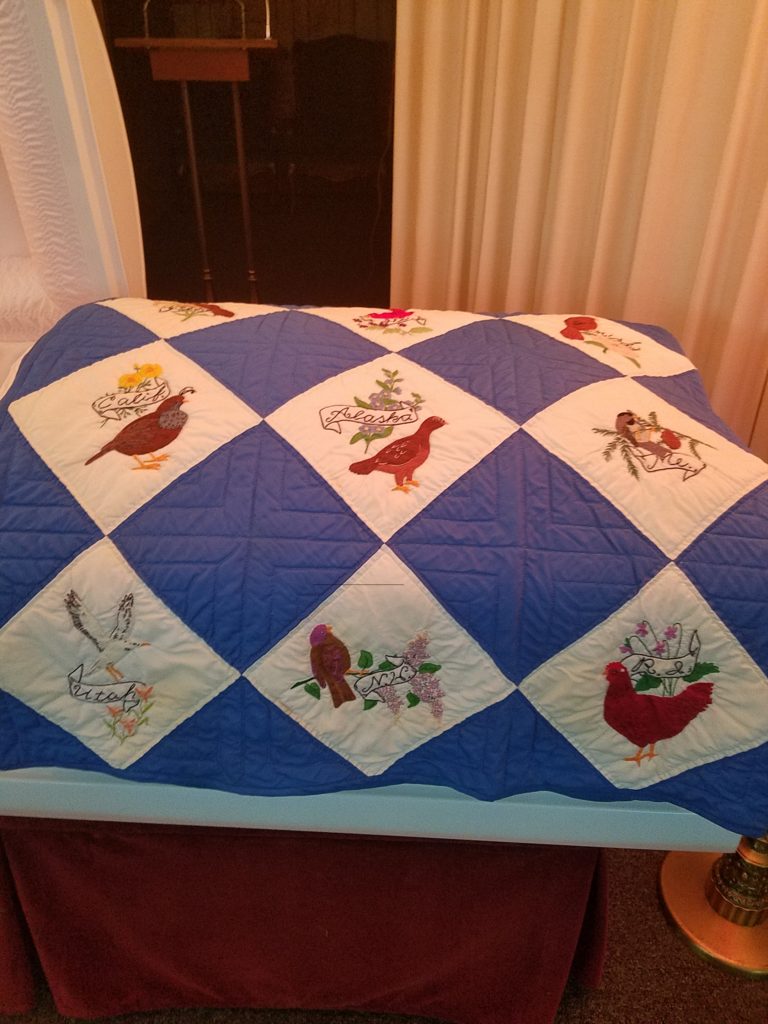
I only have one surviving photo of the quilt that Granny considered to be her best quilting achievement. It was an absolutely stunning embroidery quilt featuring the state flowers & birds from all 50 states!
When she passed away in 2018, we draped this incredible piece of art over her coffin.
Now that my Granny has passed away, her quilts have taken on even more significance to me. When I hold one of her quilts today, I remember the months of time, care, and attention that Granny poured into making it. My dear Gran left me many lasting reminders of her love for me through the legacy of her quilts.
What’s Your Best Quilt Memory?
If you were fortunate enough to have someone in your life who was a quilter, or if you yourself are busily sewing memories for your family, please share the story! Your memories – not to mention the fabulous works of art – are far too precious to ever be forgotten.
As I’ve gotten into restoring antique quilts that I’ve found at the thrift and antique stores around here I’ve been thinking a lot about what connects “you” to quilts and fabric art. What is it that makes each one of us love fabric art and quilting, beyond a simple appreciate for color, texture, or skill? Is it:
The fact that quilts make a room so much more homey and inviting?
The rich addition to our daily lives?
A warm blanket under which to sleep?
Something to hand down to the next generation?
Any of these things might – or might not – be true for each of us. Personally I do use my quilts, both to hang from walls and staircases and to sleep under. Although I have a rigid list of rules about actually touching the quilts!
But my theory is that it’s something deeper.
Your Quilting Heart
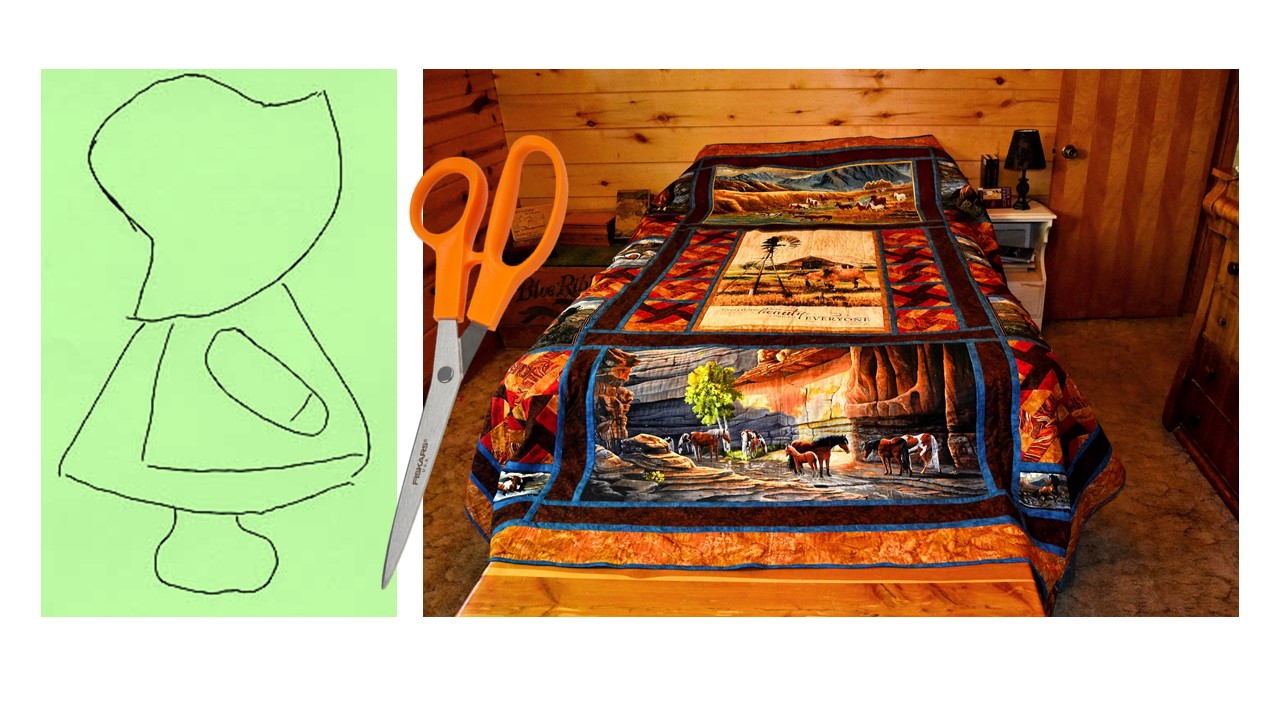
As you may know from our last newsletter, Suzanna recently entered a social media challenge hosted by Fiskars scissors on “Create Your Happiness.” She had only one story that she felt had a connection – and that was the story of the first quilt she ever made, and the first heirloom-level quilt I let her have on her bed.
It was a story that made me tear up, it was so beautiful.
She didn’t win, which makes me a little sad because I thought it was the most perfect quilting story ever written. (I might be a little biased). Suzanna, who loves to enter writing competitions, shrugged and said, “oh well, I’ll get the next one.”
But I still thought that her story about my husband’s grandmother, a Sunbonnet Sue quilt that I tied (yes, tied, if you can believe that I ever did something like that), and a pair of scissors was a beautiful picture of what our quilting loves are all about. The heart, the history, the art, the beauty, the love!
That’s why I quilt – and that’s why I hope you quilt as well.
While the he/art of love might be what ties us all to fabric art, it’s my belief that the individual stories of what connects you to quilts and fabric art is infinitely unique and special. So, win or lose, I’d like to encourage you to enter our latest challenge – open indefinitely – on your quilting story.
I look forward to hearing what connects you to quilting and fabric art!
Here at Princess YellowBelly Designs we’re all about quilts and every type of related quilting project, but driving all of our passion and interest in these types of fabric art is a deep love for a quilting life.
Like everything else in life, and in fact, life itself, quilting is a journey.
And that journey takes us through so many techniques and pursuits of joy and creativity, passion and struggle, hard work and results that it really becomes a totally consuming lifestyle. Or at least, that’s how it’s been for me. What started as a part-time hobby has become a whole business, and as I look at the art on every wall and every bed in my house, I can honestly say I’m on the path of living a quilting life.
The Imperfections of a Quilting Life
There is no way you can simply sit down at your sewing machine one day and sew a beautifully crafted quilt. It takes a lot of learning and practicing to get it right.
And by ‘right’, I don’t mean perfect.
Not Perfect – But it’s not bad…
You know how in recipe books the pictures of the dishes of food are always so beautiful and perfect? I have been cooking for decades and my finished dishes rarely look like those perfect pictures!! But they do taste great!
This is because the dishes in those pictures had to be made inedible in order to look that great. Suzanna took a college photography course once where she learned all about how to completely yuckify normal good food in order to perfect it:
How to replace ice cream with Styrofoam
How to glue hamburgers together
And how to paint dewdrops on with more glue and a glitter gun
Just like those food pictures, the photos on the quilting patterns are taken to create the illusion of perfection – which is unachievable for the vast majority of us.
Note: Not that I’m blaming anyone. I’ve watched Suzanna create “perfection” out of my admittedly beautiful, but definitely imperfect, quilts using the right camera angles, carefully staged rooms, and an almost freakish attention to detail.
My Top Tips to Living a More Productive & Fulfilling Quilting Life
But, I have discovered that the more time you take to do things right, the more amazing a project will look and the happier you will be with the finished result. And let’s face it fellow quilters, we walk this way on a quilting life path because it fills a need we have to create and the way we accomplish this is through quilting.
So, just like life, let’s strive to quilt the best we can – not perfectly – but as close as humanly possible.
We do this by doing each step as right as we can and the end product will be great!
Give Yourself Time to Do Each Step Right
Make a promise to yourself that you will take the time to perform each step and task in the quilting process to the very best of your ability.
Set your mind to it and remind yourself of it firmly whenever you are tempted to fudge, skip or ignore something. It always helps me to remind myself that whatever I’m making will likely –hopefully – outlive me, and I really don’t want the posthumous humiliation of my descendants being so underwhelmed or even embarrassed by my quilts that they sell them in garage sales!
Learn New Techniques Continually
Many things that look hard or impossible in many patterns aren’t really. I’ve found that one of the redeeming graces of most quilters is that they love to share their knowledge. You can find the know-how you need in quilting friends, quilting books and patterns and quilting videos. Isn’t YouTube a beautiful thing?! I have found that there is a YouTube video for almost any technique I want to learn and watching someone else explain it helps a WHOLE LOT!
And it’s free – which quilting books and patterns are not, and YouTube doesn’t take up any space on your shelves!
And, if you like our unique and original patterns and designs – you’re more than welcome to browse our shop of original printed photo panels and quilting patterns.
Don’t Be Afraid To Strike Out and Create Your Own Path to a Quilting Life
A lot of the patterns I’ve created have started with a common enough technique and then, as I think about what I want to achieve, my brain supplies alternate routes for getting there. If it doesn’t work, no one will ever know, and if it does, people will declare you a genius – or at least your family will.
Before using a new technique on a large project such as a quilt, try it out on something smaller instead so that you can practice and tear out and practice and tear out repeatedly if you have to without struggling with a large quilt or ruining it.
Time Is Your Friend!
Nothing has to be completed today, or even this week. The carefuller you are – I just made that word up – the more time it will take, so don’t rush. Enjoy the process instead. Remember, it’s all about the journey.
And speaking about time being on your side – it’s on my side to.
I have a whole other article about practical tips that will help you grow in a quilting life and lifestyle, and I’ll publish it, in good time. If you want to be sure not to miss that article – and all the other great exclusive content and reminders that you’ll get in our newsletter, please subscribe today, 100% FREE.
When you put in your name and email address you’ll also receive instant access to our 52 Fabric Art Success Tips report, a $22.95 value!
Subscribe today. It’s risk free, SPAM free, money free – and value packed.
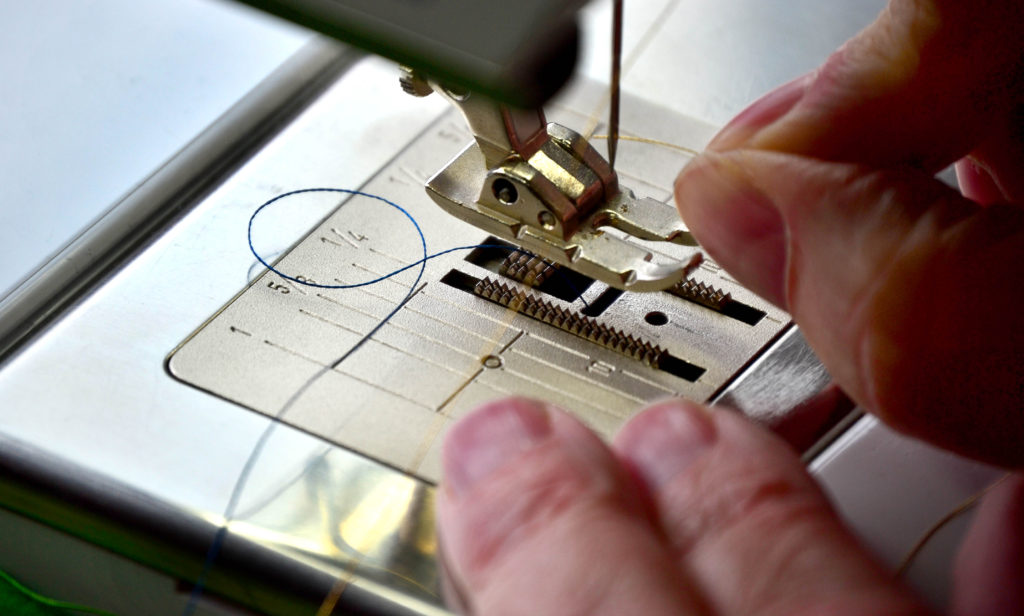
Every quilt must be finished off with an edge, or what quilters call “binding.” The trick is in knowing how to sew binding on a quilt, or a quilting project. Getting a beautiful, project-relevant, and most importantly flat binding onto the edge of your quilt is not as simple as it sounds.
It may not surprise my fellow rebelliously creative quilting artists to know that the first thing I did in learning how to sew binding on a quilt was to throw out the majority of “expert” advice.
It did take some trial and error, but I’ve been using my “Flat and Smooth Every Time” Binding Process for the last thirty or so projects I’ve done, and I get flat binding every time.
The idea of traditional binding is really pretty simple, you make binding by cutting your fabric into strips and sewing them together in one long strip.
The Hidden Binding Catch
Most quilt books and quilting patterns will tell you to cut your binding strips 2 ½” wide. You then sew your strips together on the bias, and then sew the strips around the edges of your nearly complete quilt sandwich.
There are, of course, a number of different techniques and instructions for how to sew binding on a quilt – some go fast and some are seriously time-consuming – but all of them will get an edge on your quilt.
They just won’t get your binding to look smoothly flat and professional.
Tricks & Tips to Get Your Quilt Binding to Lay Flat & Look Smooth Every Time
When I was new to quilting I tried a number of different techniques, line-by-line out of the quilting books, but I was not truly happy with any of them. And if you go back through some of my earlier projects and look closely at the bindings, you will see that my bindings didn’t lay perfectly flat.
Princess YellowBelly’s “Flat and Smooth Every Time” Binding Process
The true difference between our technique and every other quilt binding process is the strip widths. After that you can pretty much use any sewing technique you like, although our way of knowing how to sew binding on a quilt goes quickly and requires the least amount of nitty-picky work.
Step 1 – Pick the Right Binding Fabric
When you’re at the beginning of figuring out how to sew binding on a quilt; take a good look at your project and decide if you want your binding to fade away, to make a contrasting statement, or to be a frame for your project.
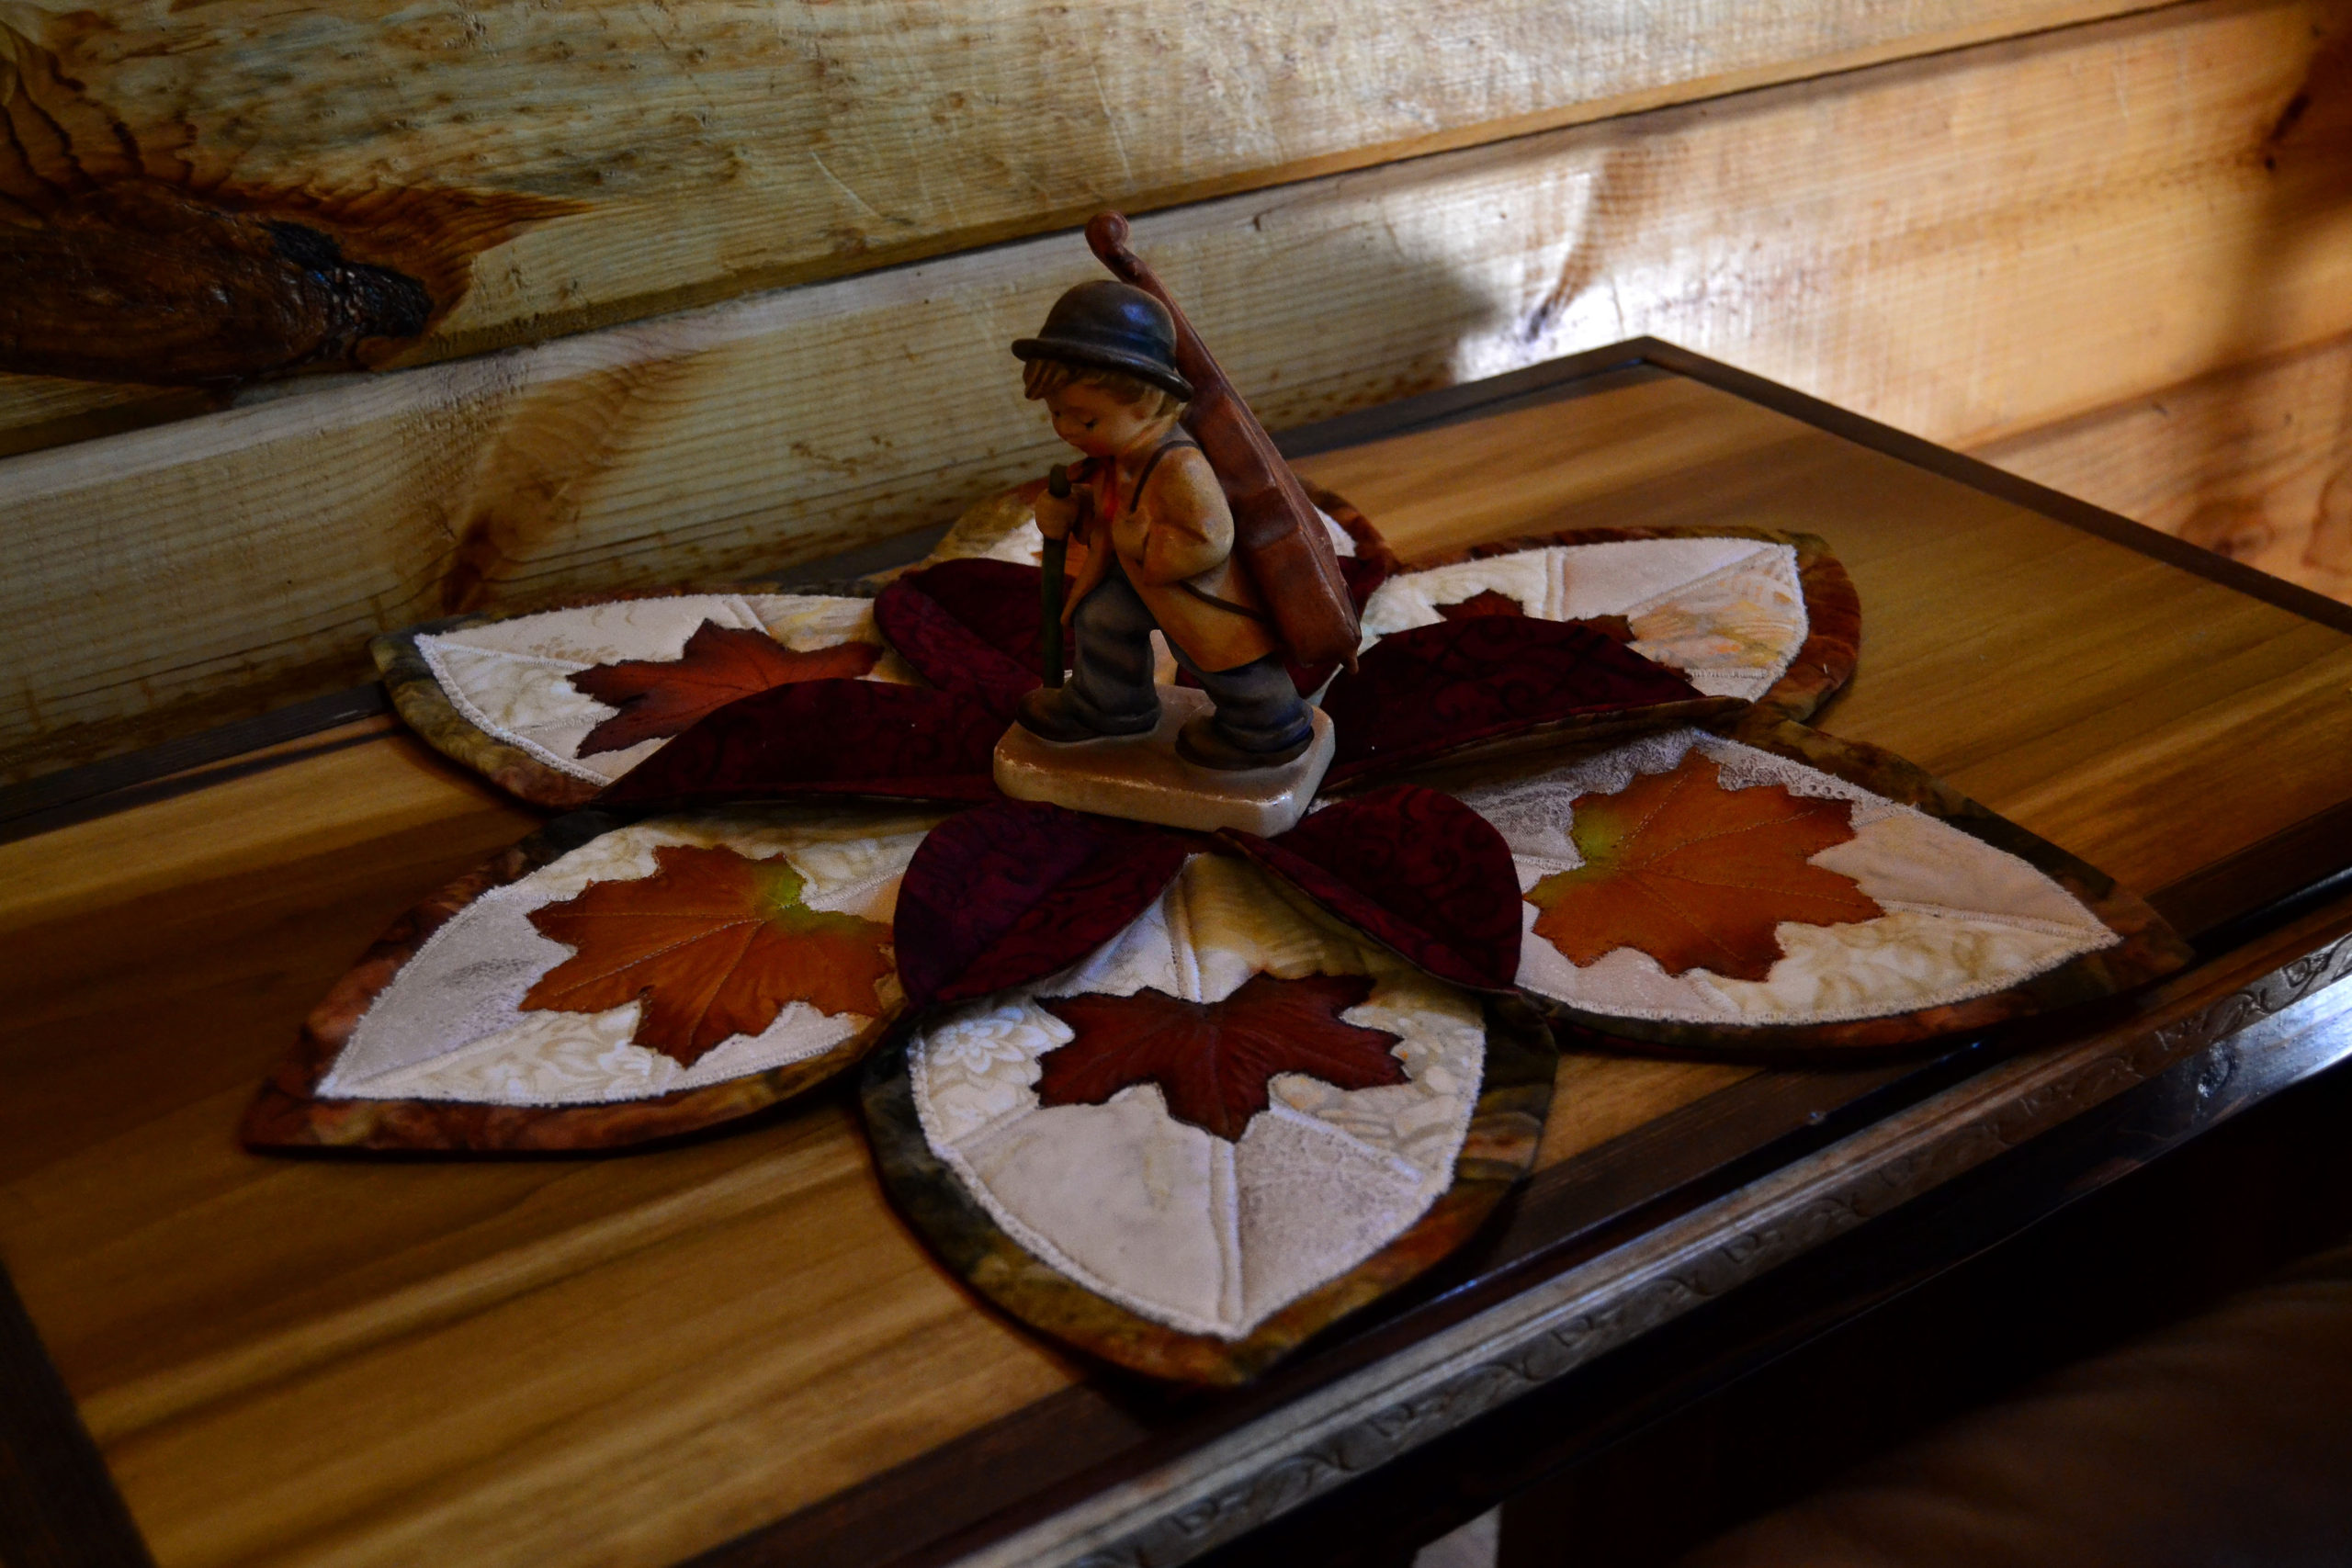
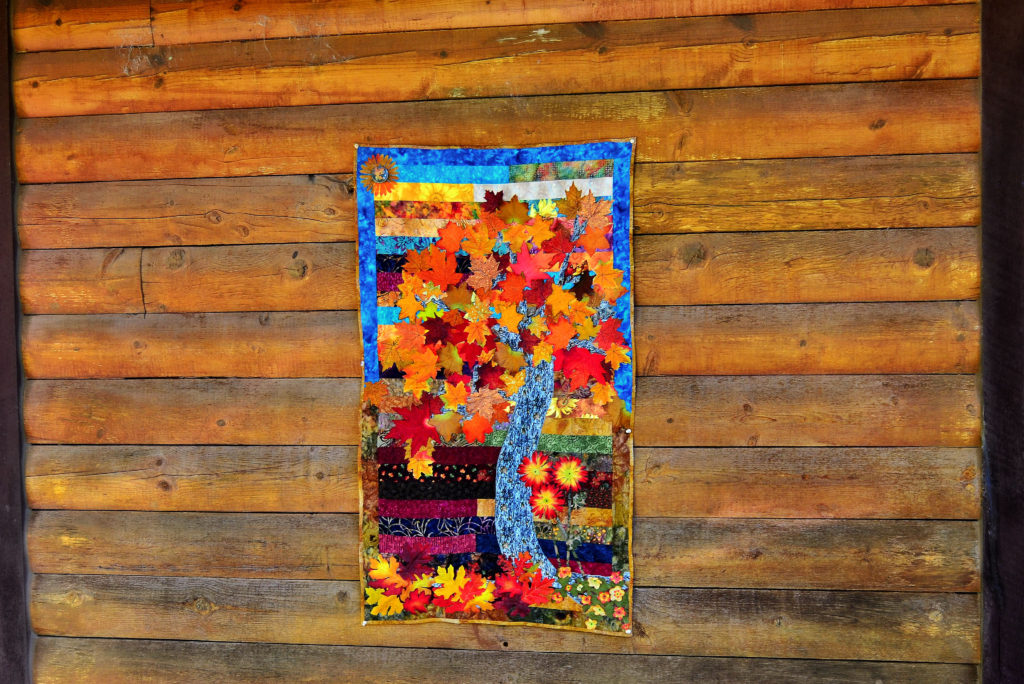
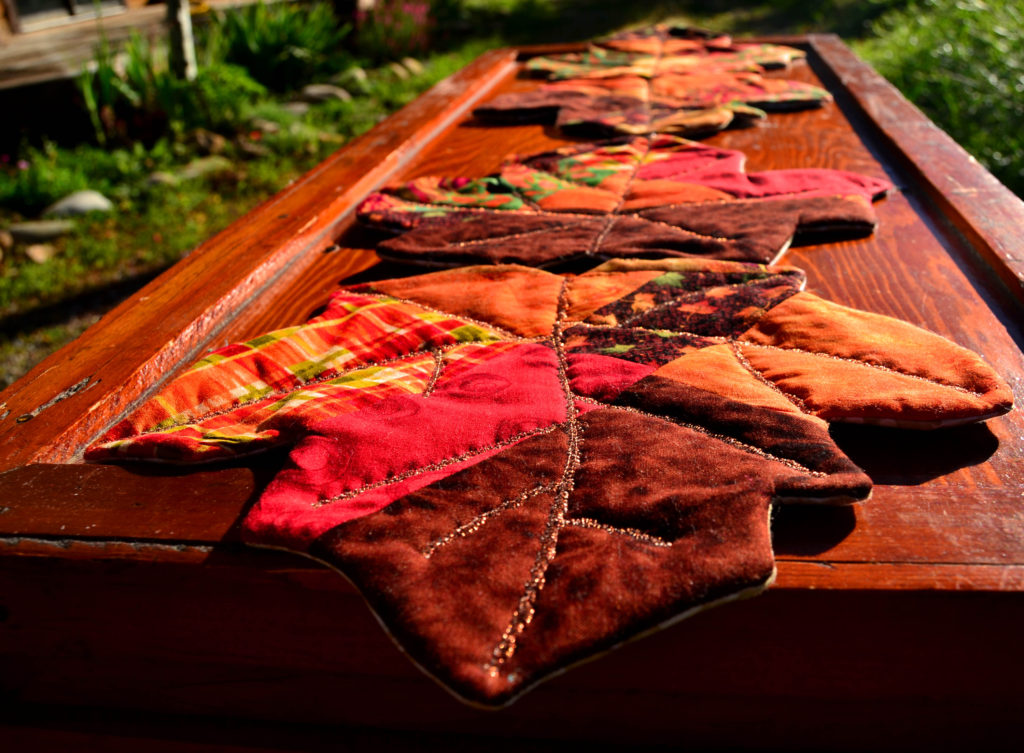
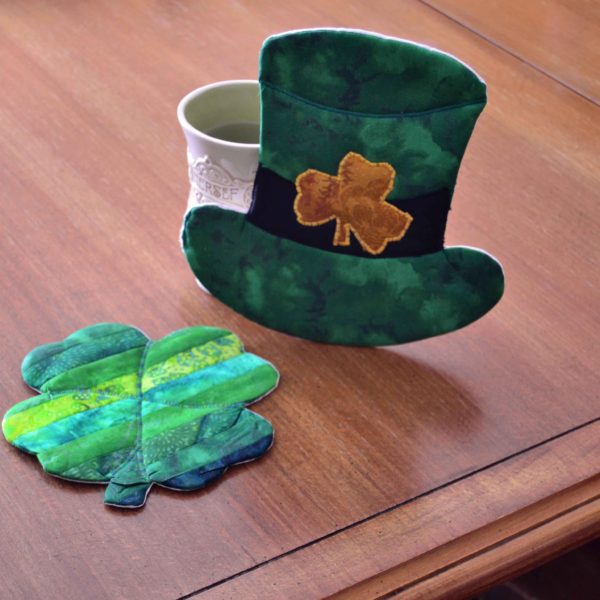
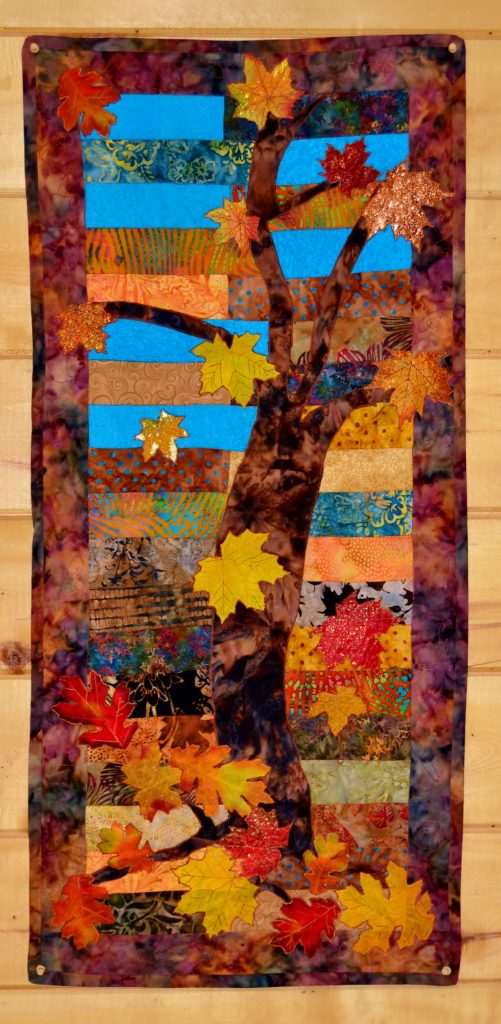
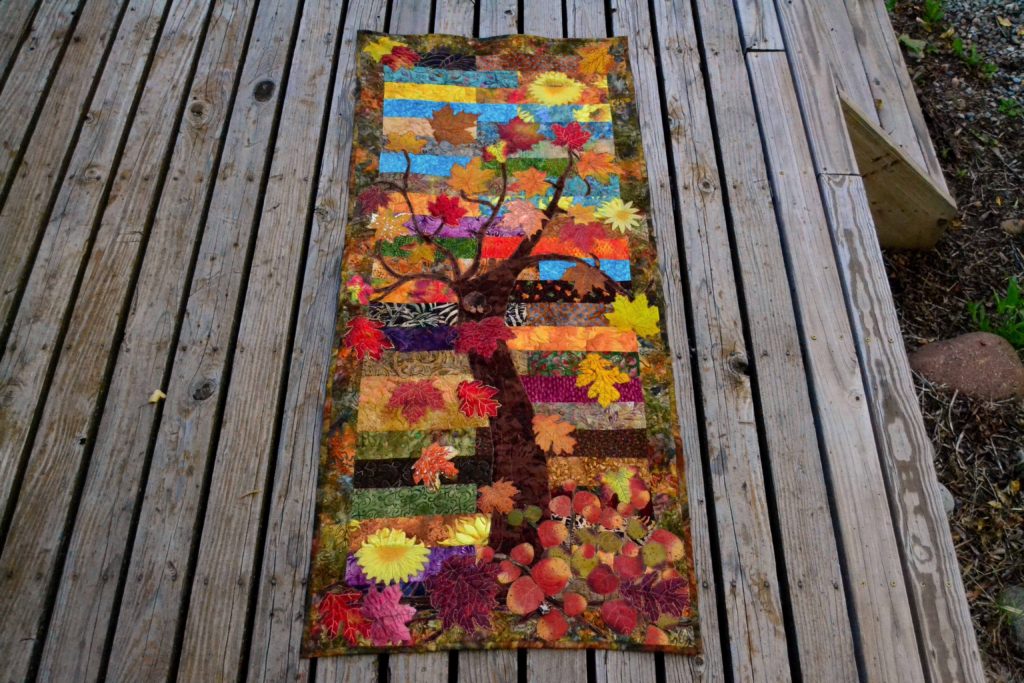
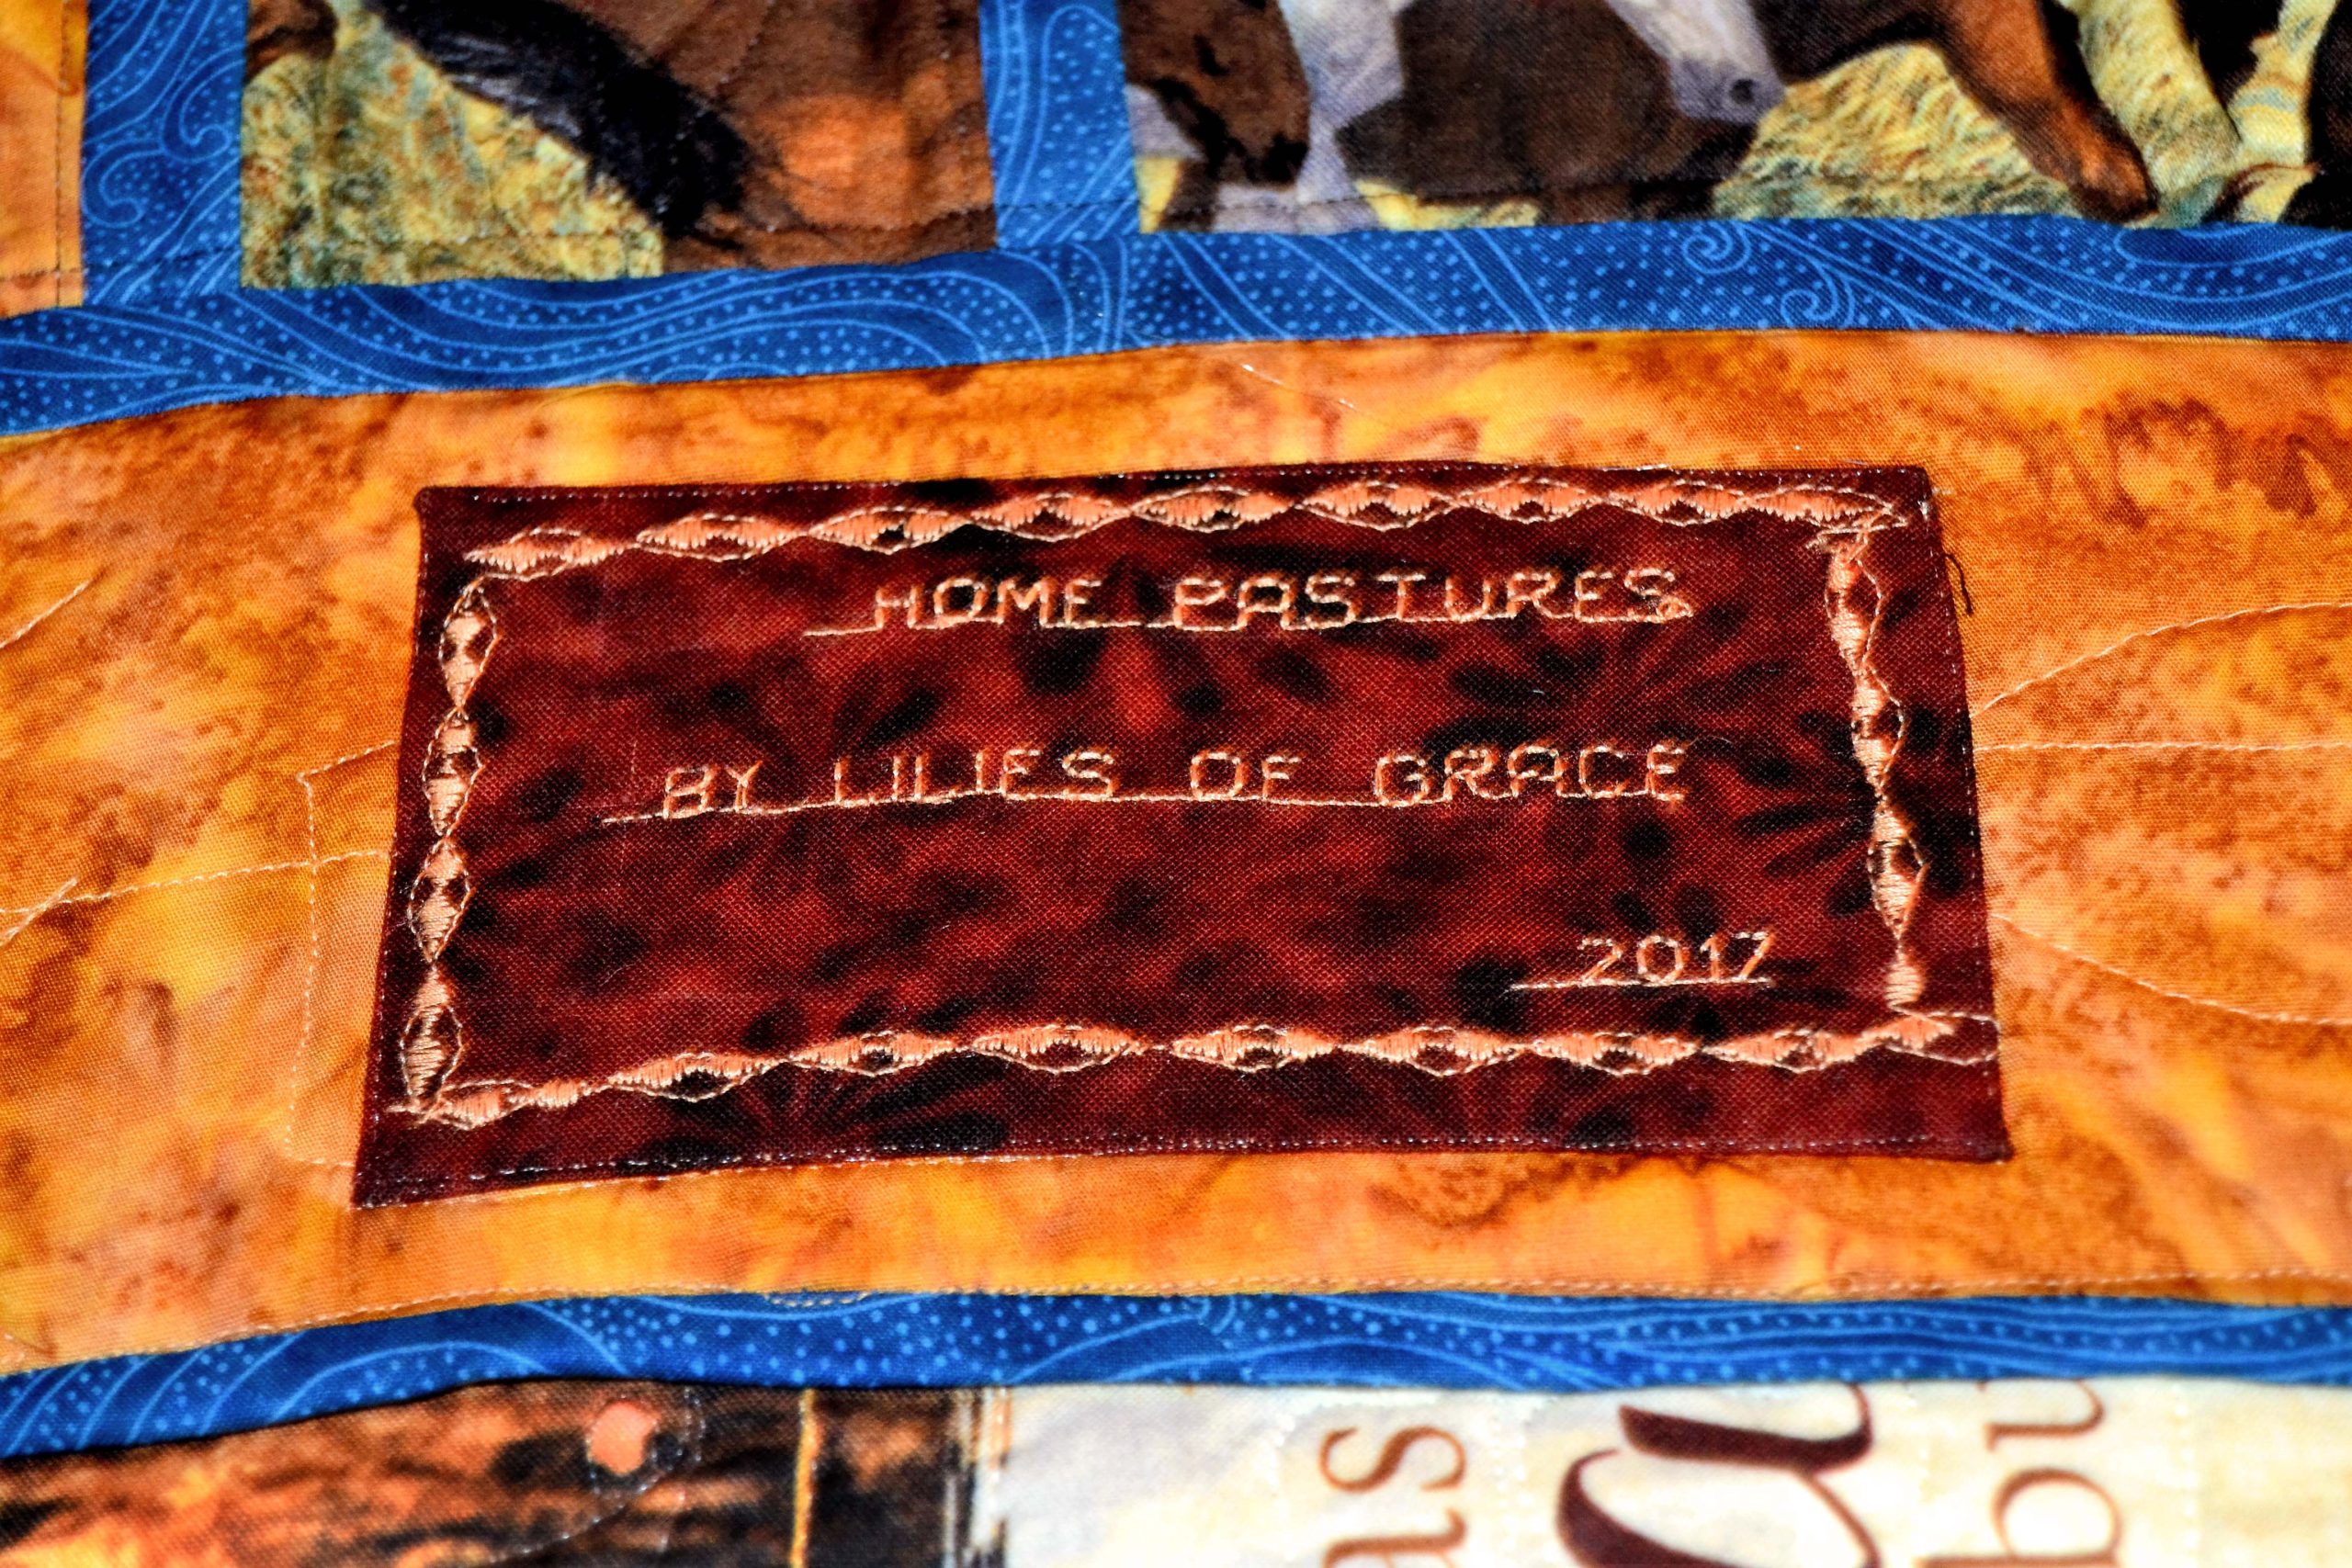
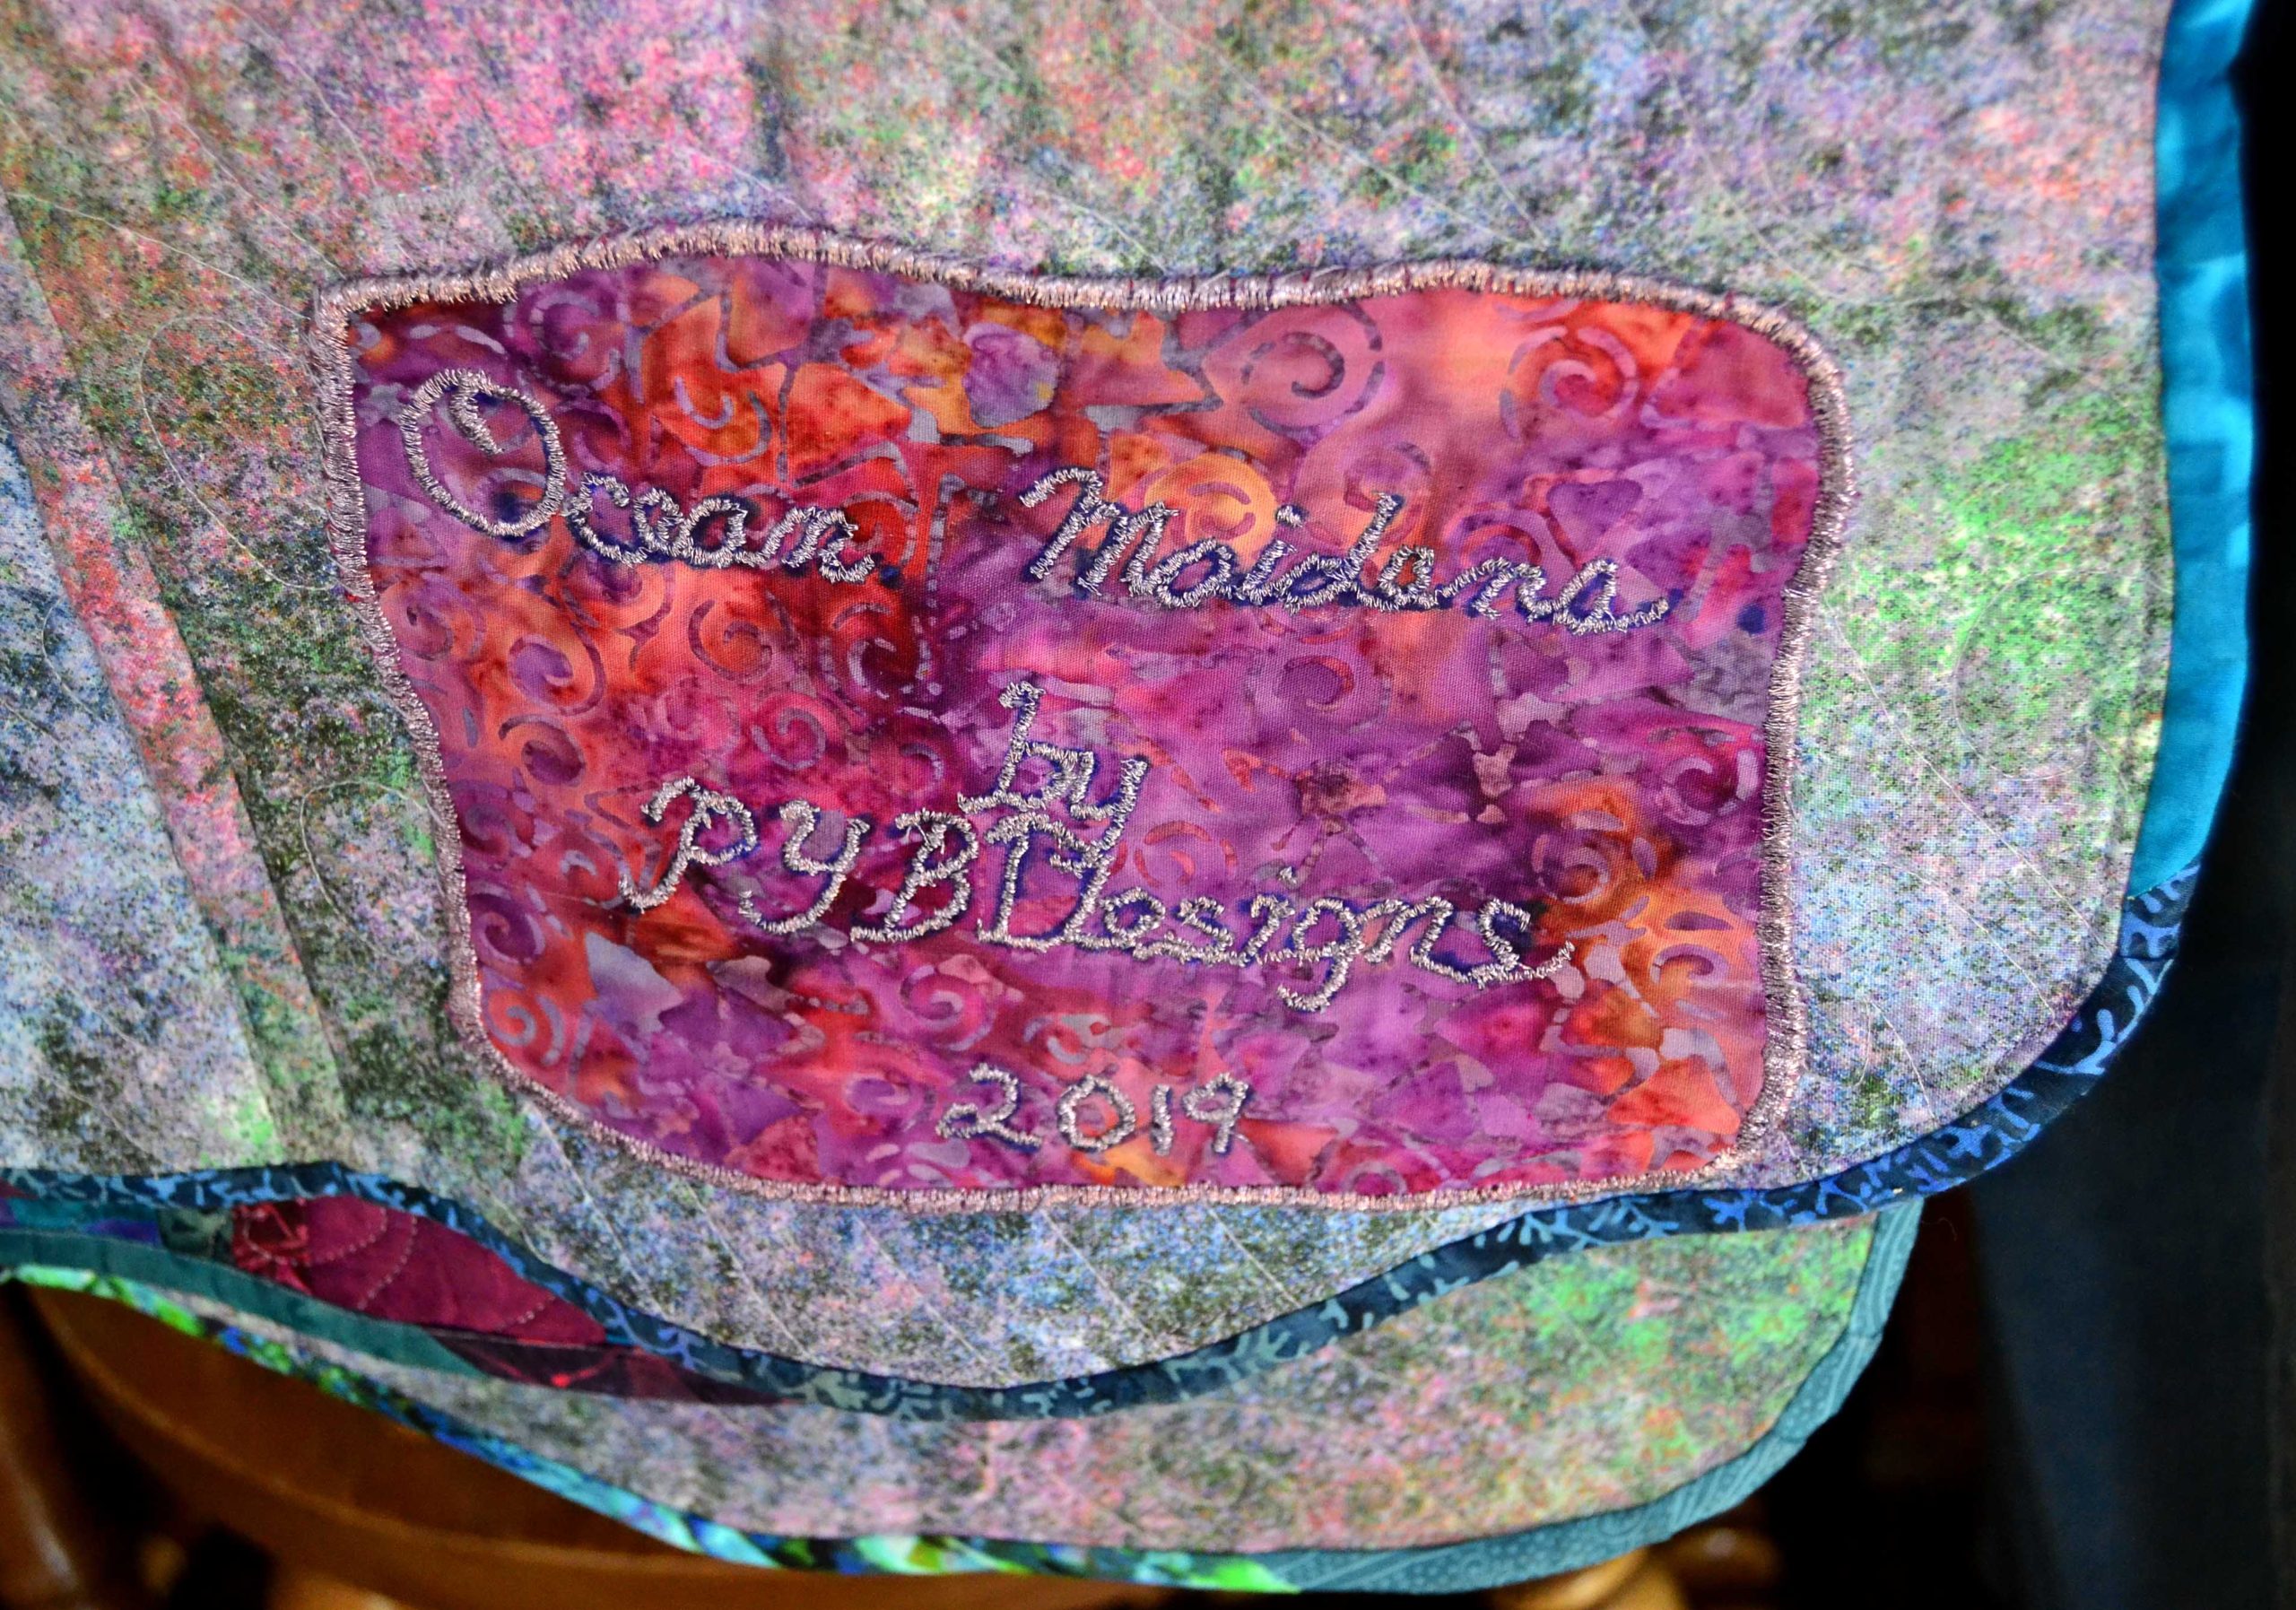
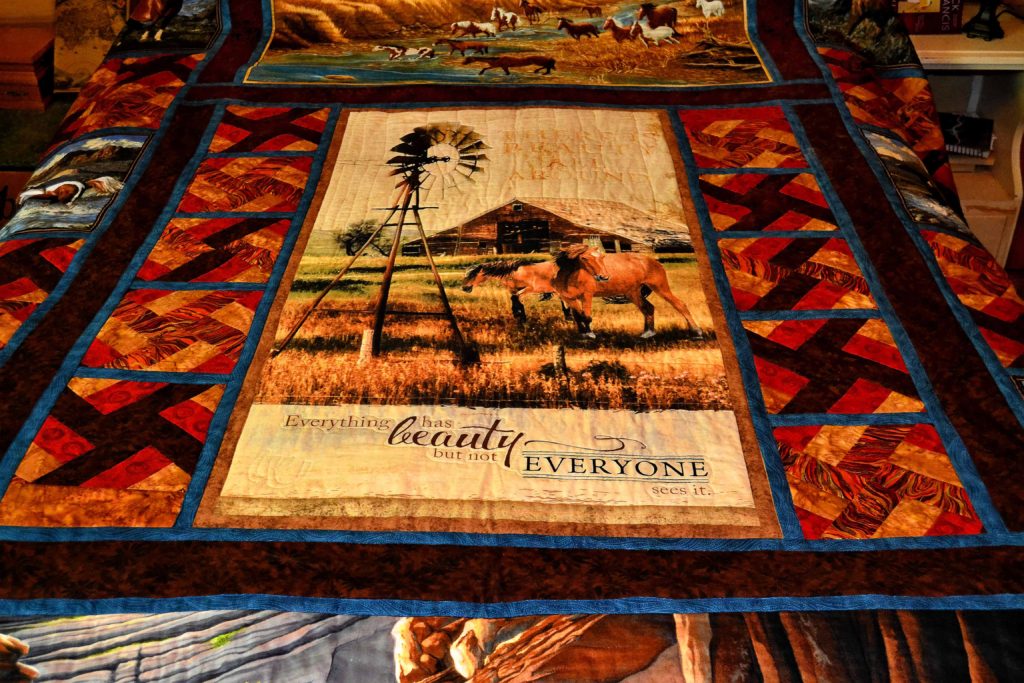
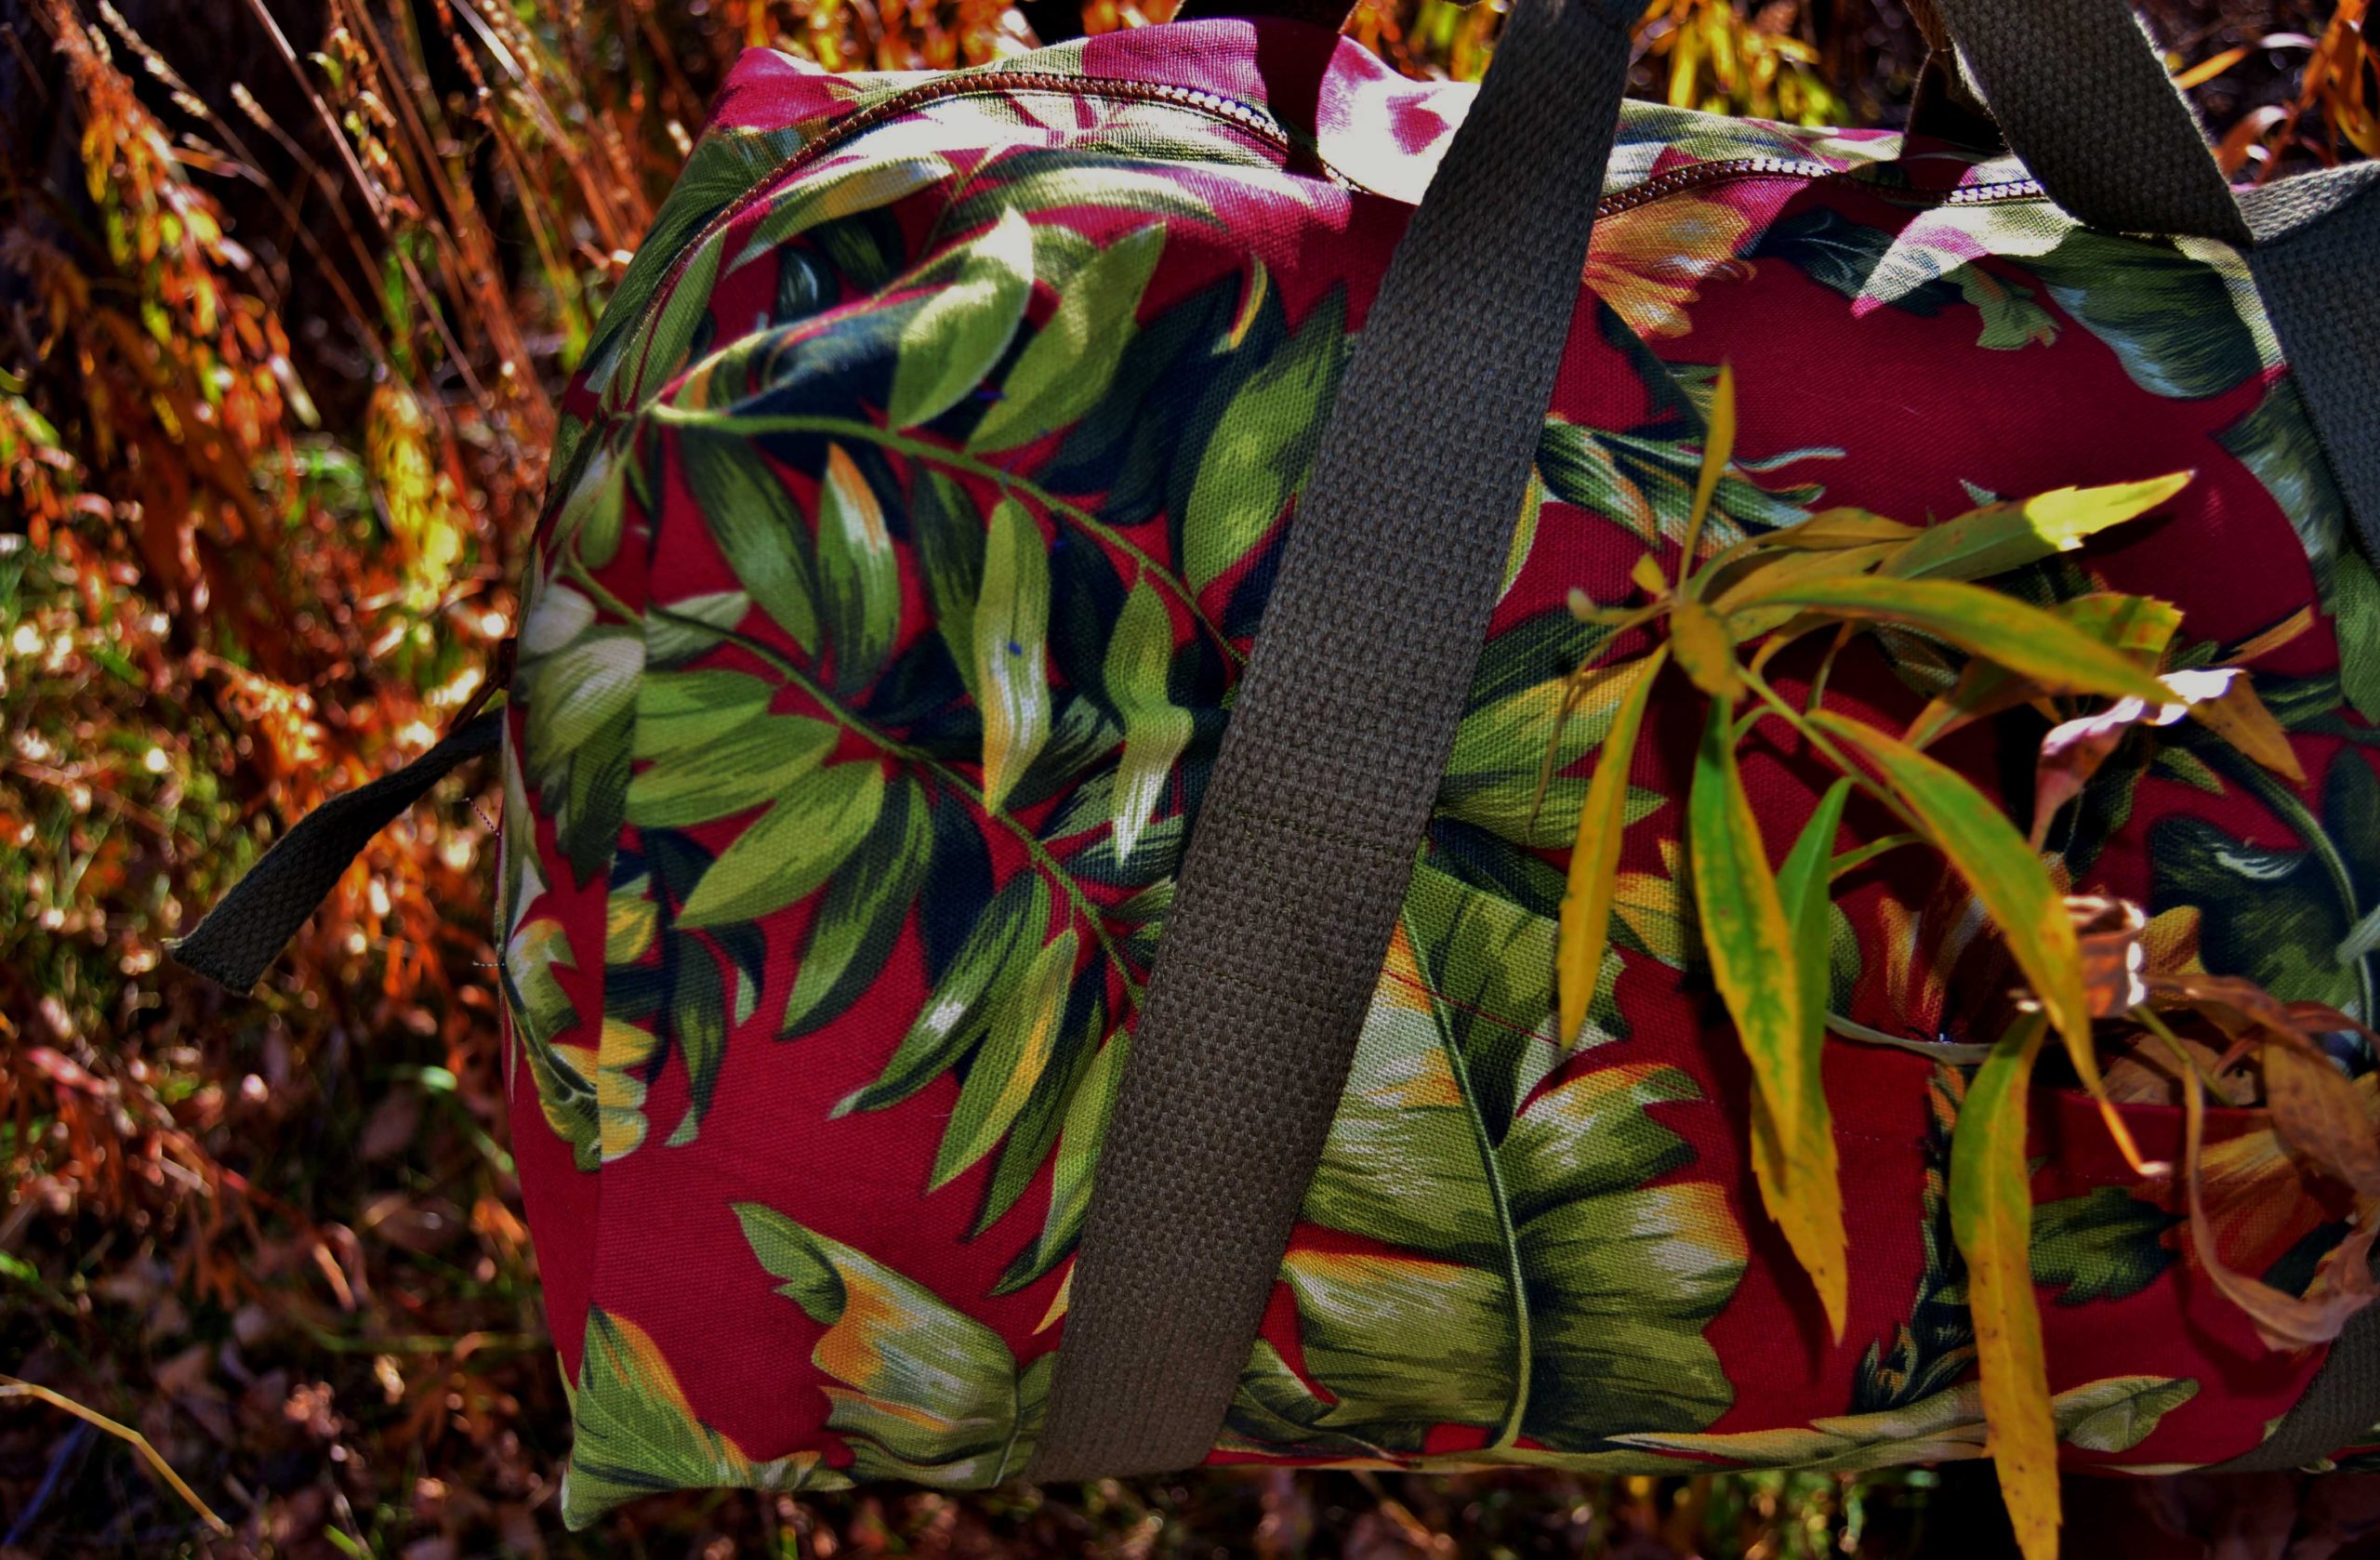
On my ‘Autumn Daze’ panels I used a mottled brown-green-gold batik fabric that I also used in the project itself. This binding is a great example of “fading away.” It simply finishes my fall-themed wall-hanging without drawing the eye away from the landscape scene.
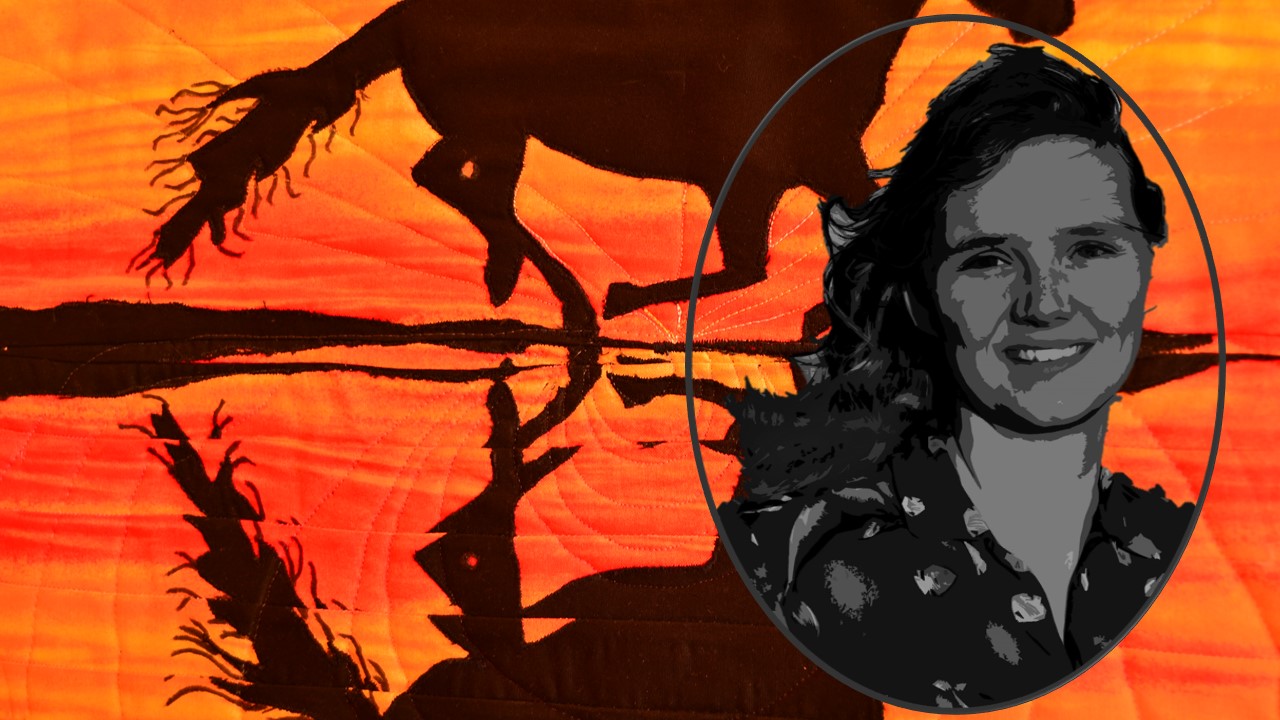
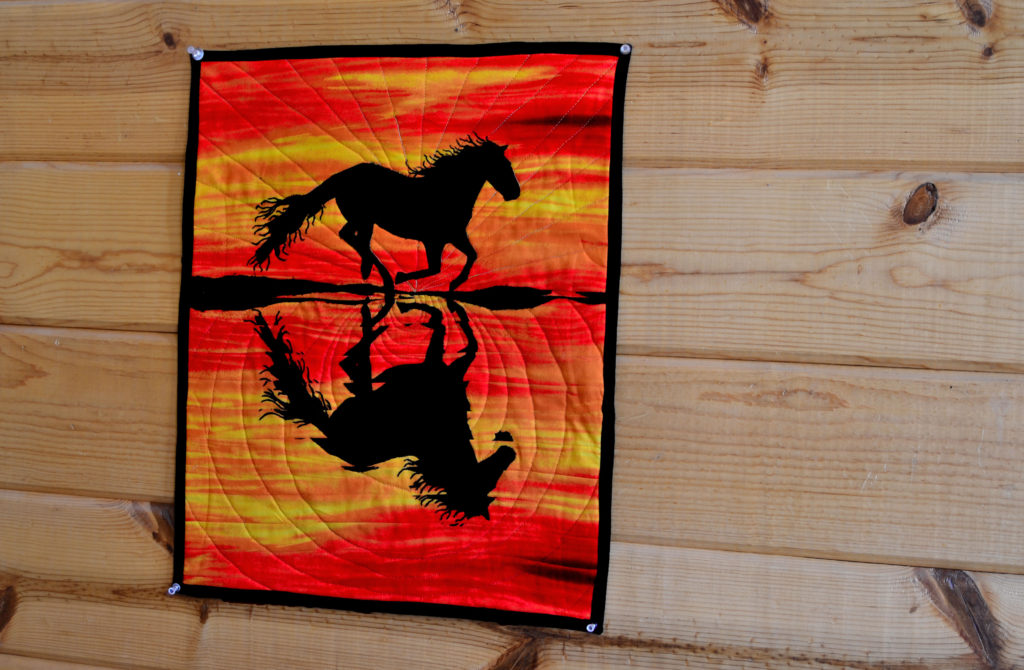
However, when I’m doing a silhouette such as ‘Running Wild,’ I bind it with black. This makes for a dramatic binding without distracting from the overall effect of my image, since the black binding picks up the black of the silhouette and nicely frames the panel.
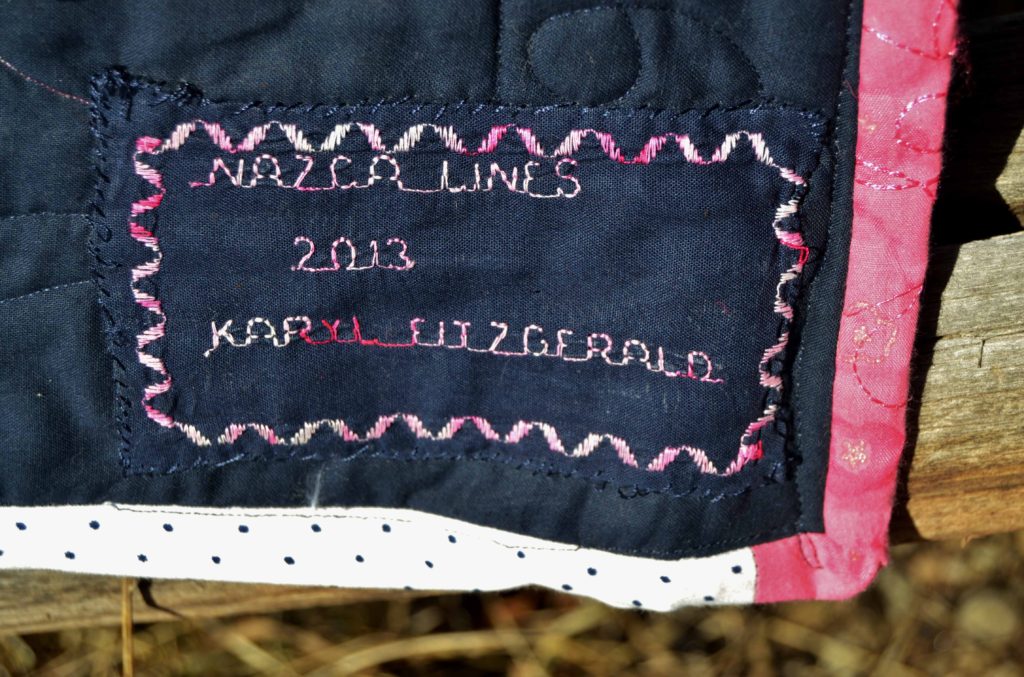
Sometimes, though, nothing will blend in – or you don’t want it to. Sometimes the binding itself needs to make a strong statement. This was the case with my ‘Nazca Lines’ quilt, where I used a candy-striped binding to finish off this crazy quilt with a definite statement.
I always pick out a choice of fabrics that I think might work for a certain project and lay them out alongside my quilt.
It often surprises me which fabric looks best.
However, I do most often choose a fabric that I’ve already used in my project because it helps keep the flow going.
Step 2 – Cut Narrower Binding Strips
This is my biggest secret, and it’s so terribly simple I’d feel guilty about writing such a long article about it…if this one simple technique hadn’t saved me so much frustration.
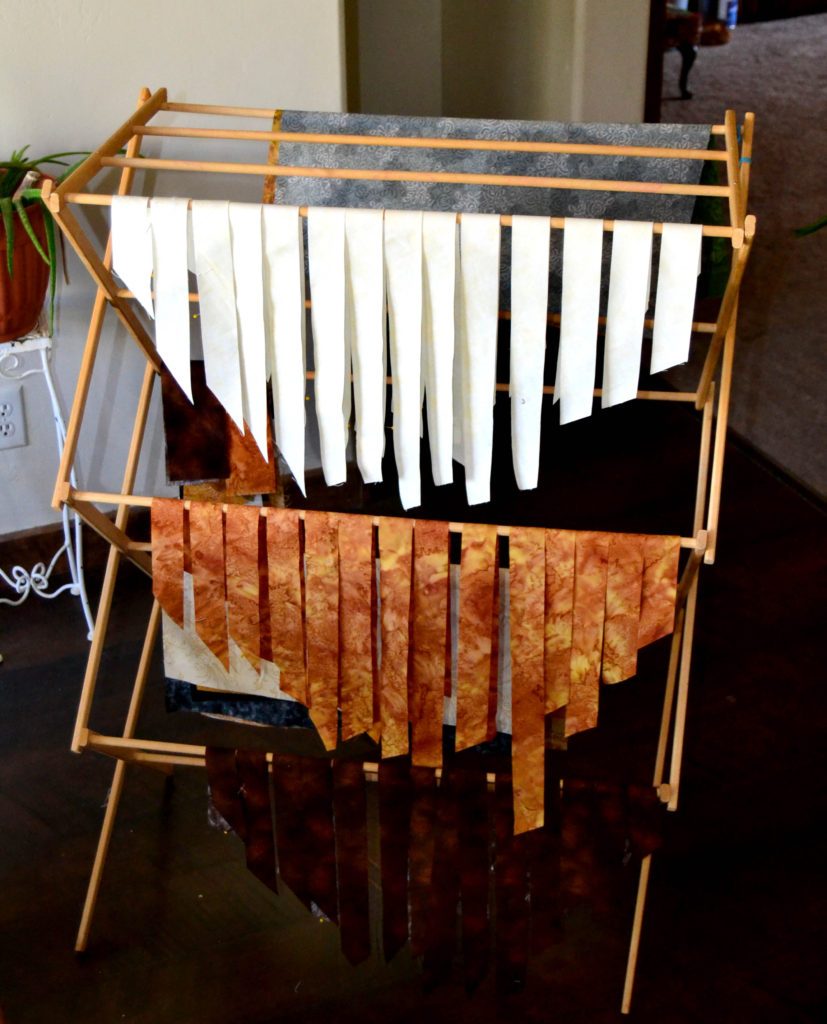
Cut your binding strips 2 inches wide on the bias.
Having the narrower strips to start with means that the binding will have less wiggle room for making pleats. The binding will wrap much tighter around the edge of the quilt, which reduces your risk of getting bubbles, or loose fabric that can make your project look unprofessional.
Step 3 – Find the Grain of Your Binding Fabric
Before cutting, pull gently on your fabric in first one direction and then the other. The fabric will stretch quite a bit one way (this is called the lengthwise grain) and not nearly as much in the other direction (this is the crosswise grain). I have discovered that you ALWAYS want to cut your binding on the crosswise grain because it reduces the stretching and eliminates most of the wrinkles that happen when your fabric is stretching too far.
This means that you need to fold your material and cut it so that your lengthwise grain makes the 2 inches across, and the crosswise grain is the long 20 inches or so.
When you’ve sewn the binding to your quilt, the binding won’t stretch or pull loose with time, because the stitching will pin the stretchiness of the fabric into place forever. Cutting your fabric on the cross-wise grain usually requires re-folding and re-figuring but it is well worth your while.
Step 4 – Cut Extra Strips
Always Cut More than You Think You Need
It’d be easy to think that you need to cut the same length of binding strips as your quilt is around. But that’s not how it works – and don’t ask me why.
Once you have your fabric folded right, measure the length that each strip you cut will be. This will differ with each project depending on how you have to fold the fabric so that you can cut it on the cross-wise grain.
To figure out how many strips you’ll need to cut, simply divide the total circumference of your quilt by the length of each strip you will cut. For example, if your project is 157” around, add 15” for starting and finishing. This gives you 172” total. If your fabric strips will be 45” long each, simply divide 172 by 45 = 3.82, which means you cut 4 strips of 45” long each.
That total is the number of strips you’ll have to cut to make enough binding to finish your project.
Always remember to add approximately 10” – 15” to the total circumference of your quilt. Otherwise you’ll run short, and have to cut another strip or two and try to add them on while you’ve got most of your binding attached to the quilt – which is a major pain-in-the-neck.
Step Five – Creating Binding on the Bias
Once you have your strips cut, you’ll need to sew them back together again to make one long strip. When I started I simply joined each strip to the next one with a straight seam, but I gradually discovered that I didn’t like that look (it’s really obvious). Other problems with this method of how to sew binding on a quilt were:
The seams were very thick and made a lump in the binding
And they also didn’t go around corners or curves smoothly
So I learned how to sew them like a bias strip is sewn and that has made all the difference.
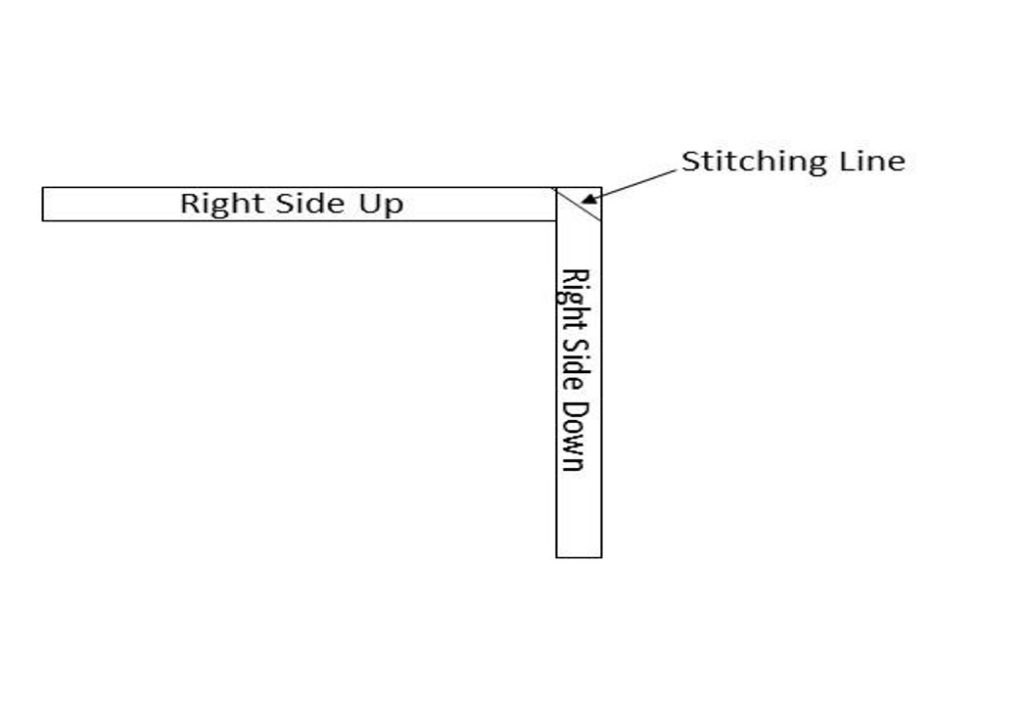
Sewing Bias Seams
Lay your strips end to end with right sides up.
Lay the 2nd strip on top of the 1st at right angles so that the 2 ends make a square. Pin this, and then sew a diagonal seam from one corner to the other.
Trim the excess down to ¼” and iron flat.
Turn to the right side. You should now have one long strip with a diagonal seam joining them together.
Repeat for as many strips as necessary.
Always check before you sew the next strip together that you are joining the right sides. With bias it’s not always easy to tell and then like me you’ll end up with a couple of strips sewn backwards right in the middle somewhere.
One of the great advantages of sewing your strips together with a bias seam is that your seam starts and ends at a different place so when you know how to sew binding on a quilt, you don’t sew through 2 seams at once. Much less bulk!
In fact, I often can’t find the joining seams on the binding when my project is finished!
Step 6 – Folding & Ironing
Iron your binding strip by laying out your binding strip wrong side up on your ironing board and spray starch. Before ironing, fold your binding strip in half, being careful to line up your edges, then iron down.
This will give you a long, continuous strip that is 1 inch wide with the right sides out.
Step 7 – How to Sew Binding on a Quilt (Backside First)
Sewing your binding strip to your project. This is one of my favorite steps. Not only is it the last one, but also one of the easiest.
Start by laying your strip on the back side of your project about 2/3rds of the way down one long side. This starting seam will be a straight across one and thus bulkier than the others, so I always try to put it where it will be the least obvious.
Line up the raw edge of your binding strip with the raw edge of your project. Leave approximately 4” loose at the beginning and start sewing a regular ¼” seam from there on. I never bother pinning the binding – I just smooth and gently tug the binding and project edges as I go.
Sew all the way around and stop approximately 4” from where the strip begins.
How To Sew Binding on a Quilt’s Corners – Back
There’s a trick to making your corners flat and smooth – of course there is! Here it is:
Slow down as you come to a corner and stop altogether when you’re ½” – ¼” inch away.
With the needle down, lift your foot and turn your project at a 45 degree angle toward the corner.
Put your foot back down and finish your seam straight into the corner, pull your project completely out, and cut off your threads.
Next, turn your project so that you will be ready to sew down the next side.
Before beginning to sew, lift the long end of your binding strip up and over the side you’ve just sewn.
Then fold it back down, so that is straight and even along both the top and side edges. Start sewing your ¼” seam again straight down from the edge.
Repeat for the 3 remaining corners.
Joining the Ends
Stop sewing when you get within 4” of the beginning of your binding. Overlap the ending strip with the beginning at least 4”. This will give you 8” to get your ending seam sewn and you will need every inch of it.
To mark where to sew your seam, bring both ends together so they meet. Mark this line with chalk at both ends, front and back. Then, open up both ends and with right sides together match up your chalk lines and pin.
Your middle creases should also match.
Baste this seam and then lay the binding down on your project. If the binding lies flat and smooth, then sew the seam with a regular stitch. If it’s too short or too long, simply baste a shallower of deeper stitch line until the binding fits precisely.
Trim off the excess binding, fold the remaining binding back together, and stitch down. Ta da!
Truth be told, joining the binding ends is nitpicky and annoying but necessary, and when you’ve done it a few times, easy.
Your binding should now be sewn down all the way around on the back side of your project with the raw edges even. Using a water spray or steam iron, pull the binding gently away from the backing and press it flat. This is also a very good chance to inspect your binding and make sure you caught both sides of it in your seam.
Step 8 – How to Sew Binding on a Quilt (Finish on the Front)
Thread your machine on top with thread that either matches your binding exactly or use invisible thread. This is NOT a place where you want your thread to show. Load your bobbin with thread that matches your backing fabric.
Every machine is different, so on a scrap piece of fabric, practice sewing right on the edge of a line. Note where your foot has to be, so that you don’t sew too shallow or too deep.
We do this because to sew your binding down on the front neatly, you must sew a 1/16” seam or less. Otherwise, the edge of the binding tends to curl up. So pay attention to where this seam line falls on your foot, and then place your foot in that exact same location on your binding.
And sew slowly!!!! If you go too fast, you will wibble wobble and either sew in too deep, or miss the edge altogether. The tendency, when you’re sewing such an exact seam is to watch your needle. I have found that you’ll sew a lot more accurately if you watch your foot. Keep your foot lined up with your fabric and you’ll be fine.
I’m a lot better at this than I used to be – so be patient and fix the wawaws when you’re done.
As you get ready to sew, you will see the seam line along the front where you sewed the binding down on the back. This is your guide. Simply fold the binding over until it just covers this seam and stitch it there.
How To Sew Binding on a Quilt’s Corners – Front
Of course, you must take special care in the corners. As you come to a corner use a pin to hold down the edge and sew far enough into the corner so that binding edge stays down.
Reverse just far enough so that you can overlap the next side over this, and then continue sewing.
When you’re all done, spray starch and iron your entire binding again. This helps to take out any wrikles that may have had the audacity to make an appearance and also leaves your binding looking crisp and perky.
A Final Note on the “Approved” Method of Binding
You will find many quilt books and “professional” quilters who turn their noses up at doing bindings this way. For them, it’s not done right unless you sew it onto the front first, turn it to the back, and then hand stitch it down.
Barb does it this way. It usually takes her a couple of weeks to hand sew the binding of a queen quilt. It takes me a couple of hours.
Choose wisely when you’re deciding how to sew binding on a quilt.
Have you ever had a dream that you didn’t believe could come true, but just felt that you absolutely had to capture somehow? If you’re a quilter today, or if you have a family heirloom quilt – that’s exactly what happened. Somewhere, at some point, someone (maybe you) poured their heart and soul into creating a quilted dream.
Quilts are such amazingly tangible pieces of our past. They hold so many precious things:
Memories
Hopes
Dreams
Smiles
Tears
We want to celebrate the memories of quilts, what it is that we love about quilts and why we keep making them, year after year, generation after generation. That’s why we’ve created this new section, “Quilter’s Memory Book,” where we’ll be sharing the most personal and touching memories of quilts and the stories behind them.
Today, we’re sharing the genesis of our own fabric journey, which started with our head seamstress Karyl’s (aka Princess YellowBelly herself) quilted dream.
My First Quilt Kept Me Keepin’ On
“The first quilt I ever made was a desperate act of hope and faith that sustained me through 14 years of doubt and loneliness.
As a young single girl I had moved from the farm to the big city and was living in a one bedroom apartment by myself. Most of my friends were newly married and too busy for me. I hated my job, and since I didn’t own a car at that time, I was reluctant to go out at night by myself.
Consequently, I spent a lot of lonely evenings thinking about my life; the direction I wanted to go, and the goals I wanted to achieve.
It turned out that my one over-riding goal was to be a mother – although there were no prospects in sight. I wasn’t one of those women who attract men effortlessly and so I was struggling in that area (self-esteem and loneliness) as well.
I Had to Have Some Hope
Finally, in an effort to give myself hope for the future, I used some leftover fabric from blouses I’d sewn on the $60.00 machine my parents had given me as a graduation present, to create a quilted dream. I sewed a baby quilt.
It wasn’t anything fancy, just 12 simple squares:
Just a Little Bit of Hope…
No complicated patterns
No sashing
And no name (if you can believe it)
It was in different shades of pink and white because that was what I had and I finished it with a pink satin blanket binding.
Then I Put My Quilted Dream Away
Over the next 14 years I would take it out when I was especially down and lonely, and dream about the little baby girl that I would wrap my quilt around and love. This hope kept me going and kept me focused and on my knees.
One day faith, hope, and the hidden quilted dream found a way and I met Michael.
He was – and is – an answer to my prayers and in the fullness of time I wrapped tiny, newborn Suzanna in that quilt.
A quilt is SO much more than the fabric, thread, and time that goes into making it. In my case, my quilted dream was a visual reminder of future hope. For others it brings back the joy and love of learning how to quilt from someone you love. For others it’s therapy. Whatever memories your quilt evokes in you, I bet it’s a good one. It was for me.
How to Share Your Own Quilted Best Memory for the Quilter’s Memory Book
As you can see, quilting is a much more deeply personal and historical endeavor that you’d think!
What’s your best memory of a quilt? Was it your grandmother’s gift to you? Watching your Mom sew on the kitchen table? A trip to a quilt store? A secret hope that you turned into a piece of fabric art?
It’s easy and fun to share your quilting memories with us, and we earnestly hope that you do:
Some of our earliest memories involve quilts. Even if we don’t consciously know it.
And even if they weren’t “quilts” in the sense that we use it here at Princess YellowBelly Designs; which is “a pieced top of some kind that incorporates beauty made into a fabric sandwich with a backing and a middle batting layer.”
The warmth, comfort and security that quilts generate are, quite frankly, priceless.
Quilts are Tangible Links to Our Past
For some of us quilts have been there from our earliest childhood as symbols of warmth and love – gifts from Mom or Grandma; the quilts that kept us warm and safe for years.
Or, for those of us who are active quilters, our most poignant memories of quilts often involve the first quilt we made, and the events that surrounded it. The hopes, dreams, smiles, and tears that we stitched into each line of that carefully pieced coverlet.
Whatever it is, that quilt is a part of our history, a living and impressionistic link to our personal past.
Now is the Time to Celebrate Those Treasured Memories
Whatever your special connection to quilt memories might be, we want to know about it! We’re building a sort of special library of the emotional connection that we have to quilts and quilted items – whether that’s an appreciation for the art or as an artist yourself.
So please, take a few minutes to fill out the form and share your special quilting memories with us.
We’ll start publishing our own stories – and depending on what responses we get – we want to start adding video content to this special trip down our quilted memory lane. So if you do make a submission, you might get a chance to be live on video with us!
(Your choice, of course, don’t worry if you’re camera shy, we’ll be perfectly happy with a couple of paragraphs.)
Please, help us celebrate the special connection between quilts and memories.
Lots of love,
Your guide to Quiltivity,
Princess YellowBelly Designs
P.S.
We LOVE pictures! Unfortunately it’s really hard to get pictures (or videos) through the website. So once you share your quilting memories, we’ll contact you personally via email to get any pictures or video content you might have. You can also just send us a really quick message via the contact form and let us know that you have a memory, and we’ll get back to you via email with a more personal connection.
Today at Princess YellowBelly Designs we are proud to announce the first steps in a grand new adventure for our team. We are no longer simply making our own quilts – we are now restoring and enhancing beautiful antique quilts!
Hurray!
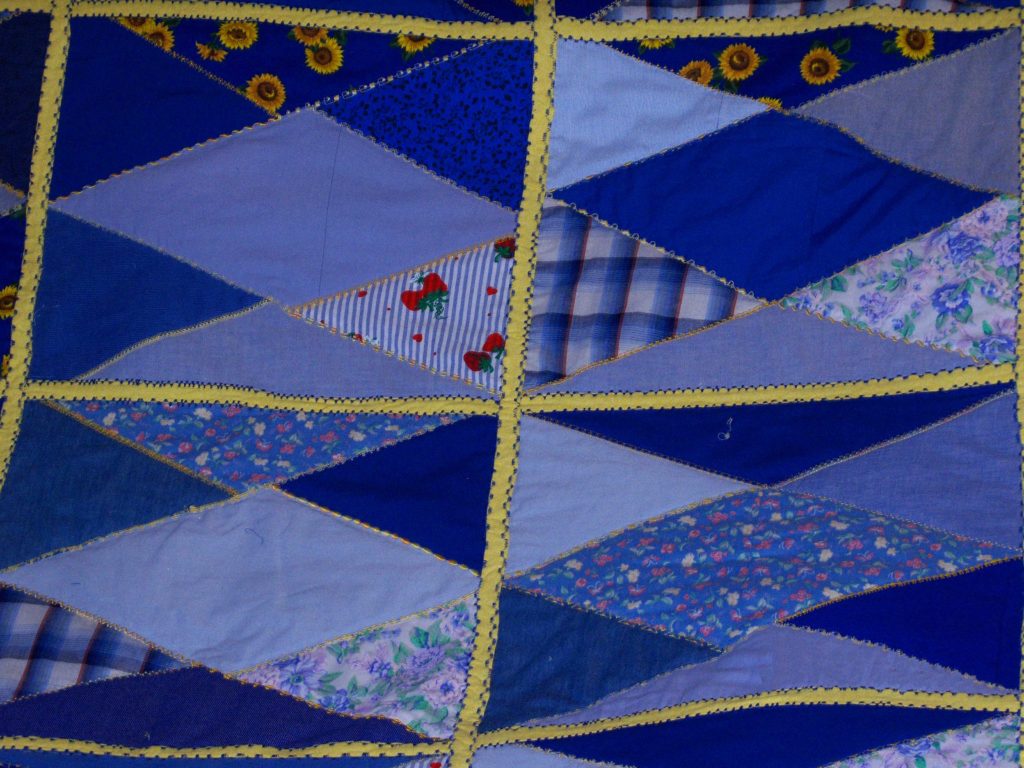
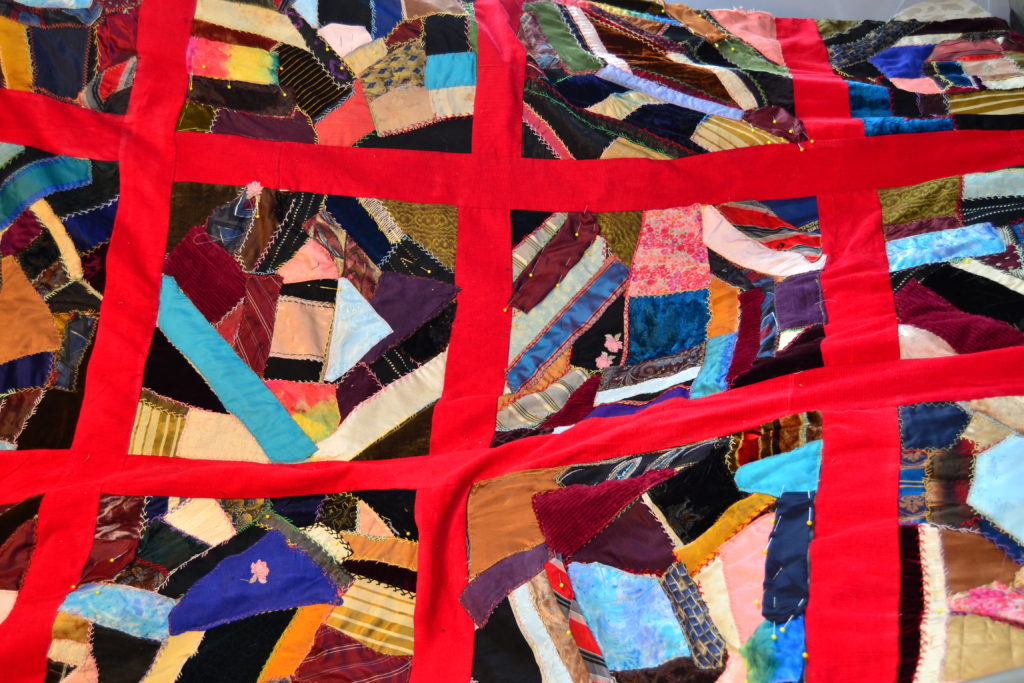
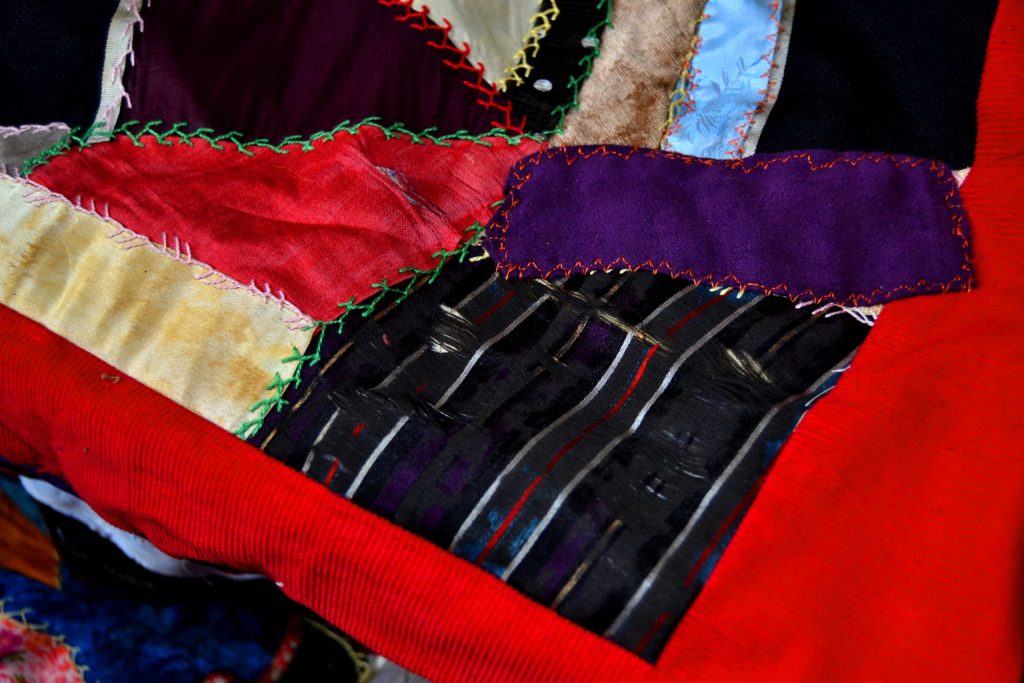
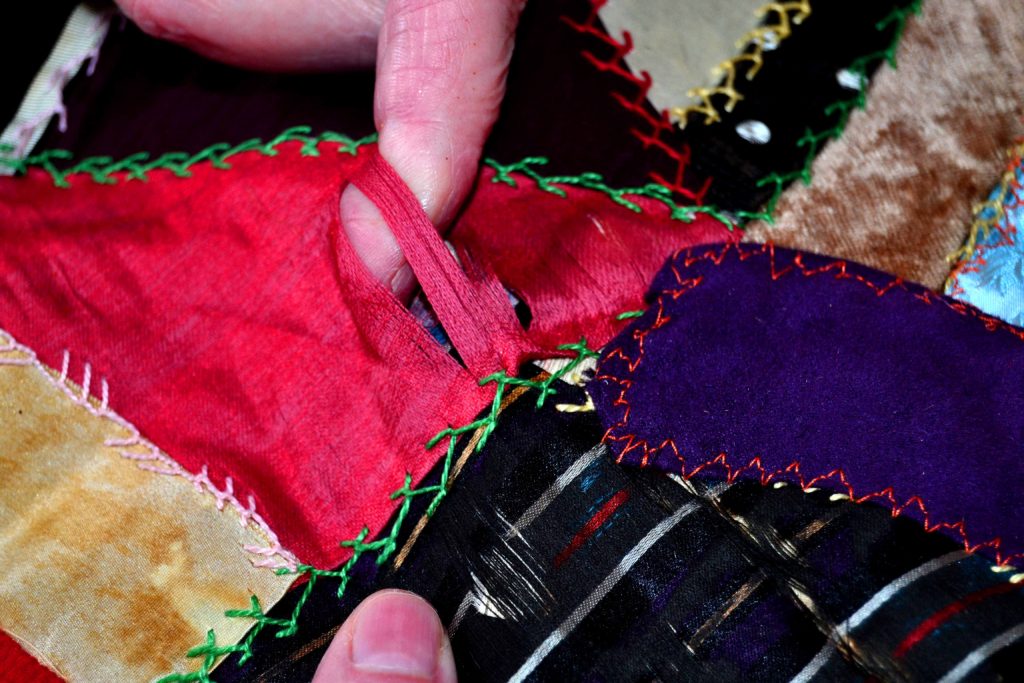
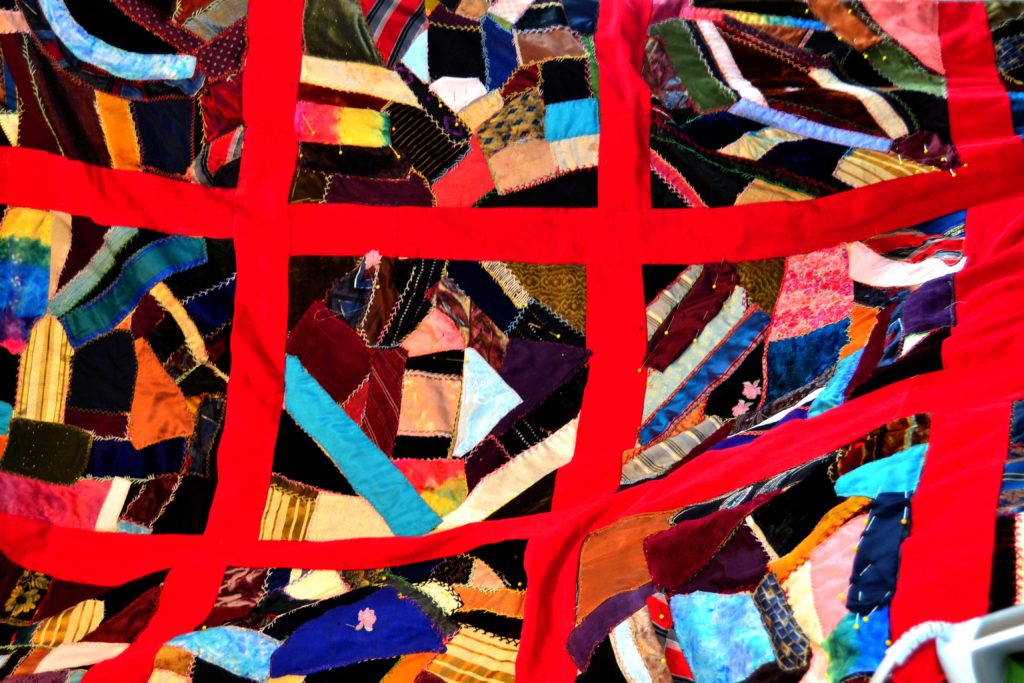
And now that we’ve announced it, we must ask for your help once again. You see, one of the quilts that we found, lost and almost forgotten, at the local antique store, is a real treasure. But it’s unique. Its crazy unique. It is…
The Craziest Crazy Quilt You Ever Saw
We found this amazing ode to an old wardrobe. At least, we think that’s what it is. Some quilter in the bygone days apparently took every old shirt, curtain, and a few potholders, cut them up into funny shapes, and arranged them – sort of – in squares.
Nothing on this quilt matches, and on top of that the sashing is this amazing fire-engine red corduroy material that matches with nothing on earth.
And yet, somehow, this quilt works brilliantly.
Making Insane Crazier
One of the reasons that this quilt had been lost and forgotten was the all the different weights and textures of the different fabrics break the cardinal rule of quilting – use like, if not identical, fabrics.
There’s a reason for that. If you use fabrics of different weights and thicknesses then it puts a lot of stress on the weaker fabrics.
In this case, some of the fabrics had shredded completely away.
So, we dumped our wardrobe rejects out – old scarves, thrift store ties, shirts from the 80s, and cut more patches to cover the torn and stained pieces. It’s still a quilt that breaks all the rules – but it’s gorgeous.
Choose Your Favorite Crazy Name for Our Special Crazy Quilt
And, now that we’ve almost got the quilt fixed, we need a good name for it.
Crazy in Love
Our first two options are kind of the obvious options. Crazy in Love kind of describes the journey of life and love – not to mention this wacky color scheme that somehow works despite the odds, don’t you think?
Crazy for You
Then there’s being Crazy for You. Which is really fun. In some ways this quilt feels like when you love someone so much you just hate them, and your brain is flinging out all these contrasting colors and emotions.
Scrambled Squares
I think this option sort of speaks for itself, don’t you? It’s exactly what the original quilter did to this quilt, she took a bunch of fabrics, scrambled everything around, and served it up on a dish of steaming hot corduroy sashing!
Beginner’s Luck
You know how you learn something, like a game or an art and you spend hours and days and years perfecting your technique? And then someone comes along who really doesn’t know what they’re doing, but somehow they win, or create something amazing and surprising and almost magical that you couldn’t have conceived of in a million years?
That describes this quilt pretty well. Like we said at the beginning, it breaks all the rules, and there are little signs throughout that this was either a first or second attempt for the artist.
Yet, it works. It’s magical, unique, a crazy quilt that no “accomplished” quilter could manage.
Apatches
This one is kind of a personal favorite. My kids grew up not far from the Apache reservation, and when Suzanna was about four we had this common calico cat. Suzanna named her Apatches, because at the time she thought Apache was the coolest word in the language, and the cat fit the bill.
Kaleidoscopic
This quilt is also pretty reminiscent of a kaleidoscope. It even has some of the shapes that spin for just a second as you turn the kaleidoscope.
Kaleidoscope Innards
Our final choice. Is it too much? We think its funny and descriptive, but what are your feelings?
Actually, what are your feelings about every name we’ve come up with? There’s two weeks to think about it and decide. In our next newsletter, we’ll announce the winner. Speaking of the newsletter – you should take this opportunity to subscribe! You get crazy exciting news and fun little bonuses – like the results of a name poll.
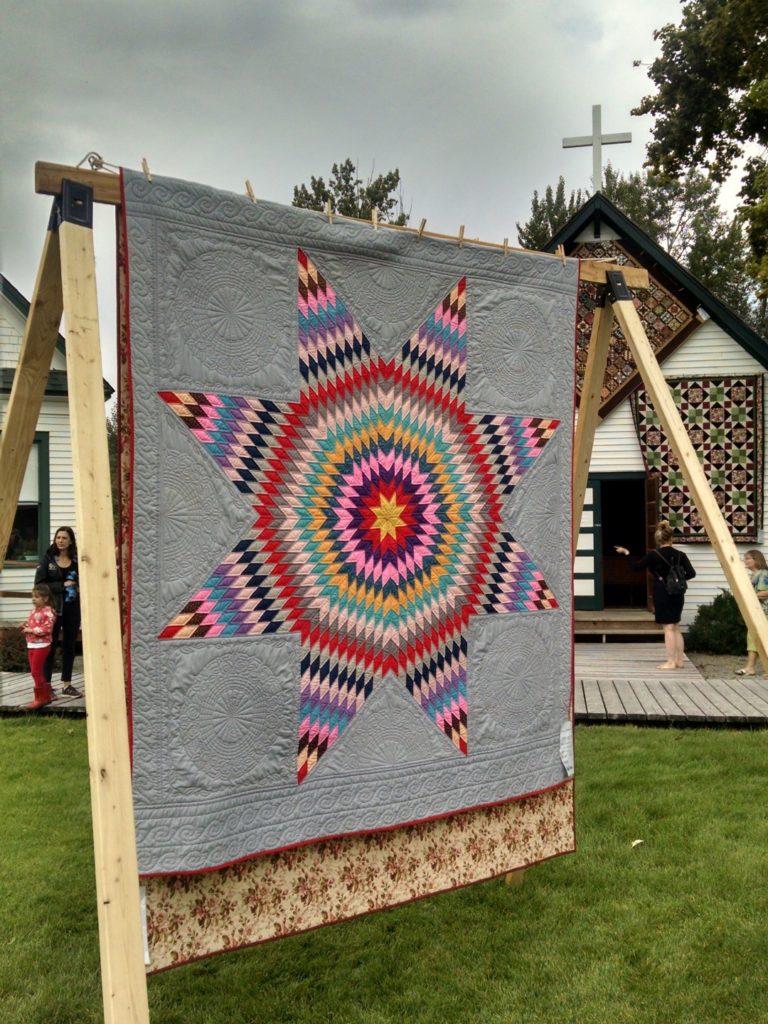
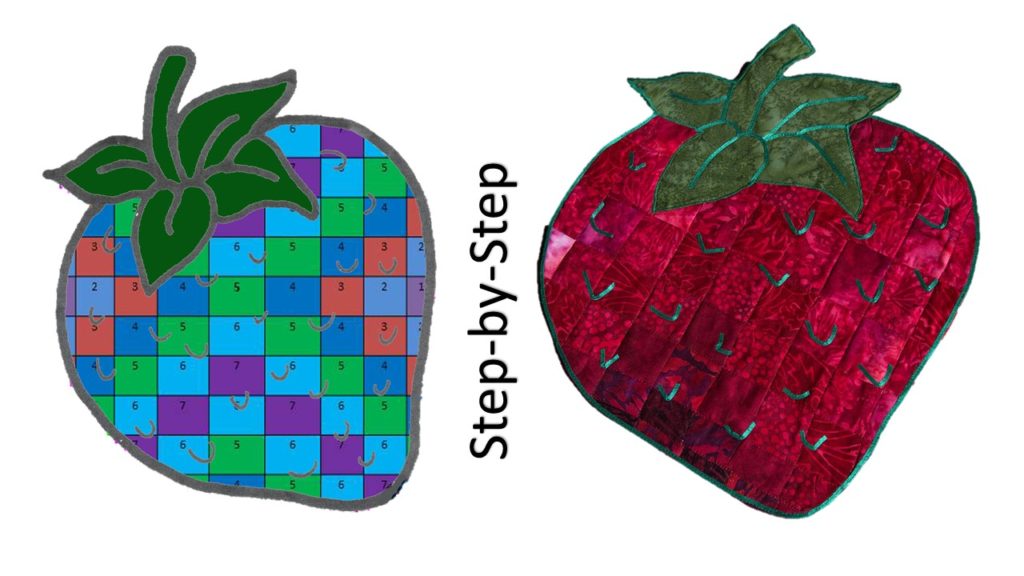
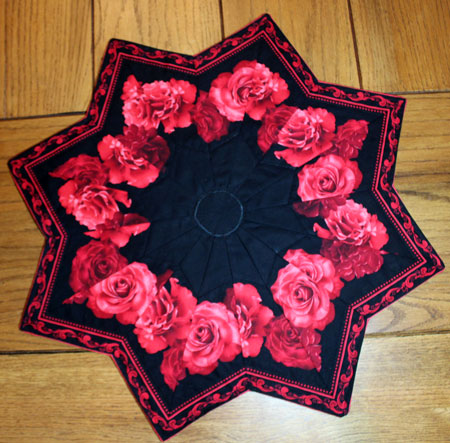
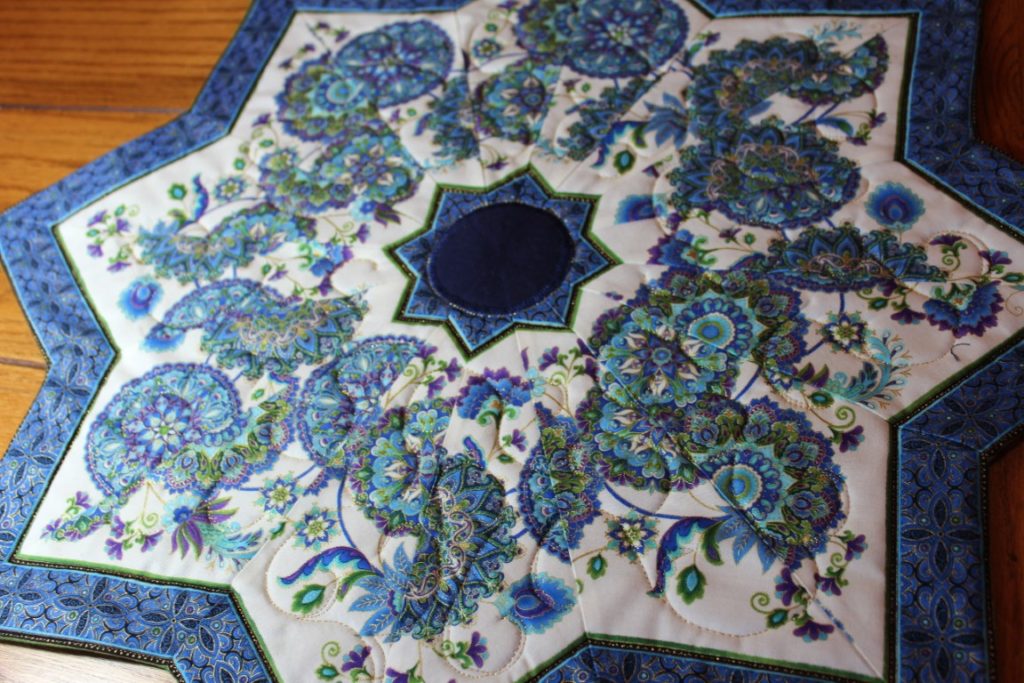
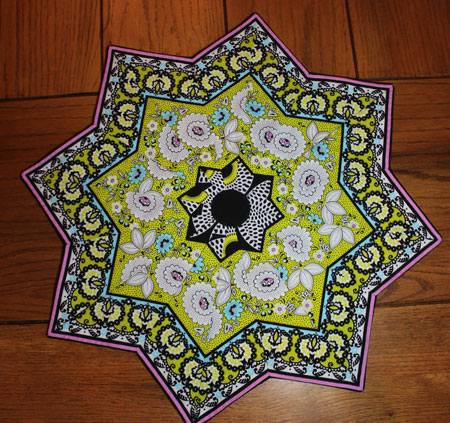
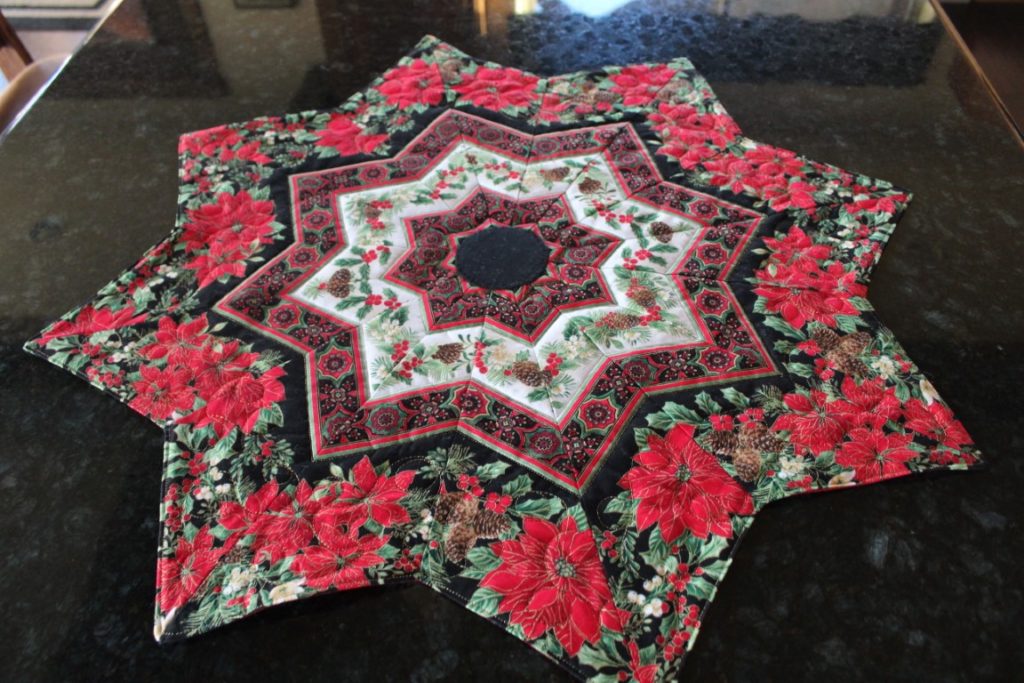
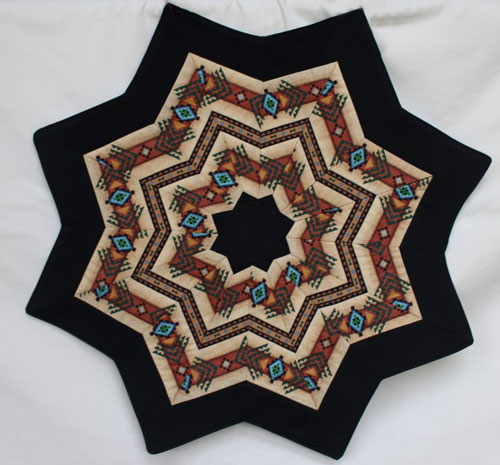
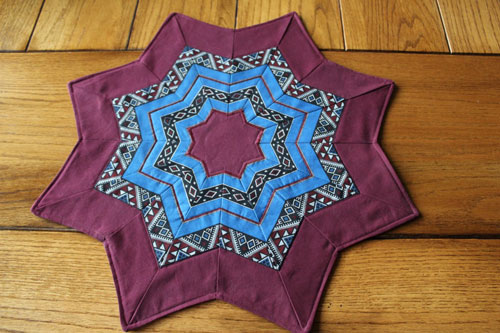
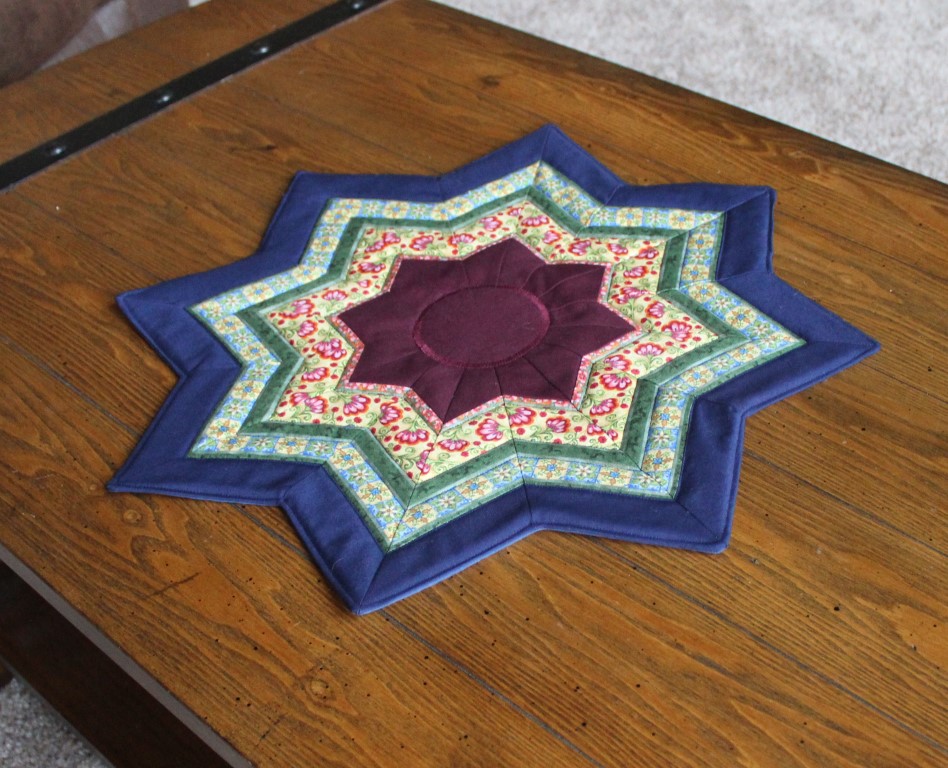
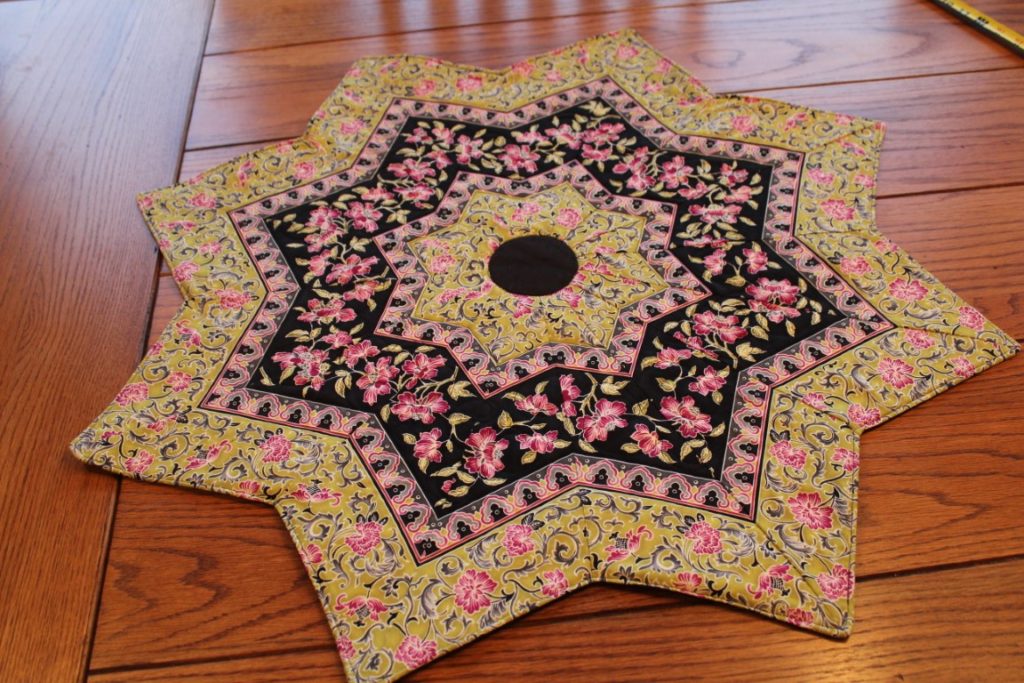
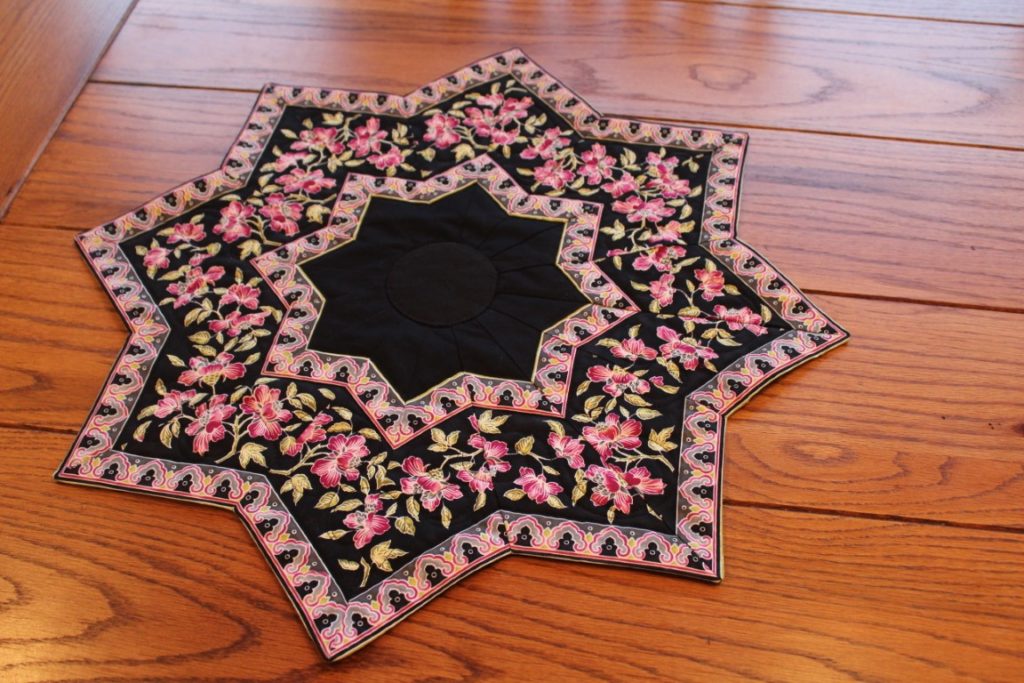
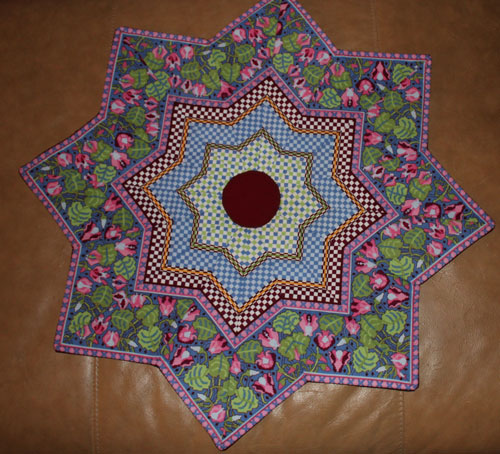
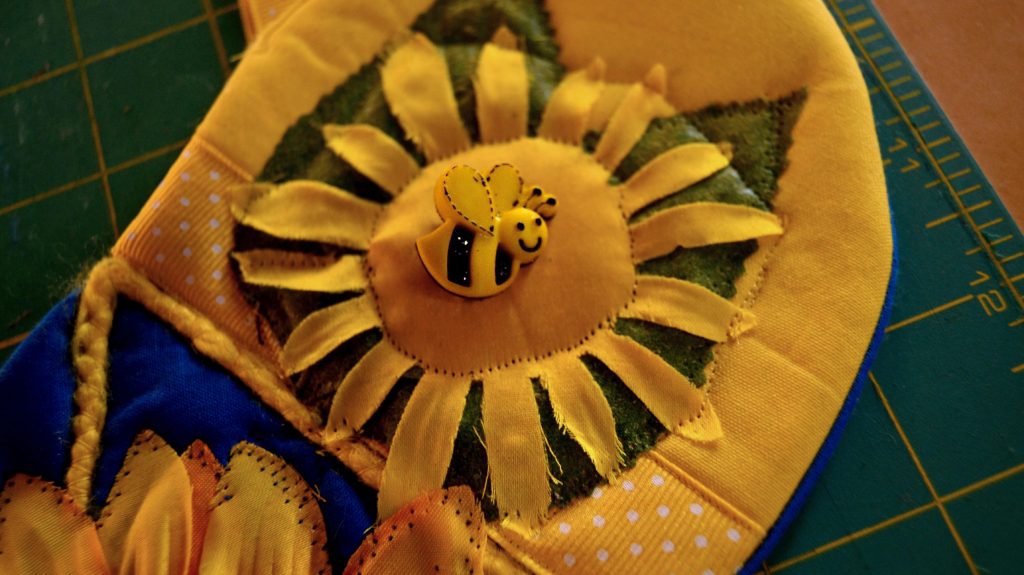
One of the art forms that we at Princess YellowBelly Designs truly enjoy is shaped quilting. Rather than the traditional squares and rectangles – and the occasional oval or circle – we enjoy quilts that have shapes:
Wavy edges
Points
Definable Shapes (like a dog or bird outline)
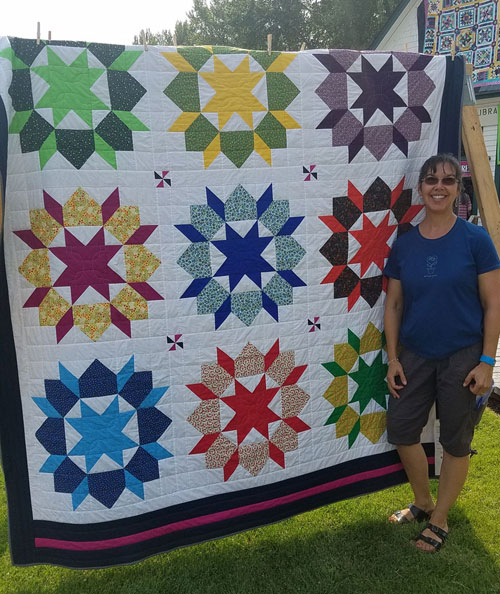
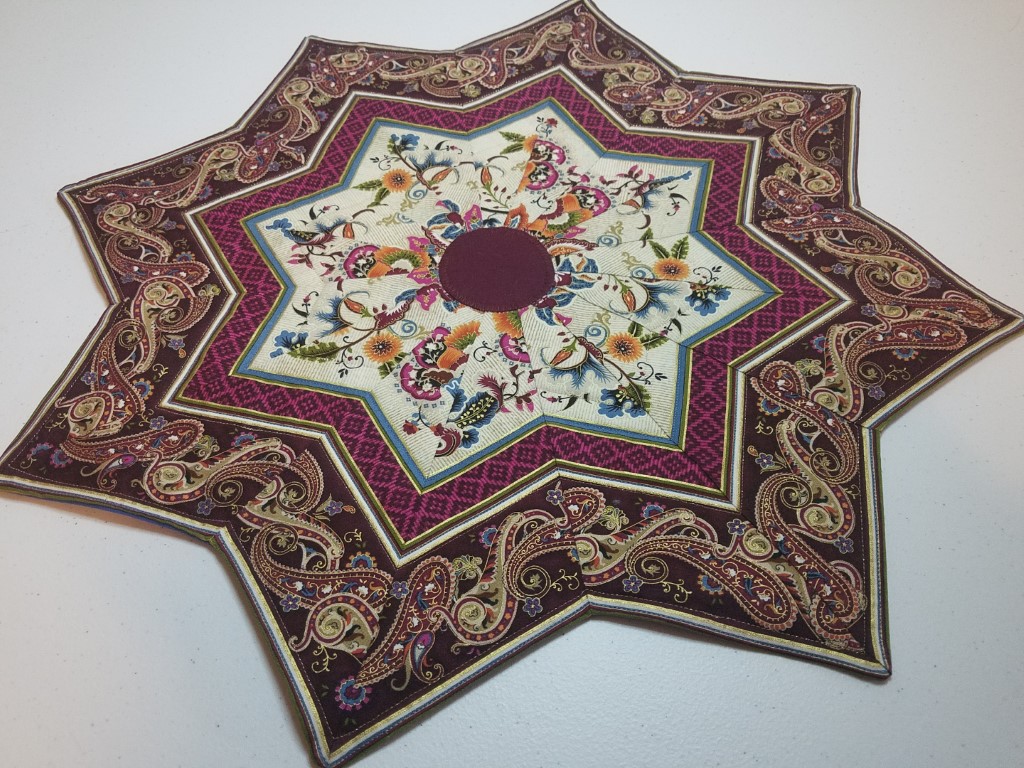
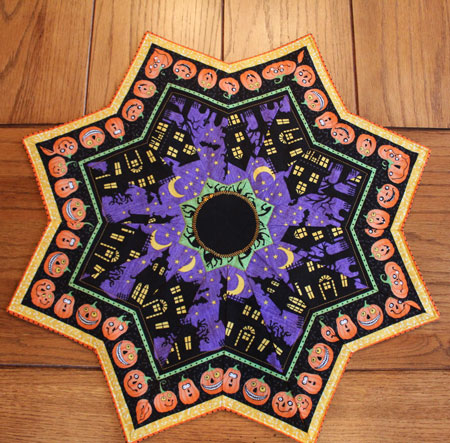
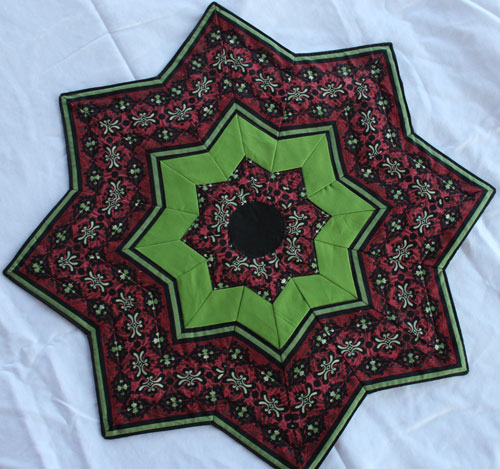
And we’ve met a new quilter who makes shaped quilts. My personal favorite shape that Casazza Creations turns out is the star table toppers, but our brilliant new unique artist also turns out hexagons, oblongs, and even a few rectangles with stunning patterns.
How an Oklahoma Computer Programmer Became an Etsy Quilt Shop Owner
My original inspiration was my paternal grandmother Wanda, who we called Gran. Gran was a very gifted quilter, making beautiful, bed-sized quilts all pieced and quilted by hand. I spent a lot of time with my Gran over the years. She was always working on a quilt until her vision gave out on her. Our home was full of Gran’s quilts, both the useful and the decorative kind.
I made my first quilt as a Christmas gift for my sister in 2009, but it turned out disastrously! When I finished quilting the quilt, I flipped it over to admire the back. Imagine my disappointment when I found it had a big area in which the backing fabric was all bunched up in folds instead of lying flat like it should. After that, it took me six years to regain an interest in quilting!
My second inspiration came at the annual Eureka Montana Quilt Show (EMQS) held in our Montana hometown each August. It is a huge outdoor show, drawing as many as 600 quilt entries. The quilts are displayed on the town’s buildings all the way along the main street. It was at the 2015 show that I felt a desire stirring to try my hand at quilting once more. I finished a quilt in October of that year; then made a quilt a month for at least a year afterward.
Why make shaped table toppers rather than more traditional quilts?
I got started making the star-shaped toppers after I saw a finished one on display at a quilt shop. I was so taken with it that I immediately learned how to make them. Making these toppers completely changed the way I viewed striped fabric. They are so much fun because it feels like using a kaleidoscope. Although I have a good idea of what fabric will make a nice star topper, I don’t know until it is sewn together what it will look like. This makes each topper a nice surprise for me.
Shawnna Casazza
I have been married to my husband Eric for 26 years. We do not have children but have three cats and one extremely spoiled little dog. I am originally from a small, rural community in northeastern Oklahoma. I have lived in Oklahoma for most of my life, but in 2015 my husband and I fulfilled a long-term dream of moving to my husband’s hometown in northwest Montana. Professionally, I was a Computer Programmer for 23 years. In 2016 I had an opportunity to move to part-time employment as a Mineral Manager for my husband’s small oil and gas company. I had just begun quilting in late 2015, so the change to part-time employment was a key factor in giving me space to begin releasing my creative side through quilting.
Casazza Creations was founded in 2016 and has grown steadily each year. In 2020 my little shop sold 22 quilts and 40 table toppers.
Did you start with a standard pattern or was this your own creation?
The star toppers start with a special ruler, called a Squedge. It is designed to make many different styles, but it is the star shape that I love. Over the years I have made my own version of that ruler, but the credit for the design goes to Cheryl Phillips of Phillips Fiber Art who originally developed the ruler.
The hexagon and oblong hexagon toppers were inspired by a design I saw from Jinny Beyer Studio.
*It’s a small world after all – we’ve met Jinny Beyer’s amazing designs here before!
What is your process?
For me, the star toppers start with careful fabric selection. Once I see a fabric that I believe will make a striking star, I cut it into long strips. Then I cut out the building blocks for the star shapes using my special ruler. Sewing them together is the fastest part of the process and the most fun as well.
Then I make a “quilt sandwich” with the batting and backing, sewing them right-sides together and then turning them right-side out. I work on the points of the star for a while, making sure to get them as sharp as possible.
Then it is time for the final step – quilting.
I often use metallic thread when quilting to further accent the topper’s design. I usually try to make about 10 toppers at a time because that seems to be more efficient. I then use any leftover fabric to make the hexagons, oblong hexagons, or anything else I can dream up. The goal of using every scrap of the fabric is a fun challenge to my creativity.
Star-shaped runners have seams radiating out…
This is the result of the way they are put together. Two wedges are sewn together to make a “blade” of the star, then the “blades” are sewn together to form the star. It is in those seam intersections where the magic happens. Simple striped fabric is transformed into a kaleidoscopic star.
How long does it take for each one?
For such a small item, the star-shaped toppers take a surprisingly long amount of time. The cutting process happens twice. I first cut the whole piece of fabric into matching strips. Then I cut the shapes for the topper from those strips. Sometimes I also add accent fabric to the long fabric strips, which nearly doubles the time involved in this stage of the process.
The assembly of each topper is the fastest part – also the most fun. Things slow down again during the finishing process. I make them in batches of 10 or 12 at a time so it is hard to say how long it would take for just one, but my guess is about 5 hours per topper.
How many have you made in all?
A rough estimate is 90 of the star-shaped toppers and about 75 of the other shapes.
Do you display at fairs or participate in contests or a quilting group?
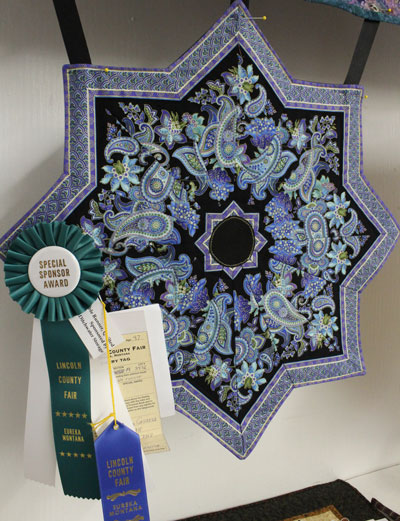
In 2017, I entered a star topper in the Lincoln County Fair here in NW Montana. It won a first place award. That topper was also given a Special Sponsor Award for Best Quilted Table Runner. I was so thrilled!
I participate in several quilting groups in the area. I am a member of two local quilting guilds. I’m also part of the group who coordinate the annual Eureka Montana Quilt Show. I often display my quilts in these shows, but I have not entered a table topper yet. I usually sell the table toppers in the boutique section of a show rather than entering them in the show itself. You have made me wonder whether I should reconsider this decision though!
How to Connect with Shawnna Casazza
If you’d like to get one of Shawnna’s amazing star topper (or other quilted) creations for yourself, or contact her directly, you can do all of that at her Etsy.com shop.
Being able to showcase unique artists like Shawnna is one of the best parts of being Princess YellowBelly Designs. We love discovering new artists, learning about their techniques, and getting to experience their amazing works of art. If you know of someone – or are someone – who practices a unique form of fabric art, please use the form below to let us know!
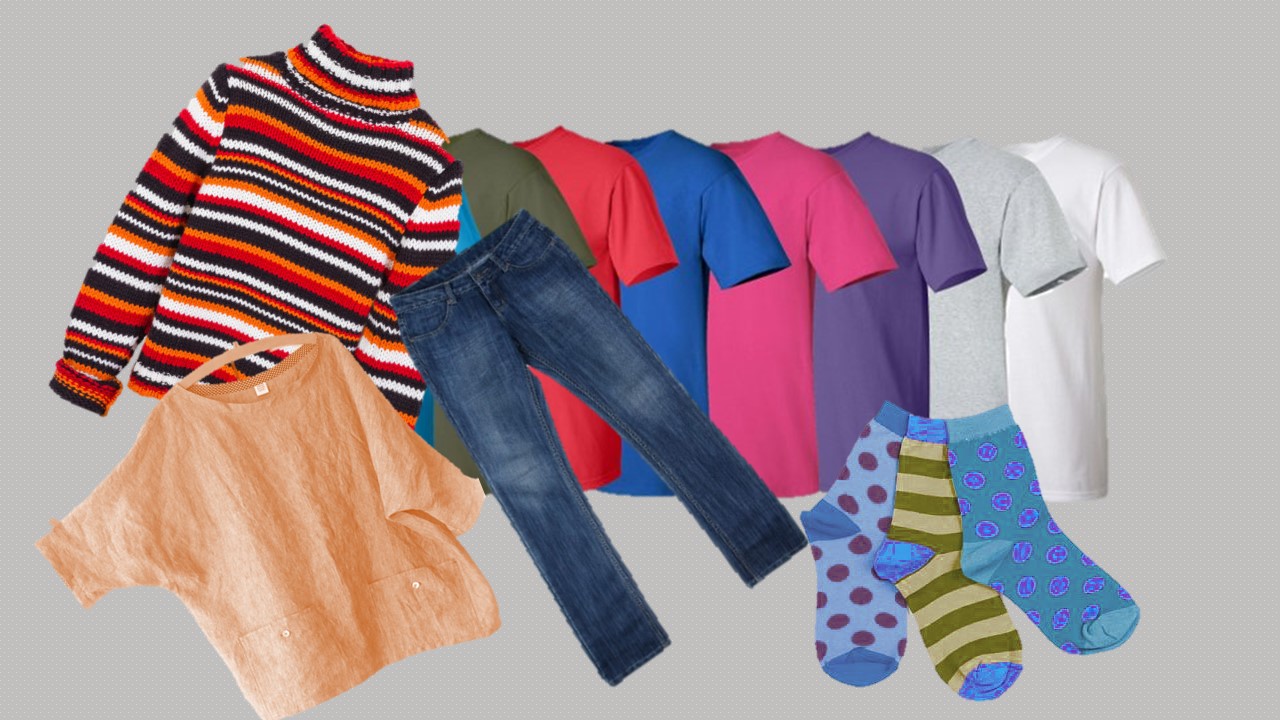
Now that we’ve properly explored how useful and important it is to be able to mend all mendable clothes for your family – let’s check in on the clothes that you’ll mostly be mending, and a few handy tips and tricks on how to mend.
Jeans are the hardest garments to mend because they are the thickest, but also because the pant legs are quite narrow and therefore hard to get under your sewing machine needle.
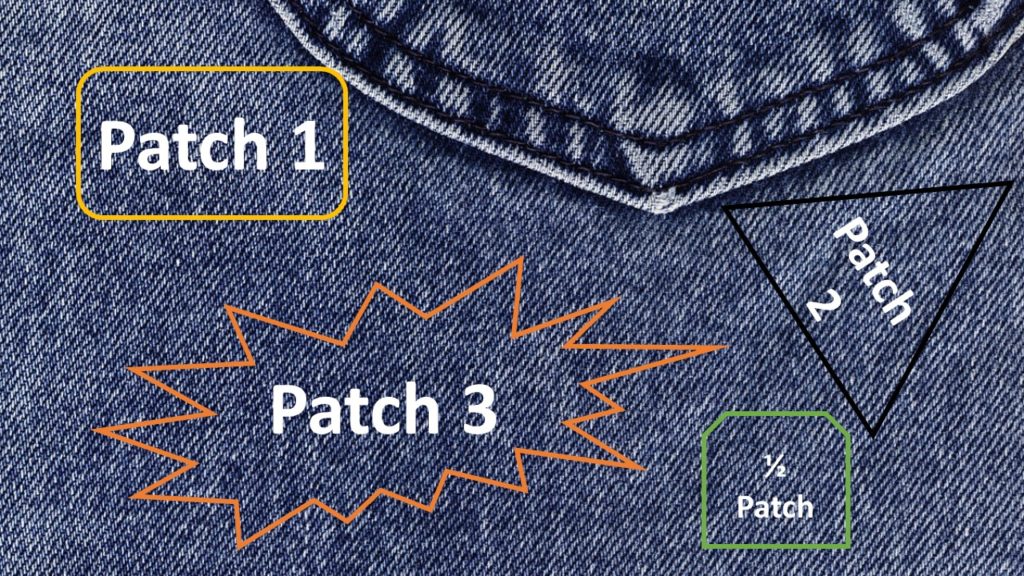
Preparing the Patch
Make a patch out of left-over denim you have in your stash.
Denim comes in all different shades of blue and many different colors as well. Try to find a patch that matches as closely as possible – sometimes the ‘inside’ color of a patch will match the ‘outside’ of the jeans’ color best.
Make the patch big enough to cover the worn part around the hole, not just the hole itself.
If you just make it to cover the existing tear, you will have those same jeans to mend in just a short while with a new tear beside the patch you just put on.
Cut your patch to fit the area it needs to cover – it doesn’t have to be perfectly square.
I just do this free-hand, and then I edge finish it with matching thread all around the outside.
Preparing the Tear
Trim away any frays or white shreds of thread over the tear.
These just draw attention to the rotten spot.
Turn your jeans inside out and pin the patch around 2 sides only.
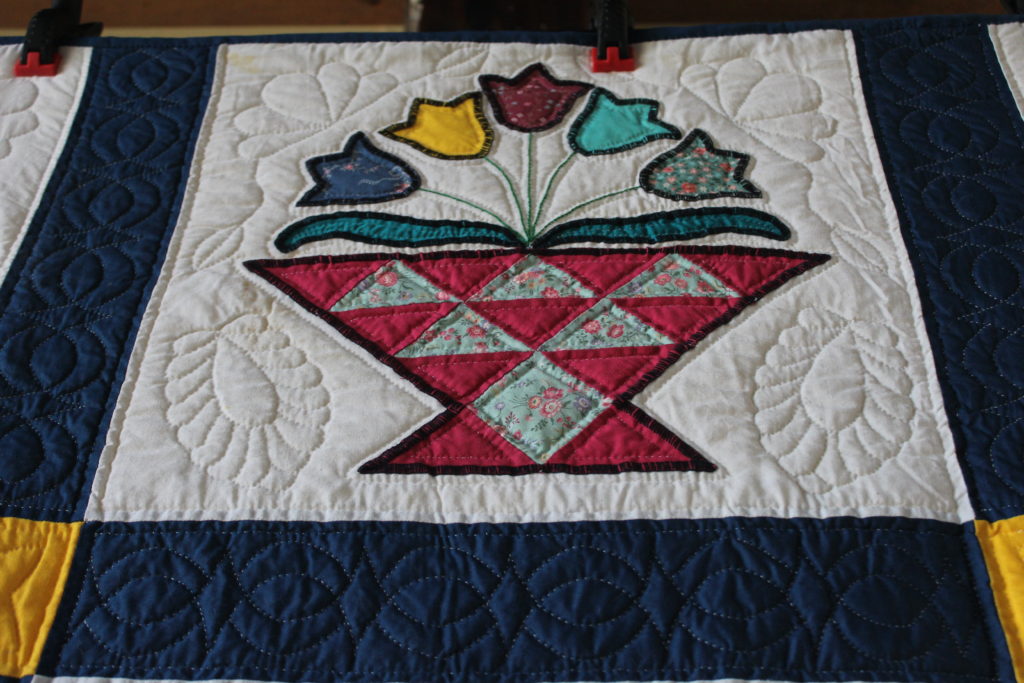
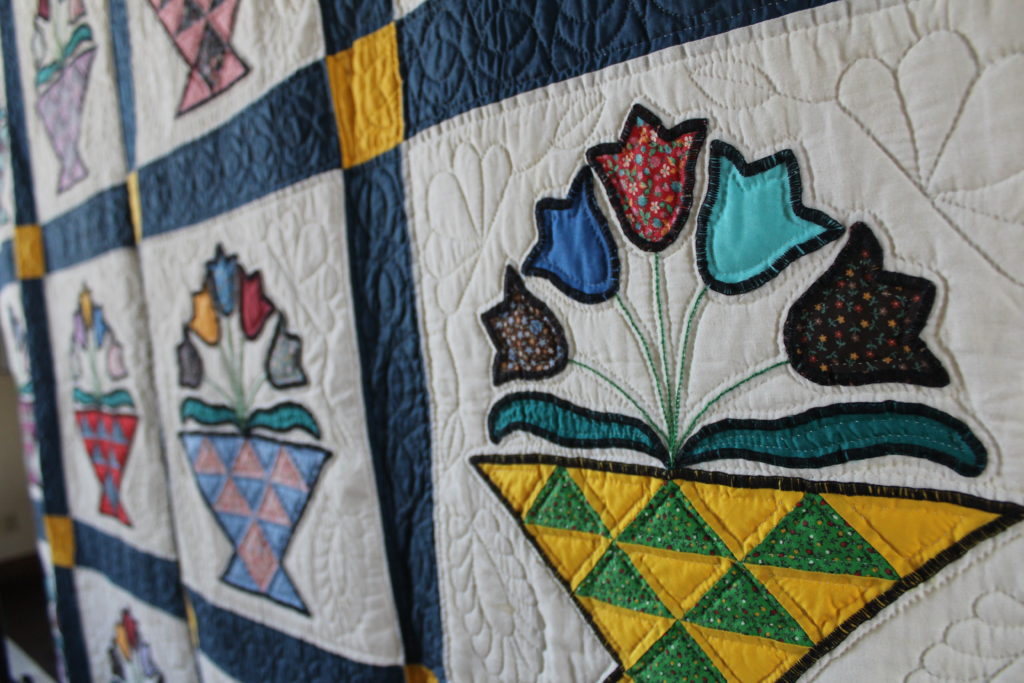
None of these are blue jean patches – but you can see the way patches work, and the different types of fabric that can be useful…
The jeans and the patch will both shift around as you sew and if you pin all 4 sides you will get pleats.
Slide the storage caddy sleeve off of your machine
Doing this will allow you to slide the leg of the jeans over the narrower sleeve so you can sew flat and smooth. This will work for most pant legs and sleeves as well, not just jeans. If the fit is really tight, I will drop the feed dogs so that I can move the fabric more easily. If you find it just too tight and unworkable, sew your patch on by hand using a whip-stitch.
Mending the Hole
Carefully sew a straight stitch all around your patch.
Make sure you have matching thread top and bottom for this part, if it’s close enough you may not even be able to see it once everything’s right side on and being worn.
Double-sew back from the front.
Turn your jeans right-side-out and using a narrow zig-zag stitch around the edge of the tear so that it won’t fray any further. Done!
If you can’t hide the patch – at all – start thinking of the denim like a blank canvas and get creative.
Sometimes I would make fancy patches for the girls’ jeans like hearts, stars or bunny shapes. These patches I would make out of bright, obvious colors and sew over the holes on the outside of their jeans so that everyone could see them.
A Few Extra Ways to Use Denim Patches
If your kids wear house slippers in the winter, chances are that the bottoms will wear through long before they will outgrow them. To extend their life, cut a piece of denim to fit, edge finish it, and sew it to the bottom of the slipper. When that wears through, layer on another patch. I have sometimes put 3 patches onto the bottoms as slippers as the kids passed them down to each other.
Sometimes the buttons on jeans are not sewn down well and will rip out, leaving a large hole behind. Make yourself a patch that fits over the hole and sew it down on the inside of the waist band and then sew the button back on. You have to give that button something solid to hold it so I make this a 2 layered patch.
How to Mend Underarm & Side Seams
The most common kind of “tear” that you’ll get in shirts and blouses aren’t tears at all. If the seams haven’t been sewn deep enough, or they get too much rough tear, sometimes the stitches in the seams will pop, and a hole will open.
These are my very favorite things to mend because they are so easy and quick to do and they’re invisible!
If a blouse or t-shirt has opened up along an underarm or side seam, simply align the seams again, zig-zag or serge over the hole extending the stitching ½” past each end and you’re done. If, when you turn the garment right-side-out the seam has a dip or bubble in it, turn it back to the inside and sew a straight stitch along the inside edge of the serge stitch.
This will even out any of those puckers.
If the hole or seam that needs mending is in a sweater do this by hand. If you whip-stitch across the entire hole from the inside and gently draw it tight as you go it will be invisible from the outside.
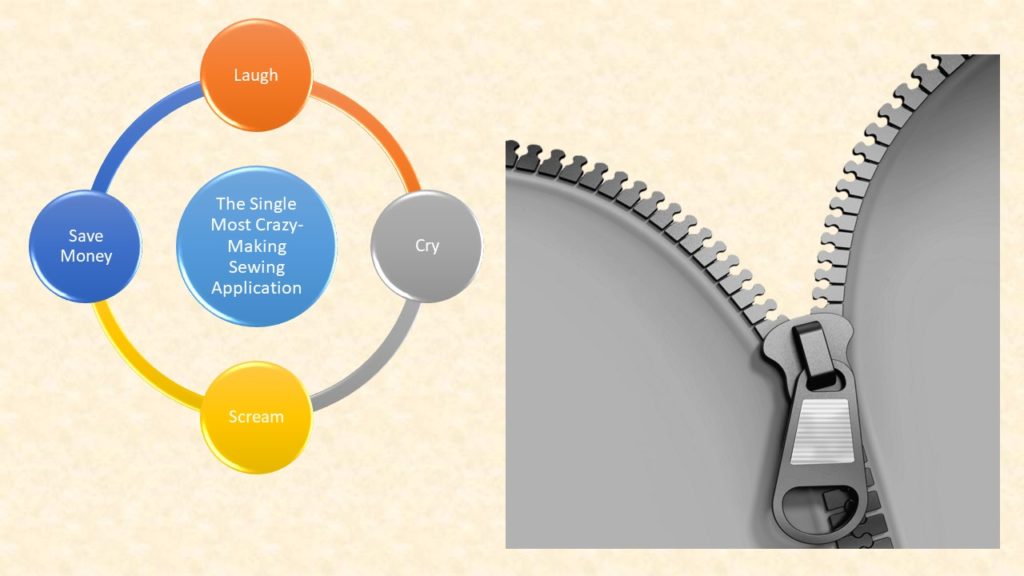
How to Mend the Devil’s Spawn – Zippers
Zippers are the items we hate to replace because they take the longest and are the most intimidating. It’s an illusion! They’re not really that hard once you learn how, but they do take time and care – and if you’re like me the tedious work is annoying – so make sure that the garment is worth it before you start.
Only use jeans zippers for jeans.
They are much heavier and much more durable than the regular zippers.
Try to use the same length zipper as the old one.
If zippers are too long, you can cut off the excess after you sew them in, but jeans zippers are so heavy that they will ruin your scissors if you try this.
Look carefully at how and where the zipper is sewn in – different manufacturer do it differently.
Carefully use a seam ripper to pull out only one side of the old zipper.
Remove all old threads and then pin the new zipper into place on that side.
Use a zipper foot to baste in this first side.
Now, tear out the second side and baste that side in.
When you’re satisfied with the way it looks and fits, sew it down for good. I always like to do this twice because zippers get a lot of use and wear and tear. You’re done!
How to Mend Missing Buttons
If you have the old button all you need to do is thread your hand sewing needle with matching thread and sew it back on. So I’ve trained my family to save all buttons and beads that fall off of clothes.
If you don’t save the garment, or if you don’t have the matching button, you’ll likely be able to match a button from the ones you’ve salvaged over the years.
If you can’t find one semi-identical, find one in the same color and shape category. If the missing button is anywhere from the neck to bellybutton area, then a different button will be extremely obvious. So remove the lowest button on the garment, sew it into the missing slot, and sew the not quite matching one into the lower spot.
No one will ever notice!
I find it a lot faster to do buttons by hand than fooling around taking the old foot off my machine, putting on the button sewing on foot, getting the spacing right, etc. Much simpler and faster to do it the old fashioned way!
I like to double my thread when I sew on buttons because it doubles the strength and halves the time it takes.
Sew through the button holes at least 8 times and then wiggle it. If it’s tight then slide your needle carefully through one of the holes but not through the fabric. Wrap your thread around the bottom of the button at least 3 times before pushing your needle through the fabric to the back.
Wrapping the thread around the underside of the button is the magic trick here – my Mom taught me that neat trick.
On the back slide the needle through the first layer of fabric and then pull the needle twice through the loop before gently pulling it tight. This gives you a double knot. I always do this twice to make sure my knots never come undone, and I can’t think of one instance when one of my buttons have come off.