Be Still My Beating Trapunto – The Easiest Way to Selectively Pop-Up Your Quilting

Fairy boy chasing a button bumblebee
Princess YellowBelly Designs logo

Trapunto is an Italian quilting word that means “putting more batting behind some design elements in your project than others,” which effectively selectively pops-up your quilting designs.  You can see why we refer to this design skill as trapunto – it’s much shorter in Italian!!  Unfortunately, linguistics alone does not make this technique any shorter in execution.  

Back in the early days of my quilting journey I was fascinated by the look of trapunto because the extra batting seriously intensifies the 3-D effect of the design it lives behind and makes for a very elegant looking finished project.

Unfortunately, achieving this effect is EXTREMELY time-consuming and to me anyway – off-putting.  

Our updated, time-saving trapunto techniques allow for multiple fantastic projects – some of them TOTALLY unique…

The Hardest Way to Selectively Pop-Up Your Quilting

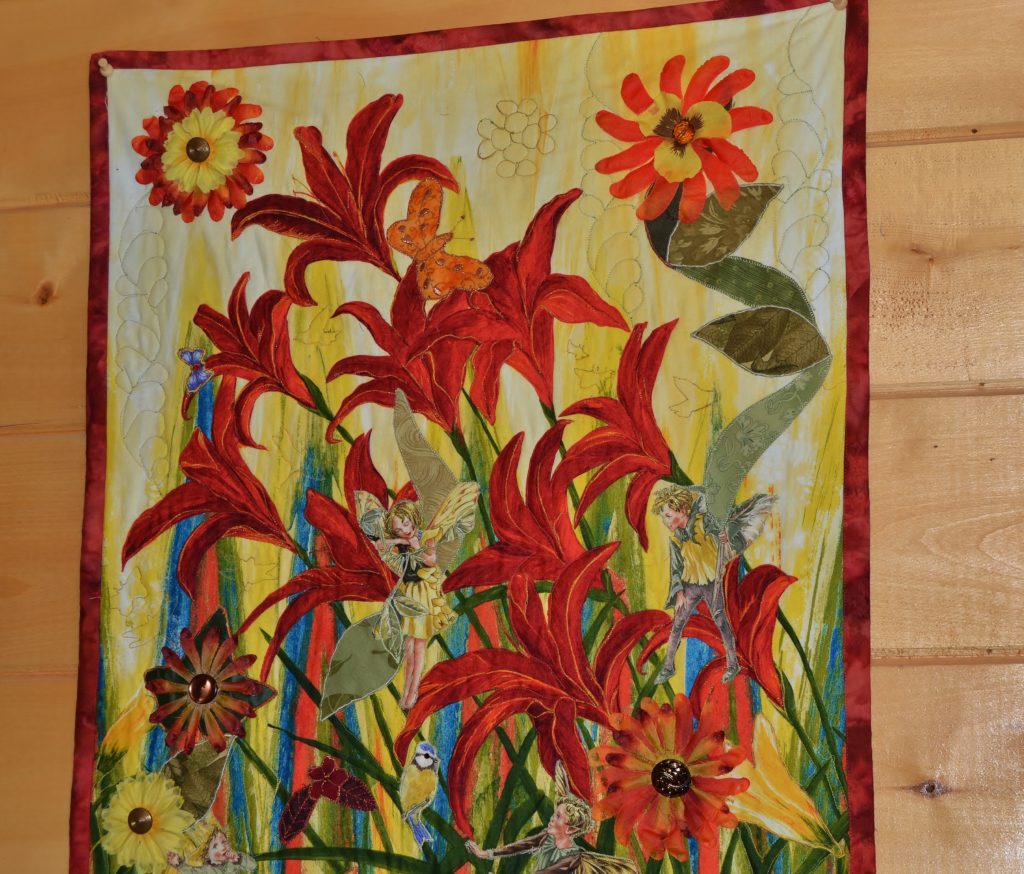
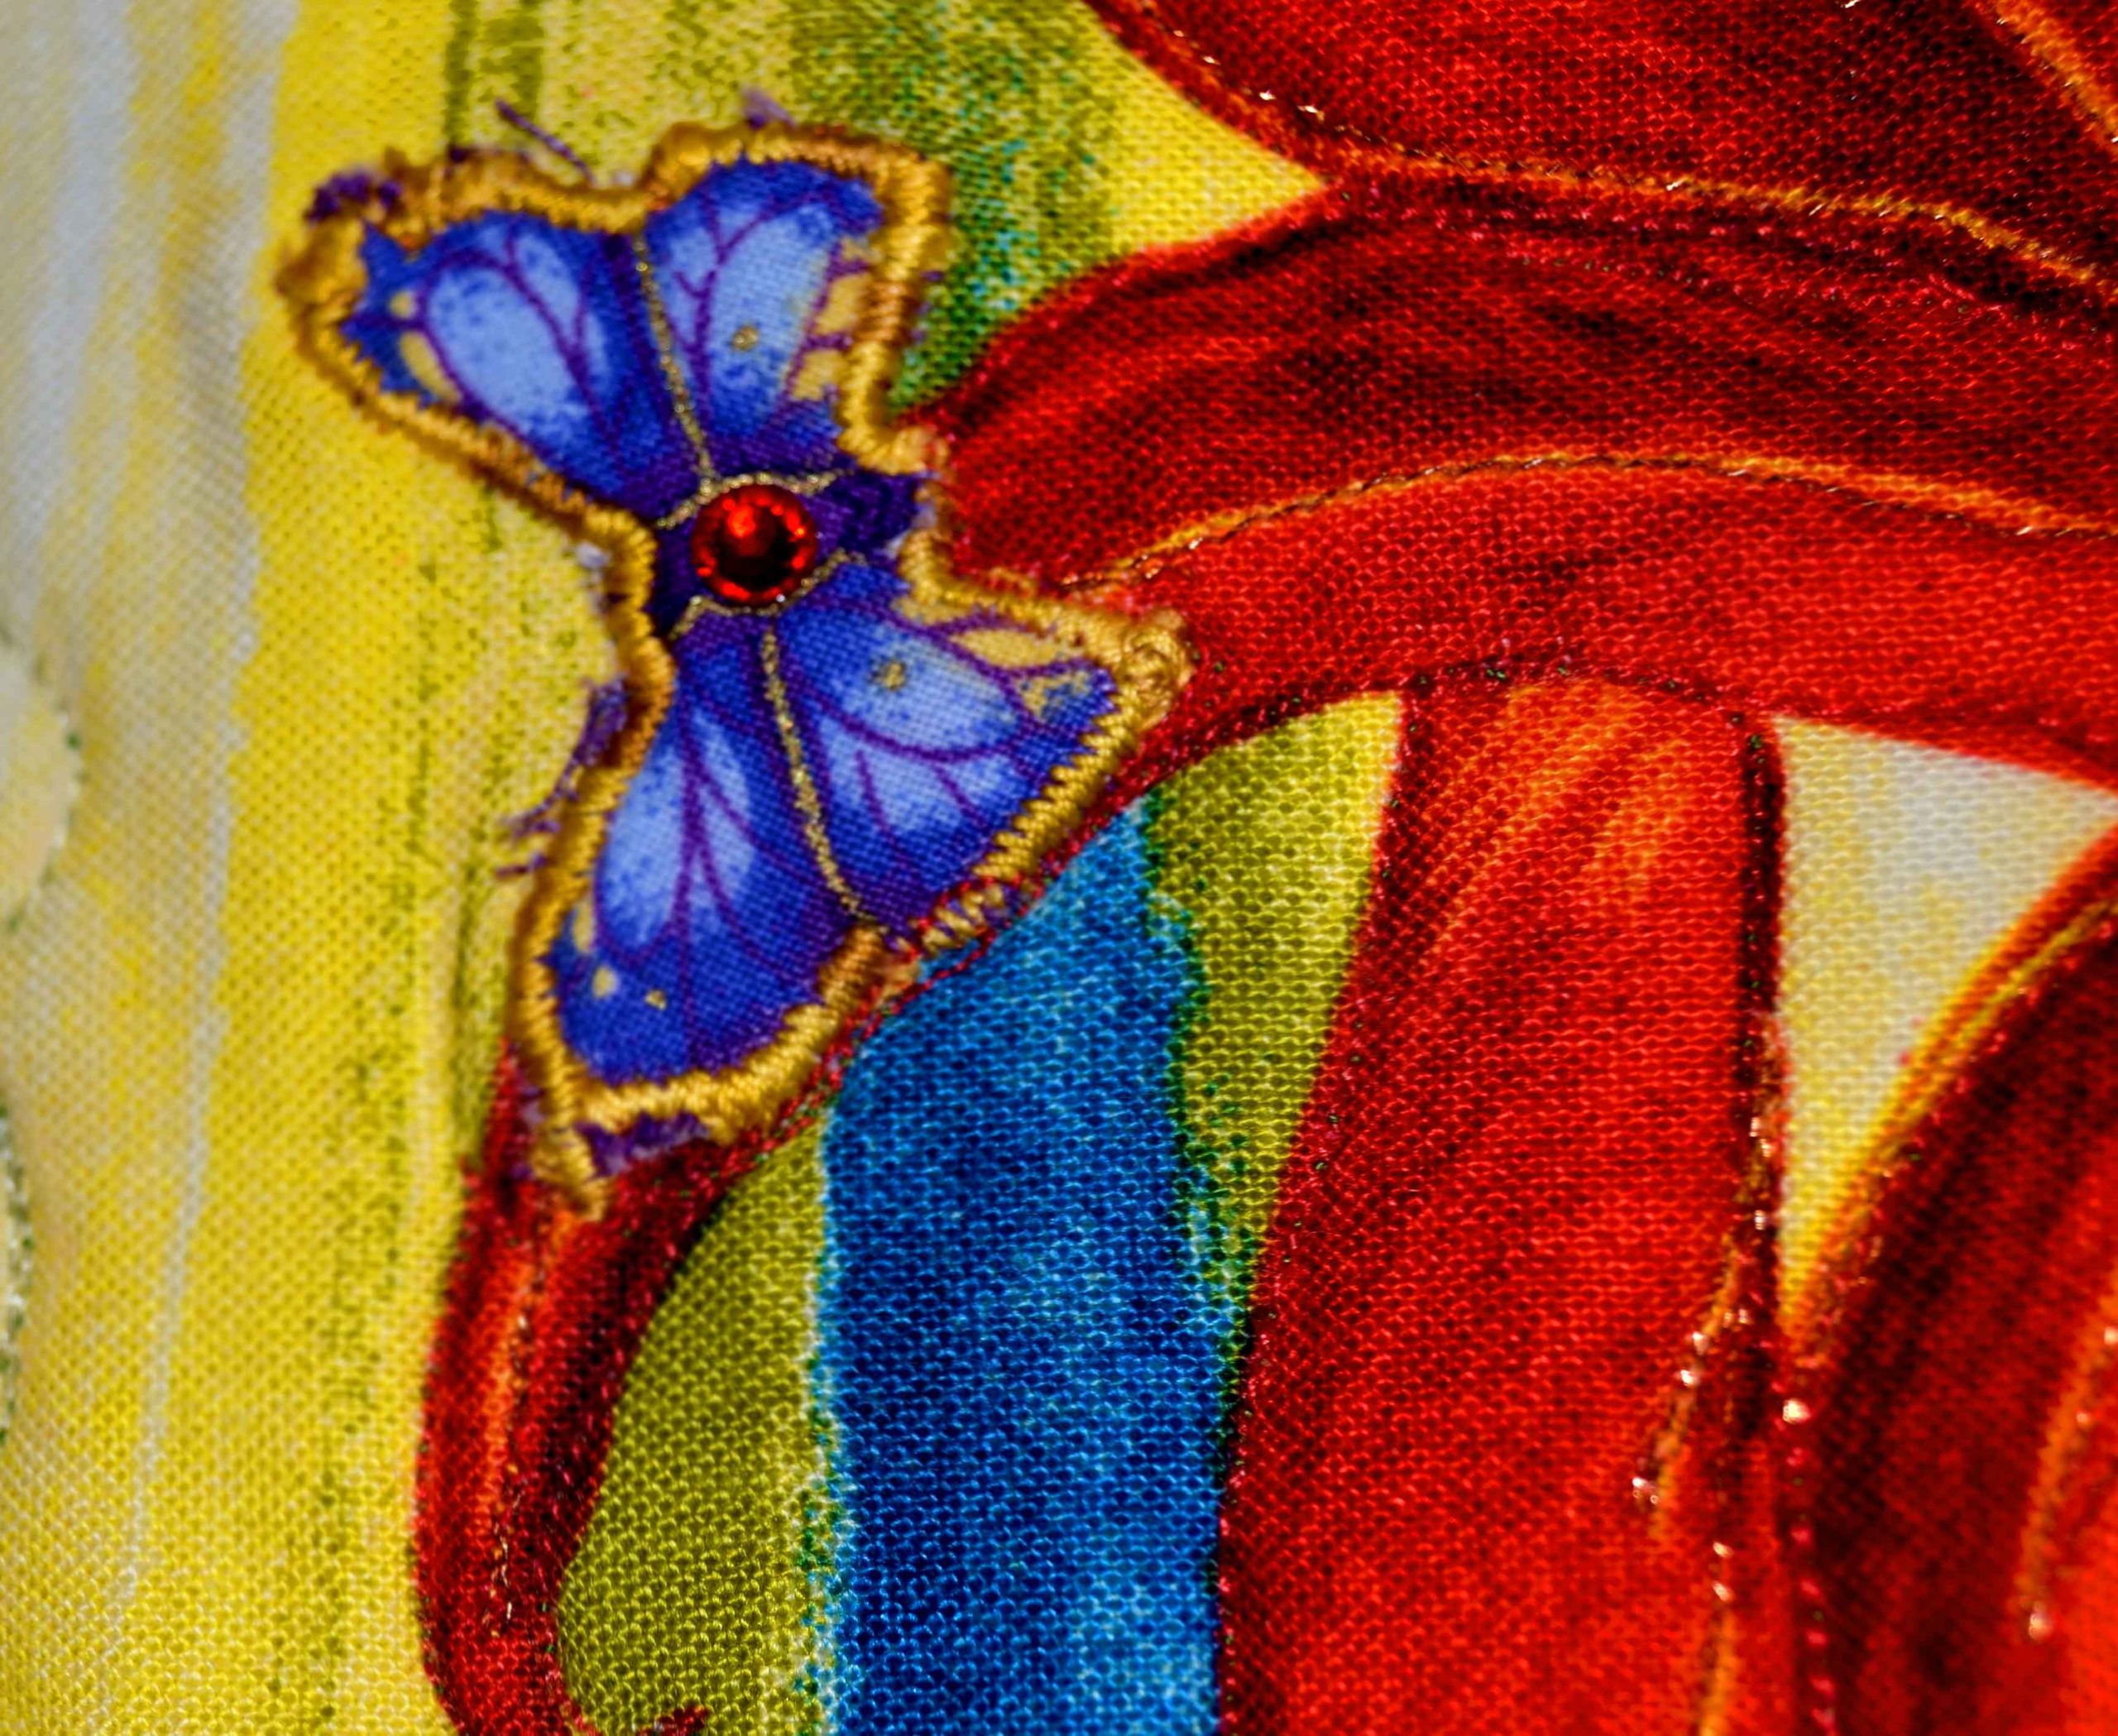
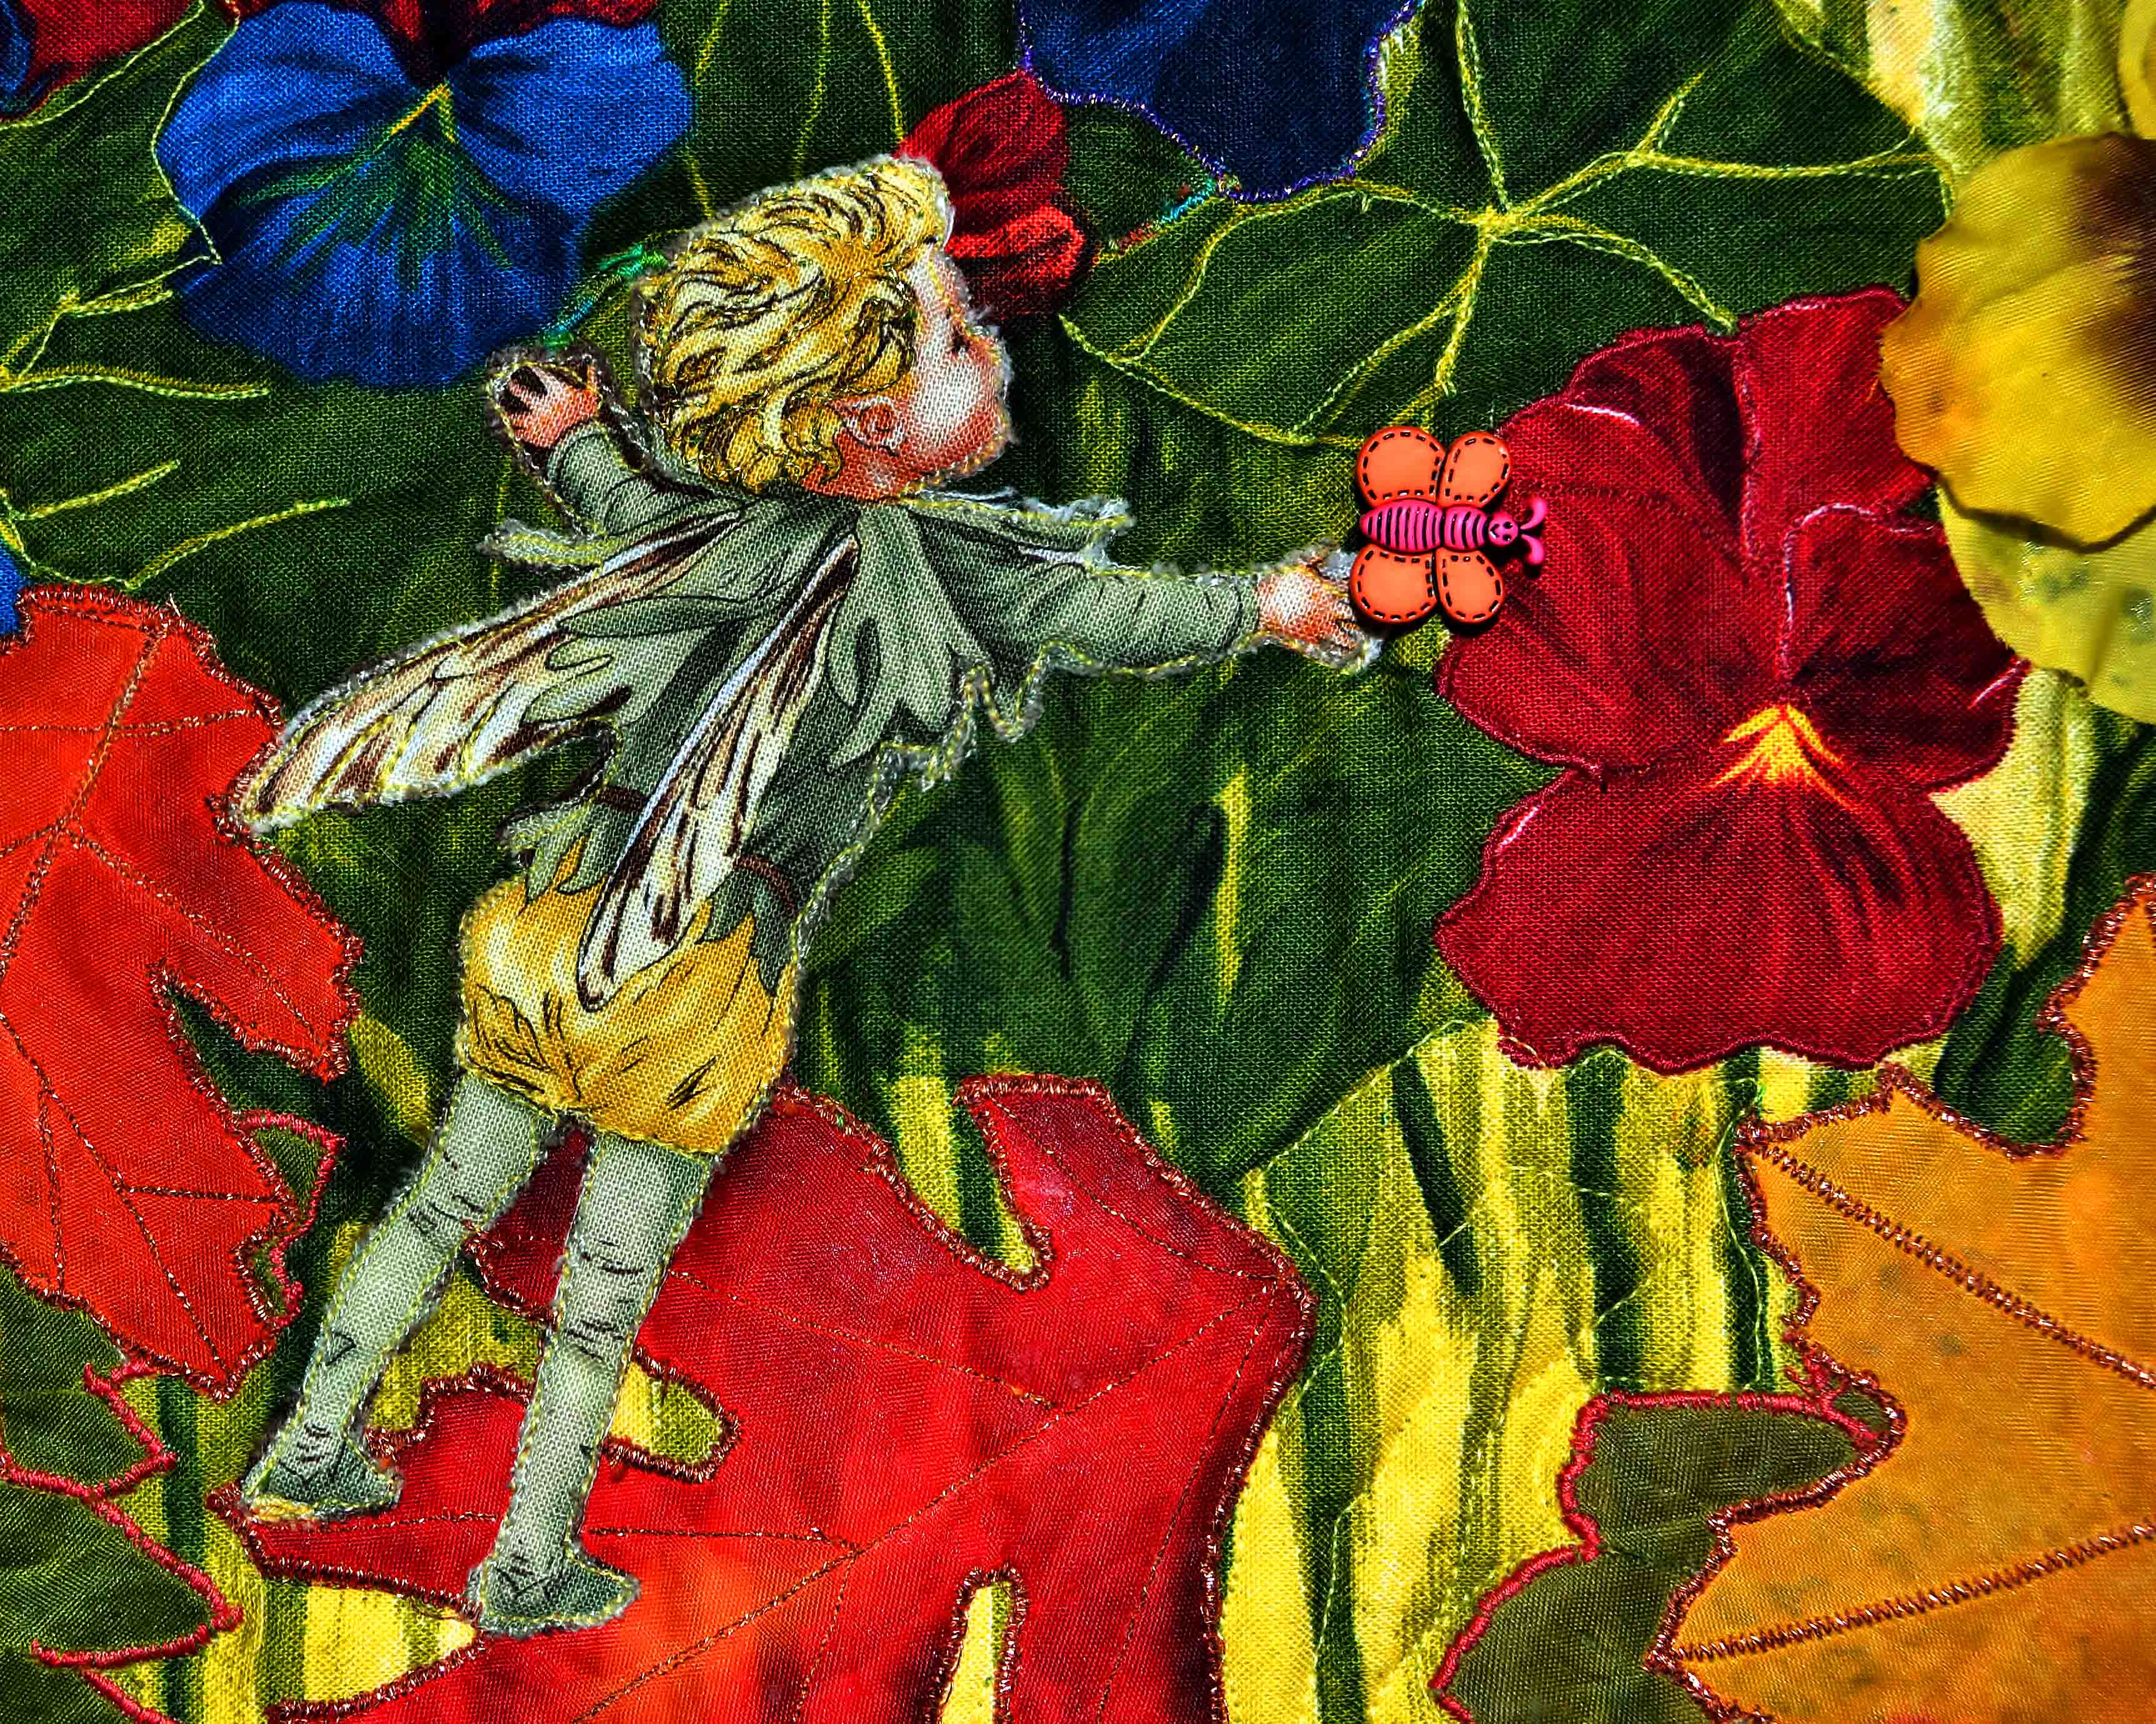
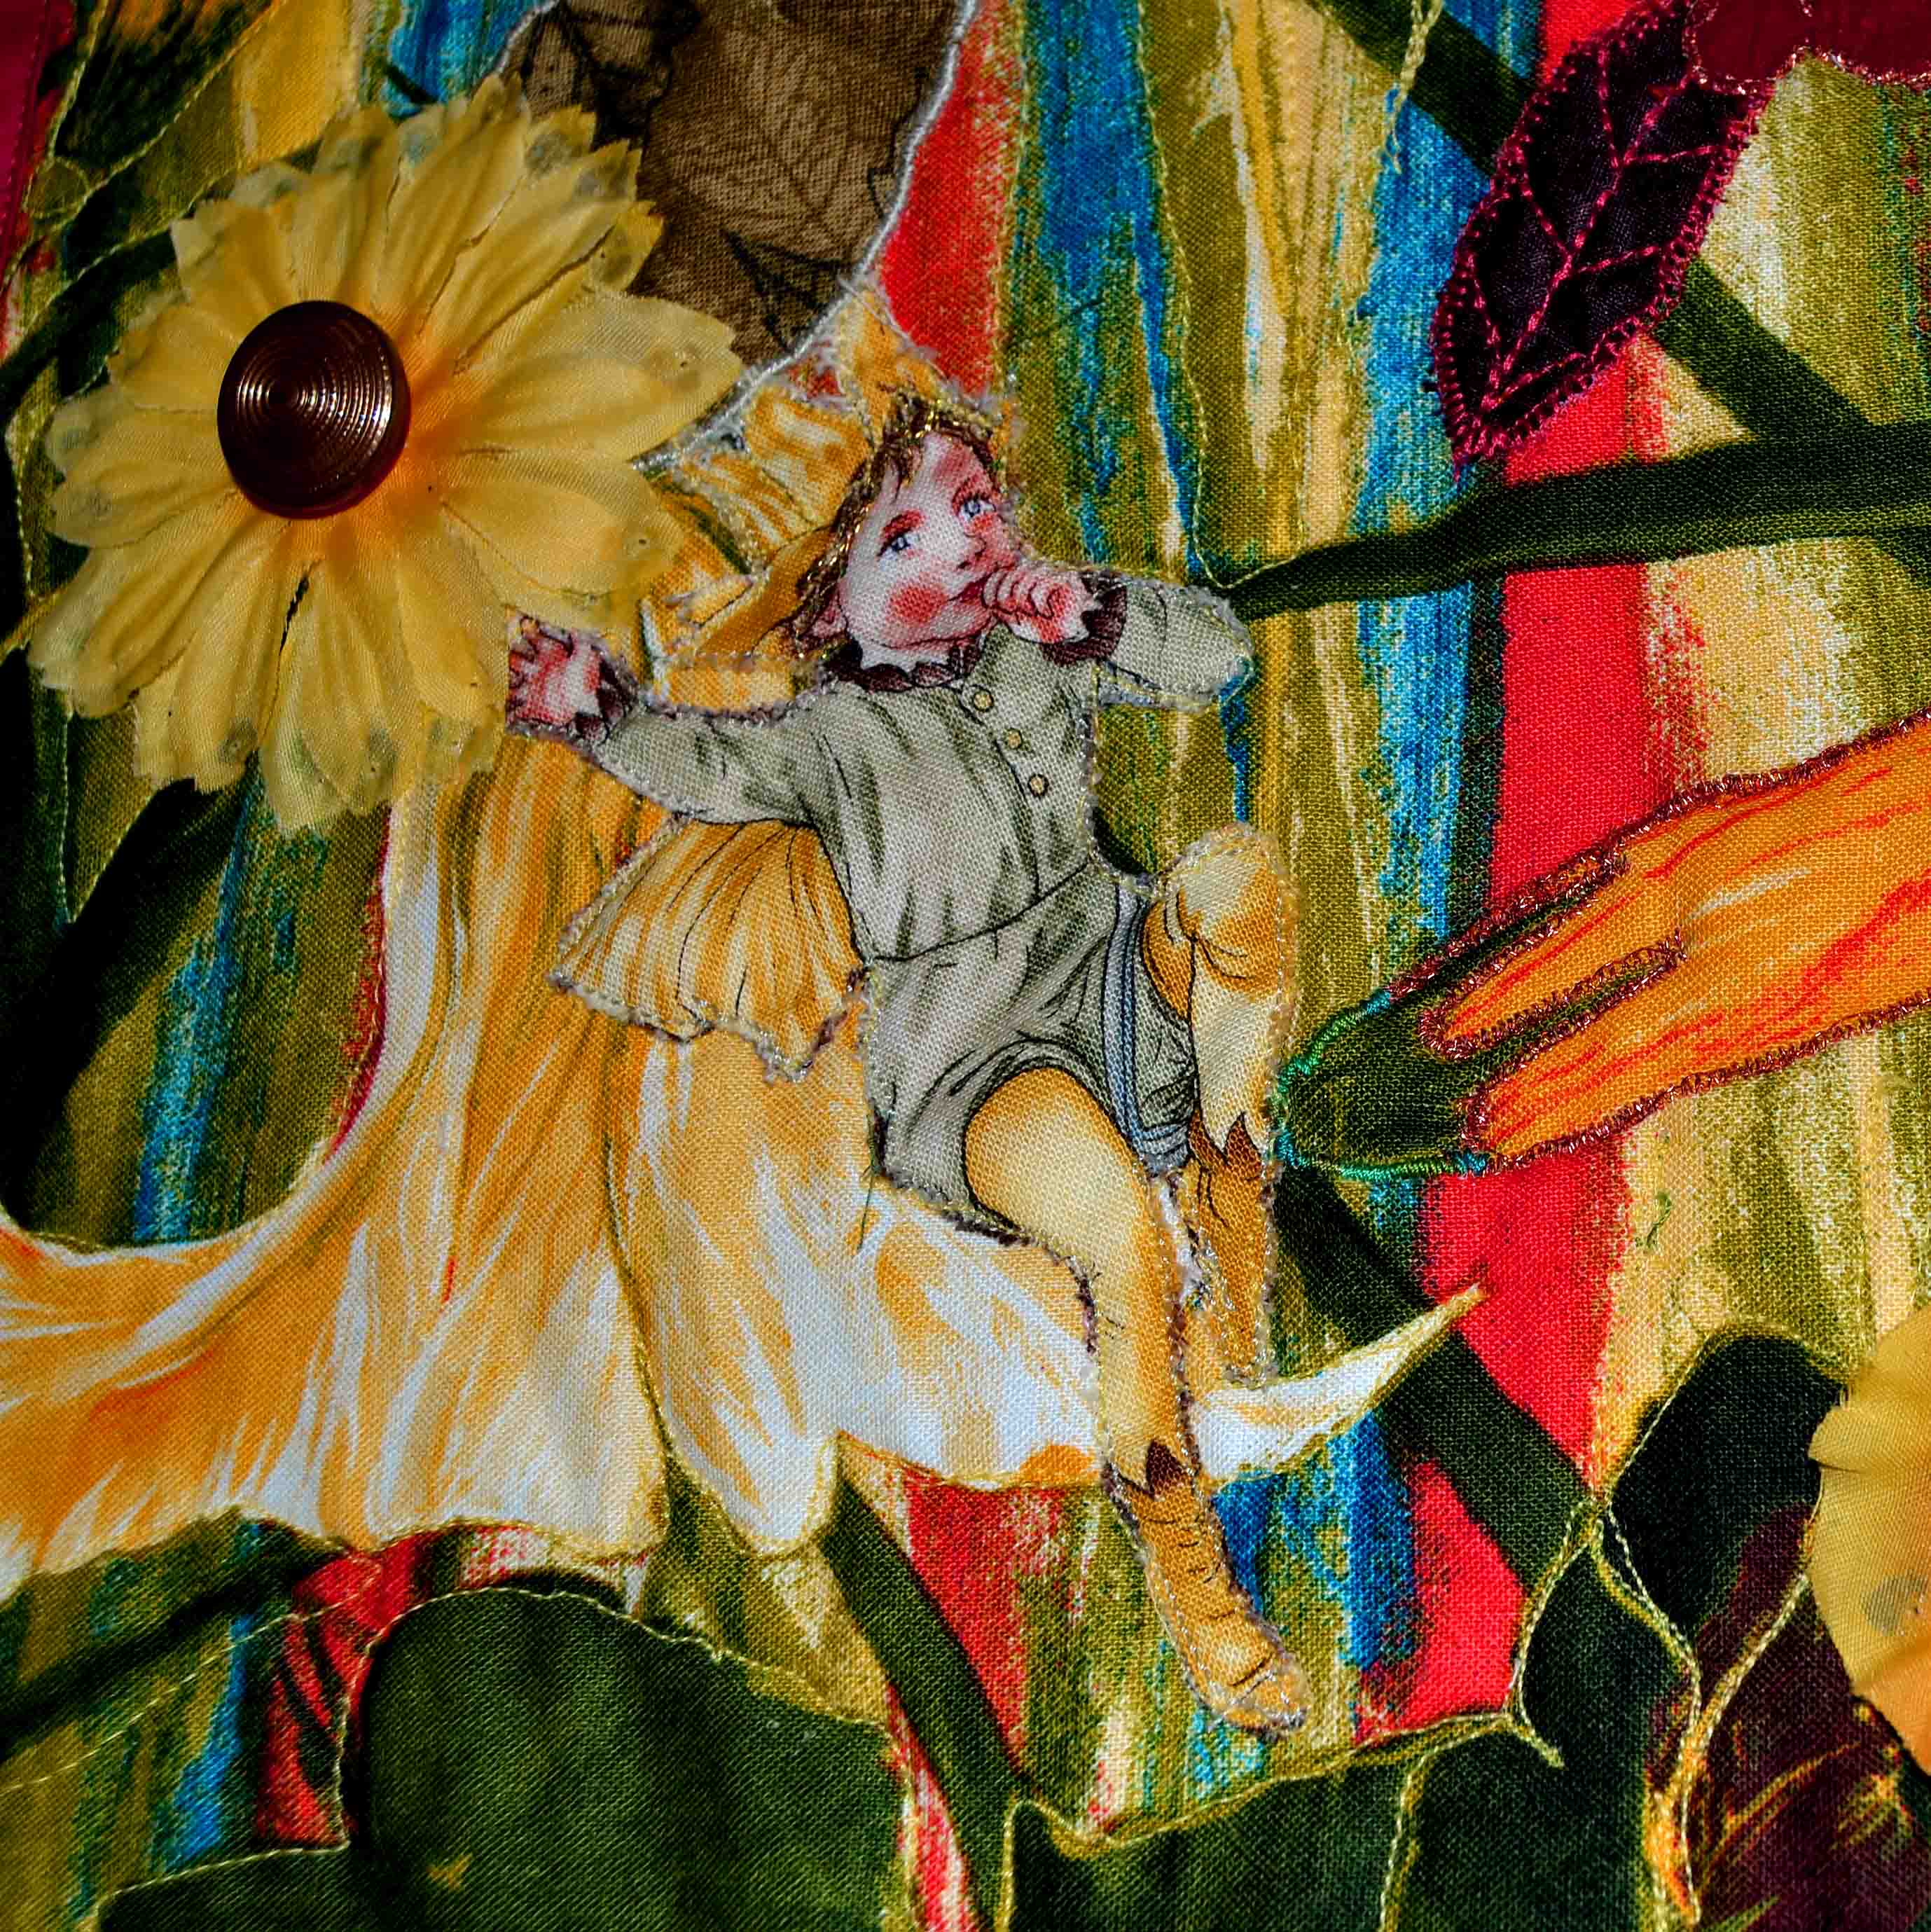
Suzanna and I decided to try the trapunto technique on a wall panel we named ‘Fairies in my Garden’, a beautiful piece that depicts 7 pale green fairies playing in a bed of autumn-ish colored tiger lilies. 

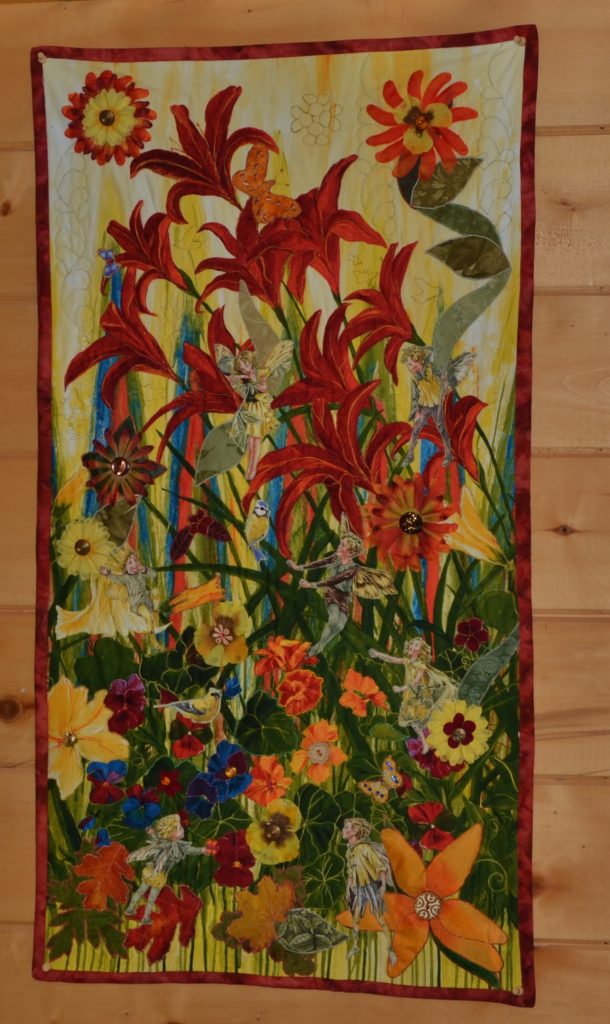
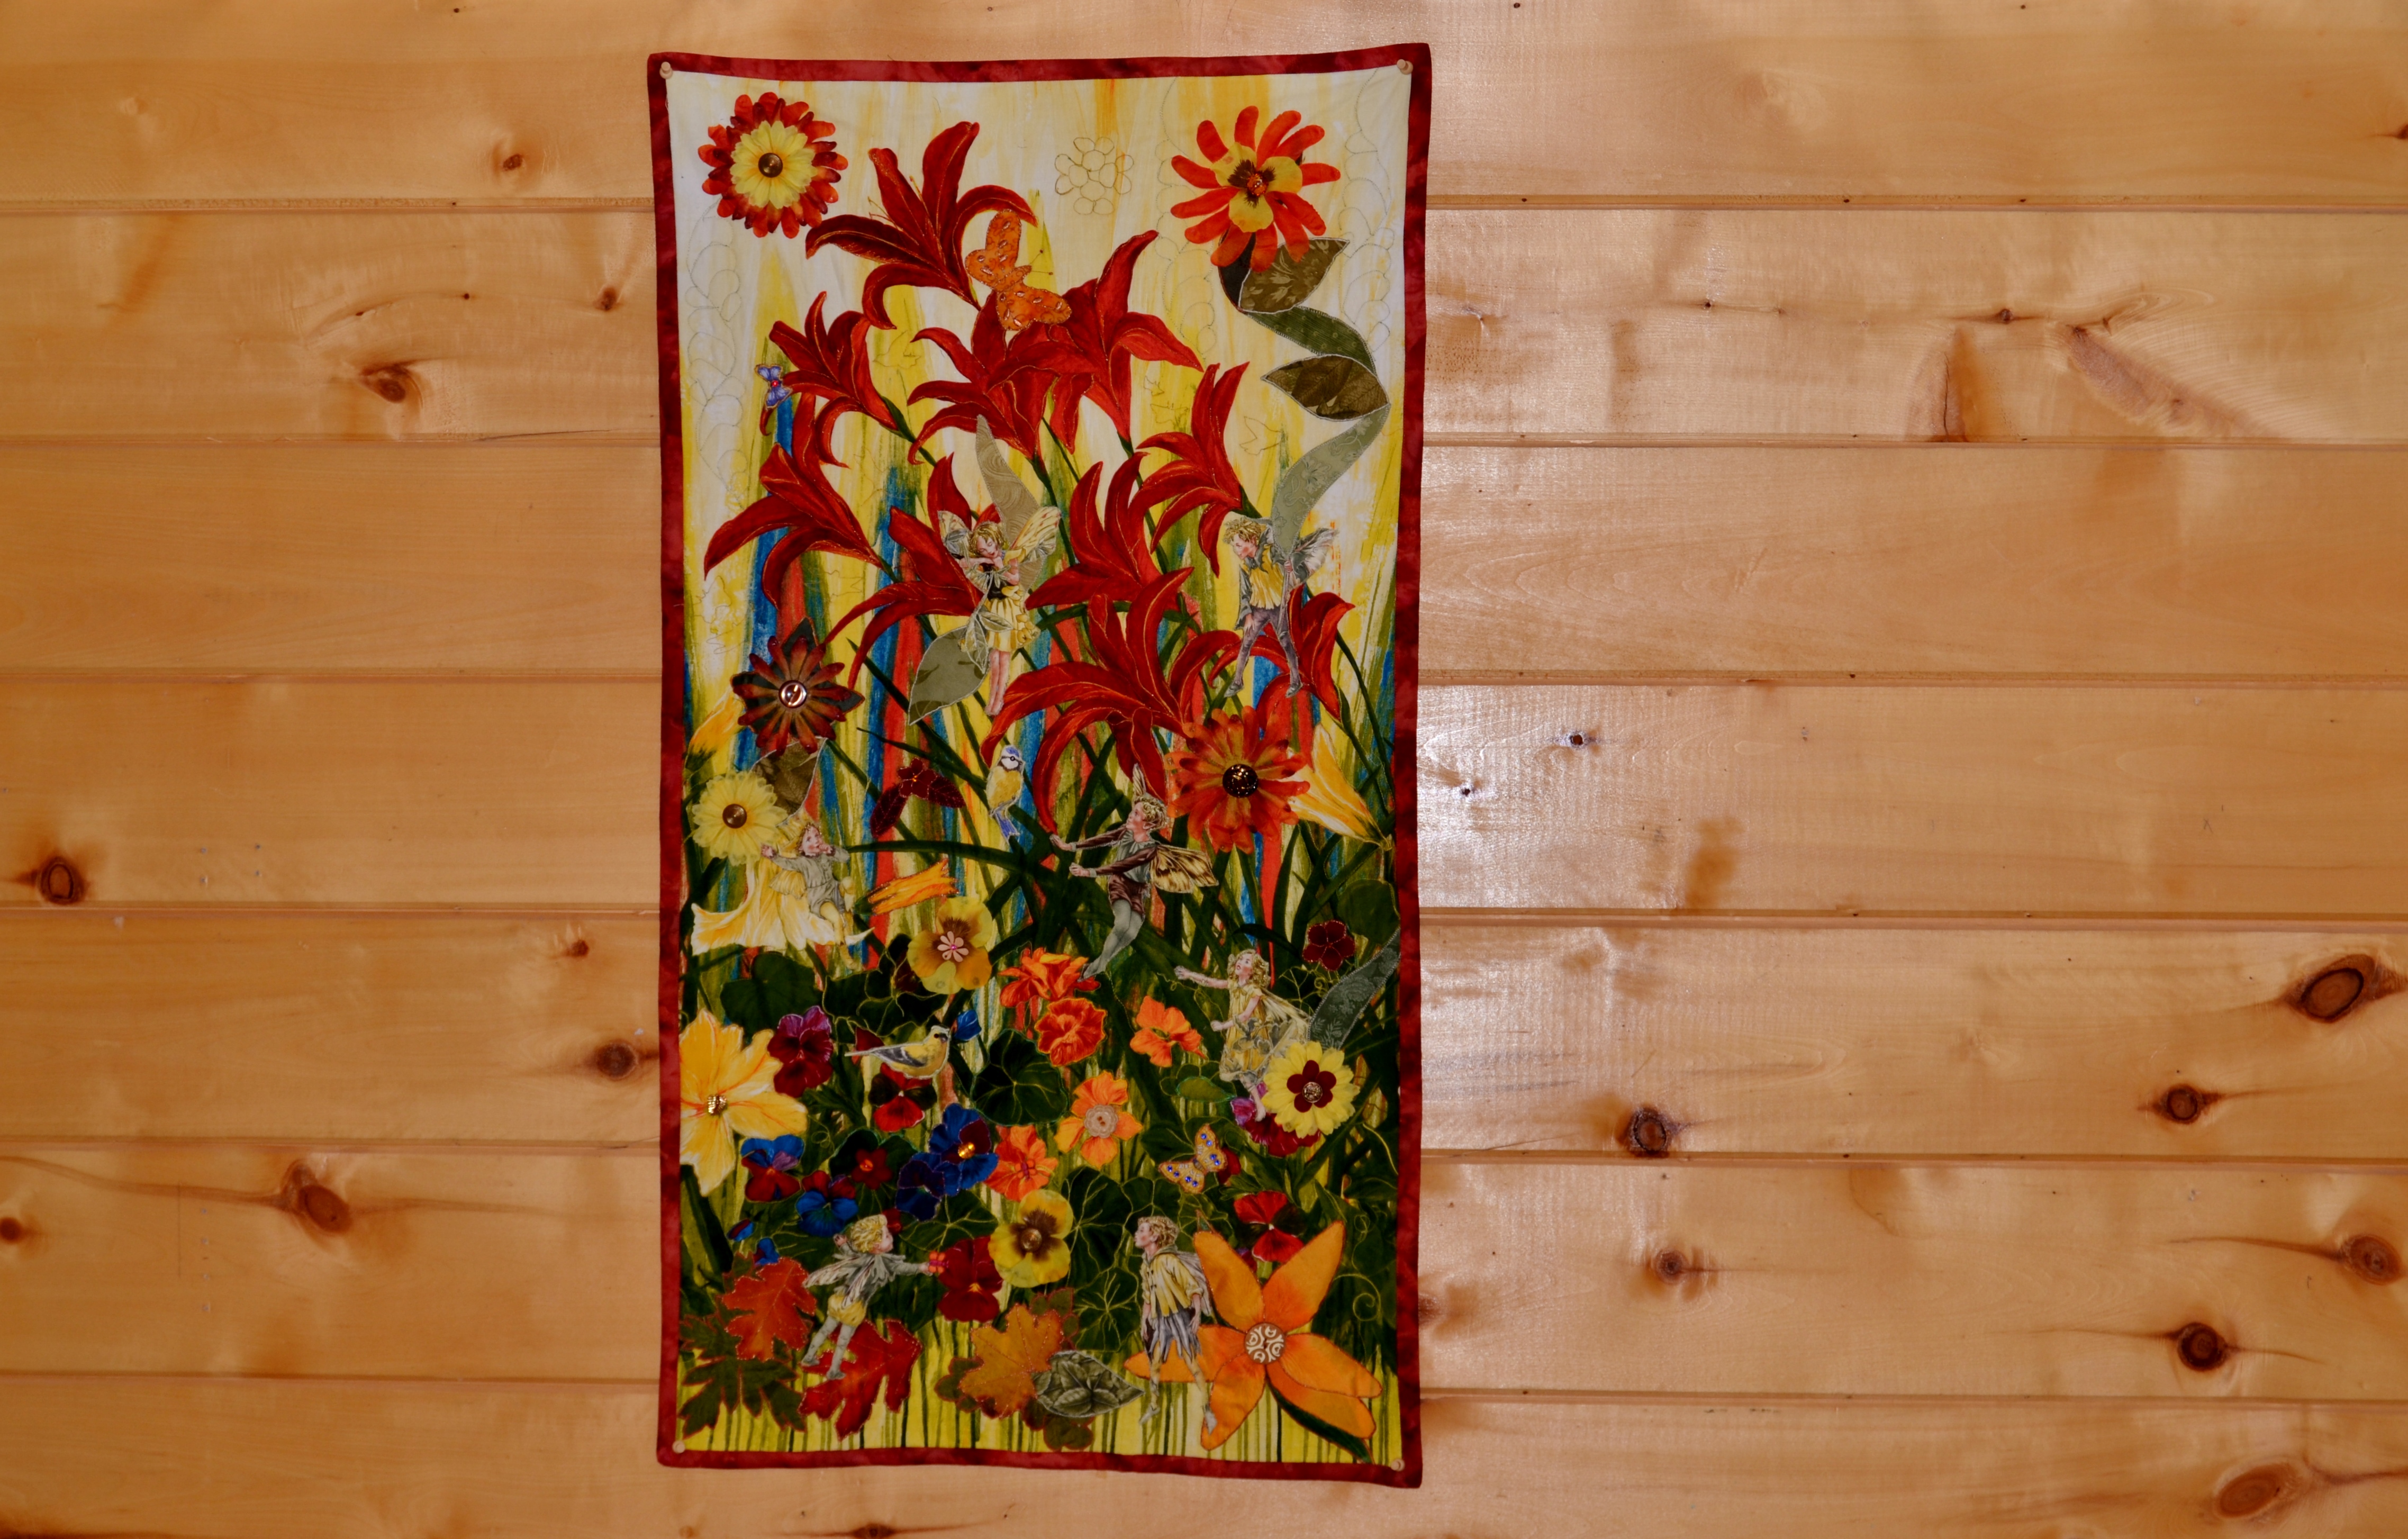
We wanted the tiger lilies to pop more than the surrounding flora & fauna and certainly more than the fairies, since everyone knows that fairies are extremely difficult to see in the real world!   Our solution to popping out the tiger lilies – trapunto.  It’s a great technique with a very simple concept:

fairy girl standing in trapunto lilies
  1. You place batting behind your project and then quilt around only those elements that you want to ‘pop up’… 
  2. When you have those elements quilted, you turn the project over to the back and carefully trim away any batting that is not directly behind your chosen elements. 

So simple, yet so extremely tedious – not to mention time consuming – and a waste of perfectly good batting. 

Suzanna spent hours with a small pair of embroidery scissors, carefully trimming away any excess batting.  As I watched her I decided that there had to be a bigger, better & faster way to do this.  And there was!

Developing a Simpler Method – the Princess YellowBelly Way

Naturally, I decided to eliminate the trimming away process altogether. 

First I decided which elements I wanted to ‘pop up’ and then I taped the front of my project onto a large window.  This makes it relatively easily to see through. 

Then I would layer paper over this and trace the elements I wanted to selectively pop-up, making sure to label each shape as I traced it.  It’s quite amazing how shapes very often don’t look like the object they are. 

I would then cut out the shapes from the paper and then cut them out of the batting

Using basting spray and a hot iron to hold the batting shapes in the right places on my project, I would then proceed to quilt them lightly along the outside edges. 

Note:

The more heavily you quilt a design, the flatter it becomes – so, if you want a design to ‘pop’ only quilt around the outside edges the first time around.

Once all of my batting shapes were secured, I’d use basting spray over the entire back of the project and baste a layer of batting over the entire back of my project.  This effectively removes all potential wrinkles and pleats from the shaped batting pieces. 

Then I’d spray more basting spray over this layer and then lay down the backing fabric over top of this.  A hot iron works great with basting spray to remove all wrinkles. 

Finally, I’d quilt as desired – making sure to leave my double-batting design elements as lightly quilted as possible. 

Trapunto Light – The Quickest & Easiest Way to Selectively Pop-Up Your Quilting

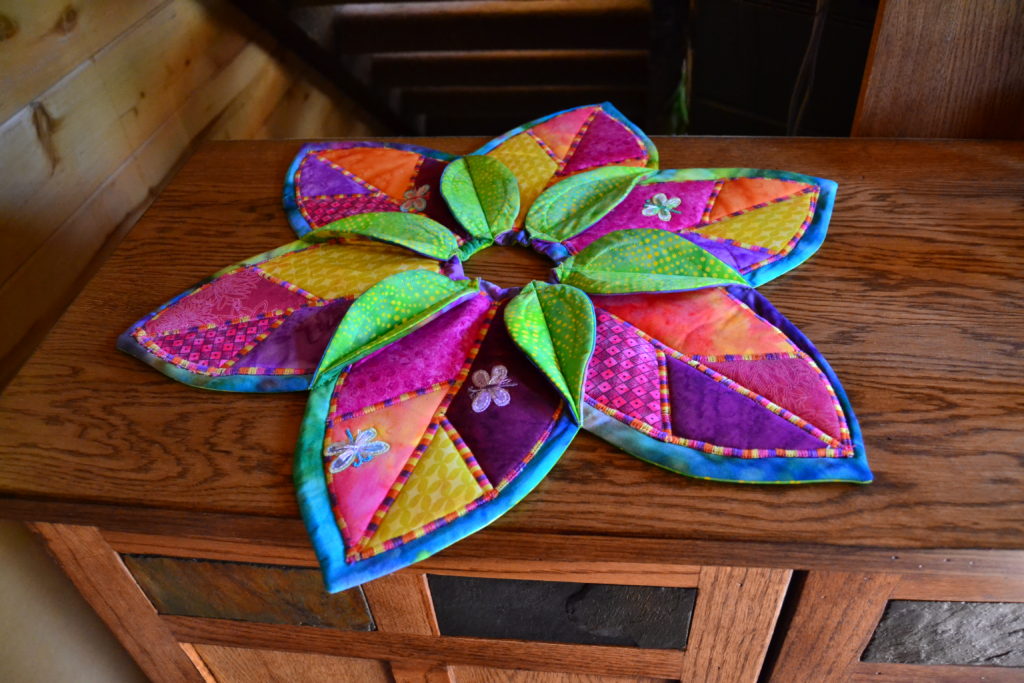
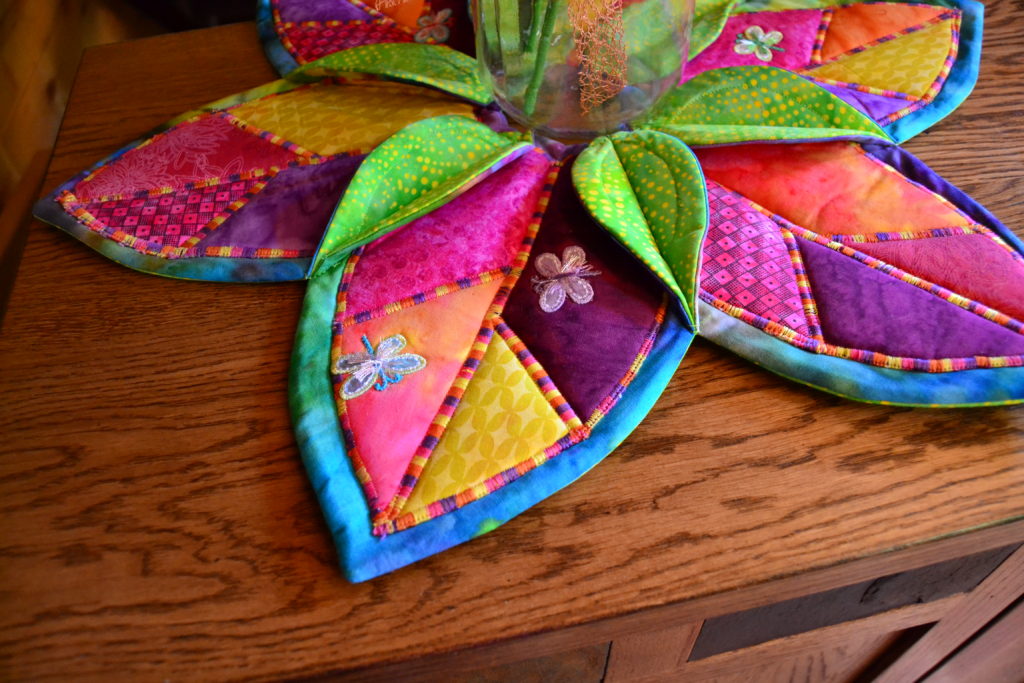
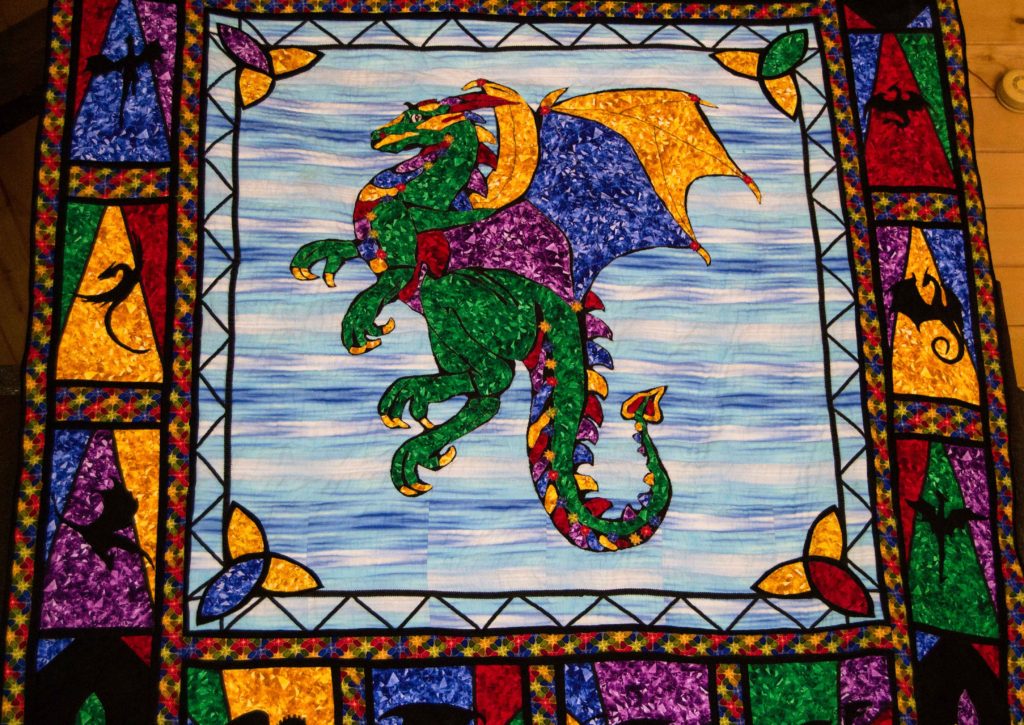
Wah-la! Trapunto – quick and easy, or, as I like to call it – ‘Trapunto Light’!  The main dragon on my Dragon Quilt was done this way.

stained glass dragon in jewel colors

After I had used this new technique a number of times I found that wonderful new product – Bosal-n-R-Foam.  I actually bought the foam because I was designing a media satchel for the girls’ and the diaper bag pattern I was using as my starting point required this stuff. 

As I sewed with it I found out 2 things:

First, keep it out of the seams, and secondly, pop-up foam is much thicker than batting and when you sew enough of it into something (like a media satchel), it will actually stand up on its own! 

You can bet by the time I was finished with those 2 satchels, I had visions of trapunto dancing in my head, but this time, instead of Trapunto Light I was envisioning:

Mermaid quilt

Trapunto on Steroids!  The Most Striking – Easy – Way to Selectively Pop-Up Your Quilting

You guessed it.  One layer of foam is like 6 layers of regular Warm and Natural cotton batting stacked together, so you get a lot more bang for your Trapunto buck when you use foam behind the design elements you need to selectively ‘pop-up’ your quilting designs and projects. 

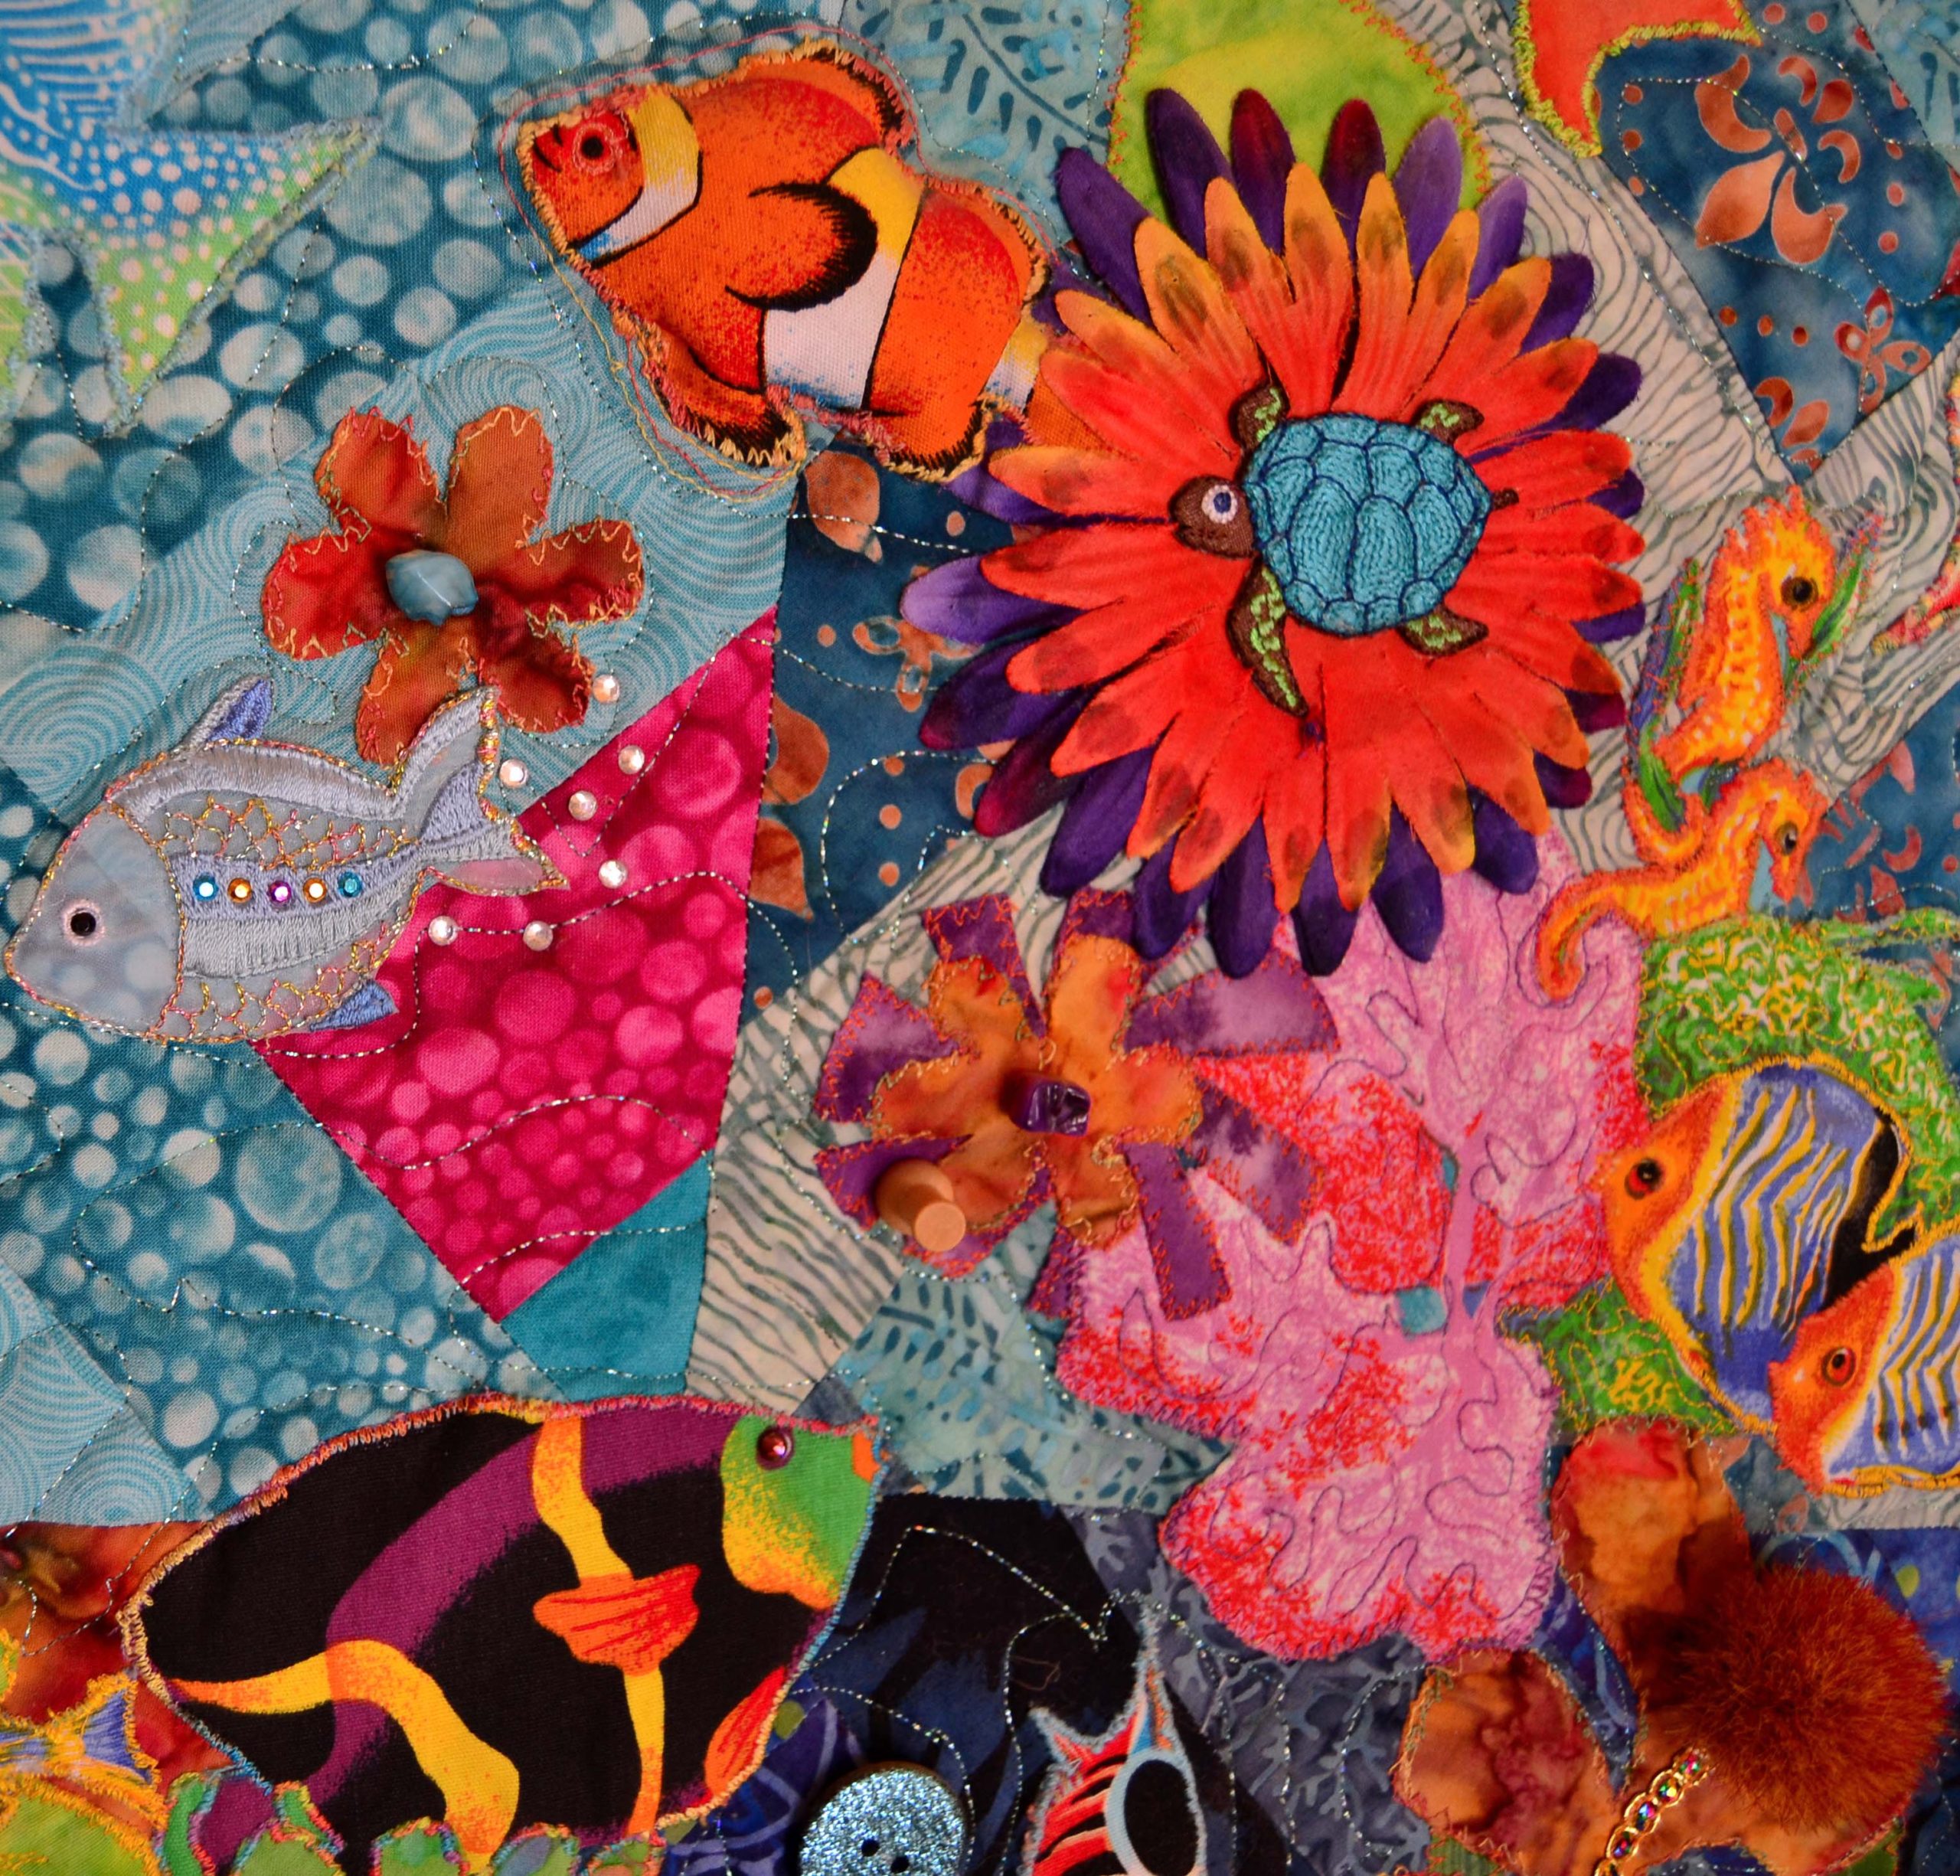
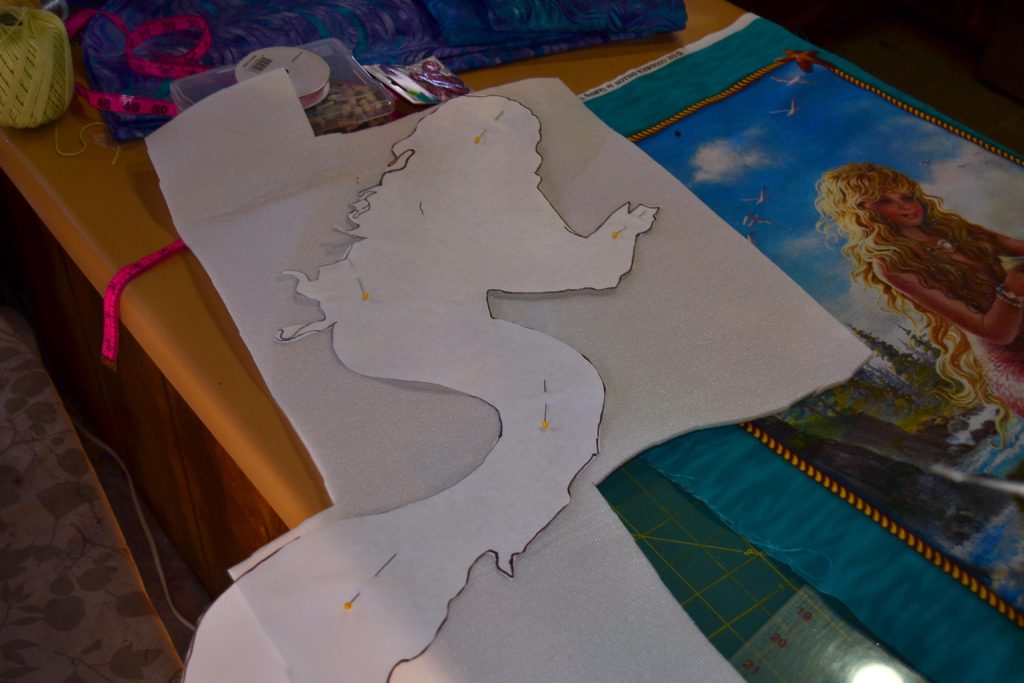
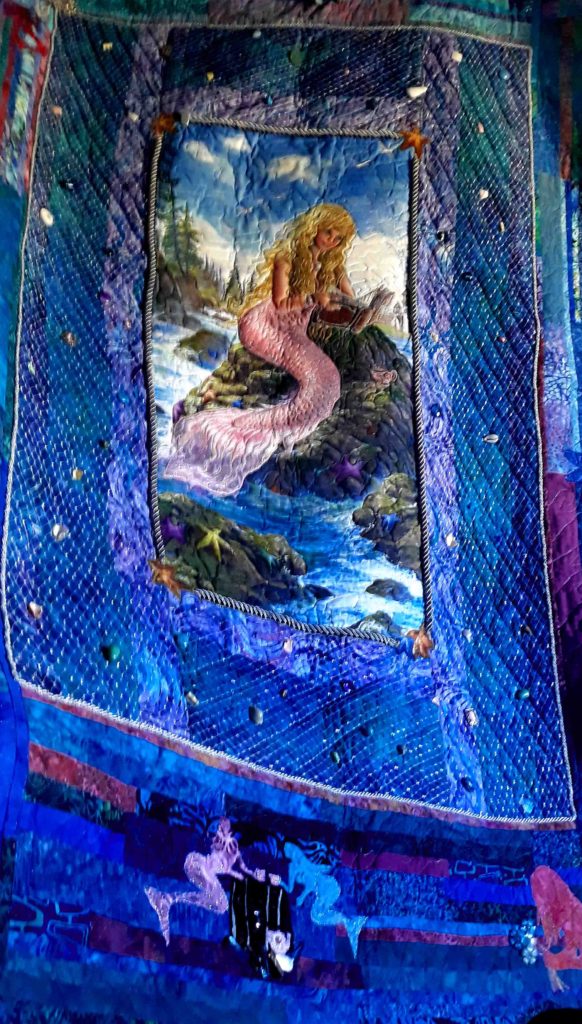
This is what I did behind the central mermaid in my ‘Ocean Maidens’ quilt.  As well as the book she’s reading and the starfish around her tide pool.  This striking, and fairly easy, technique made a HUGE difference to how much they popped out of the panel. 

Mermaid tea-cup in quilt

Never-Ending New Applications

I was delighted by the result of this experiment, and continued using this method, until one day another idea came floating into my head.

  • Does the foam ALWAYS have to be behind the design element? 
  • What if I want to add another design on top of the main design and really make that ‘pop’? 
green frog on lily pad pop-up panel

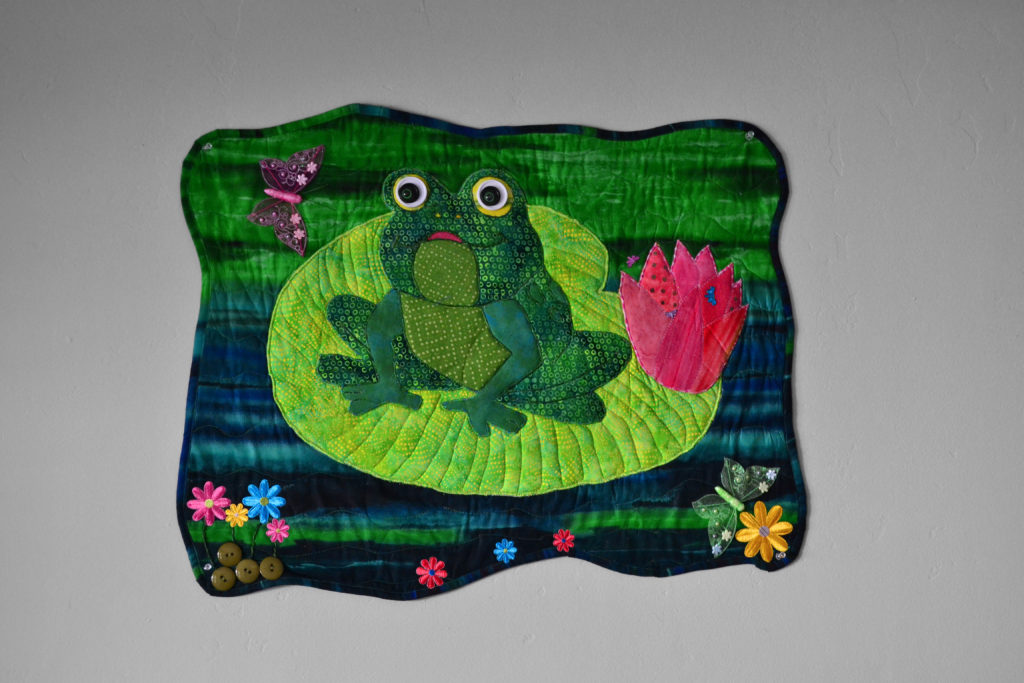
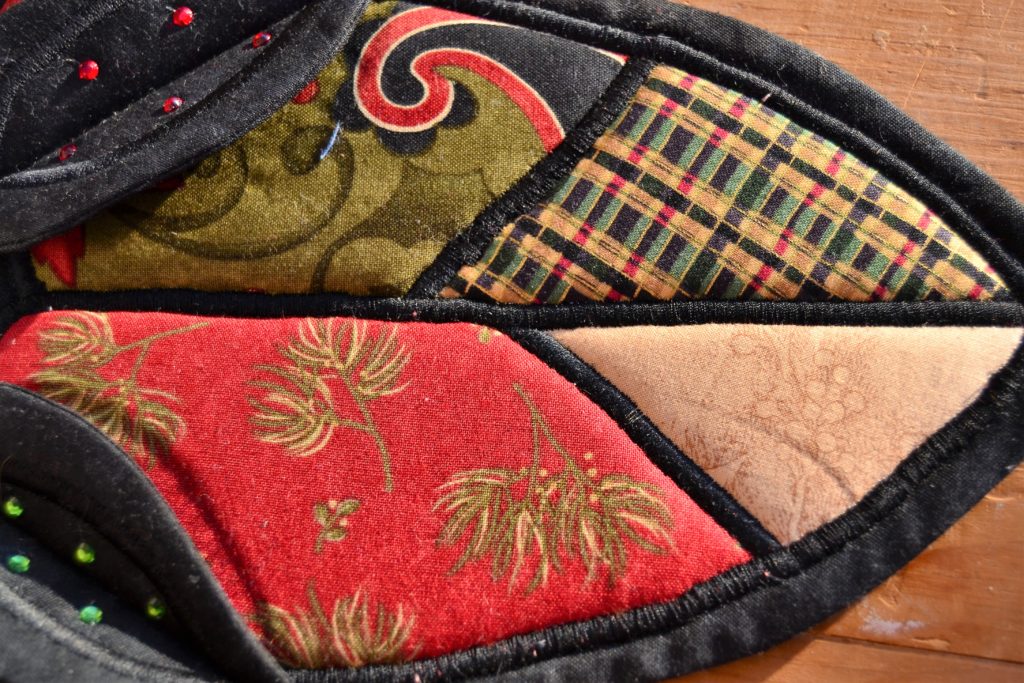
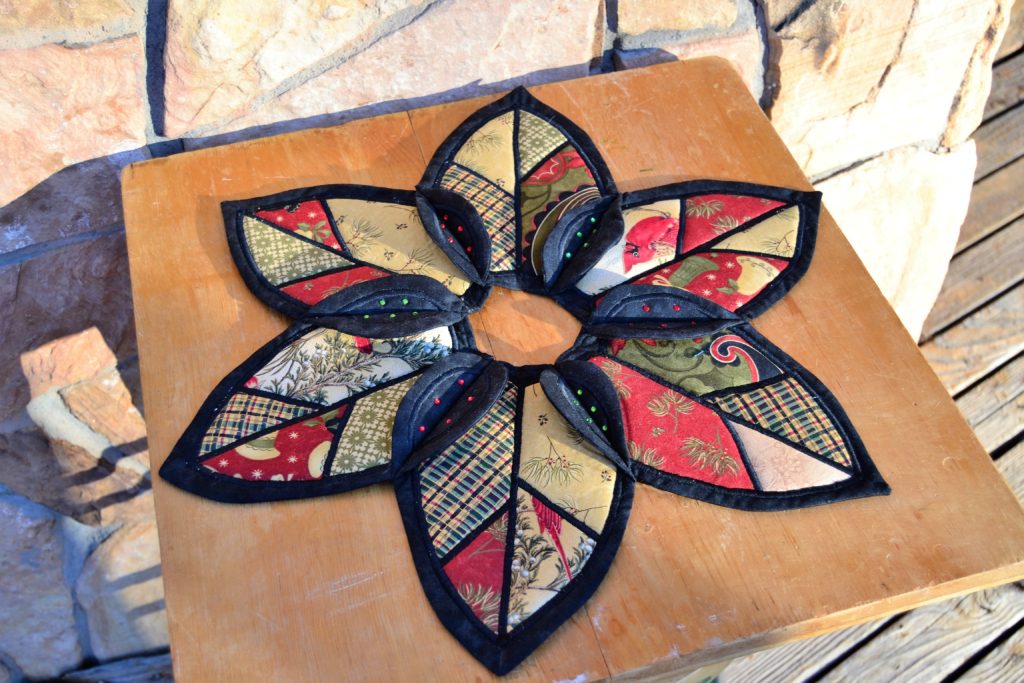
And that was how my Layer Cake Design Structure was born.  You can see examples of this in ‘My Pad’ where the frog is trapuntoed up front as well as in my Christmas Bells Table Topper where both of the bells and the clappers are ‘foam-enhanced”.  I just now made up that phrase – isn’t it great!  

So there you have my trapunto journey, from the original, century’s long traditional way of doing it, to my quick, easy, and super-enhanced way. 

Take a leap of faith and try it just once – I guarantee that you’ll love the results!

Karyl (aka Princess YellowBelly)

POPPING WITH FOAM – A Professional Review of Quilting Foam

Tropical fish on a coral reef quilt. The quilt bursts and pops with 3-dimensional effect thanks to quilting foam

Quilting Foam is the most amazing invention to come along in ages!  With this one amazing product in your back pocket you can learn how to make your quilts burst and pop with 3-Dimensional effects and deep texture you can’t find in ordinary quilts.

It can be used:

  • As a stabilizer in bags
  • To create the same effect as trapunto quilting
  • Or simply as a super stabilizer instead of interfacing

I have used 2 different brands, but found no real difference between them. The first is Bosal In-R-Form and the second is ByAnnie’s Soft and Stable


Quilting Foam Makes Your Quilts Burst and Pop with Effect

The only real difference is personal preference because both are the same thickness and perform the same way. 

I mostly use the Bosal-N-R Foam because one side has a slightly adhesive surface that will adhere to your fabric when you iron your fabric onto the foam.  It only holds for a little while, though, so I always pin the two together if I’m not going to be sewing it within 24 hours.

The second reason I use this brand of foam is because Suzanna can find it on Amazon for a significantly reduced price.

Having experimented with foam in several different projects, I will now give you my vast store of wisdom on this subject. 

Trapunto Quilting Replacement

Trapunto is an Italian word that means: “popping up certain parts of a quilting design, to make it stand out from the rest of the pattern.” (It’s shorter in Italian…) 

I am really attracted to this look in a quilt. 

It’s done by placing a double layer of batting behind your project, quilting it all, and then cutting away the second layer of batting from everything but the designs you want to emphasize. 

To me, this is a great waste of batting and worse, incredibly tedious. 

As I’ve mentioned elsewhere, I’m not the most patient person in the world, and I have absolutely none for needless busy work. 

actual trapunto effect instead of quilting foam on a quilted panel with orange lilies and autumn grasses

We tried the trapunto technique on our “Fairies in my Garden” panel because we wanted to see if it was worth it.  I did the quilting and Suzanna did the trimming – actually I made her.  She has a vastly greater tolerance for busy work than I do, but even she concluded that the result wasn’t worth the time, and this was only a panel, NOT an entire quilt top! 

So we looked around for other ways to achieve the same effect without the busy work.

Experimental Alternatives to Foam

First we would put batting just behind the designs we wanted to pop out, trim them, and then quilt a 2nd layer of batting behind the entire design. 

This worked well as long as we didn’t quilt the background design too lightly.  We found that the heavier we quilted the background, and the more lightly we quilted our pop ups, the more obvious the difference between the 2 and therefore more visually appealing. 

But it still wasn’t a big enough difference to suit me. 

After that, I tried quilting the entire panel, and then adding elements that I wanted to emphasize after.  Basically I would cut out a piece of batting with the applique, then put them on together.

I did this on our Winter Wonderland Panel, when I added the trees after I had added batting to each “tree” separately, and then quilting the trees to the panel.  This was pleasing, but a lot of extra work, so I looked around for another idea.

That’s when I found foam. What a revelation!

How to Make Sewing With Foam Easier

Foam is approximately 1/8” thick and loves to be sewn.  It pretty much stays where you put it, and has a marvelous popup affect. 

Don’t use it for very small designs

It’s a waste of foam because the popup effect is lost in the quilting process.  I found this out with my “Cowboy and His Lady panel”.  I put foam behind the cowboy, his lady, his dog, and the windmill.  It worked just fine on the first 3 figures, but because the windmill blades were much smaller, and the satin stitching around the edges almost touched in the middle of each blade, the popup effect was entirely lost.  So, don’t waste time or foam putting it behind very small designs.

Cut Your Fabric ¼ inch wider than your foam shapes

When I first began using foam, I would cut the shapes right out of the foam, place the matching fabrics on top, and then satin stitch around the edges.  This is how my “Lily Pad Table Topper” was constructed.  As you can see, it works great for larger designs, but I’ve figured out a trick to this too. 

When you satin stitch around these foam/fabric pieces, you have to use a very wide satin stitch in order to cover the edges because the foam is so thick.  To get around this, I’ve started cutting my fabric ¼” wider than the foam.  This way, when you layer the foam and fabric, the fabric lays down over and covers the edge of the foam and then it only takes a narrow satin stitch to finish the edge. 

This is the technique I used around the edge of the moon in my “Night Guardian” panel.

Know when to make your own templates

Quilting foam cut-out of mermaid shape, this effect will make the mermaid burst and pop out of her quilted panel when finished

When I’m putting foam only behind certain design elements in an already printed panel, there is no way to sew it on the top as in my moon, or camels, etc.  Instead, I trace out the designs I want to pop (I make my own template), and then I use this template to cut out the foam.  Then I layer the foam behind the design feature, and quilt – not too heavily.  When I have it the way I like it, I trim away the excess slivers from the foam.

This is how I did the mermaid and the large starfish in my still-under-construction-mermaid quilt.  This works great for panels, and other images that are already printed.

Foam is also a great stabilizer for any sort of bag you want to sew  

Quilting foam helps the bag to hold its shape, and gives your project a lot of added strength.  I have found that in this application, the heavier you quilt here, the more your bag will hold its shape and stand upright. 

A word of caution about foaming a bag

I found that out because the foam is so thick it quickly makes seams too thick to sew.  I almost went insane trying to get my first media bag through my machine, even using my jeans needles, and I broke A LOT! 

The 2nd bag I made sure to cut the foam ½” narrower that the fabric with much better results.

Now I Can Pop “That” Up – and “That” Can be Anything At All

Be sure to experiment, and enjoy working with this great product.  I’m sure some of you will come up with some more creative ways to incorporate it into your projects – it really is worth it.

If you come up with an absolutely amazing way to make your quilts burst and pop, or if you discover something new about using foam, please contact us and let us know what you did and how you did it.  Pictures are great to!