Quilting Foam is the most amazing invention to come along in ages! With this one amazing product in your back pocket you can learn how to make your quilts burst and pop with 3-Dimensional effects and deep texture you can’t find in ordinary quilts.
It can be used:
- As a stabilizer in bags
- To create the same effect as trapunto quilting
- Or simply as a super stabilizer instead of interfacing
I have used 2 different brands, but found no real difference between them. The first is Bosal In-R-Form and the second is ByAnnie’s Soft and Stable.
Quilting Foam Makes Your Quilts Burst and Pop with Effect
The only real difference is personal preference because both are the same thickness and perform the same way.
I mostly use the Bosal-N-R Foam because one side has a slightly adhesive surface that will adhere to your fabric when you iron your fabric onto the foam. It only holds for a little while, though, so I always pin the two together if I’m not going to be sewing it within 24 hours.
The second reason I use this brand of foam is because Suzanna can find it on Amazon for a significantly reduced price.
Having experimented with foam in several different projects, I will now give you my vast store of wisdom on this subject.
Trapunto Quilting Replacement
Trapunto is an Italian word that means: “popping up certain parts of a quilting design, to make it stand out from the rest of the pattern.” (It’s shorter in Italian…)
I am really attracted to this look in a quilt.
It’s done by placing a double layer of batting behind your project, quilting it all, and then cutting away the second layer of batting from everything but the designs you want to emphasize.
To me, this is a great waste of batting and worse, incredibly tedious.
As I’ve mentioned elsewhere, I’m not the most patient person in the world, and I have absolutely none for needless busy work.
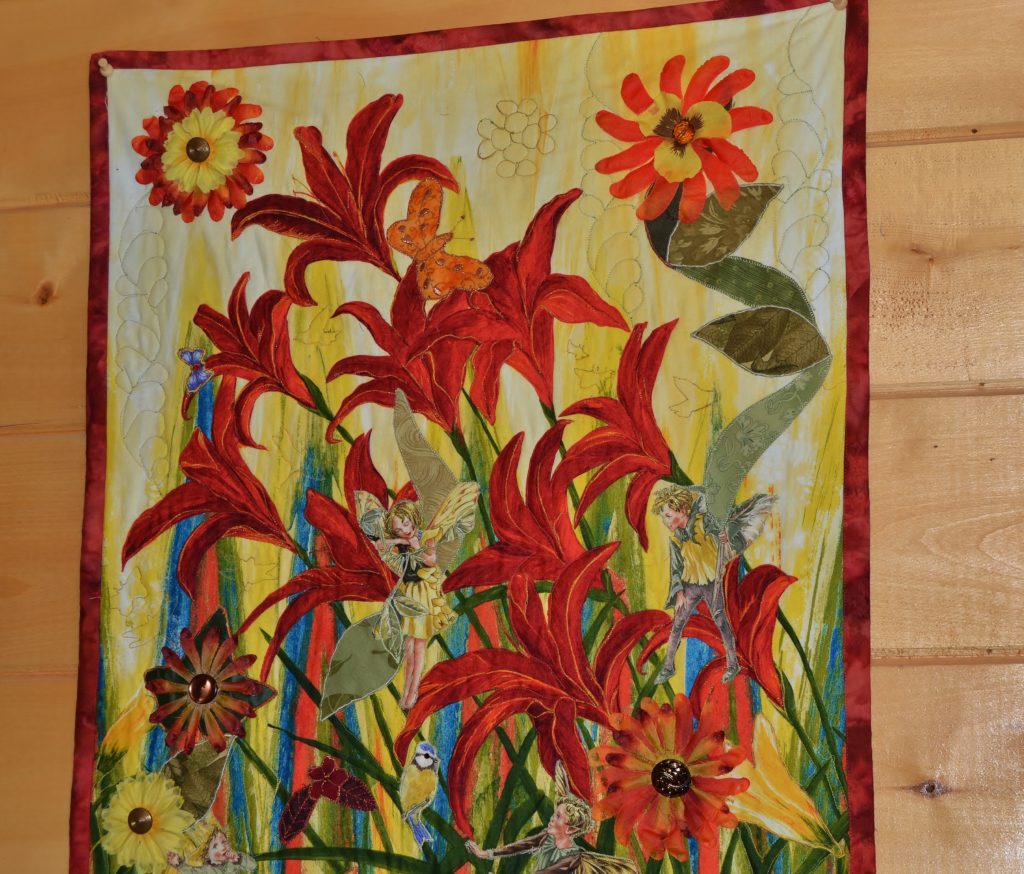
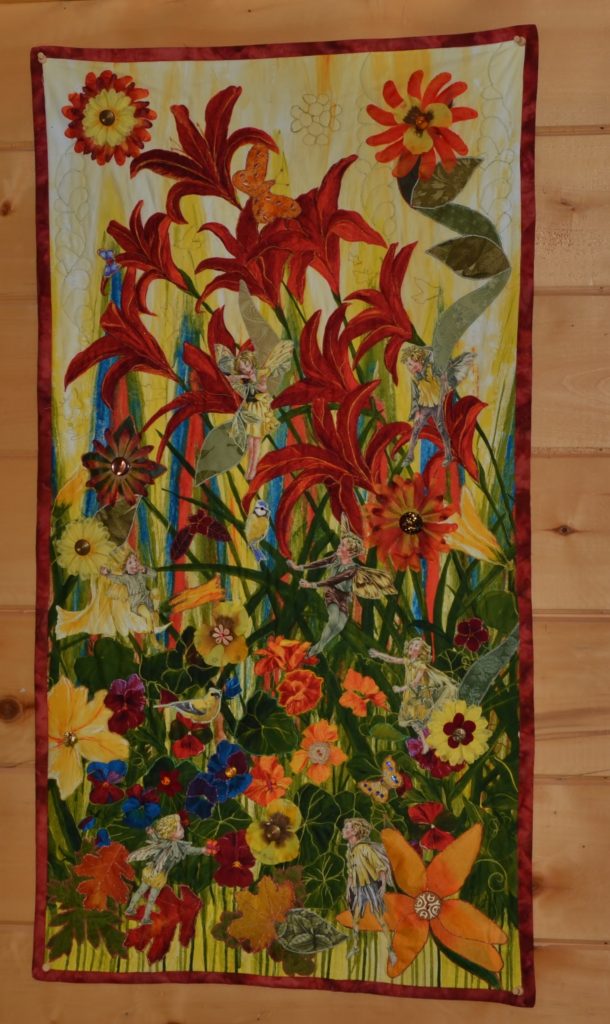
We tried the trapunto technique on our “Fairies in my Garden” panel because we wanted to see if it was worth it. I did the quilting and Suzanna did the trimming – actually I made her. She has a vastly greater tolerance for busy work than I do, but even she concluded that the result wasn’t worth the time, and this was only a panel, NOT an entire quilt top!
So we looked around for other ways to achieve the same effect without the busy work.
Experimental Alternatives to Foam
First we would put batting just behind the designs we wanted to pop out, trim them, and then quilt a 2nd layer of batting behind the entire design.
This worked well as long as we didn’t quilt the background design too lightly. We found that the heavier we quilted the background, and the more lightly we quilted our pop ups, the more obvious the difference between the 2 and therefore more visually appealing.
But it still wasn’t a big enough difference to suit me.
After that, I tried quilting the entire panel, and then adding elements that I wanted to emphasize after. Basically I would cut out a piece of batting with the applique, then put them on together.
I did this on our Winter Wonderland Panel, when I added the trees after I had added batting to each “tree” separately, and then quilting the trees to the panel. This was pleasing, but a lot of extra work, so I looked around for another idea.
That’s when I found foam. What a revelation!
How to Make Sewing With Foam Easier
Foam is approximately 1/8” thick and loves to be sewn. It pretty much stays where you put it, and has a marvelous popup affect.
Don’t use it for very small designs
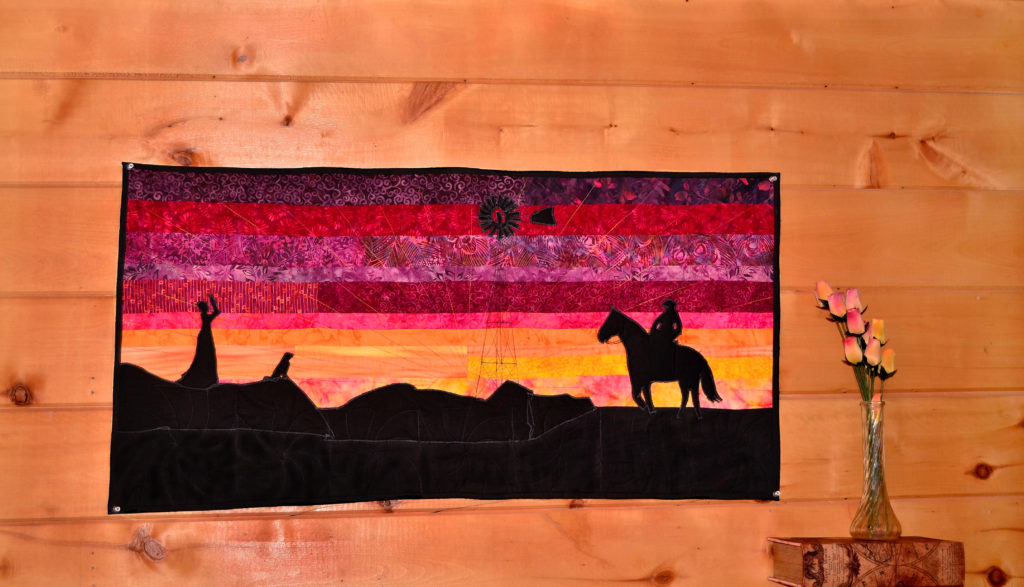
It’s a waste of foam because the popup effect is lost in the quilting process. I found this out with my “Cowboy and His Lady panel”. I put foam behind the cowboy, his lady, his dog, and the windmill. It worked just fine on the first 3 figures, but because the windmill blades were much smaller, and the satin stitching around the edges almost touched in the middle of each blade, the popup effect was entirely lost. So, don’t waste time or foam putting it behind very small designs.
Cut Your Fabric ¼ inch wider than your foam shapes
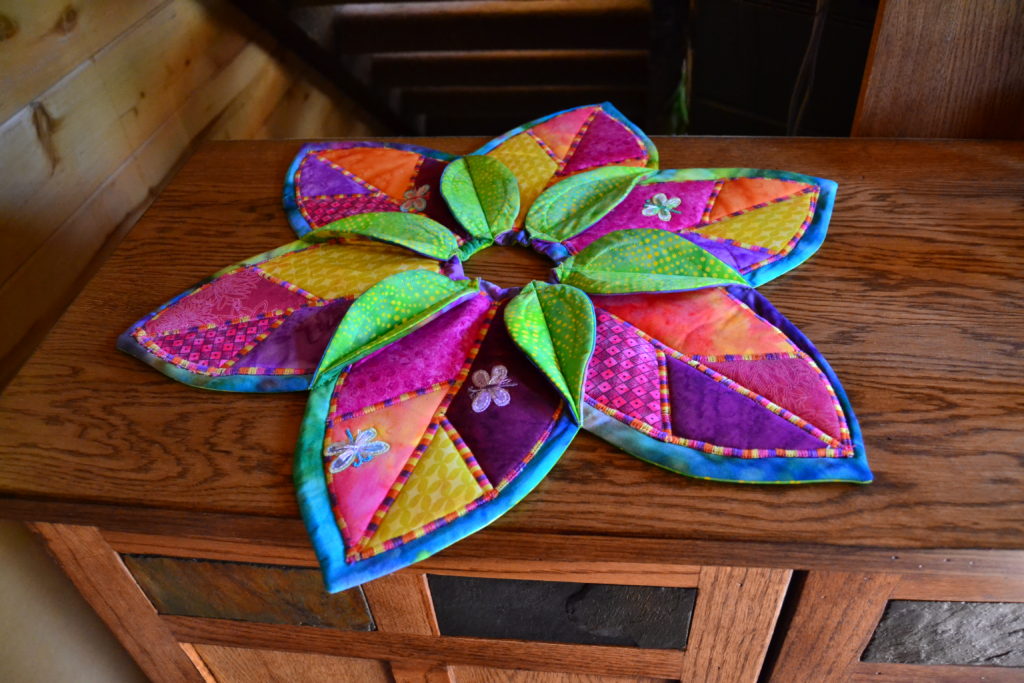
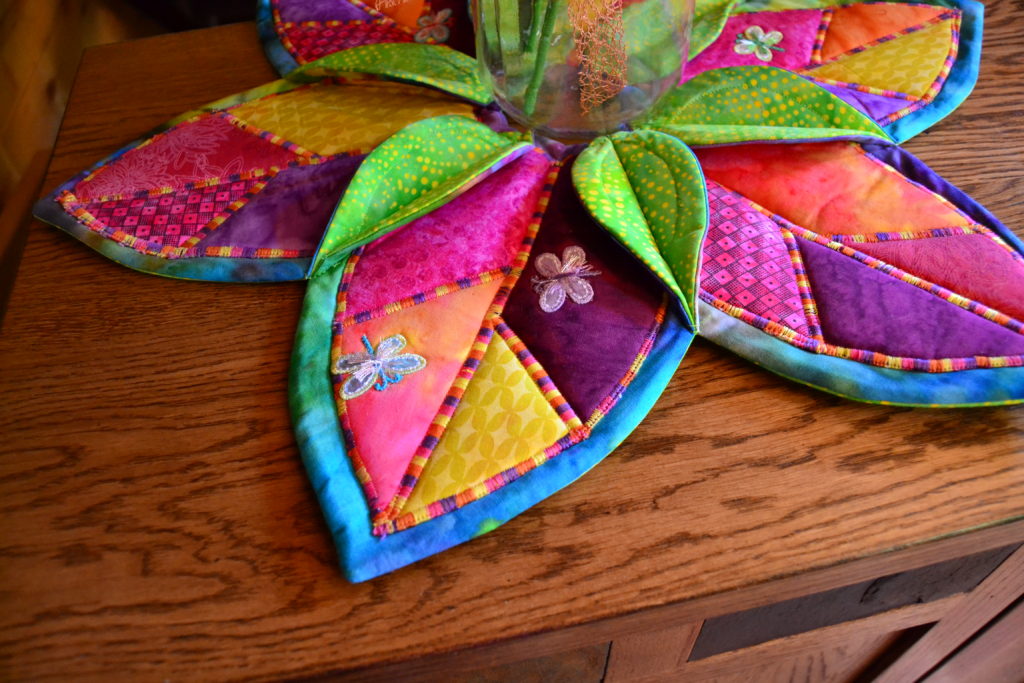
When I first began using foam, I would cut the shapes right out of the foam, place the matching fabrics on top, and then satin stitch around the edges. This is how my “Lily Pad Table Topper” was constructed. As you can see, it works great for larger designs, but I’ve figured out a trick to this too.
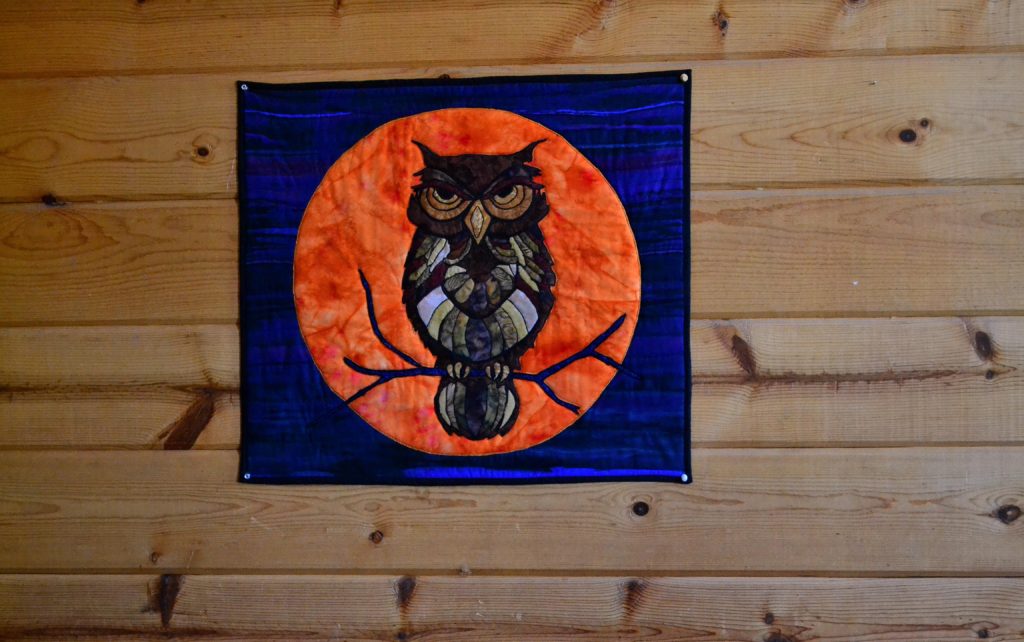
When you satin stitch around these foam/fabric pieces, you have to use a very wide satin stitch in order to cover the edges because the foam is so thick. To get around this, I’ve started cutting my fabric ¼” wider than the foam. This way, when you layer the foam and fabric, the fabric lays down over and covers the edge of the foam and then it only takes a narrow satin stitch to finish the edge.
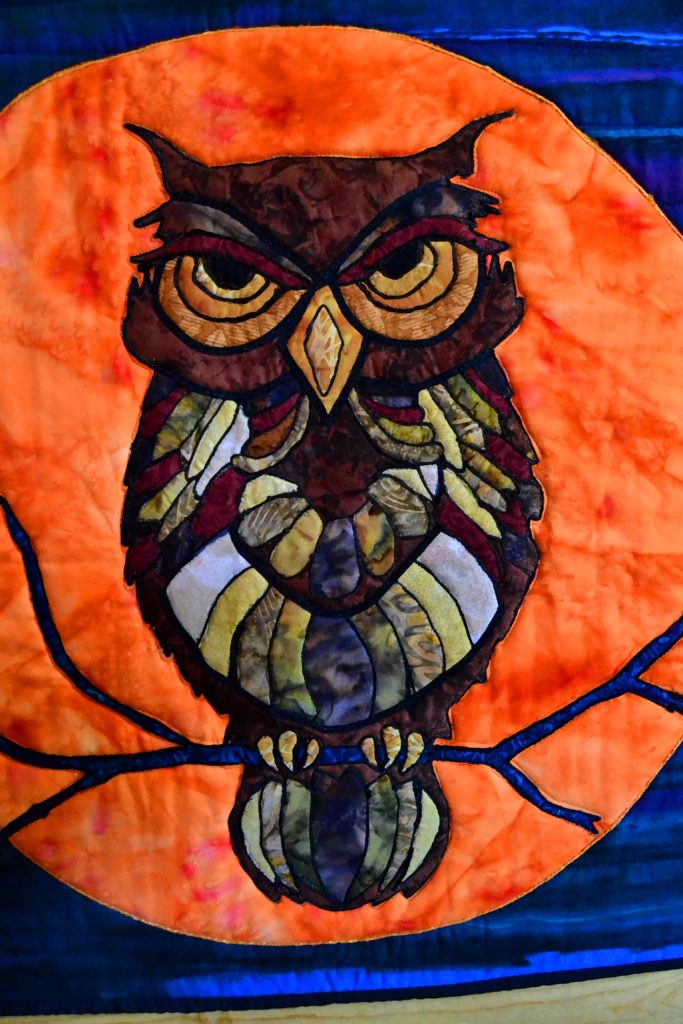
This is the technique I used around the edge of the moon in my “Night Guardian” panel.
Know when to make your own templates
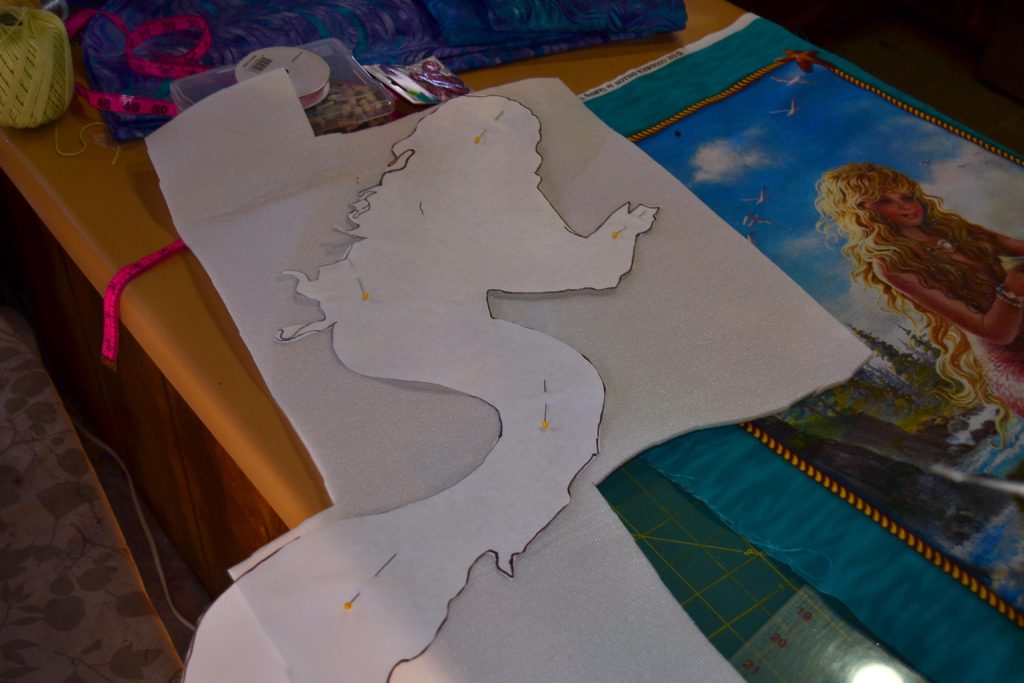
When I’m putting foam only behind certain design elements in an already printed panel, there is no way to sew it on the top as in my moon, or camels, etc. Instead, I trace out the designs I want to pop (I make my own template), and then I use this template to cut out the foam. Then I layer the foam behind the design feature, and quilt – not too heavily. When I have it the way I like it, I trim away the excess slivers from the foam.
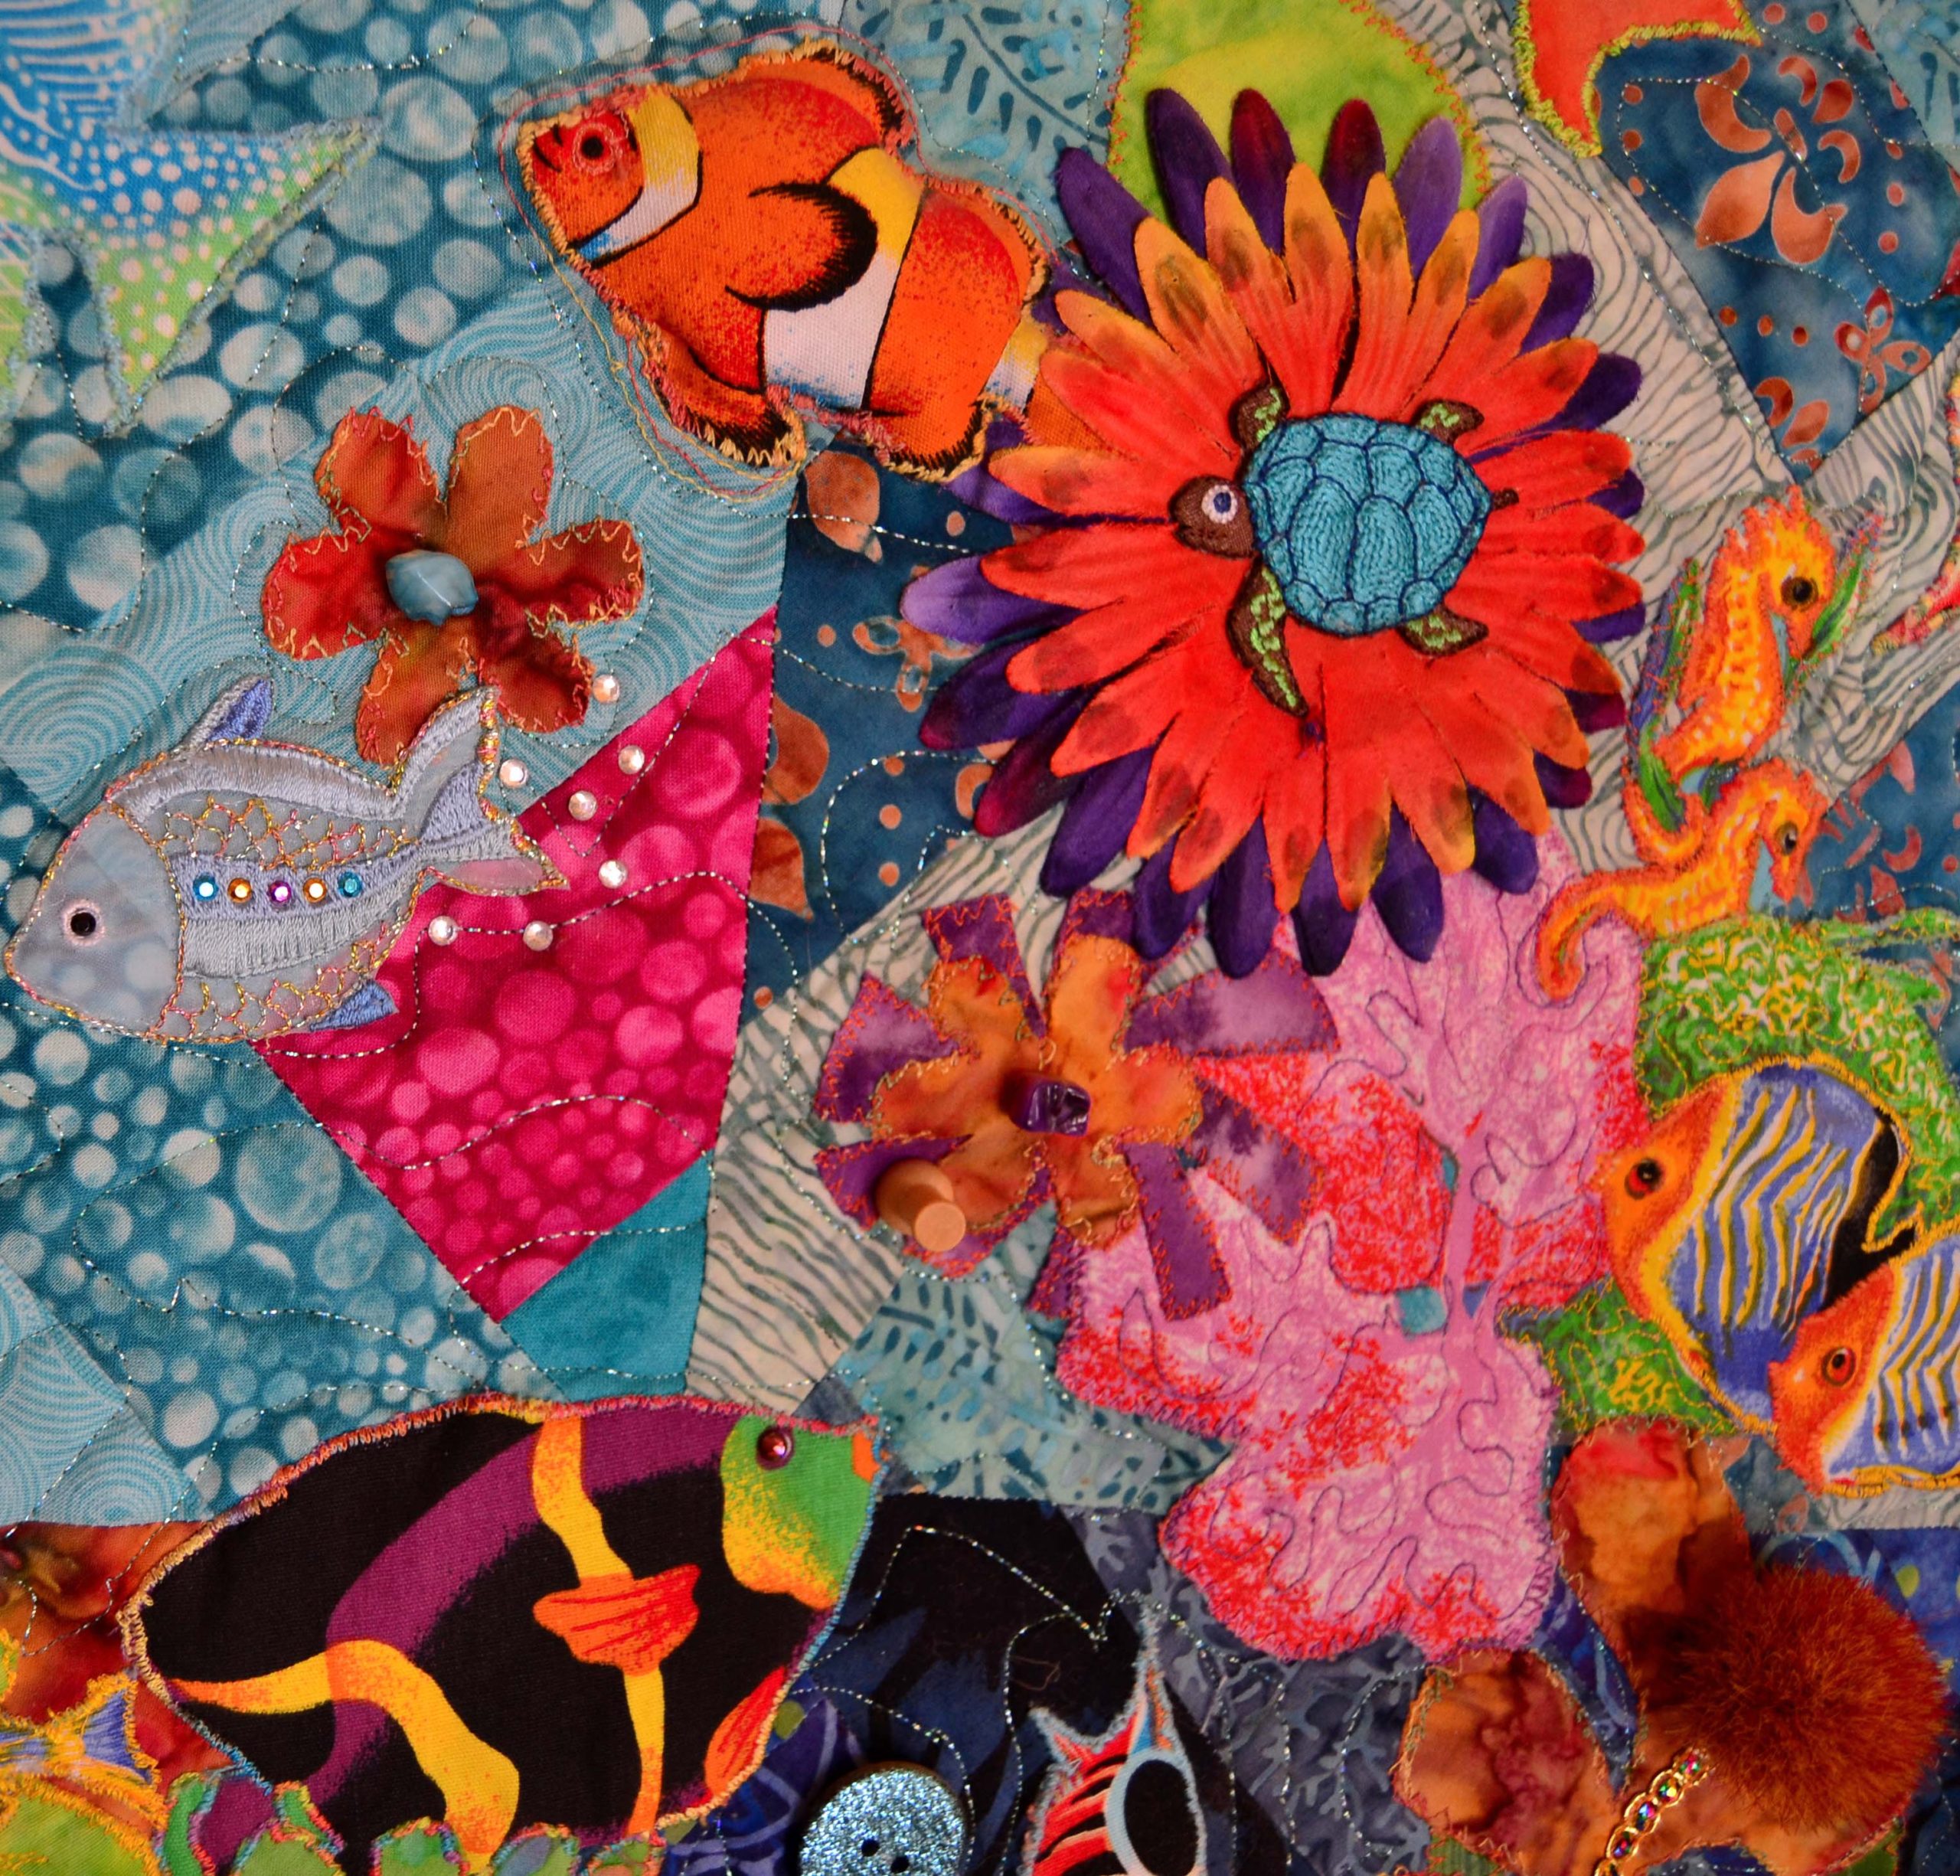
This is how I did the mermaid and the large starfish in my still-under-construction-mermaid quilt. This works great for panels, and other images that are already printed.
Foam is also a great stabilizer for any sort of bag you want to sew
- Diaper bags
- Media bags
- And makeup travel bags.
Quilting foam helps the bag to hold its shape, and gives your project a lot of added strength. I have found that in this application, the heavier you quilt here, the more your bag will hold its shape and stand upright.
A word of caution about foaming a bag
I found that out because the foam is so thick it quickly makes seams too thick to sew. I almost went insane trying to get my first media bag through my machine, even using my jeans needles, and I broke A LOT!
The 2nd bag I made sure to cut the foam ½” narrower that the fabric with much better results.
Now I Can Pop “That” Up – and “That” Can be Anything At All

Be sure to experiment, and enjoy working with this great product. I’m sure some of you will come up with some more creative ways to incorporate it into your projects – it really is worth it.
If you come up with an absolutely amazing way to make your quilts burst and pop, or if you discover something new about using foam, please contact us and let us know what you did and how you did it. Pictures are great to!
I could not refrain from commenting. Very well written! https://hickoryfoodfactory.com/
Its such as you read my thoughts! You appear to know a lot
approximately this, such as you wrote the ebook in it or something.
I think that you could do with some p.c. to force the message home a bit,
but other than that, this is magnificent blog. An excellent read.
I will certainly be back.
Wow, amazing blog layout! How long have you been blogging for?
you make blogging look easy. The overall look of your website is
wonderful, let alone the content!
Helpful info. Lucky me I discovered your web site by chance, and
I am shocked why this twist of fate didn’t happened in advance!
I bookmarked it.