Trapunto is an Italian quilting word that means “putting more batting behind some design elements in your project than others,” which effectively selectively pops-up your quilting designs. You can see why we refer to this design skill as trapunto – it’s much shorter in Italian!! Unfortunately, linguistics alone does not make this technique any shorter in execution.
Back
in the early days of my quilting journey I was fascinated by the look of
trapunto because the extra batting seriously intensifies the 3-D effect of the
design it lives behind and makes for a very elegant looking finished project.
Unfortunately,
achieving this effect is EXTREMELY time-consuming and to me anyway –
off-putting.
Our updated, time-saving trapunto techniques allow for multiple fantastic projects – some of them TOTALLY unique…
The Hardest Way to Selectively
Pop-Up Your Quilting
Suzanna
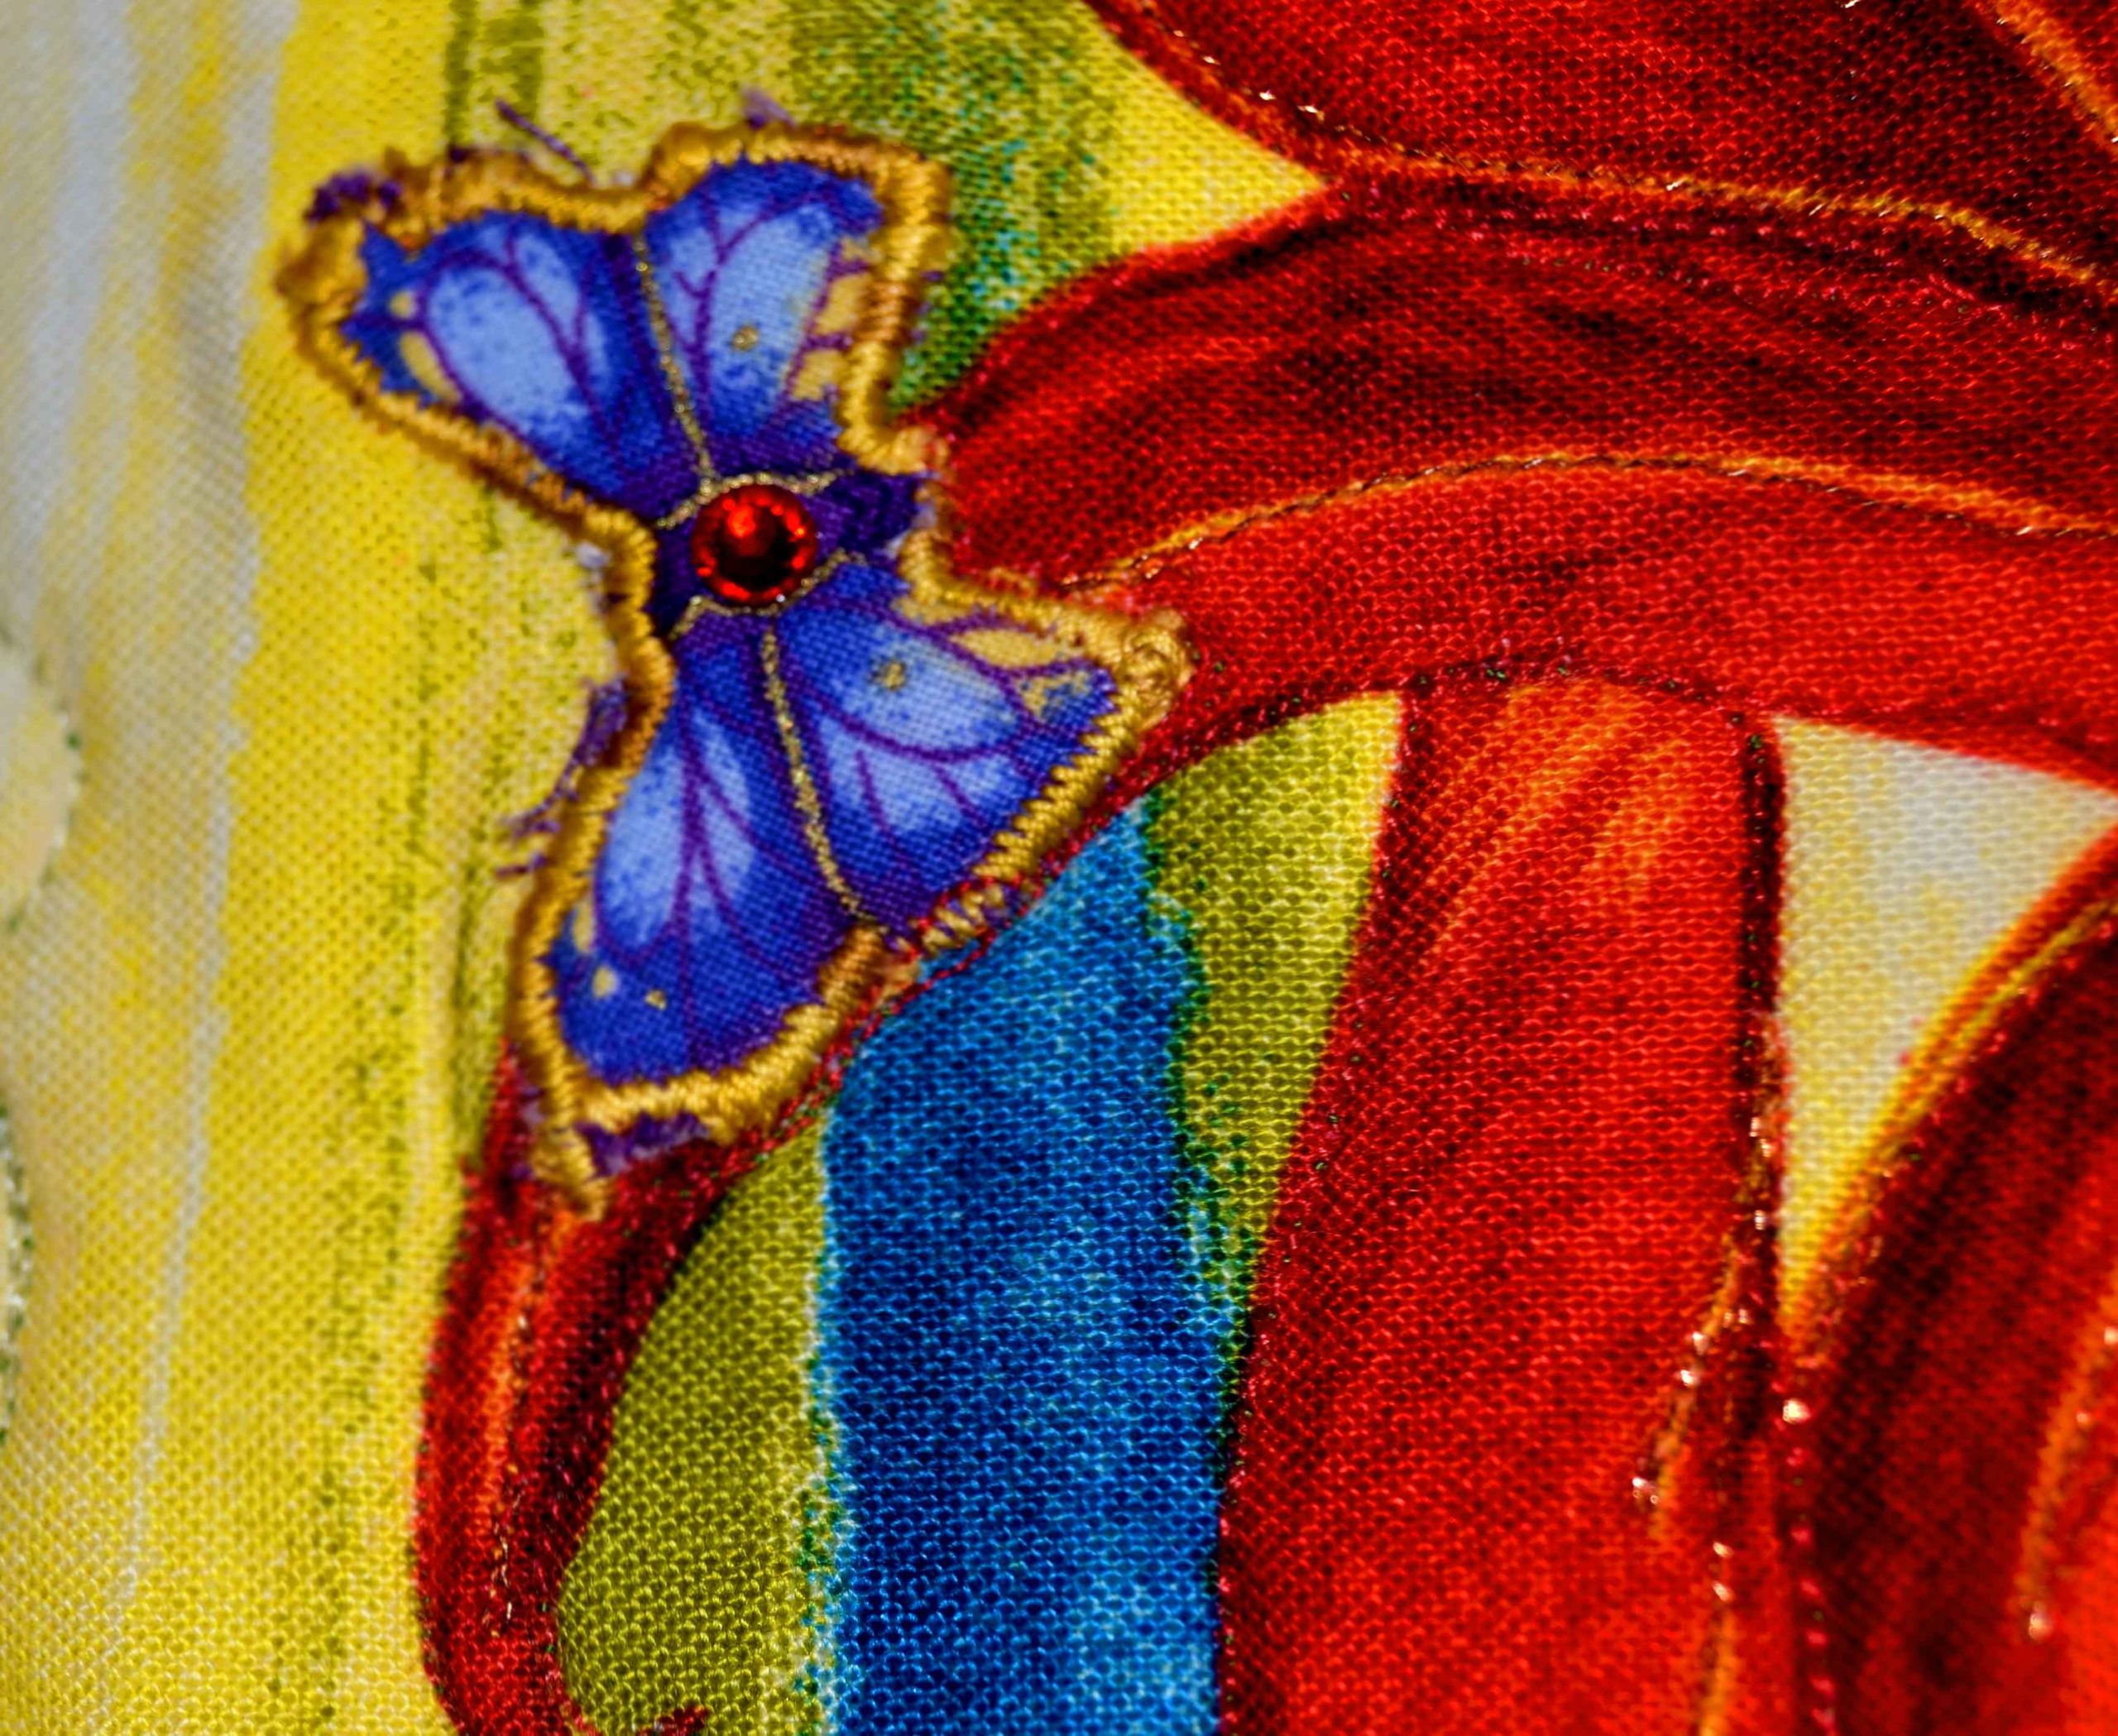
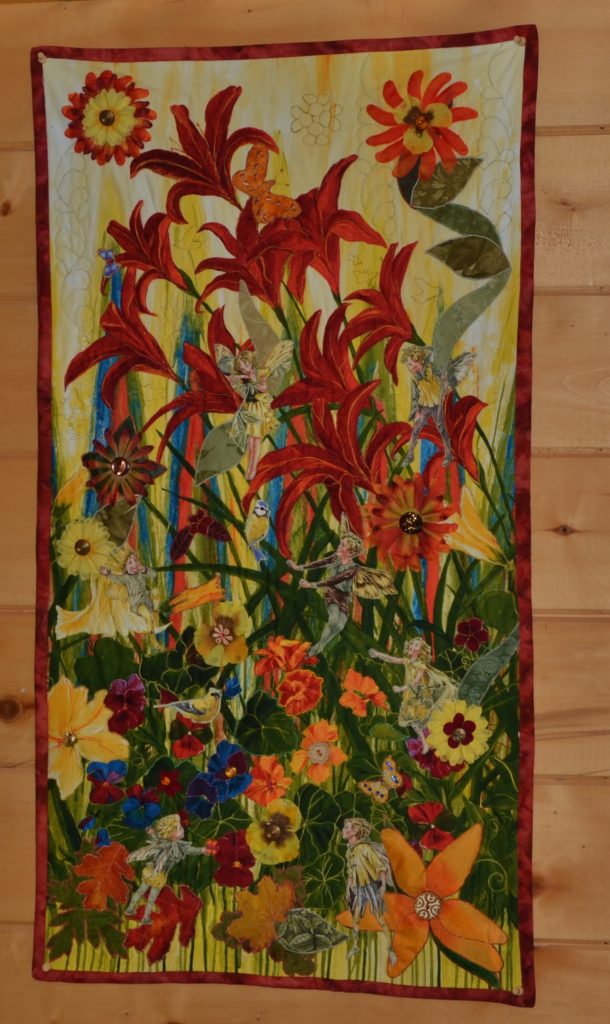
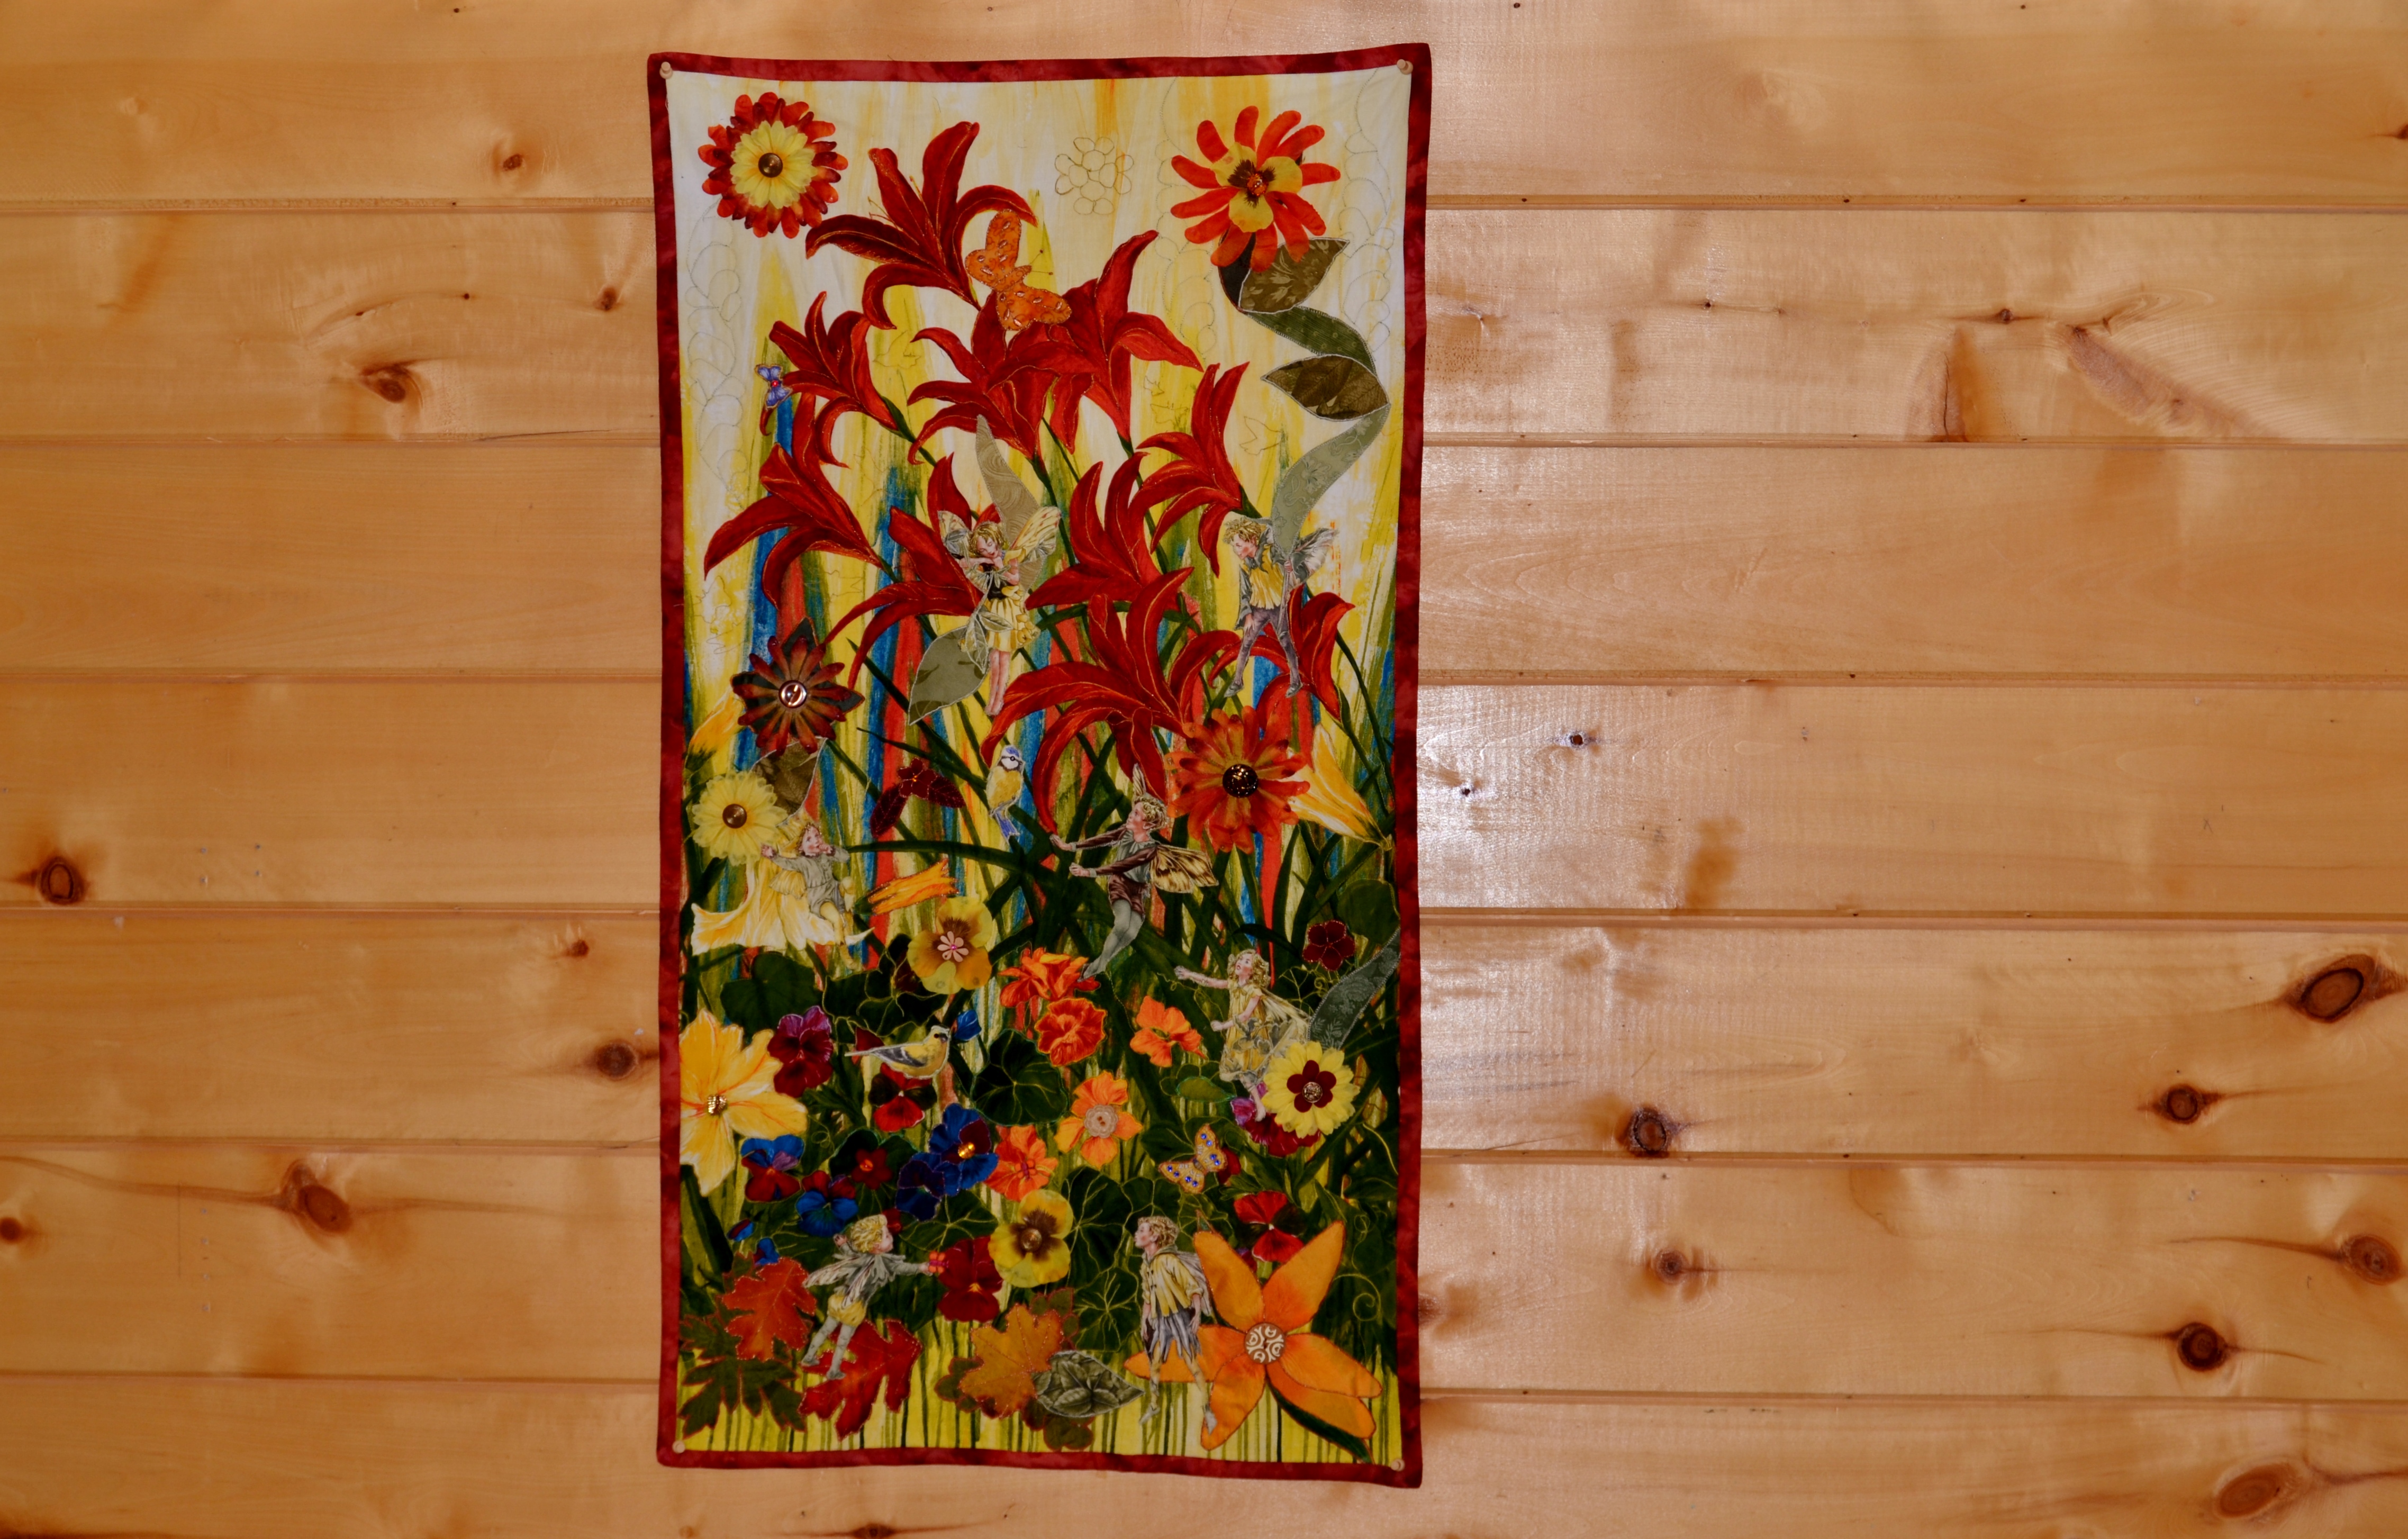
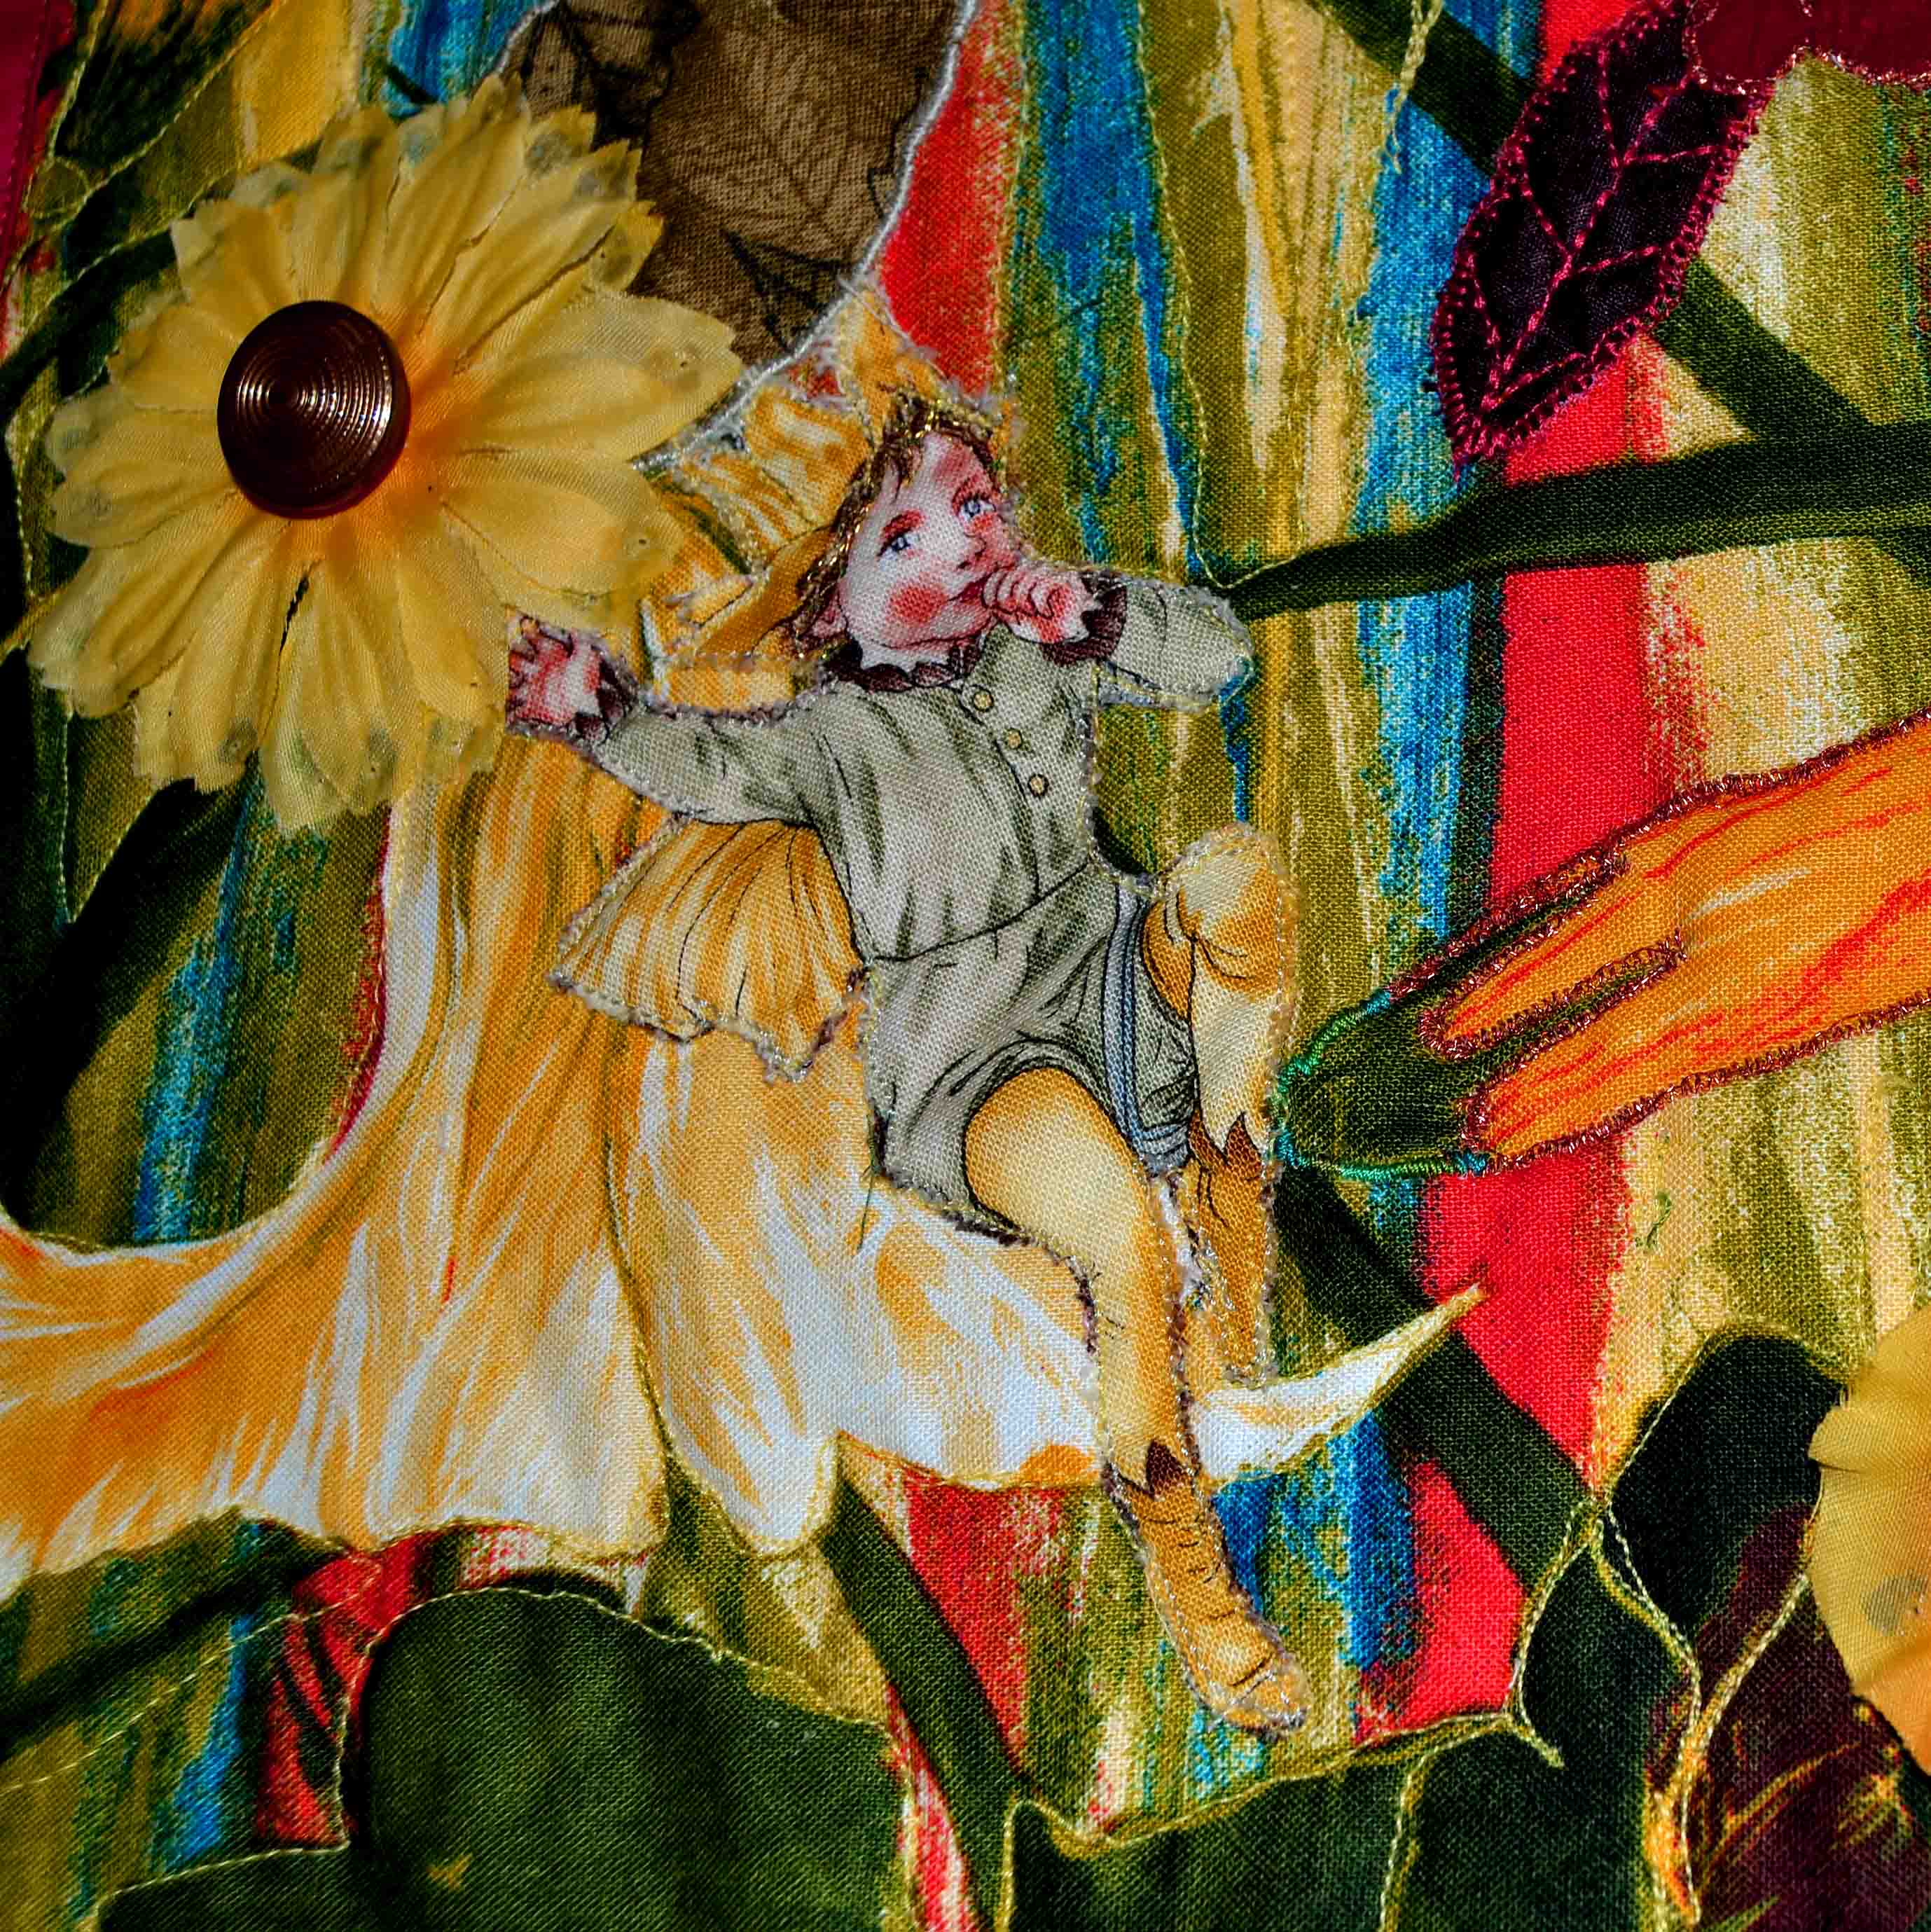
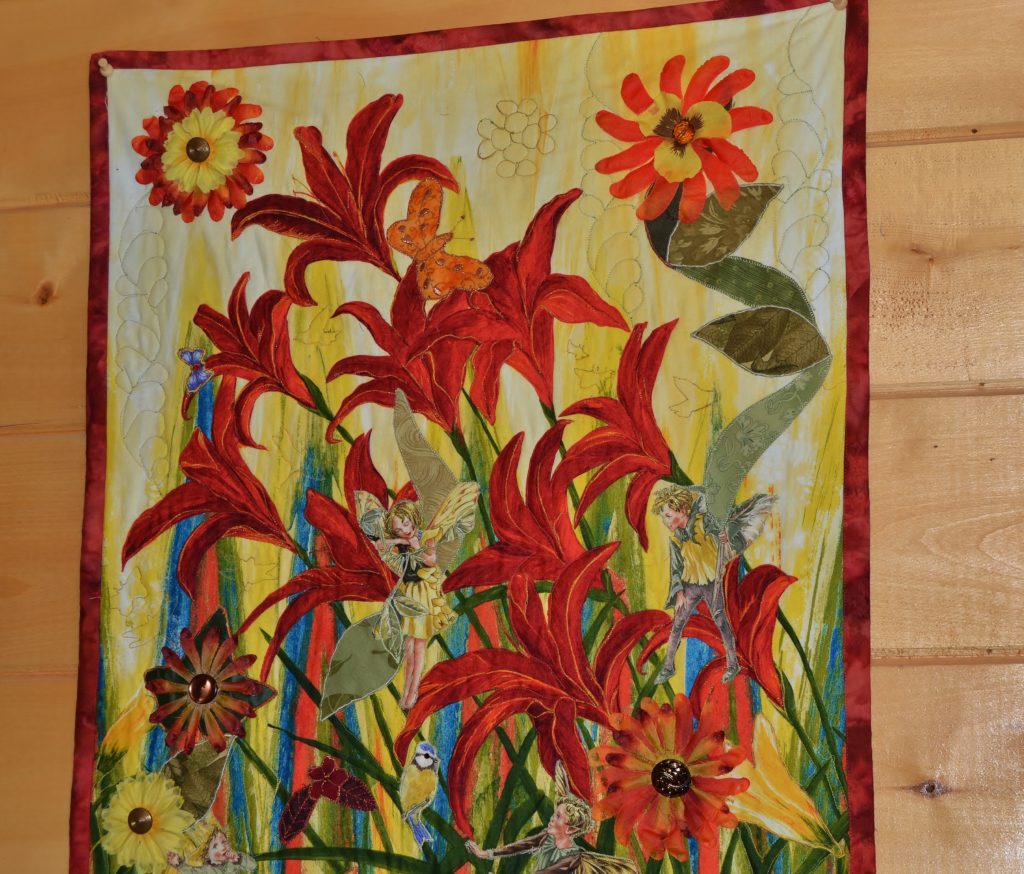
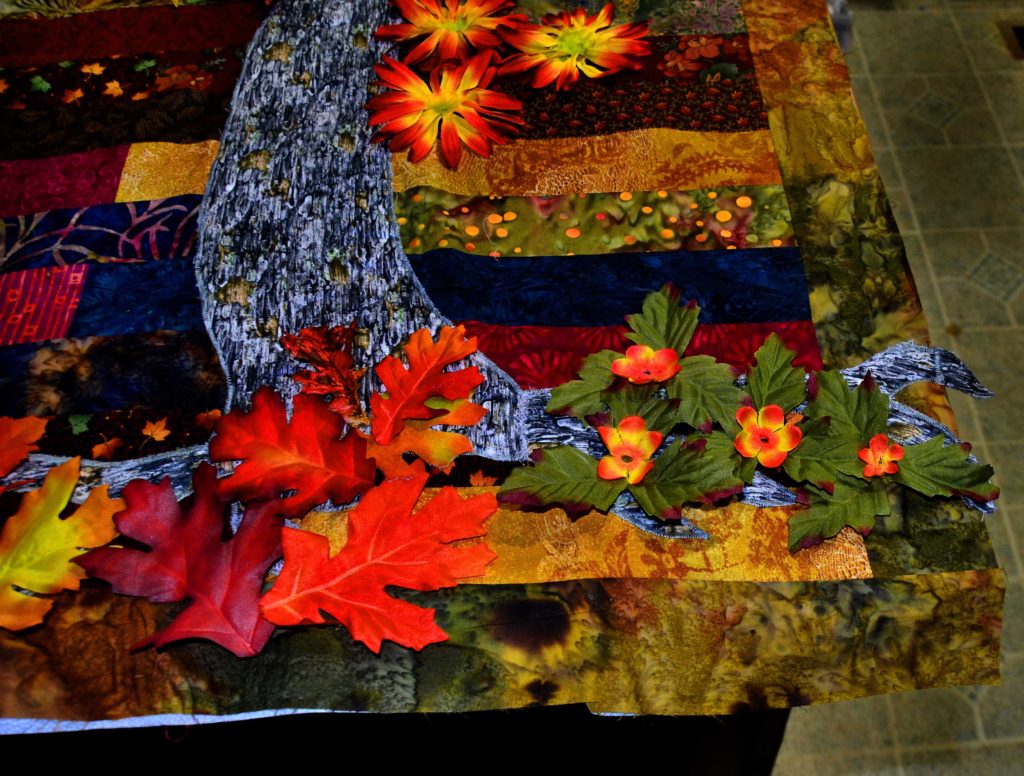
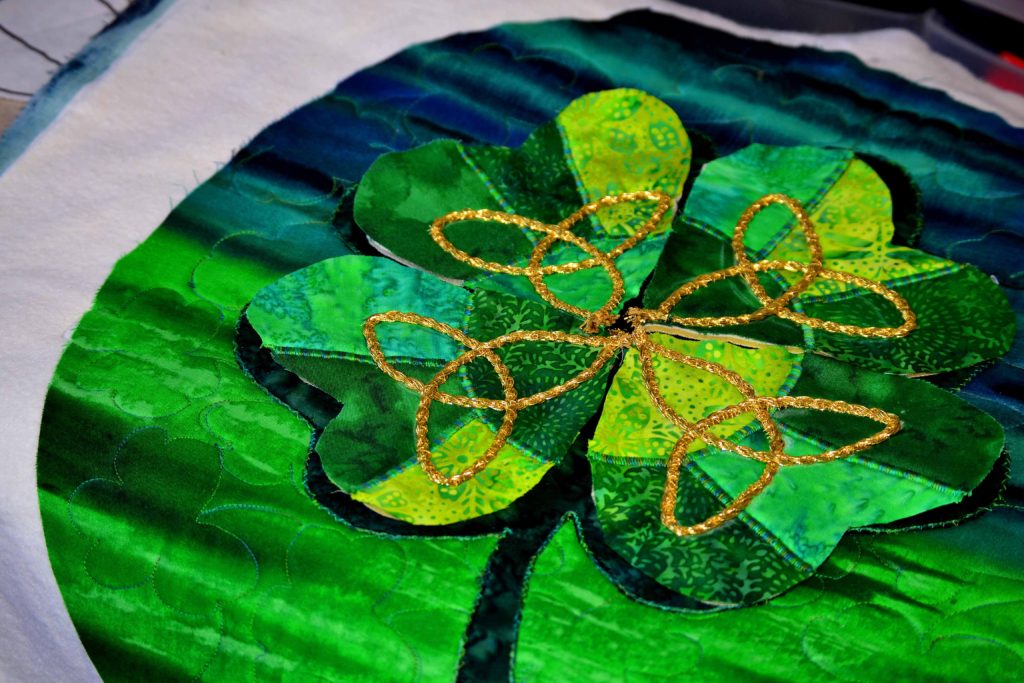
and I decided to try the trapunto technique on a wall panel we named ‘Fairies
in my Garden’, a beautiful piece that depicts 7 pale green fairies playing in a
bed of autumn-ish colored tiger lilies.
We
wanted the tiger lilies to pop more than the surrounding flora & fauna and
certainly more than the fairies, since everyone knows that fairies are
extremely difficult to see in the real world! Our solution to popping
out the tiger lilies – trapunto. It’s a great technique with a very
simple concept:
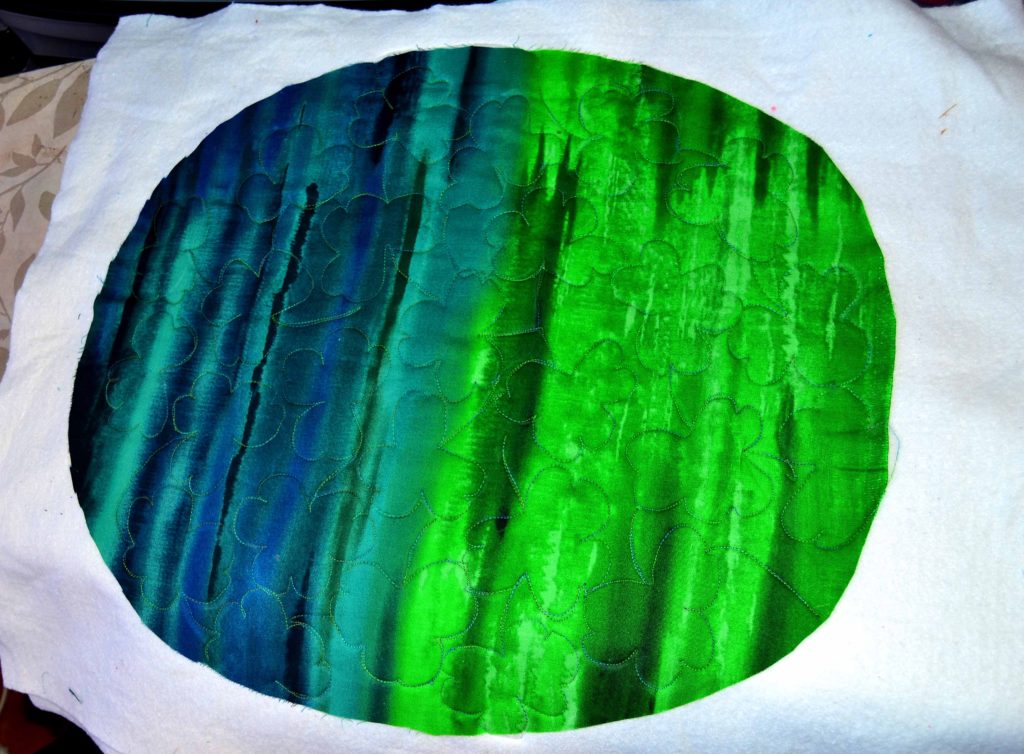
You place batting
behind your project and then quilt around only those elements that you want to
‘pop up’…
When you have
those elements quilted, you turn the project over to the back and carefully
trim away any batting that is not directly behind your chosen elements.
So
simple, yet so extremely tedious – not to mention time consuming – and a waste of perfectly good
batting.
Suzanna
spent hours with a small pair of embroidery scissors, carefully trimming away
any excess batting. As I watched her I decided that there had to be a
bigger, better & faster way to do this.
And there was!
Developing a Simpler Method – the Princess
YellowBelly Way
Naturally,
I decided to eliminate the trimming away process altogether.
First I decided which elements I wanted to ‘pop up’ and then I taped the front of my project onto a large window. This makes it relatively easily to see through.
Then I would layer paper over this and trace the elements I wanted to selectively pop-up, making sure to label each shape as I traced it. It’s quite amazing how shapes very often don’t look like the object they are.
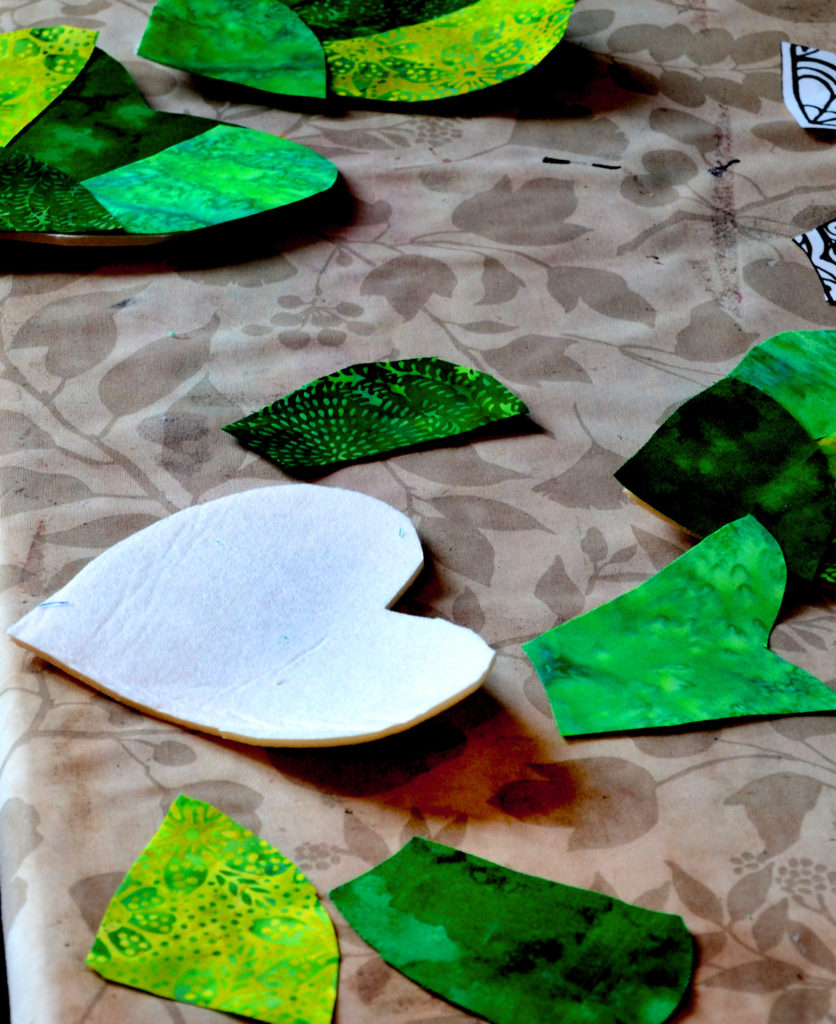
I would then cut out the shapes from the paper and then cut them out of the batting.
Using basting spray and a hot iron to hold the batting shapes in the right places on my project, I would then proceed to quilt them lightly along the outside edges.
Note:
The
more heavily you quilt a design, the flatter it becomes – so, if you want a
design to ‘pop’ only quilt around the outside edges the first time around.
Once all of my batting shapes were secured, I’d use basting spray over the entire back of the project and baste a layer of batting over the entire back of my project. This effectively removes all potential wrinkles and pleats from the shaped batting pieces.
Then
I’d spray more basting spray over this layer and then lay down the backing
fabric over top of this. A hot iron
works great with basting spray to remove all wrinkles.
Finally,
I’d quilt as desired – making sure to leave my double-batting design elements
as lightly quilted as possible.
Trapunto Light – The Quickest &
Easiest Way to Selectively Pop-Up Your Quilting
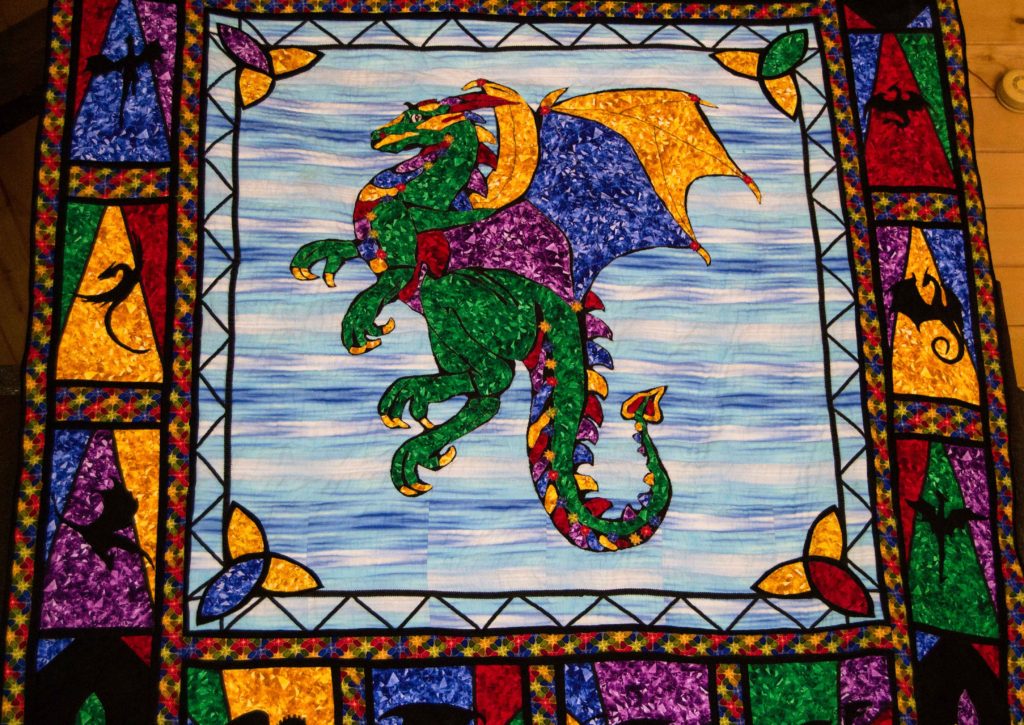
Wah-la! Trapunto – quick and easy, or, as I like to call it – ‘Trapunto Light’! The main dragon on my Dragon Quilt was done this way.
After I had used this new technique a number of times I found that wonderful new product – Bosal-n-R-Foam. I actually bought the foam because I was designing a media satchel for the girls’ and the diaper bag pattern I was using as my starting point required this stuff.
As
I sewed with it I found out 2 things:
First,
keep it out of the seams, and secondly, pop-up foam is much thicker than
batting and when you sew enough of it into something (like a media satchel), it will actually stand up on its own!
You
can bet by the time I was finished with those 2 satchels, I had visions of
trapunto dancing in my head, but this time, instead of Trapunto Light I was
envisioning:
Trapunto on Steroids! The Most Striking – Easy – Way to Selectively Pop-Up Your Quilting
You guessed it. One layer of foam is like 6 layers of regular Warm and Natural cotton batting stacked together, so you get a lot more bang for your Trapunto buck when you use foam behind the design elements you need to selectively ‘pop-up’ your quilting designs and projects.
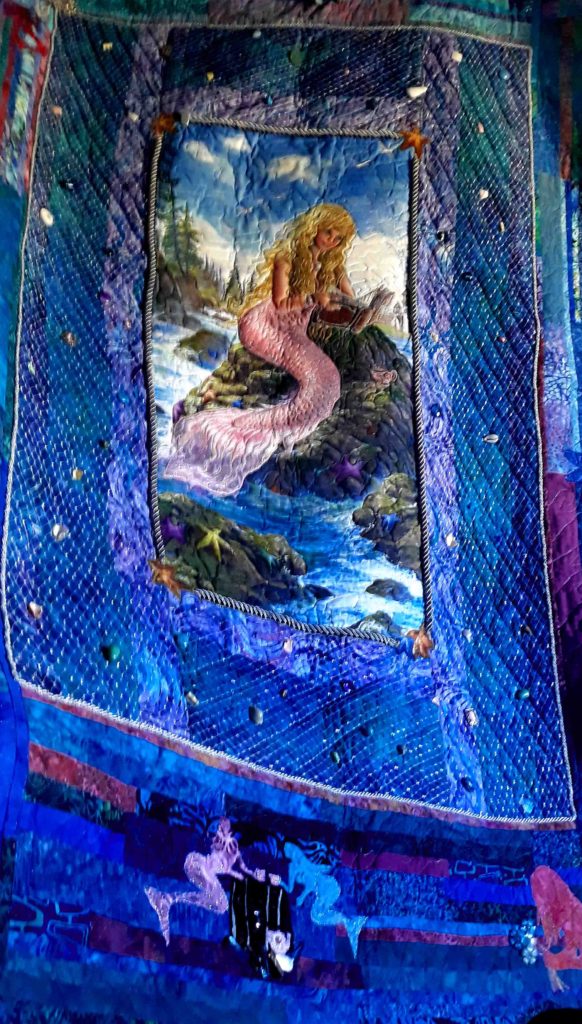
This
is what I did behind the central mermaid in my ‘Ocean Maidens’ quilt. As well as the book she’s reading and the
starfish around her tide pool. This
striking, and fairly easy, technique made a HUGE difference to how much they
popped out of the panel.
Never-Ending New Applications
I
was delighted by the result of this experiment, and continued using this
method, until one day another idea came floating into my head.
Does the foam
ALWAYS have to be behind the design element?
What if I want to
add another design on top of the main design and really make that ‘pop’?
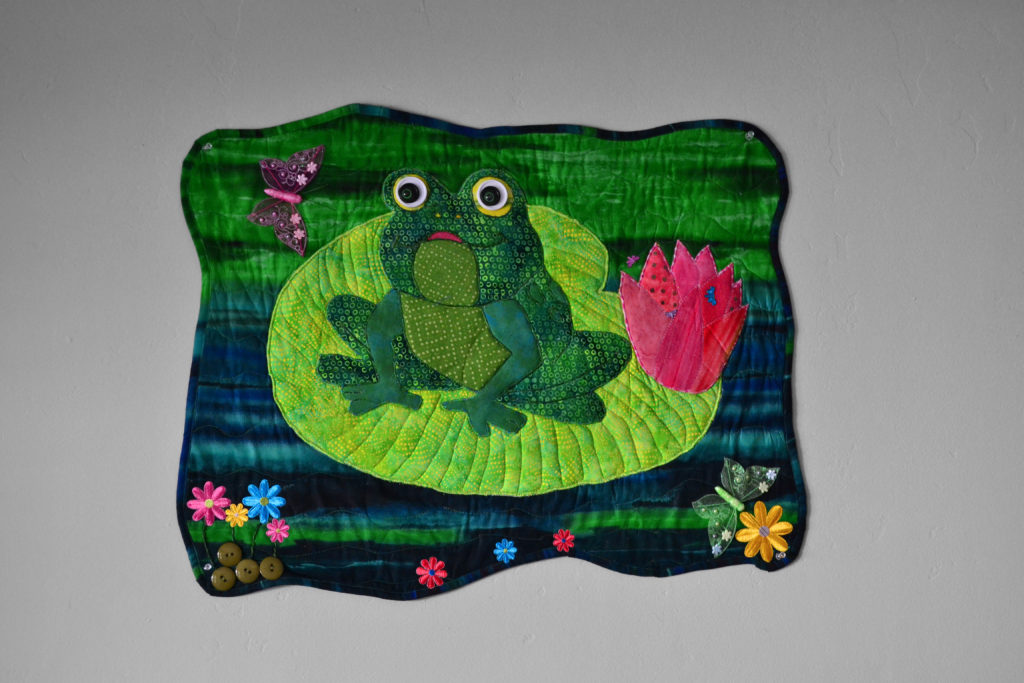
And that was how my Layer Cake Design Structure was born. You can see examples of this in ‘My Pad’ where the frog is trapuntoed up front as well as in my Christmas Bells Table Topper where both of the bells and the clappers are ‘foam-enhanced”. I just now made up that phrase – isn’t it great!
So
there you have my trapunto journey, from the original, century’s long
traditional way of doing it, to my quick, easy, and super-enhanced way.
Take
a leap of faith and try it just once – I guarantee that you’ll love the
results!
Quilt
batting is one of those things that are invisible when a project is finished
and so it’s human nature to deem it of less importance than the front of the
project. Just like quilt backing,
another so-called “secondary” concern which is actually very important.
We often ask the wrong question, “Why bother spending time on something no one sees?”
Instead of asking, “I want my quilt to be the best it can be, and so I need to know how to use quilt batting to its best effect in my work of art.”
Your quilt sandwich – neat & clean
However,
quilt batting matters greatly because it’s that foundation thing again – if you
don’t get your foundation right the whole thing goes to rack and ruin very
quickly. Quilt backings and battings are
MAJOR
foundations, so you need to consider your batting choices. And there are a lot of choices out there!
Like
everything else in quilting there is no one right answer because quilting is an
artistic endeavor and not an exact science – which is very lucky for me since I
had no luck with the sciences in school.
How to Make the Best Product Choice
when Selecting Quilt Batting
What kind of batting you decide to use in your project depends on the purpose of your project. Here are the purposes I consider. Do you want your finished quilt to be:
Nicely functional
A showpiece
A competition entry
Decorative or shaped piece
A gift
An heirloom
Like everything else in the quilting universe, the choices in battings has expanded exponentially (this is a very big word that I like to use whenever I can to make myself look smart). So let’s have a look at each type and what they can and cannot do.
NOTE:
Here’s a trick that comes in real
handy when your project is a bit catawampus or your quilt top doesn’t want to
lay flat no matter how much you starch and iron it. To correct this, use 2 layers of batting in
your project – I recommend cotton since its lighter. The extra batting helps to take up the extra
slack in your quilt top and lays it down flat.
100% man-made polyester quilt
batting
There’s nothing ‘natural’ about this option. And to be honest polyester batting has a lot of problems and it’s not my favorite. Which isn’t to say it doesn’t have its proper place in the spectrum of artistic options.
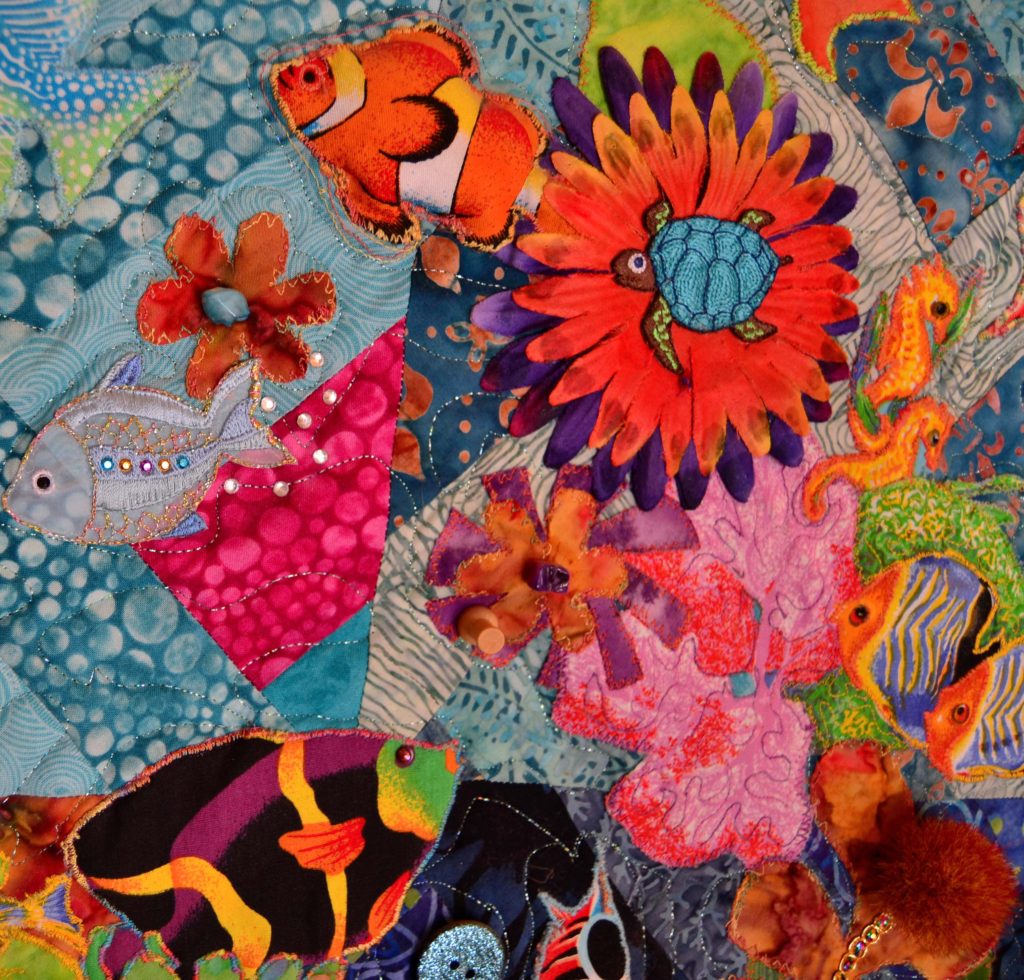
Polyester batting is used only behind the really puffy fish, making them stand out from the flatter cotton quilt batting used for the whole panel.
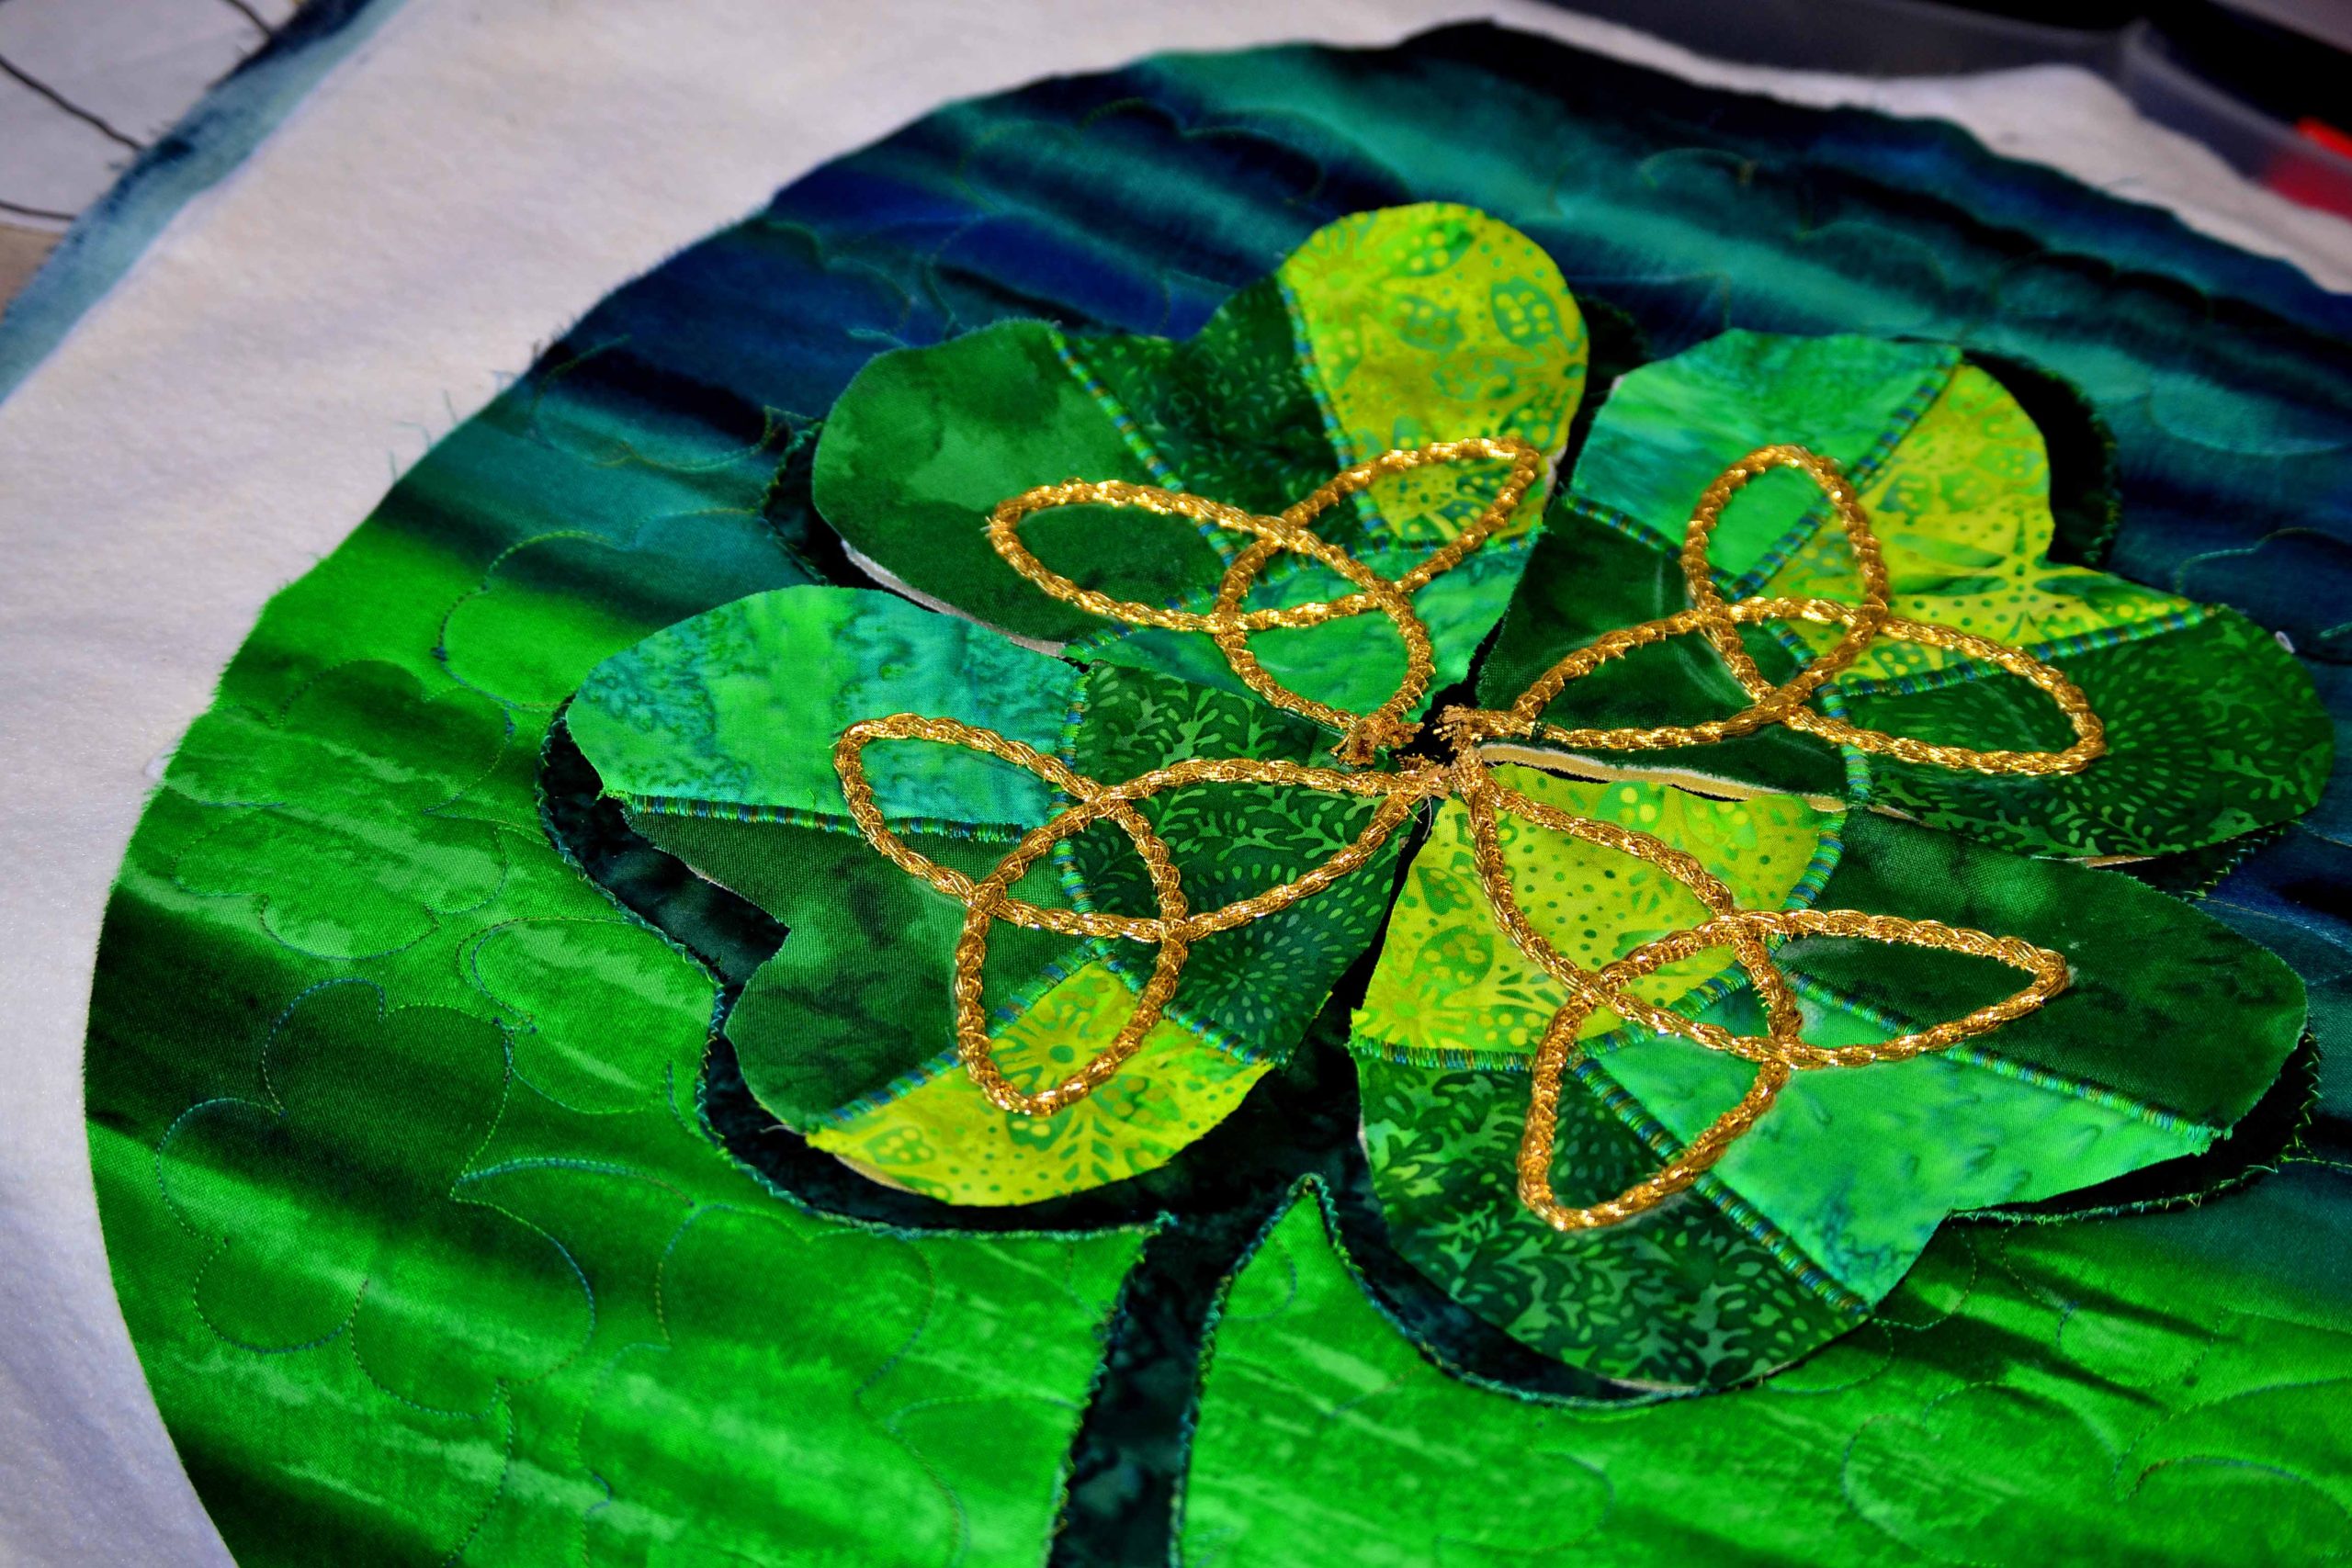
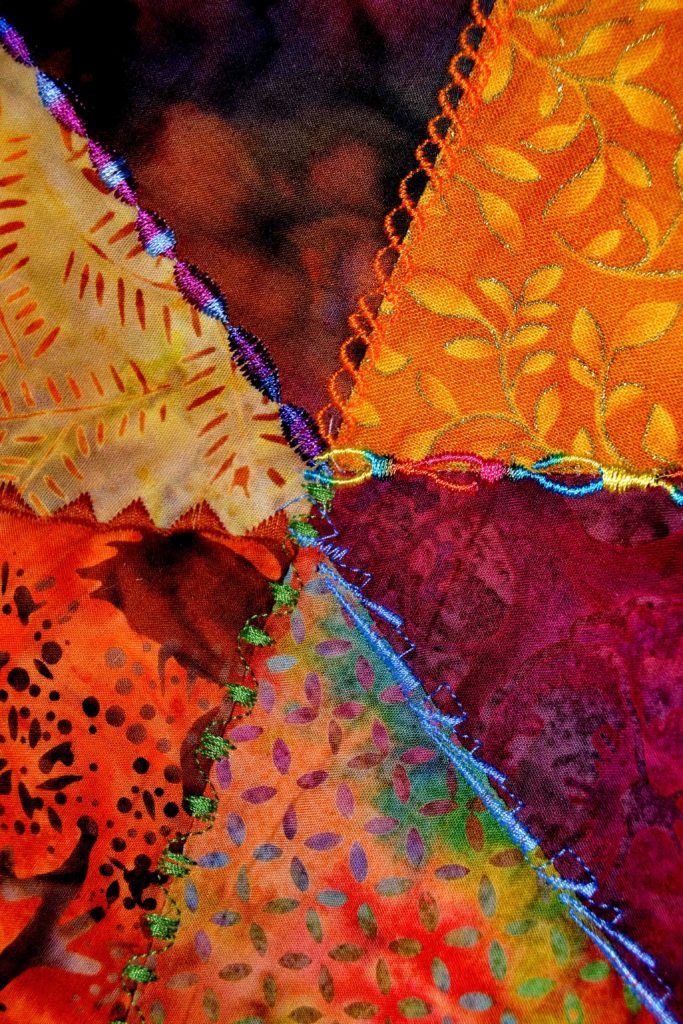
We used polyester batting, carefully cut away from sections of the lilies, to create this incredibly subtle 3D effect
Pros:
It’s very light – actually the lightest batting available
Very cost-effective. If cost is an issue for you, then this is the cheapest way to proceed.
I find this batting a good choice for children’s soft cuddle toys, poufy baby quilts, etc. I keep some on hand to use for ‘Trapunto’ – which is when you put batting behind an applique to make it ‘pop out’ from the rest of the design.
This batting is also ideal for baby and young children’s quilts because it is so light-weight and yet warm. You don’t have to load your precious little one down with heavy quilts to keep them warm.
Cons:
Polyester batting can be pulled apart quite easily
which means that it has to be quilted much more tightly than other battings so
it won’t pull apart inside your quilt and make lumps. This takes more thread and time.
For want of a better word, polyester batting is fluffy
and poofy, even the low-loft stuff which is much flatter than the high-loft
batting. This makes it harder to quilt
and also makes keeping your quilt surface flat a considerable challenge.
100% Natural Cotton Batting
If the thought of manufactured goods bothered you, and you prefer to keep a connection to natural ingredients than this is probably the most natural choice for you. Most cotton battings are now 100% natural.
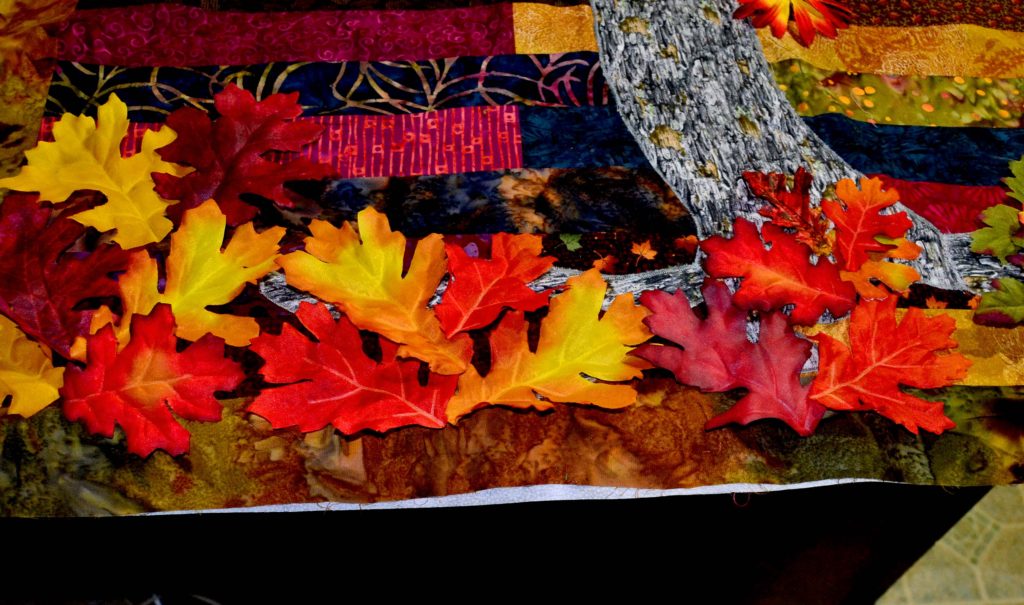
This panel used different layers of different types of batting to create the puffy, full effect
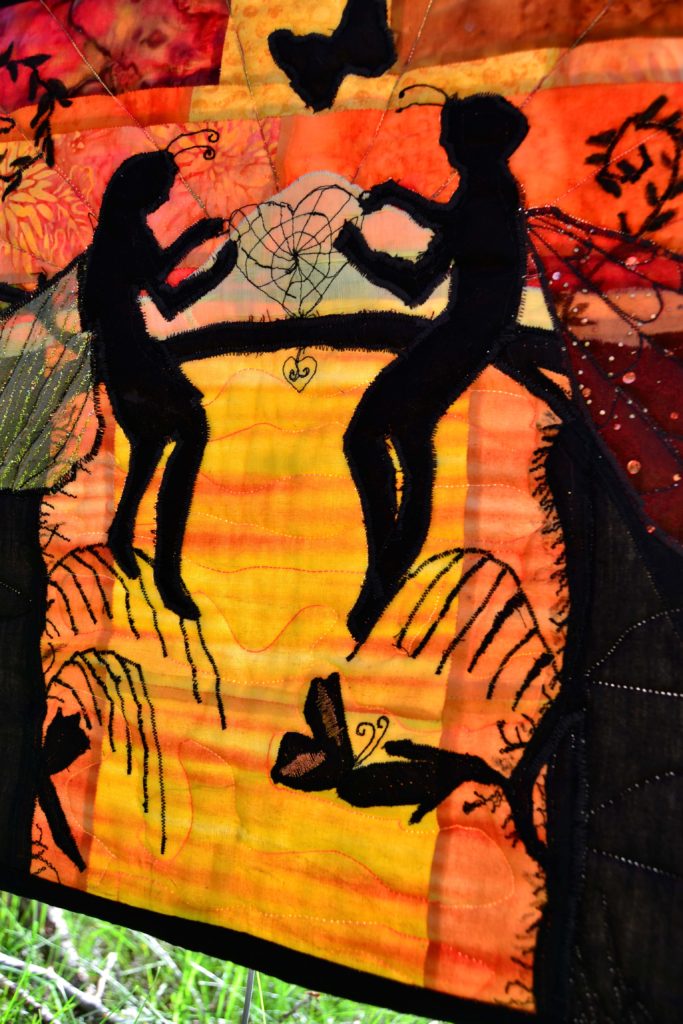
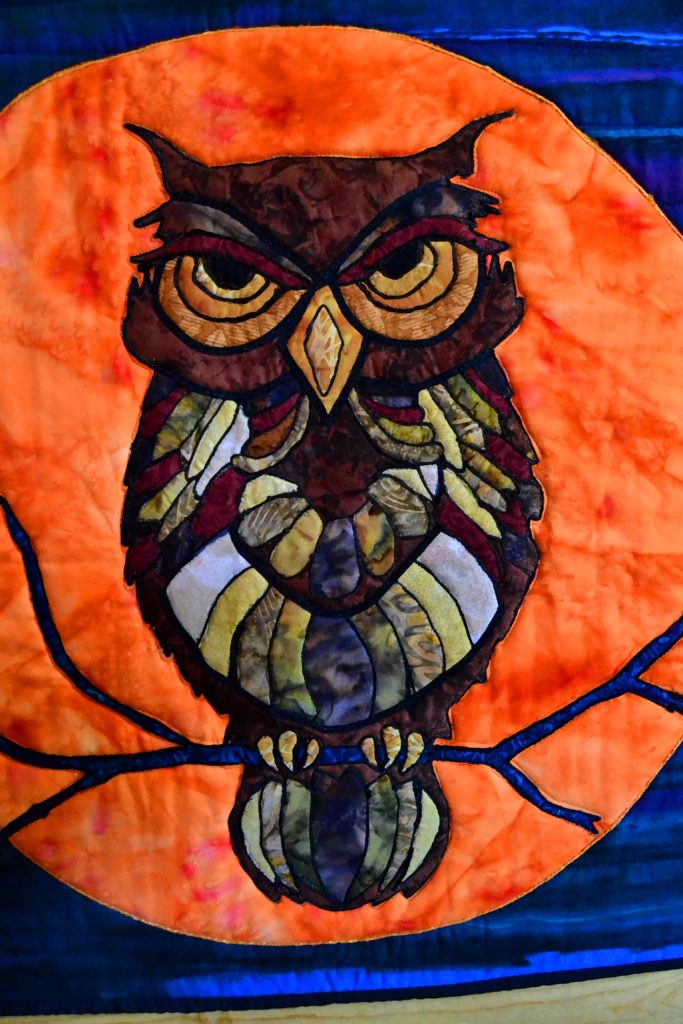
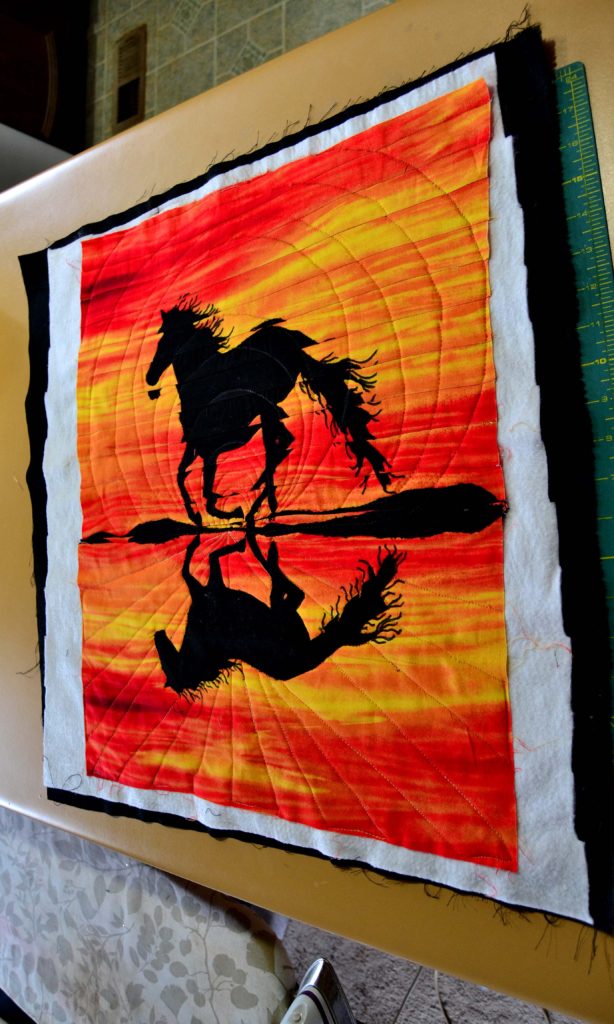
A single layer of thin cotton batting helps keep the focus on this silhouette
I
really, really like cotton battings and use them in most of my quilting
projects. In my opinion there aren’t
that many cons to using cotton, or mostly cotton, battings. Here’s why…
Pros:
Cotton battings are thin, lay flat, can be easily
ironed and are mid-weight which makes them a superior choice for quilts that
will be used on beds.
They are also warm for being so thin. If you have never constructed a full size
quilt, you will be amazed at how heavy they can get when all 3 layers are sewn
together. The front, batting and backing
are not heavy by themselves, yet quilt them together and boy howdy, that sucker
gets heavy real fast! This is an
important consideration if you’re planning a king or queen quilt and plan on
quilting it yourself – the thicker your batting, the heavier the quilt gets – exponentially.
These battings are much harder to pull apart manually
and will not come apart with repeated washing.
Therefore, the quilting does not have to be that dense to keep it in
place. Most of these battings can be quilted
8” – 10” apart, which cuts down on the amount of thread you use and also the
time it takes to quilt your project.
Because they are lightweight, they work very well for
panels that will be displayed on walls because there is very little drag.
If perchance, your batting piece is not large enough
for your project, it is simplicity itself to sew 2 or more pieces
together. Just lay the pieces side by
side and sew them together with beige thread and a zig-zag stitch. I have seen special joining tape that can be
purchased for this purpose, but it’s not necessary.
Cotton batting will lay flat and straight if you sew
the seams with a tight enough stitch.
Cons:
Cotton quilt batting is more expensive
Cotton doesn’t have that “cuddly” feeling – so by itself it may not be the best choice for a child’s quilt or a comfort lap quilt.
Cotton can get too warm really fast. Sometimes a quilt tends to be wonky and have pleats and bubbles. One of the best ways to get around this is to use a double layer of batting to stretch the quilt top – but a double layer of cotton batting can be much too suffocating for a summer quilt.
Another Natural Batting is 100% Wool Batting
I’m
not a huge fan of wool quilt batting, but it does exist, and it is,
occasionally, a good choice for a great quilt. Since I seldom use it, you may want to take
my advice on it with just a little grain of salt.
Pros:
The main usage for wool batting in my world is when I really want to define some aspect of the quilting.
This is what cotton batting looks like, flat and neatly trimmed. I don’t use wool enough to have pics of the effects
Because
wool batting is approximately twice as thick as cotton, the quilting lines go
in much deeper than with cotton batting.
This causes the un-quilted portion of your project to pop up and appear
much closer than it is. In effect, it
causes a 3-D illusion. I used this
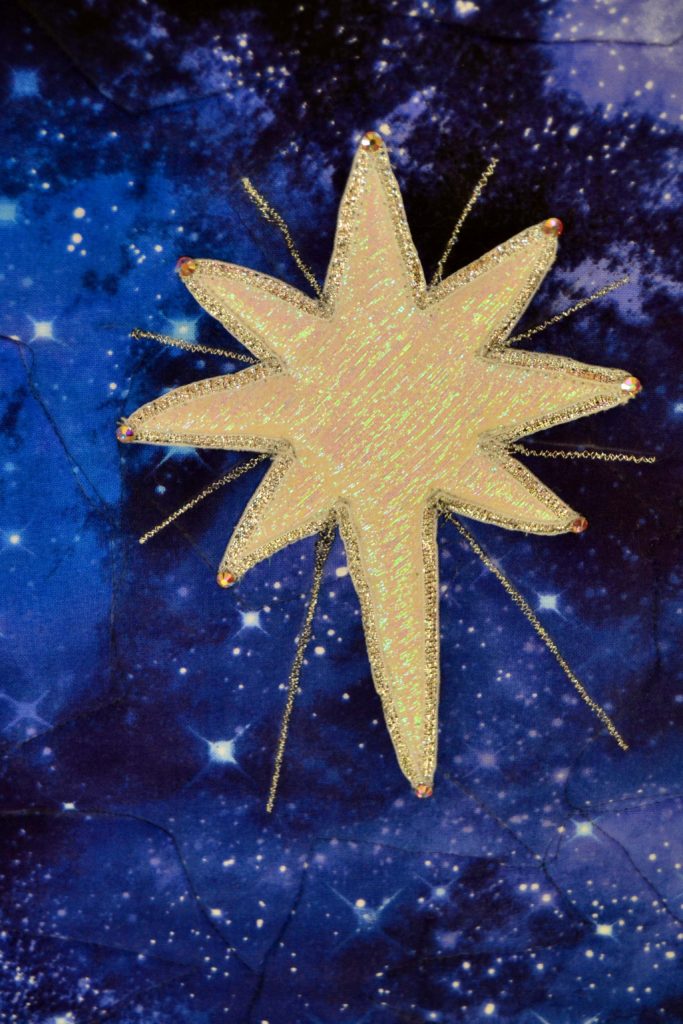
technique in my Night Guardian panel.
The night sky portion of that panel was quilted with wool batting and
therefore appears much closer than it actually is. I also used this same quilting on the
background of my dragon panel to help the dragon itself pop off of the panel.
Wool
batting, however, does have its good points.
One of these is that, like cotton, it is natural so that there is less
worry about allergy and health issues.
Wool
quilt batting’s also densely constructed, so the quilting doesn’t have to be
that heavy.
Also,
washing is not a problem – it goes through washers and dryers without pilling,
pulling apart, or shrinking.
Cons:
Wool
batting, by its very nature is WARM.
Very warm. Unless you live in an
unheated house, or Antarctica, you may want to re-think using a wool batting in
your quilts. They are HOT!
Wool
batting is also very heavy. For these
reasons I don’t use it in quilts, especially NOT anything larger than a lap
quilt. Remember that once you layer all
3 entities of a quilt sandwich together, a quilt gets heavy very fast. If you use wool batting, the weight will
become almost unmanageable. I had to
have help pulling a quilt sandwich through my machine, and that was just the
middle panel of my dragon quilt.
Imagine, if you will, the weight of a full-sized quilt!
These
are the 3 main types of batting available in quilt stores. The come in different weights, thicknesses,
and percentages. The choices seem
overwhelming when you look at the shelves and shelves of batting choices.
But my number one recommendation is:
Warm’N’Natural Mostly Cotton
Batting
This
stuff is amazing. Its 80% cotton, and
20% some man-made fiber I can’t really pronounce. It combines the best of both worlds, and is
warm but much lighter than any other option.
You can double-down on it without causing your house to sink into its foundation, and you can also use it in combination with wool or polyester quilt battings when you’re going for poufy applique techniques.
You’ll find warm’n’natural quilt batting in most of my quilts and wall hangings from the last ten years, and I’ll stand by its use in 97% of quilting situations.
It’s also fairly well-priced on one of our favorite money-saving sites, Fabric.com. Here you can get a King-sized package and – unless you’re making a king-sized quilt – it’ll last at least a couple of months.
My
final recommendation is to use warm’n’natural mostly – but if you want or need
to use a different quilt batting for some reason, here’s Princess YellowBelly
Design’s final word.
Match-Up of Desired Finish to Functionality
Most quilt battings can be layered
Foam works great with batting
And you can achieve this effect – easy, beautiful, and in-depth
Functionality
– Cotton batting either 100% natural or a blend – it really doesn’t matter.
Showpiece –
If it’s small enough and you really want to create a 3-D effect use 100% wool
batting. If it’s larger use cotton. Sometimes, I’ll use 2 layers of cotton
batting so that I get the 3-D effect without the weight.
Competition
– If you’re entering your work to be judged, then use the best batting you can
afford and get it professionally quilted.
Weight doesn’t matter so much in this instance, but quality does.
Decorative
– Use cotton batting and quilt thoroughly – you don’t want it to lose its
shaped and definition while it’s hanging.
Gifts
– Depends on size and function but use the best batting you can afford so that
the gift will endure.
Heirlooms
– This is where quality is the most obvious.
If you are planning for your projects to be passed down to future
generations, you have to use the best quality materials available and this
includes your batting. I would recommend
warm’n’natural, of course, but if not then you should go for 100% cotton at the
highest quality available.
Purchasing Batting
Like
everything else you need to consider your needs and shop around.
Packaged
quilt batting comes in specific sizes – twin, queen, king, etc. If you are only going to be sewing one
project then buying a pre-packaged size is the cheapest way to go. There will be little waste.
Also,
if you’re purchasing online, then this is the cheapest option to ship.
However,
if, like me, you sew constantly, and – unlike me you live close to a JoAnn’s
Fabric store – then I would recommend buying your batting by the yard from
rolls. And when I say yard it’s not a
45” wide yard like it is for fabric, but a 90” yard.
Especially if you have a bulk coupon it’s much, much cheaper this way too, and art stores carry a lot of different brands to boot.
When all of your materials work together right…you have created art!
A Final Note of Caution
I
have seen packaged batting that is made from 100% recyclable materials.
Now,
I like recycling and saving the environment as much as the next quilter, but I
can’t help it…I’m EXTREMELY leery of these.
My
thinking is this…whatever they were recycled from you can bet it was chemically
constructed, manmade, and unnatural.
Then they recycle it with more chemicals and reconstruct it with even
more processing and chemicals.
This is certainly not something I want to put close to my face in a bed quilt – especially for babies or young children – or in a heirloom quilt will it start to break down after 10-20 years? I would urge caution if you want to go in this direction and start with something small.