Karyl Fitzgerald is our latest Seam Ripper Champion – the absolute Master of Disaster, for her humorous take on a fracturing panel project that took her for a wild and crazy ride of mistakes made and overcome. Please join us in celebrating a fabric artist that hasn’t yet heard the words “quit” or “can’t” and keeps on making amazing pieces of quilted magic.

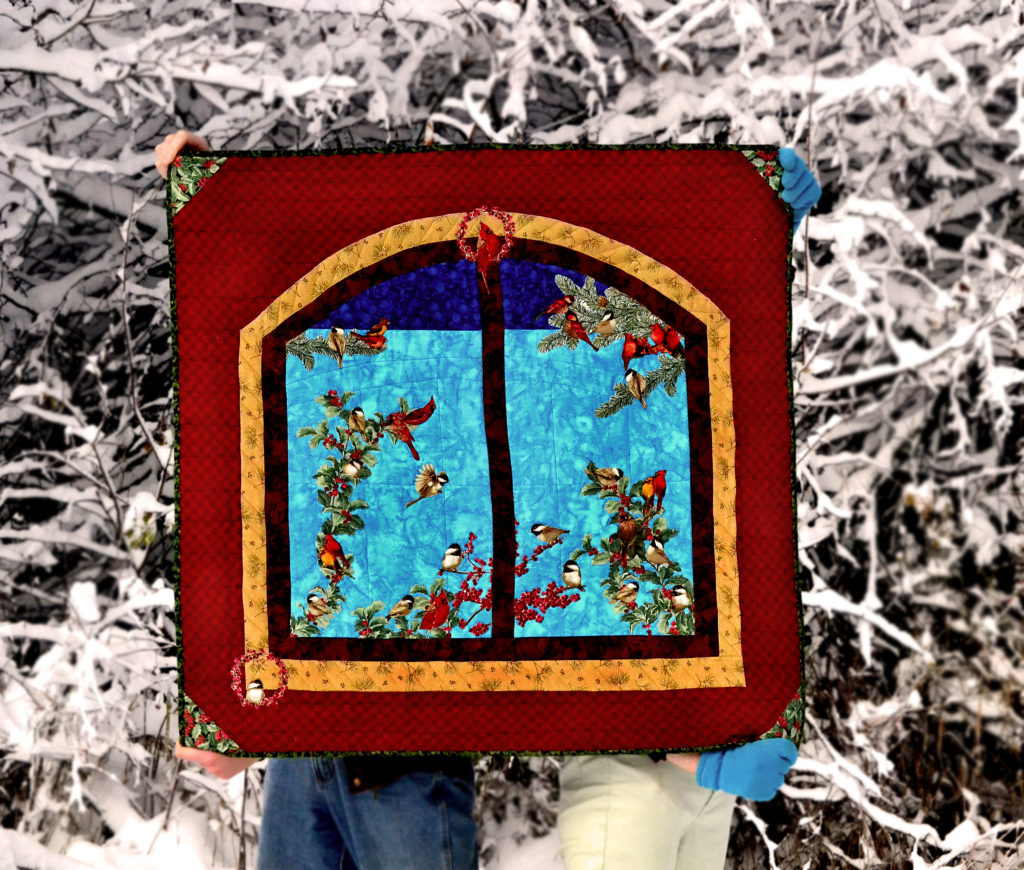
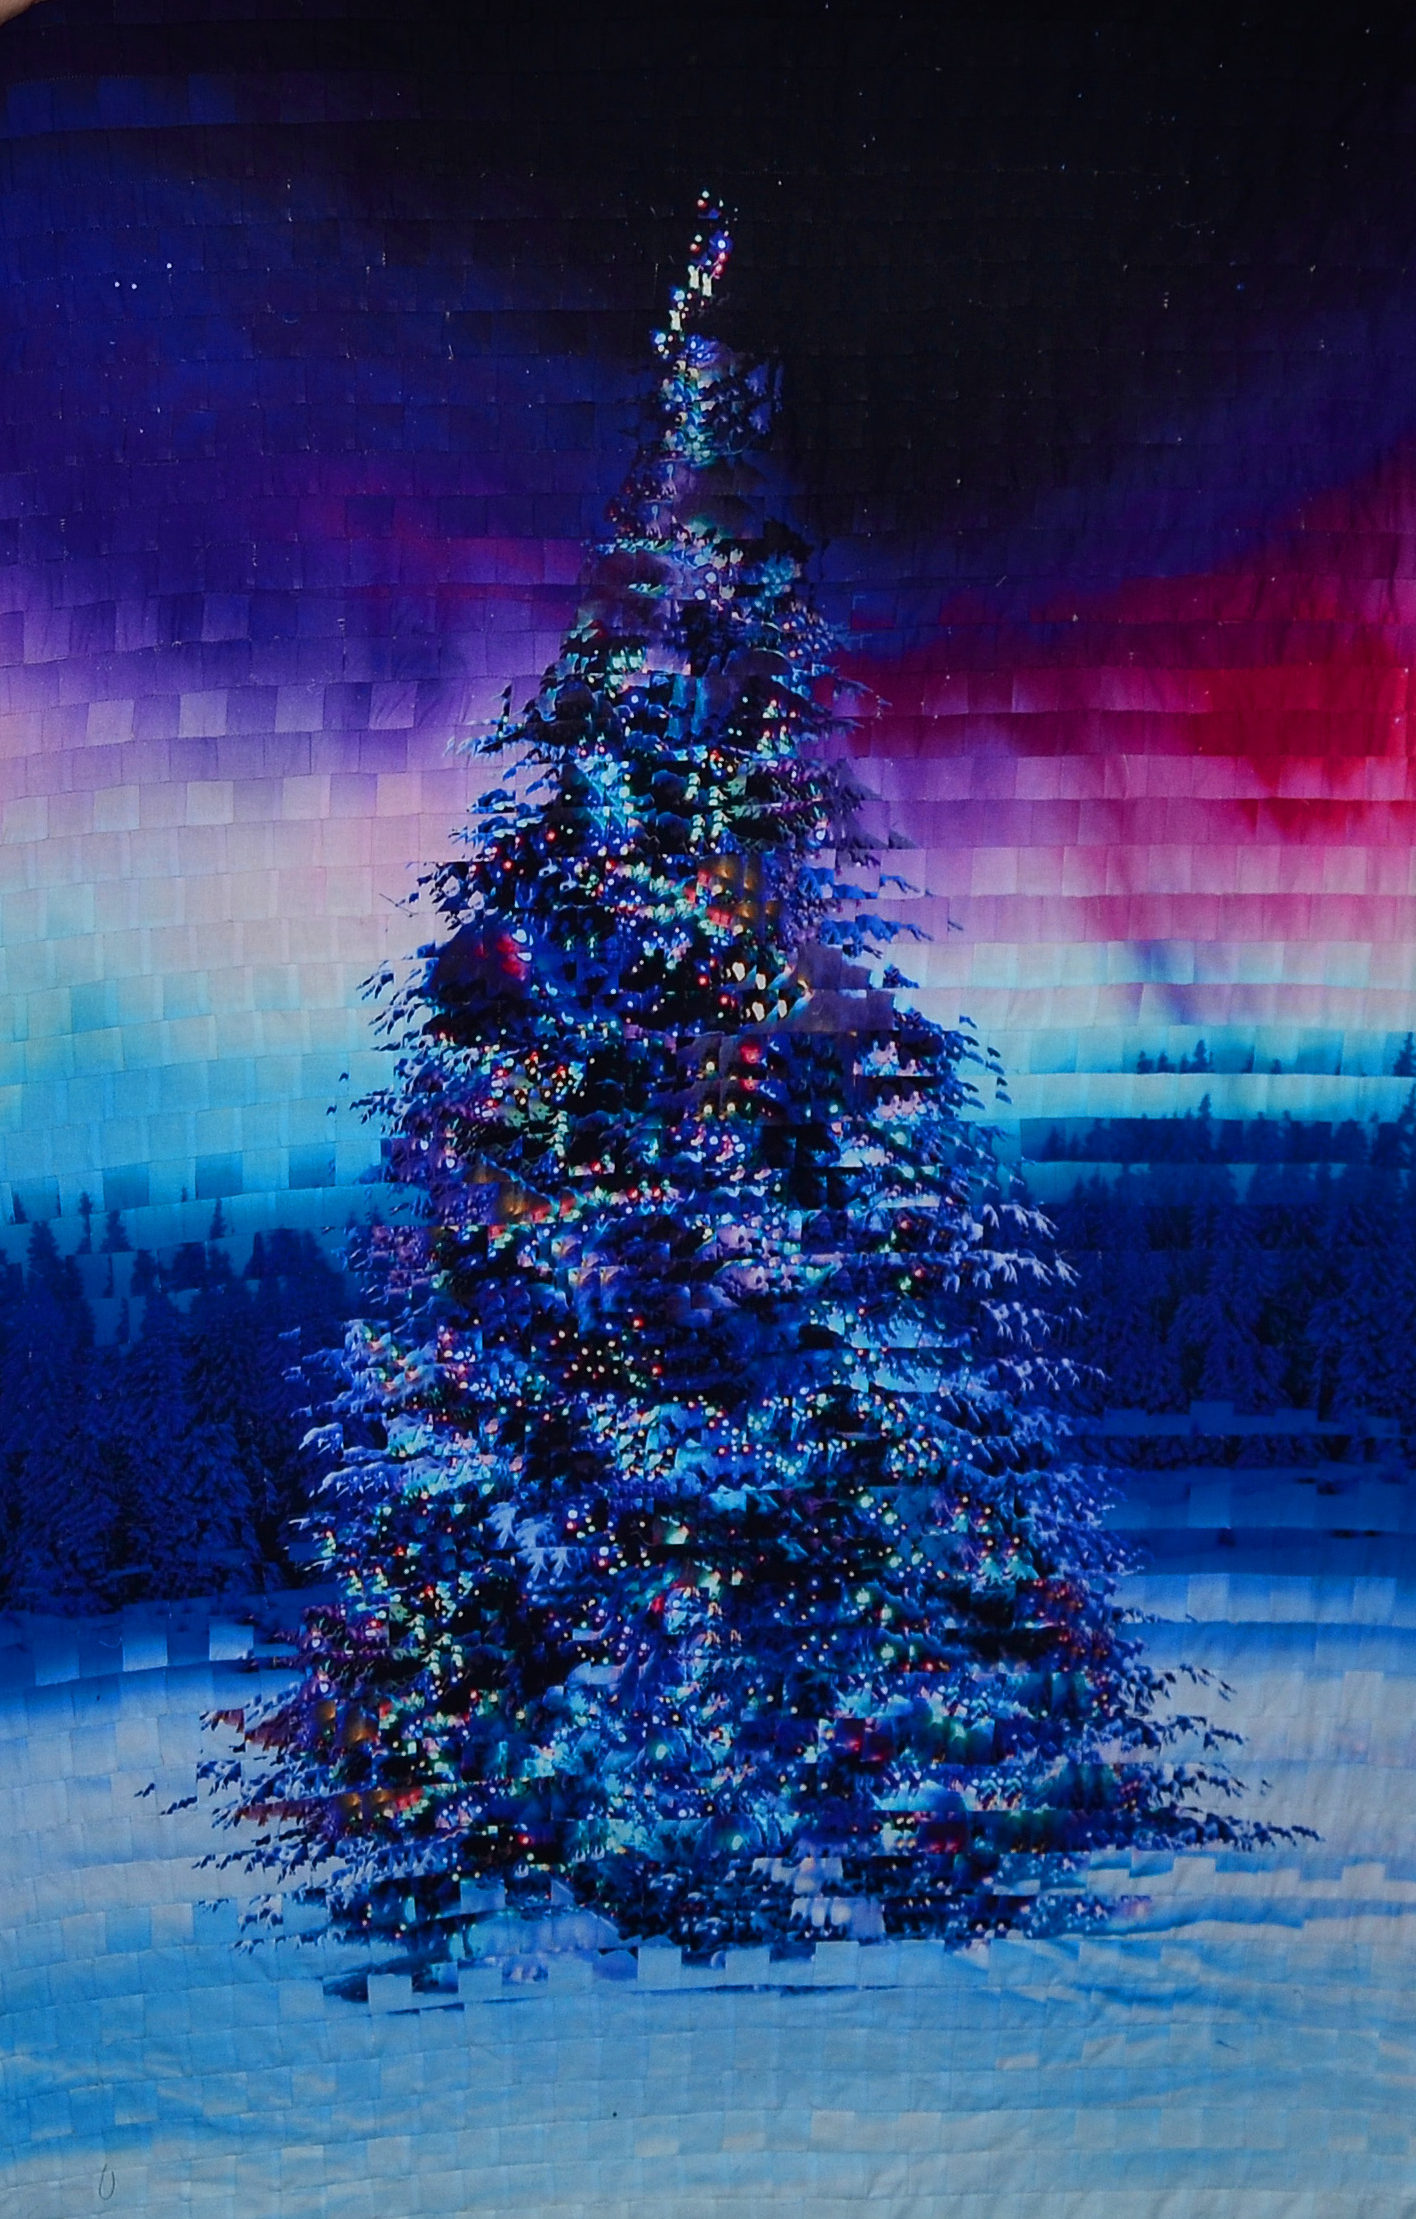
When I decided to fracture a Christmas Tree panel, I ended up fracturing more than my fabric; my fracture nightmare also fractured my confidence, composure and enjoyment into tiny little pieces that didn’t know each other anymore!
Like many of my “worst disasters” however, I learned a lot from my fractured mess nightmare, and I hope it helps ya’ll to have less troublesome quilting in the future.
Be Careful of Knowing What You’re Doing
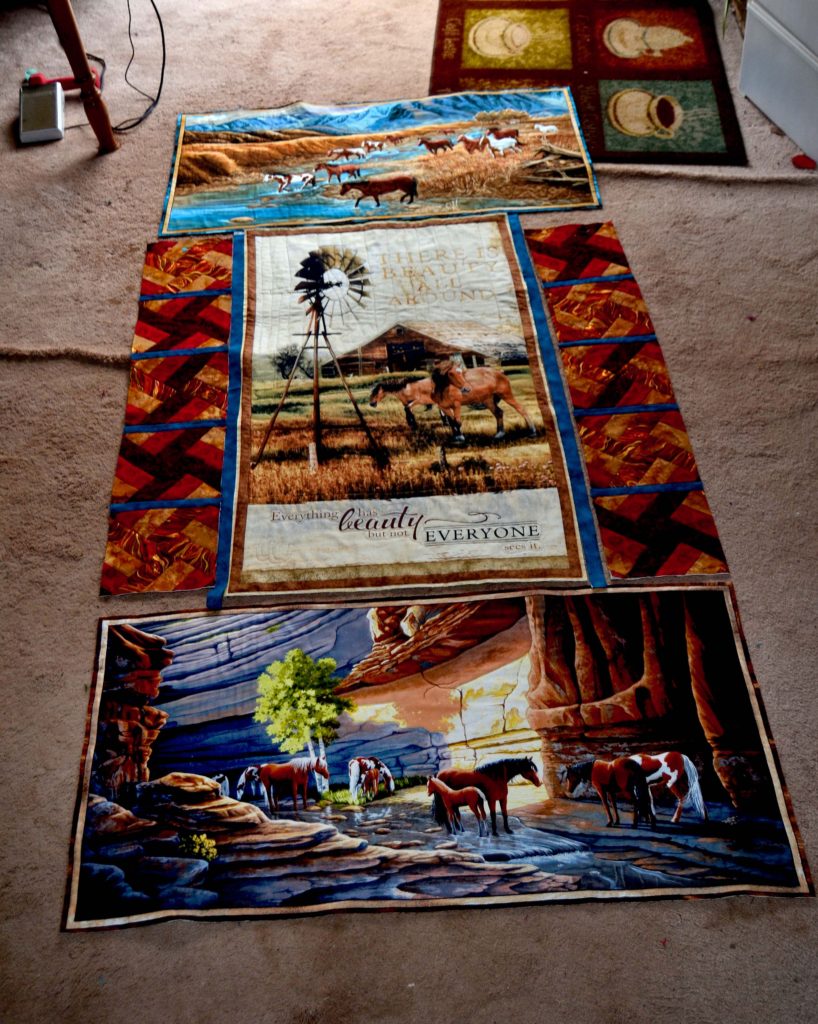
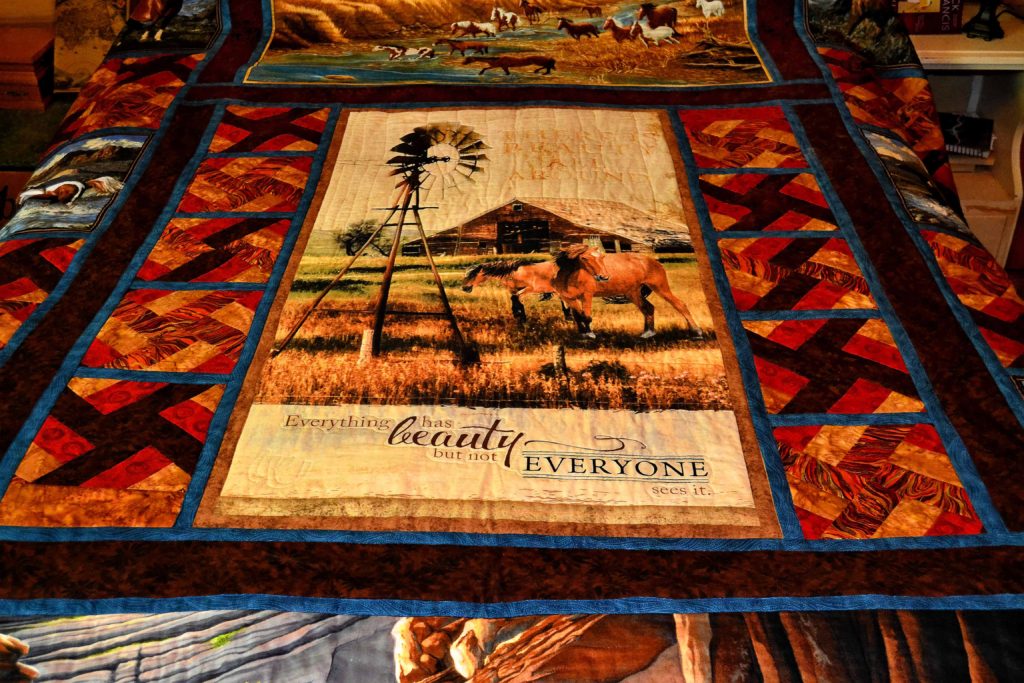
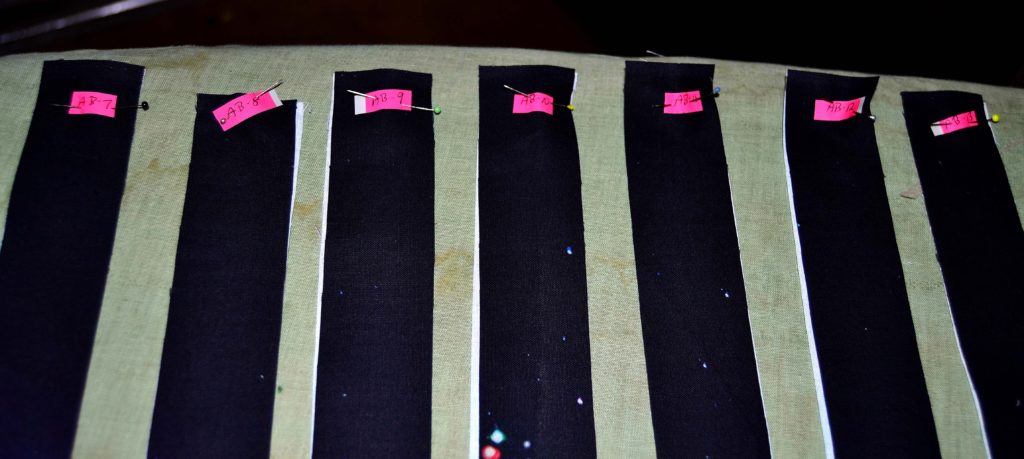
Fracturing is when you take a multiple number of identical printed fabric panels – each with the exact same images. Then you cut each panel into teeny, tiny little strips, starting at different points, and sew them back together.
Your starting number needs to be an even multiple; 2, 4, or 9.
You could probably do more, but I have no idea why you’d want to. Honestly, that’s a lot of strips!
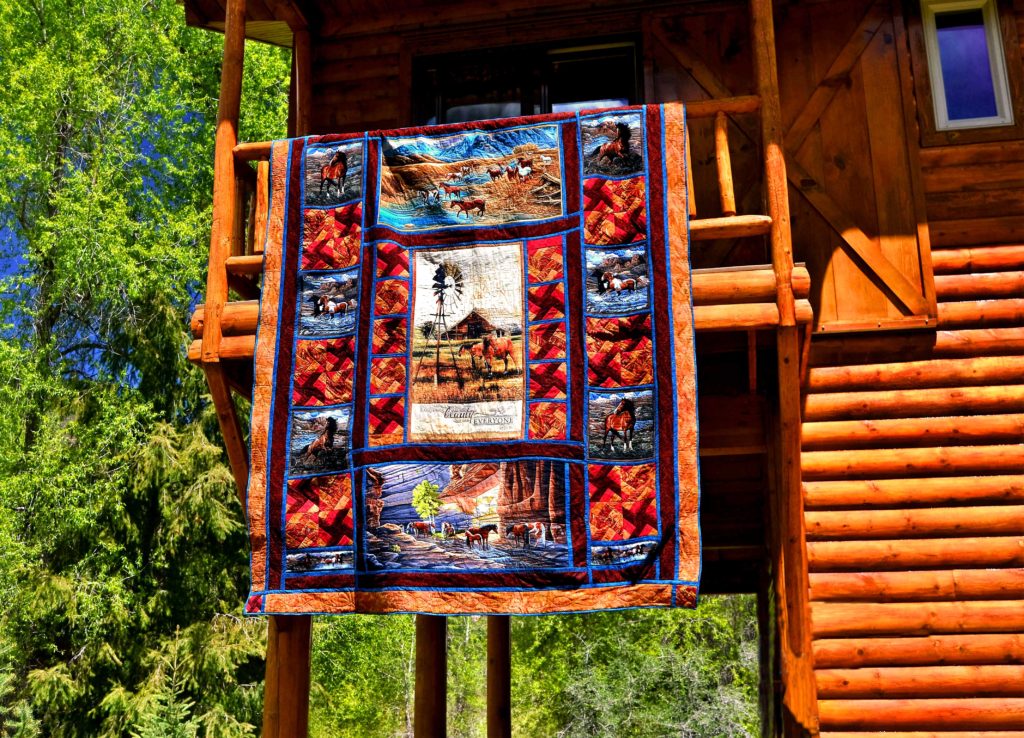
Fracturing, by the way, is one of the most fun and easiest ways to turn a regular old printed fabric panel into a gorgeous piece of fabric art that’s just right for inclusion into a quilt, or into a large wall hanging.
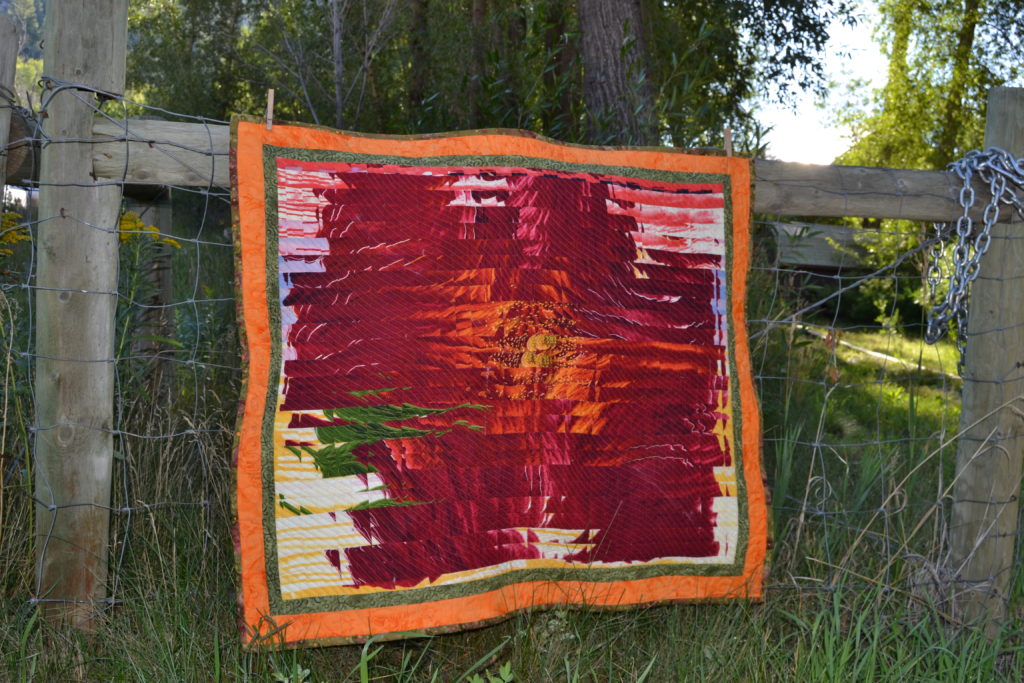
I’ve done fracturing before, most notably my “Poppy Water” panel, which worked beautifully.
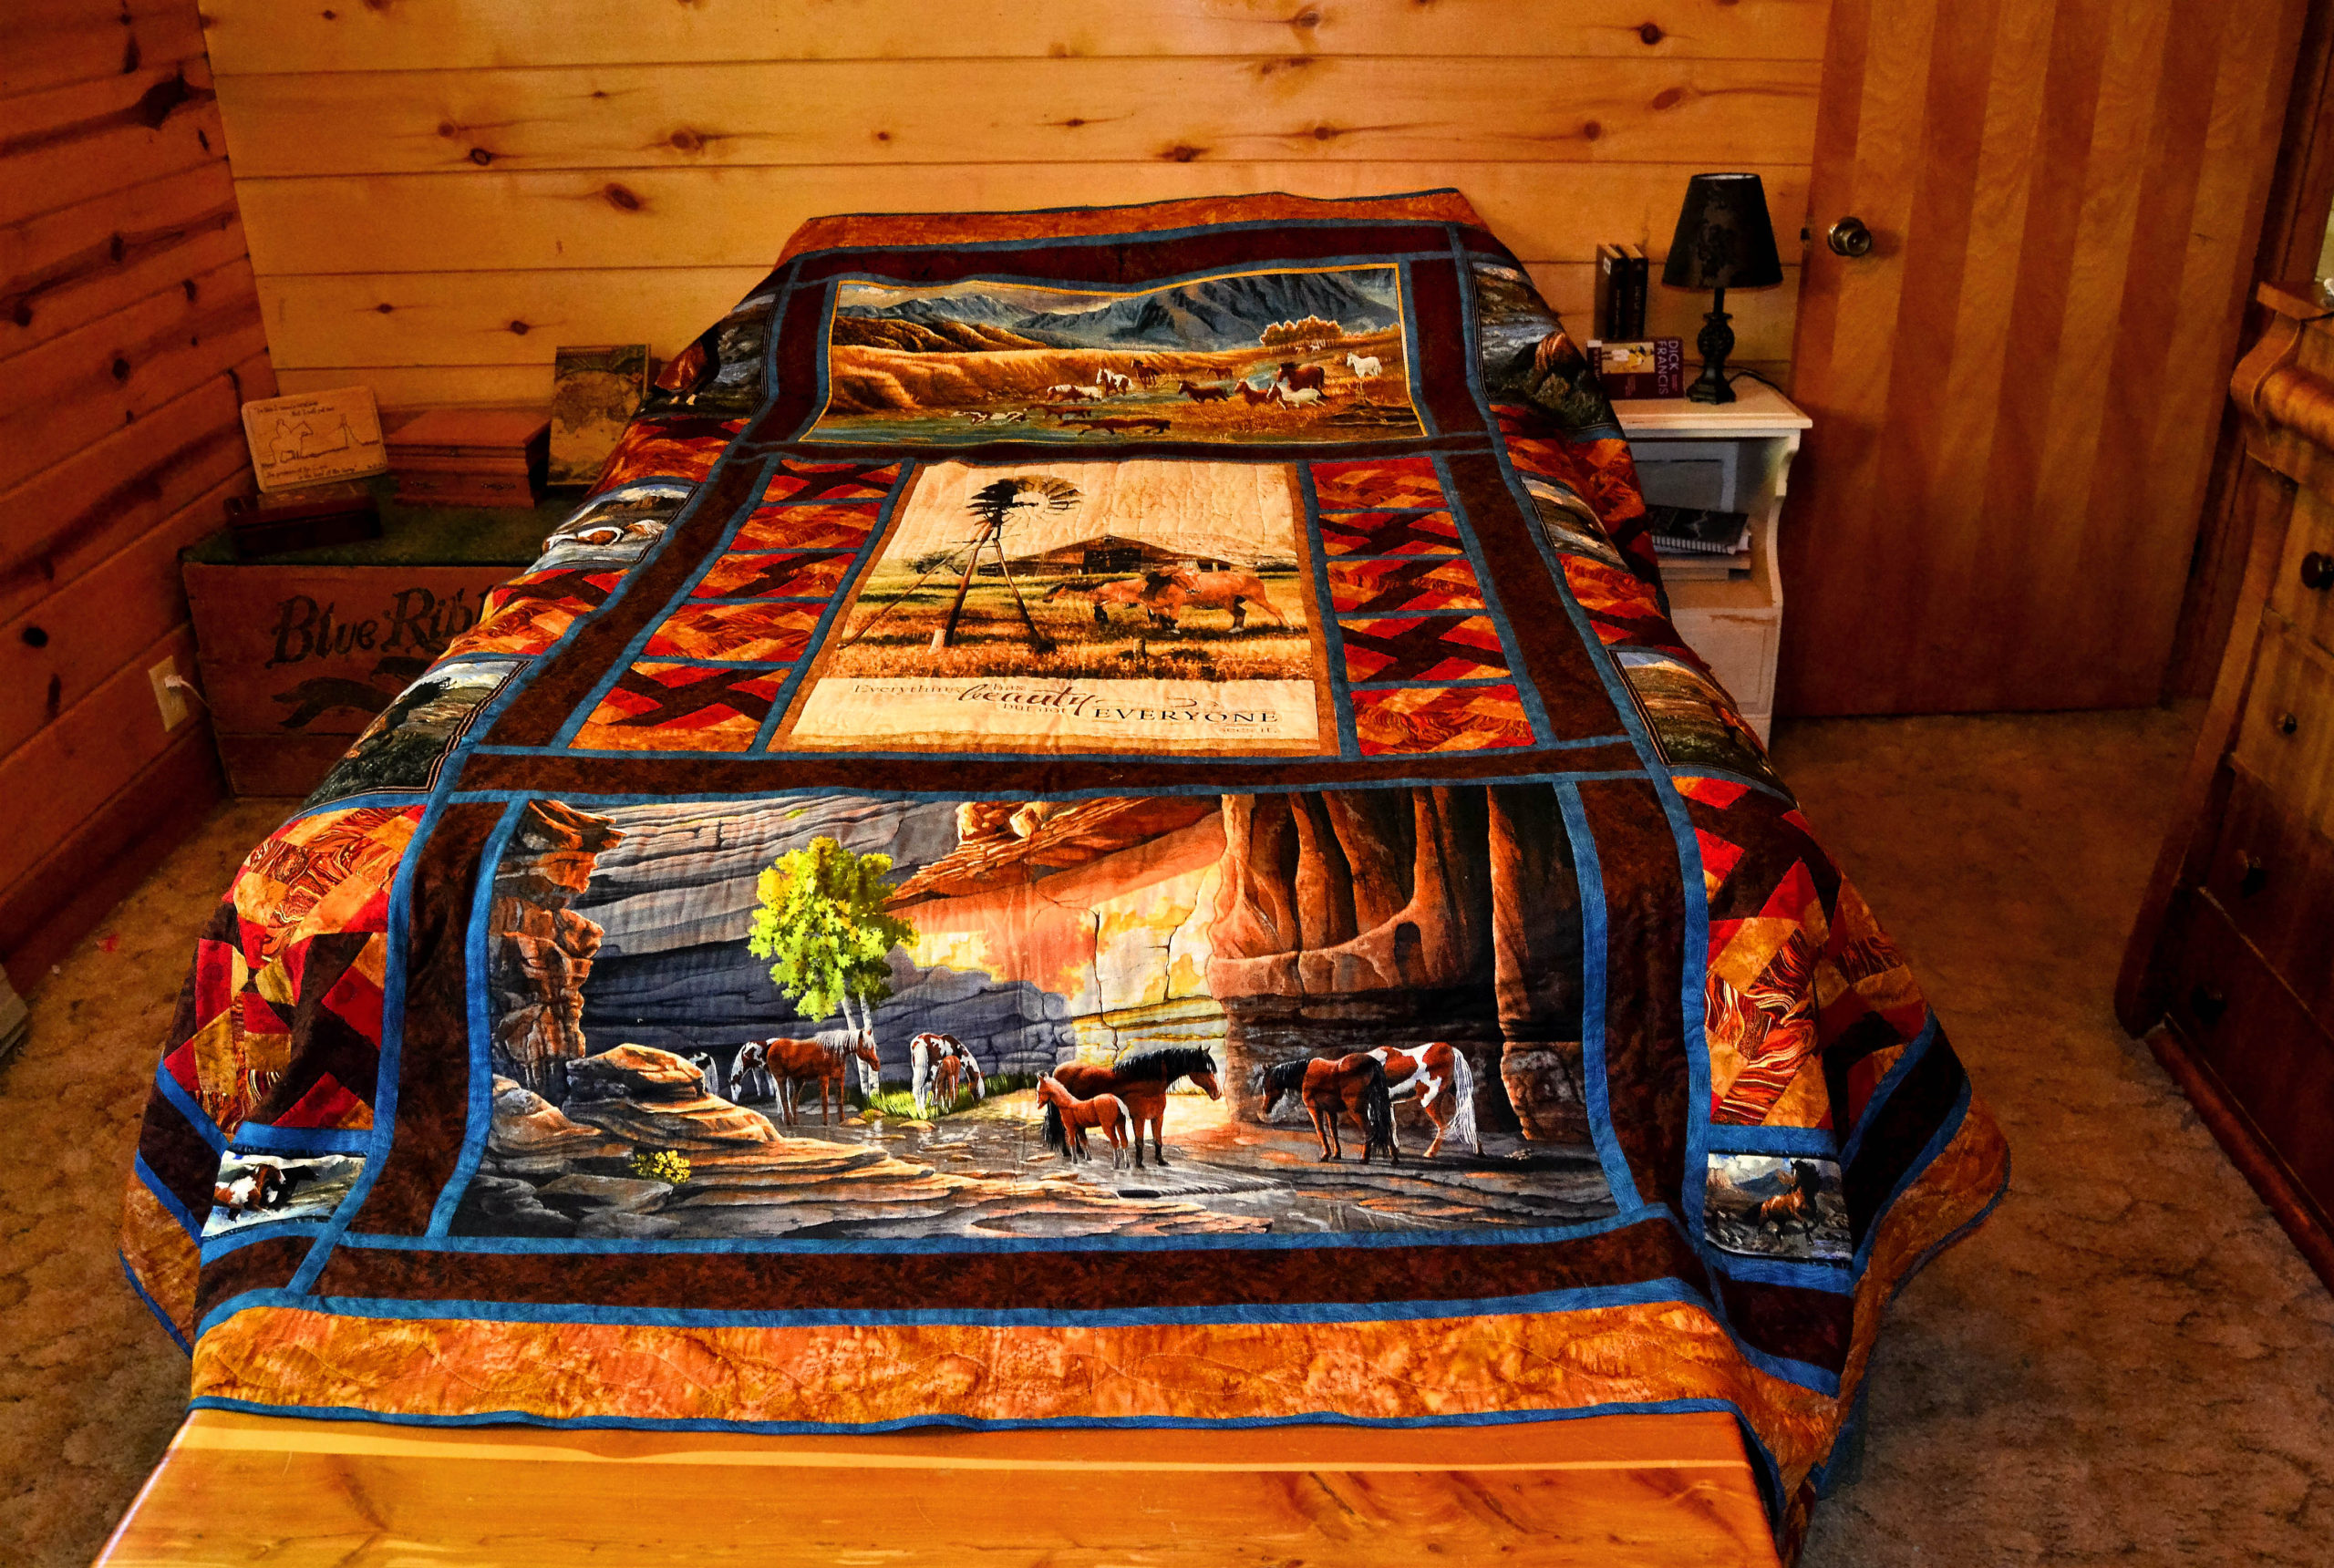
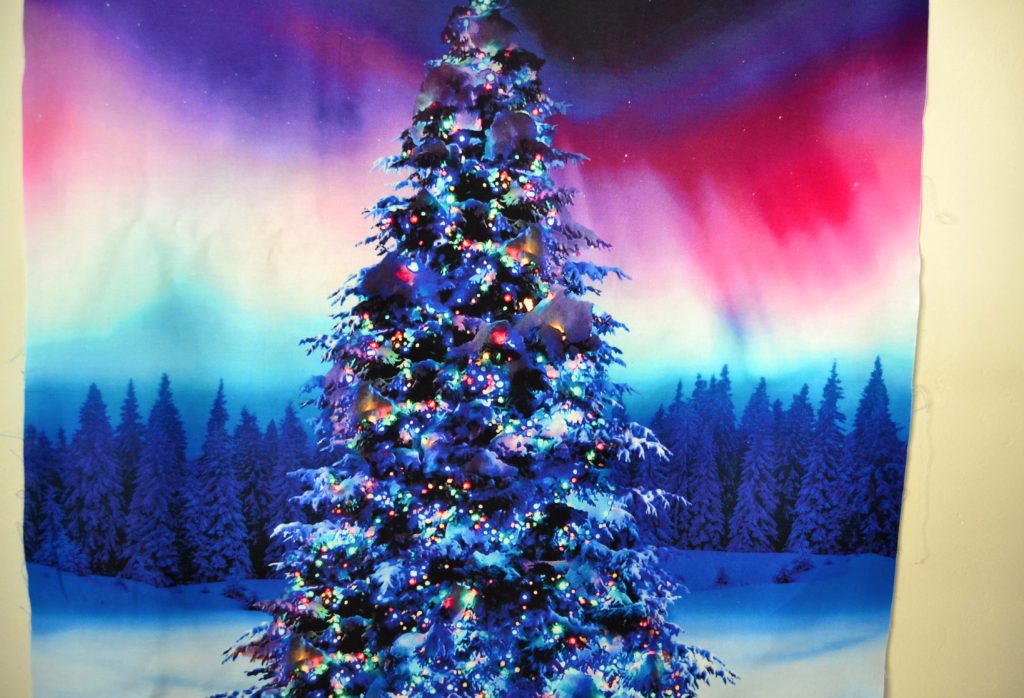
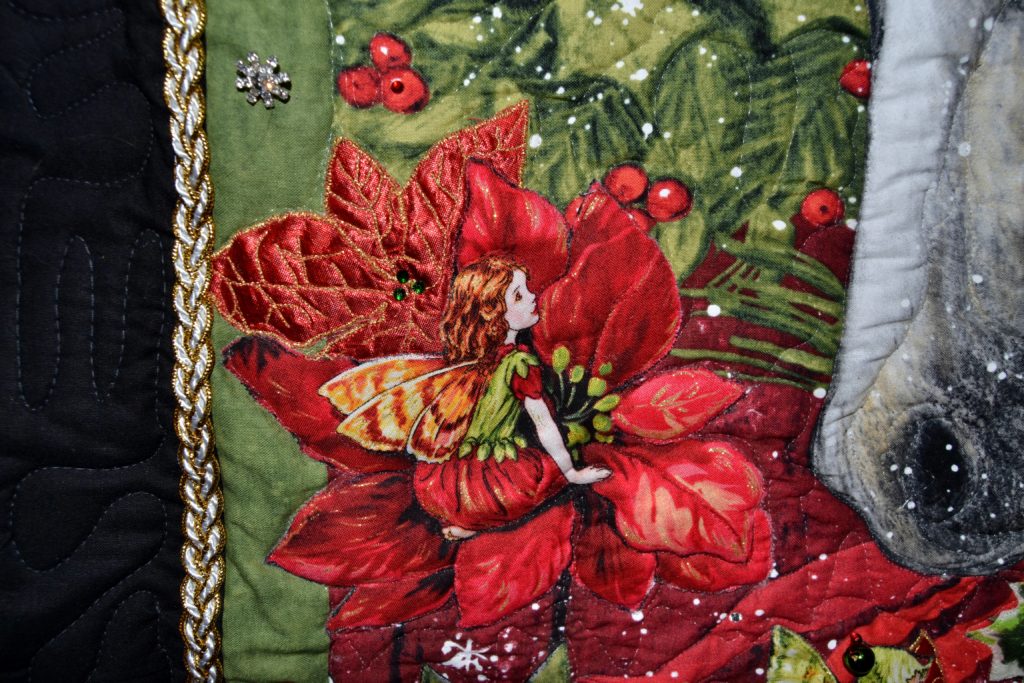
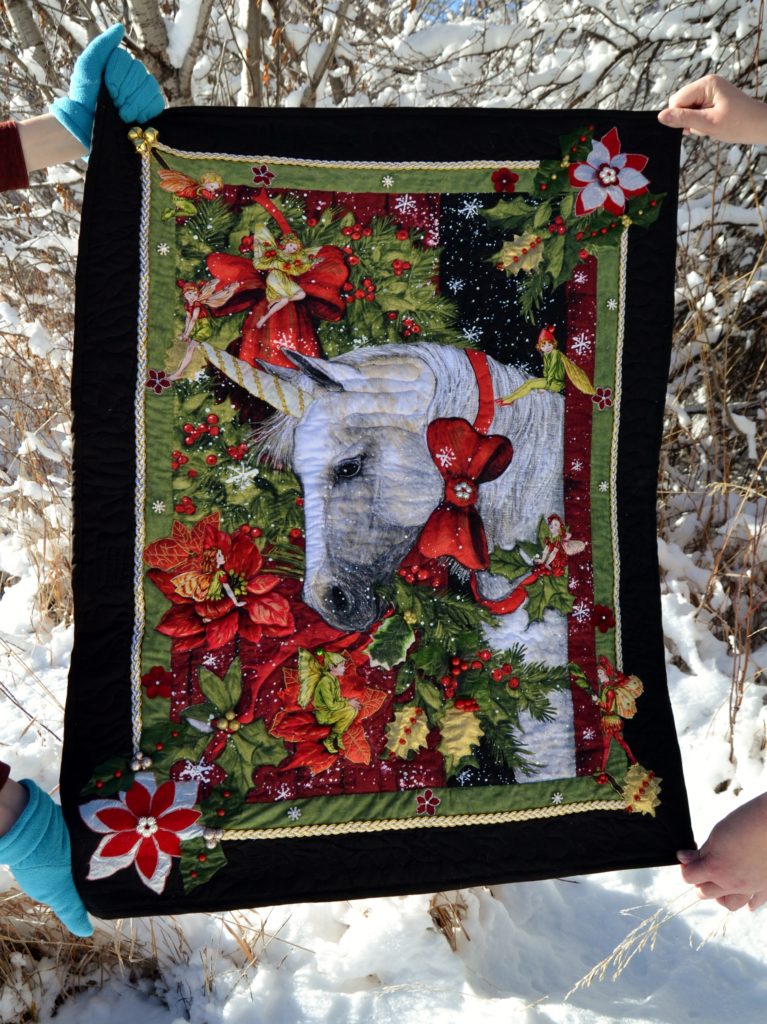
I also enjoy fracturing, which is a bit of diversion for me since it smacks very strongly of a precisionist style with all those tiny little seams and vaguely matching points. So when I saw this gorgeous panel of a Christmas Tree out in the snowy woods beneath the northern lights, a light went off in my head.

Karyl Fitzgerald is the fabric art genius behind Princess YellowBelly Designs. A lifelong seamstress and artist with many mediums, she is spending her time these days making new quilt patterns that make it easier to create amazing quilts with new twists and combining multiple techniques. Of course, creating new techniques “as you go” is one reason she has so many stories of disaster.
Karyl grew up in the bush country of Northern Alberta, has been to the Amazon Jungle, spent a year teaching in South Korea, and married a rancher from Arizona. She’s the mother of three children, and all-around a fun-loving, adventurous gal!
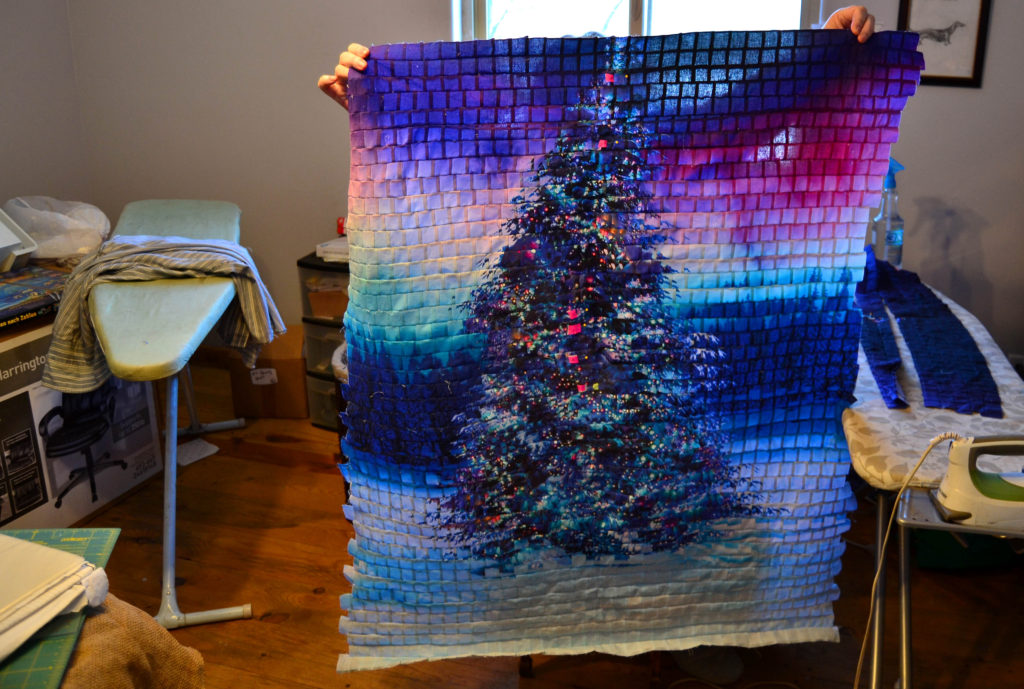
Whenever your project is at this stage – there’s a lot of room for missteps in your near future!
The panel already had a kind of watery, painted quality that made me think it would look even more amazing as a rippled, abstracted beauty.
So, I ordered the panels and prepared to create fabulous fabric art magic.
Fabric Art Techniques Can Take You for a Ride
This is, ironically, especially true for a technique that you think you know. It’s often a case of you knowing just enough to make yourself dangerous. That being said, there are lots of ways that a project can highjack your best intentions and take you riding off in a strange and bizarre new direction.
Non-Identical Images – A Problem I Couldn’t Control
The first problem we (my daughters and I) ran into was the panels themselves.
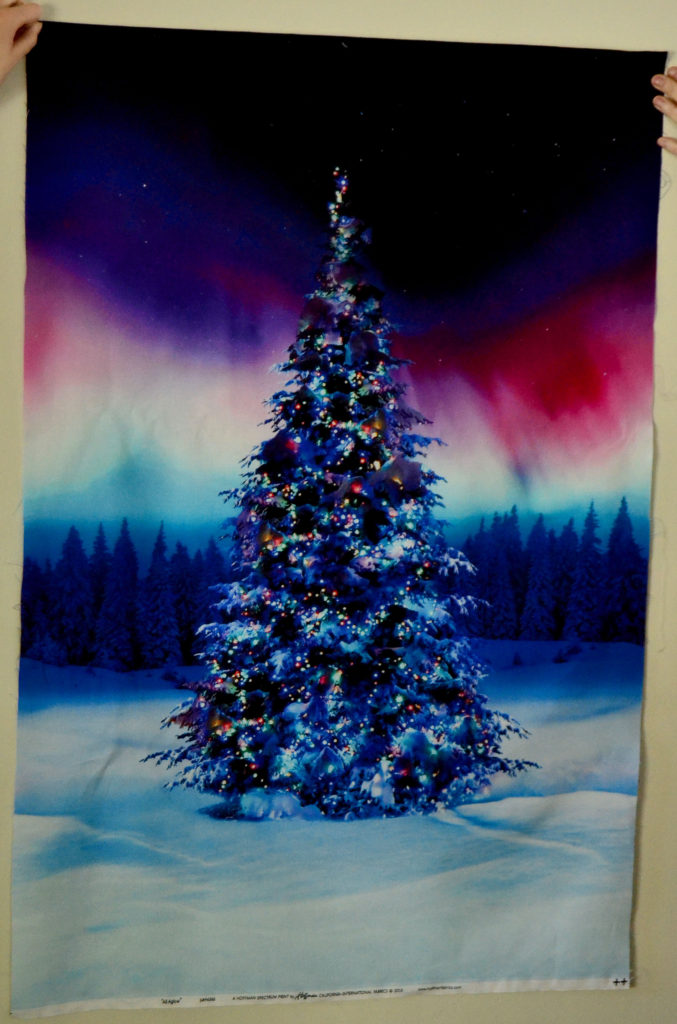
Upon unpacking them we found the rich, vibrant Christmas trees were even more beautiful than the pictures had suggested, but they had been cut wildly off-kilter.
This is, by the way, is a common problem with printed fabric panels.
I think they are probably printed on long bolts, and then machine cut. There’s no real attention to squaring up a panel, as long as they look vaguely rectangular, they get stuffed into a plastic bag and shipping off.
This isn’t a problem I’ve ever run into with panels I’ve purchased from a quilt store, at least not ones that don’t arrive there prepackaged, because quilt ladies cut these panels out by hand.
This was a big problem for a fracture project, because a basic fracturing principal is to work with identical images.
How do you square up a piece of fabric that doesn’t fit on a cutting board?
I don’t know. And, with that, my fracture nightmare was off and running!
We did work out a process and square them up, a little, but the truth is our pretty panels were still a little crooked.
Working a Pattern from Memory – the Problem I Could Have Controlled
The finished piece might have been a little wonky anyway, thanks to the crooked panels. However, thanks to “knowing” what I was doing I really created my own fracture nightmare.
The real problem was that I was lazy.
We had recently moved from a house we’d lived in for seven years – a very high-stress and pressured move – and the box with all my quilting pattern books had ended up going to storage instead of to our new place.
It was wintertime, there was a ton of snow on the ground, it was cold and stormy, and I just didn’t want to put out the colossal effort to go find my Fracturing How To book.
Besides, I just knew that I remembered how to do it from a previous project.
Some Changes are Necessary – Just Be Careful
The first thing I changed was to make the first set of cuts vertically, or lengthwise, rather than horizontally since the panels were already longer and you lose a little bit of accuracy every time you fold fabric to fit it on the cutting board.
This first set of lengthwise cuts worked beautifully, it was the second set with the crosswise cuts that ended up in a wreck.
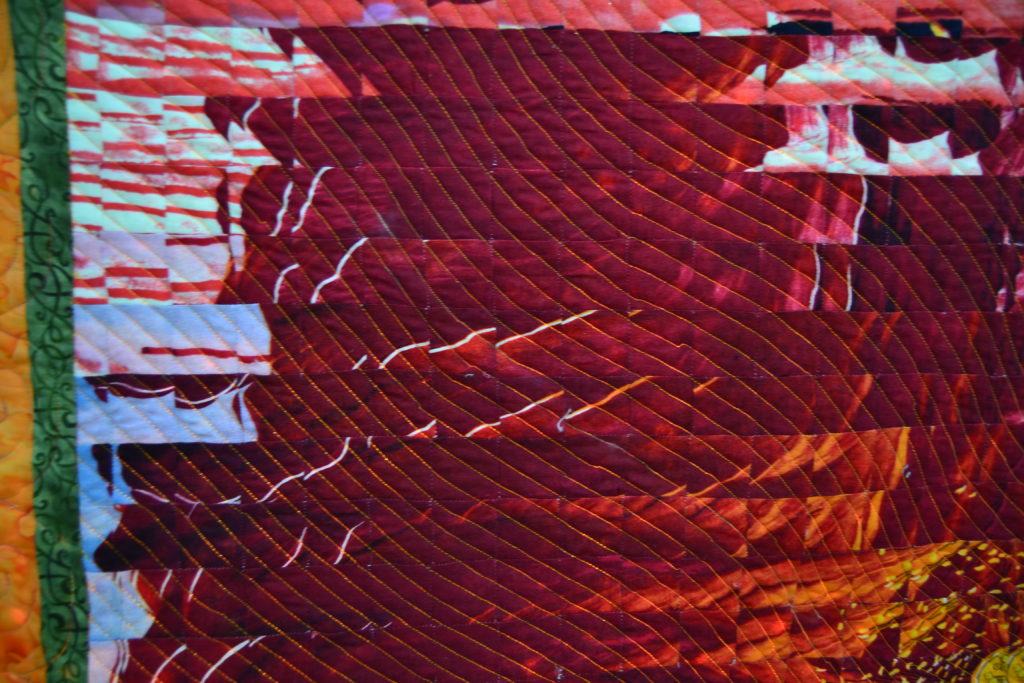
From strips… 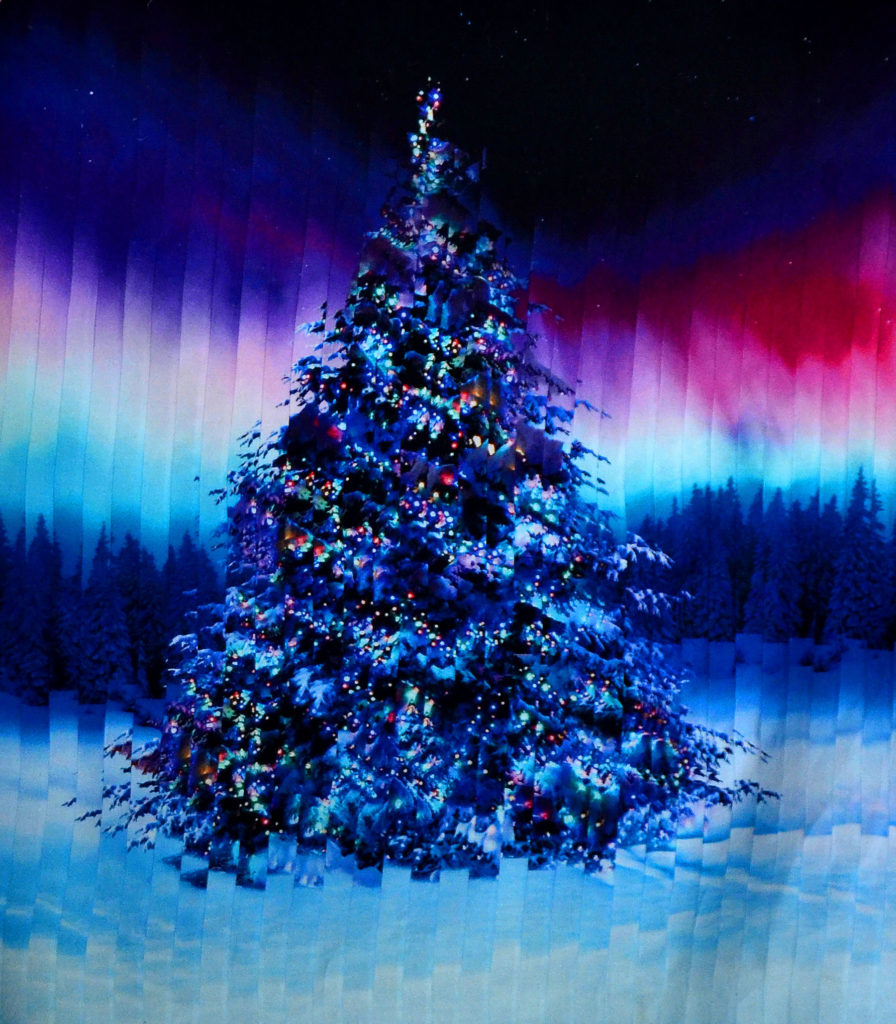
To a panel… 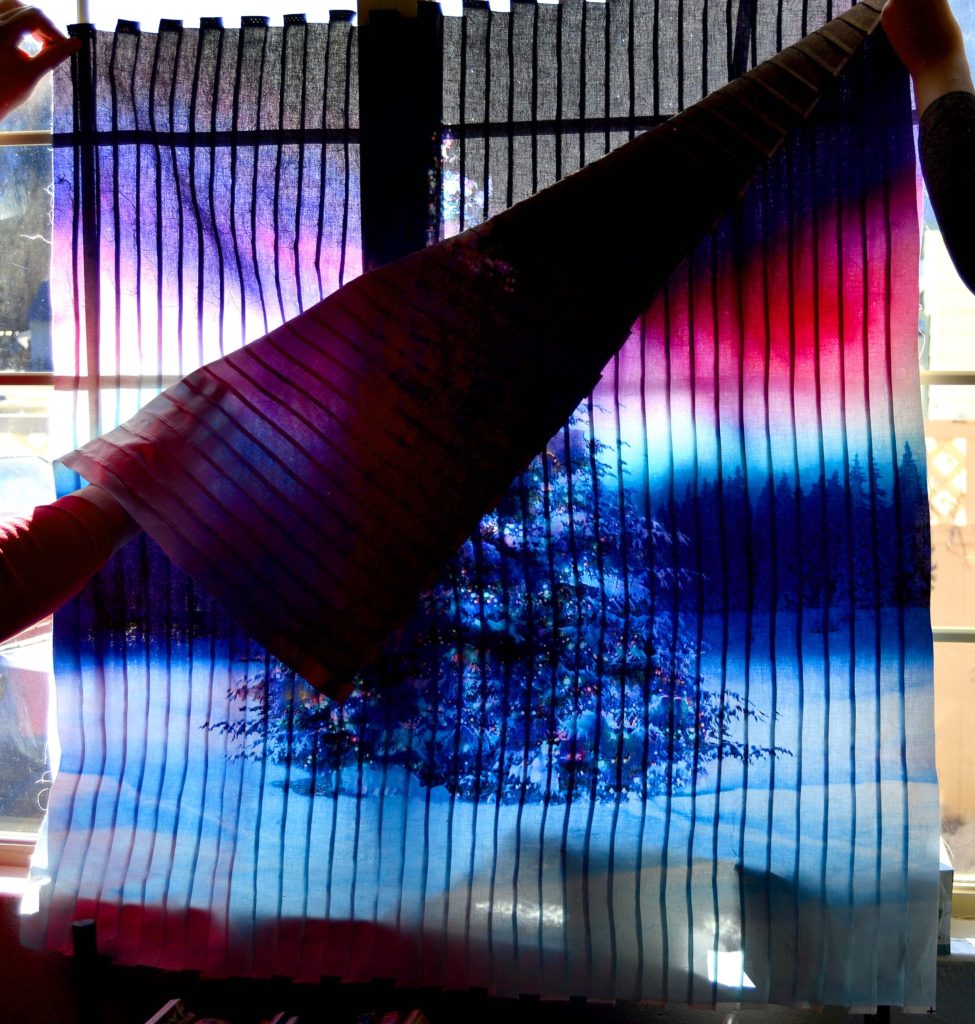
To two identical panels that are ready to be cut apart again
Now I knew the panels were not perfectly square or equal, but I had a brilliant idea to offset that fact; I ironed in a deep crease down the exact middle of each panel before I cut my strips and re-sewed them.
I figured the center images, the Christmas Trees themselves, was actually identical, and since there was a lot of expendable background in the panel, I could trim the differences down later.
Cue the Disaster Music
You know how when the Pink Panther theme music would start on those old movies you leaned forward to the edge of your seat waiting for Inspector Clouseau to fall on his face from a great height?
Strangely poor old Clouseau never heard the warning, and neither did I – even though it must have been on full volume.
First I sewed the bottom half back together with my tree branches upside down – how, I don’t know, I marked the right ends and sewed them together – so that had to be ripped out and sewed again. Absolute fracture nightmare!
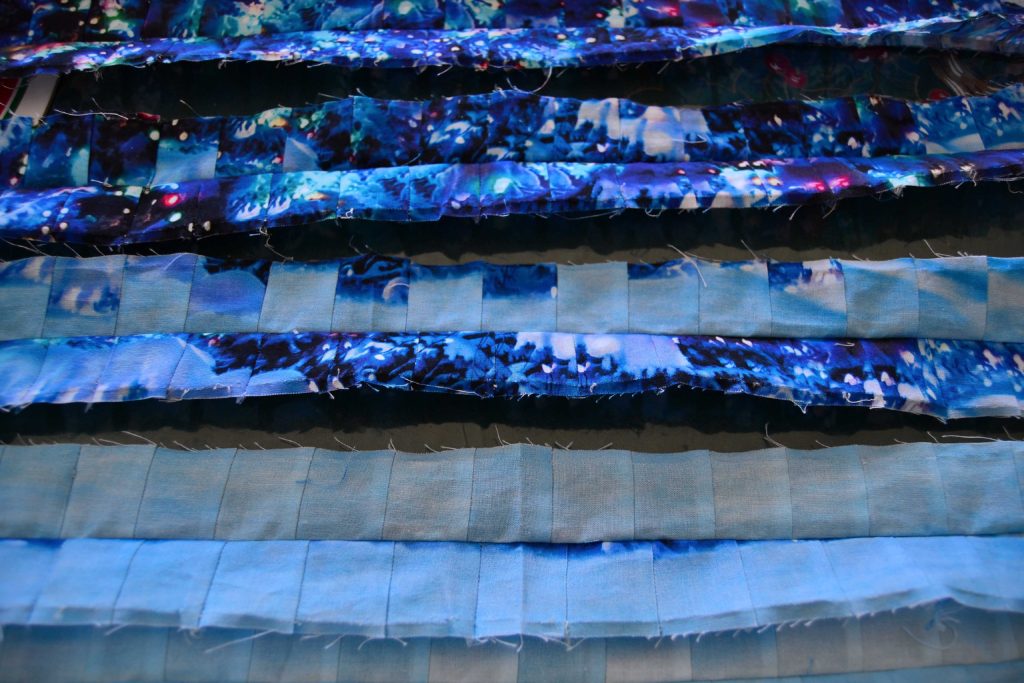
Then, I lined up each strip using the middle crease.
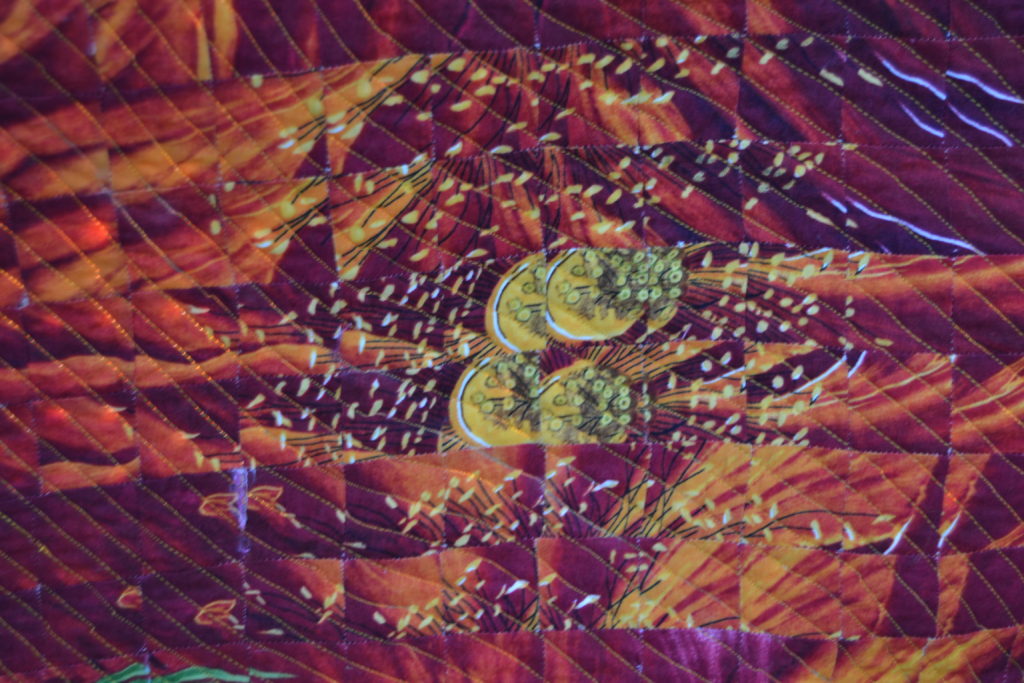
But since that was somehow off to start with, my Christmas tree ended up looking like it had drunk way too much punch. Any police officer in his right mind would have charged me with an SUI – Sewing Under the Influence.
So…I spent days and days ripping out one strip at a time and re-lining them visually. Of course, in a fracture, once you cut your fabric both length and crosswise you end up with these beautiful little 1” squares – so when I ripped out each row, the stitching would open up on at least half of these squares (both sides of the strip). And then I would have to re-stitch these before I could re-sew the entire strip back on!
How…? 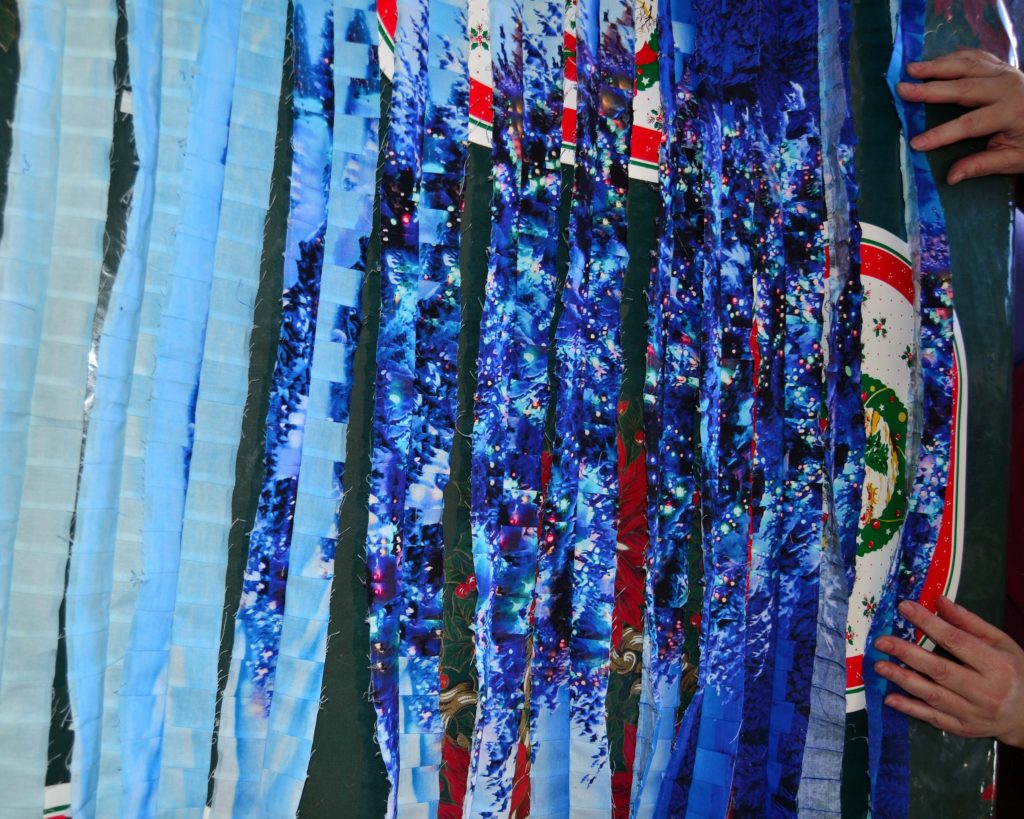
Start tearing apart, by sets of two strips and carefully realign by sight.
This was extremely tedious and I hated it!!!
But, since I don’t like giving up on a project, I set my teeth and plodded on.
The finished panel is very nice, but I’m going to dig my quilting books out of storage before I try something like this again!
Tips & Tricks to Avoid Your Own Fracture Nightmare
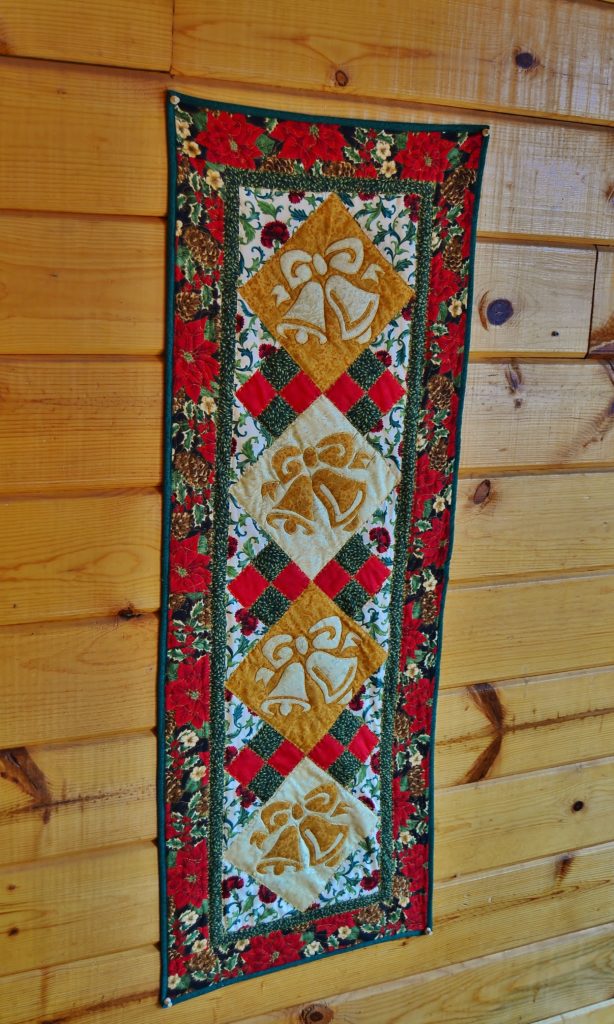
I’m proud of my finished panel, now, and glad that I took the time to figure, and re-figure, each problem and keep on with the keepin’ on until I came up with something beautiful. And I will share a picture of my Christmas tree when I get it sewn and quilted into a finalized version.
- Never assume that you understand a pattern well enough to do it without guidance (go get the book out of storage even if it’s snowing)
- If you get a panel that was cut crookedly – take the time to actually make it straight, not just sort-of straight, before you begin the process of incorporating it into a quilt or pattern.
- If there’s a possibility that you can get turned around – even with careful labeling – try starting somewhere near the middle, where you’ll see sooner that you’re making a bad mistake. I started at one end, where any normal person would, and on the white background I couldn’t tell that it was all upside down until I got to the tree, which was like fifteen rows or more of tight stitching on narrow rows.
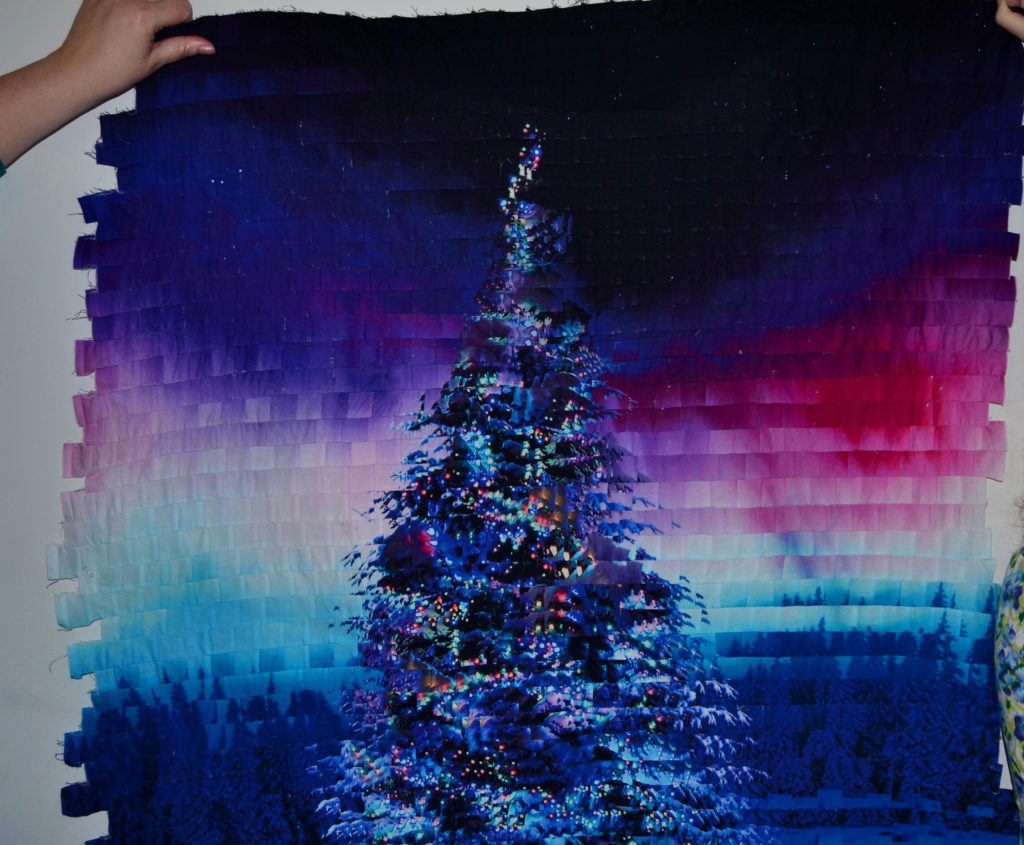
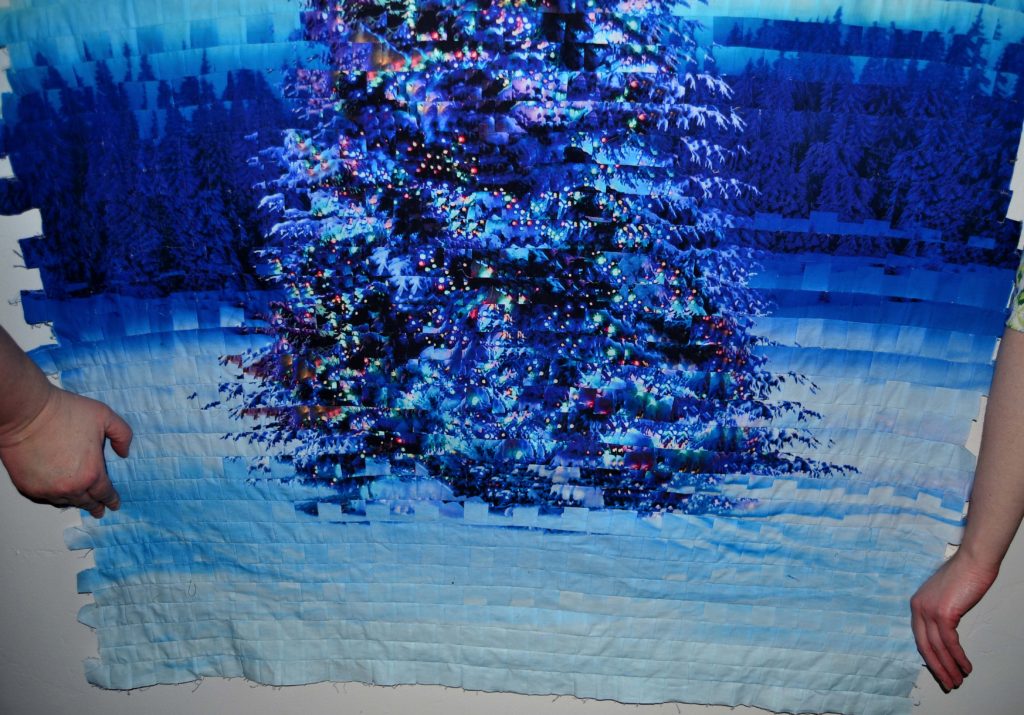

Finally – the vision is realized! Was it all worth it? I think so, but I’d rather avoid these mistakes in the future, all the same.
Here’s to your success in making great panels better, in using unique and beautiful techniques in new and amazing ways, and in overcoming each challenge on your road to being an even better fabric artist!
Next Championship
You may have noticed that Karyl’s been our Master of Disaster before. Sadly this time we didn’t receive enough submissions that adhered to our quality guidelines to let us choose a brand-new Champion.
We hope that next time – in just a few months – you’ll help us change this trend.
After all, there’s no reason to be embarrassed about making mistakes or having struggles. To err is human, to overcome is the domain of an artist. We want to hear how our friends struggled, and how they overcame. We want to figure out mistakes before we make them, and to grow our knowledge and library of beautiful and unique fabric arts.
Please sign-up for our free newsletter, where you’ll receive the latest updates and also get notified in advance when we open up the next Championship!