You can use a lot of different techniques and materials to create vivid, realistic, 3D images in your fabric art. One of the coolest materials is embroidery thread, and the many techniques you can use to apply it to quilts, panels, and wall-hangings. In this article I’ll show you how to use embroidery thread, and yarn, to outline and uniquely highlight your quilting and fabric art projects.
Outlining your work as you go should be a constant in your thinking as you plan your masterpieces. Just like in any other 2D art-form that strives to represent 3D reality, like:
- Regular embroidery
- Crewel
- Needlepoint
- Cross-stitching
- Painting
- And coloring
Placing an edge around your creation creates depth, shadows, interest, and gives your shape a definitive edge that is extremely pleasing.
From the subtle to the dramatic – embroidery thread & yarn add impact
Colors of an Outline
An outline edge is usually a darker shade – but not by that much. The more it gently blends into the greater body of work, the more effective it becomes.
If, for instance you’re trying to give depth and meaning to a strip of red fire – you might try using a very thin line of crimson or burgundy. A mottled green background, on the other hand, can be made very realistic and 3-dimensional by sewing random stippled lines of dark hunter green throughout.
The exception to that rule are blacks and grays.
For some reason – probably because these are the colors of shadows – black and/or dark shades of gray work well as the edging color for almost everything.
Occasionally, however, you’ll want to use a lighter shade of the same color – even a white.
This is where studying photography comes into use. These are highlights, or blown-out colors, just like it pictures. We use these colors to express light, reflected light, sunlight, even candlelight. The lighter the shade is, the closer our eyes will tell us it is to the point of light.
When I was doing my mermaid, for example, I wanted to make her hair more textured and 3D than the printed panel allowed.
So I used pale yellow embroidery thread to trace out her hair – and it looked really, really weird. It actually turned our mermaid kind of ugly.
Then my daughter – who’s a photographer – pointed out that she had two colors of hair, the white-blonde that was being hit by the “sun” and the dark blonde over her shoulders, in the “shade.”
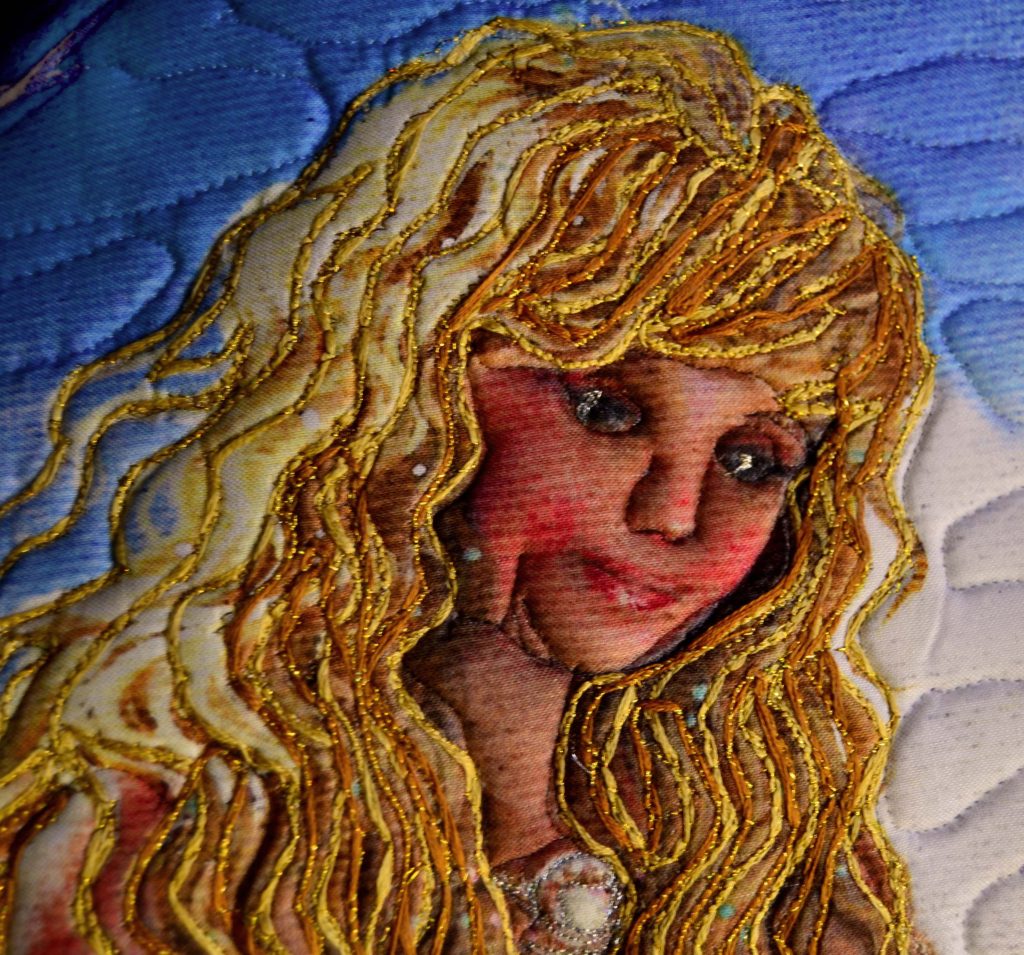
I pulled out the light embroidery thread over the mermaid’s shoulders and replaced it with a darker gold. The result was – if I may say so myself – stunning.
How to Use Embroidery Thread
I am a big fan of outlining different areas of my creation and usually it’s the major focal point that I take extra time with.
There are a number of different ways to highlight different shapes such as satin stitching, ribbons, sewing “rope”, etc., but the technique I want to go into depth here is how to use embroidery thread and yarn to create unique outlines.
The same techniques work equally with either embroidery thread or yarn, by the way.
Step One – Double Edging Principle
Because outlining with embroidery thread takes both hands, there is no free hand to smooth down the edge of the shape you will be outlining. This makes it extremely difficult to catch the edge of the fabric with the embroidery thread.
I did this on my first outlining project and hated the end result, so I figured out a way to nullify this problem. Of course!
I use matching thread on the top and with a narrow zig-zag I sew down around all the edges of the shape to be outlined BEFORE I even bring out the embroidery thread. This way, your fabric edges are neat and secure and you don’t have to give them another thought as you go around your edges.
I know this sounds like you’re sewing the edge twice, and you are, but the extra time and thread is way worth it because it ends the frustration of outlining and leaves you with a neat, attractive edge.
Trust me on this, take the extra time necessary!
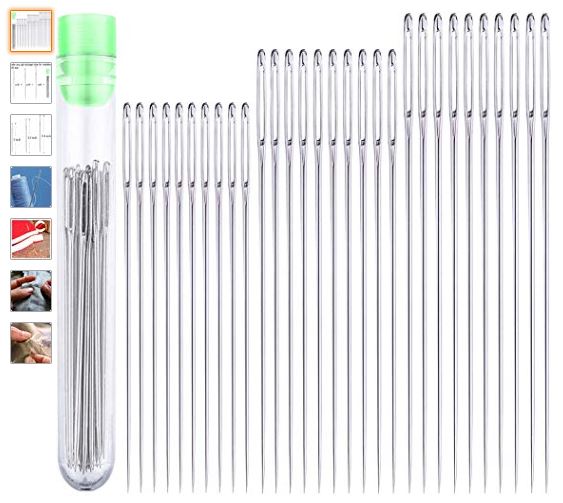
Step Two – Have the Best Possible Needle
The first thing is to have the right needles.
Trying to do this with a regular embroidery needle is almost impossible and so frustrating that you’ll never want to highlight with embroidery thread or yarn again. The solution is to use a large-eye hand sewing needle, but this can be a little tricky to.
Yarn, as you know, varies from thick to thin, but even the thinnest yarn is too thick to pass through the largest eye of regular sewing needles.
Even embroidery thread, when used on a quilt, can get to be a lot, very fast. When I highlight with embroidery thread I use 2 sets of 6 strand thread and this makes quite a thick rope. To clarify – embroidery thread comes in a strand of 6 threads. When you embroider with it normally, you separate the strands into threads of 2 or 3 threads each and this goes easily through the eye of an embroidery needle.
However, when I highlight with embroidery thread I use 2 complete strands of 6 threads each, so this is 12 threads in total.
It’s quite thick and you can get one strand through a large-eyed embroidery needle, but getting both of them through is almost impossible and you can forget about yarn completely.
Like anything, there’re ways to get it done, it just takes a while, and I don’t have much patience.
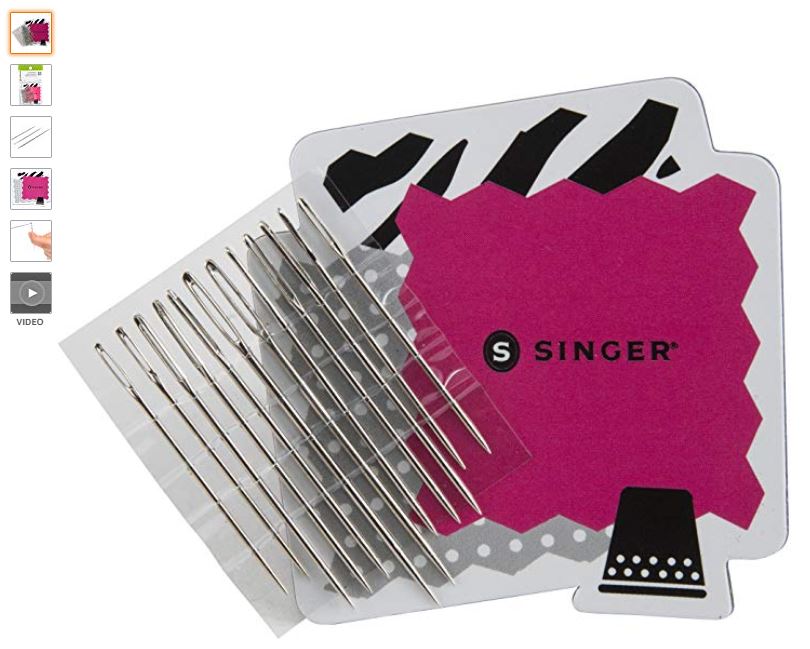
So, I have just ordered 2 different sets from Amazon of hand-sewing needles. Both of them have especially large eyes, and one looks to be sharp, as well. Hopefully these will take the frustration out of this part of the process.
If any of you readers have any knowledge of any other kind of needle I would sure like to hear from you!
Step Three – Getting Enough Line
Having to stop and start continuously because you’ve run out of thread is a MAJOR pain in the neck! So you need to get enough line to finish an area. And – after some trial and error – I’ve come up with a way to eliminate the guess factor.
Take a rough measure of the area to be outlined and double it, at least. Ideally your thread should be 2.5 times longer. So, if the area is 10” make your thread length 25”.
Even up both strands of thread at the bottom and tie one knot. This is a large knot, but it disappears underneath the batting or foam and no one will ever notice it.
Leave about 7” of thread hanging through the top of the eye so that the thread won’t pull out as you sew.
You’re now ready to start.
Quick note: Just as in all embroidery, the inside of your pattern should be completely finished before you start the outlining.
An extra note when quilting: I don’t outline entire panels, I simply pick the focal points and outline these.
And a bonus note, as well.
Along with the outlining procedure, I place either an extra layer of batting or a layer of foam behind the image to help it pop and I do the outlining before I put the backing fabric on.
This way the embroidery knots and thread as you move from one area to another are completely hidden inside the panel. Of course this means that you have to plan ahead which areas will be highlighted and when.
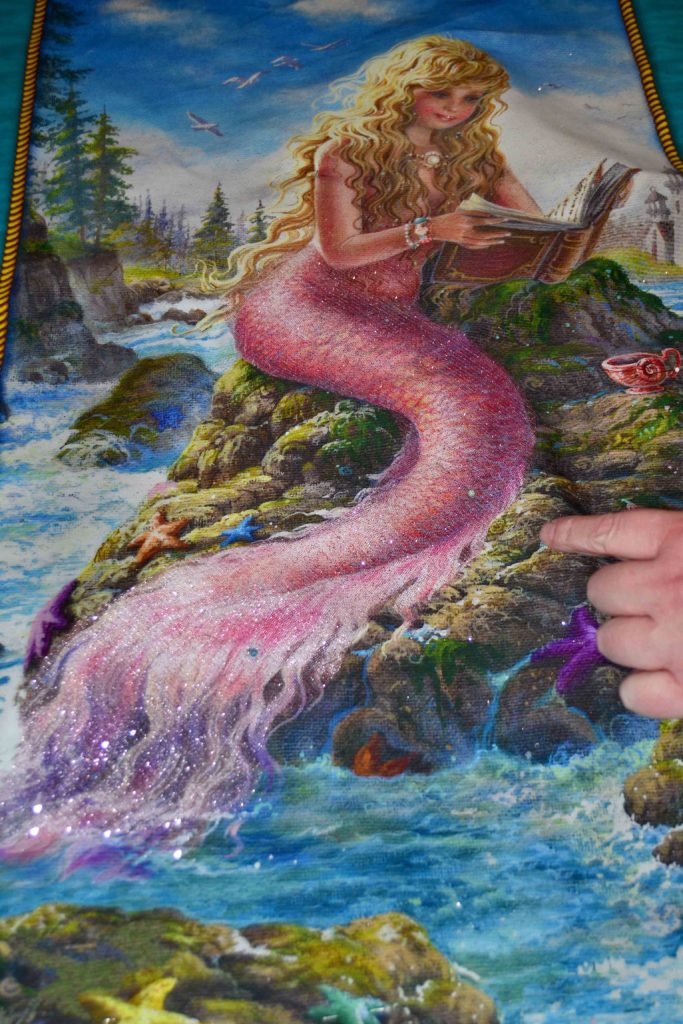
For example, on my Ocean Maidens quilt, I decided that I would outline the main mermaids’ tail and highlight her hair with embroidery thread.
I started by tracing just her shape onto paper, making a foam cut-out from that, and putting the foam just behind her. Then I did all the insides and the highlighting and outlining first. Then I placed a layer of batting over the entire back of the panel and continued on, thus hiding all my embroidery mess.
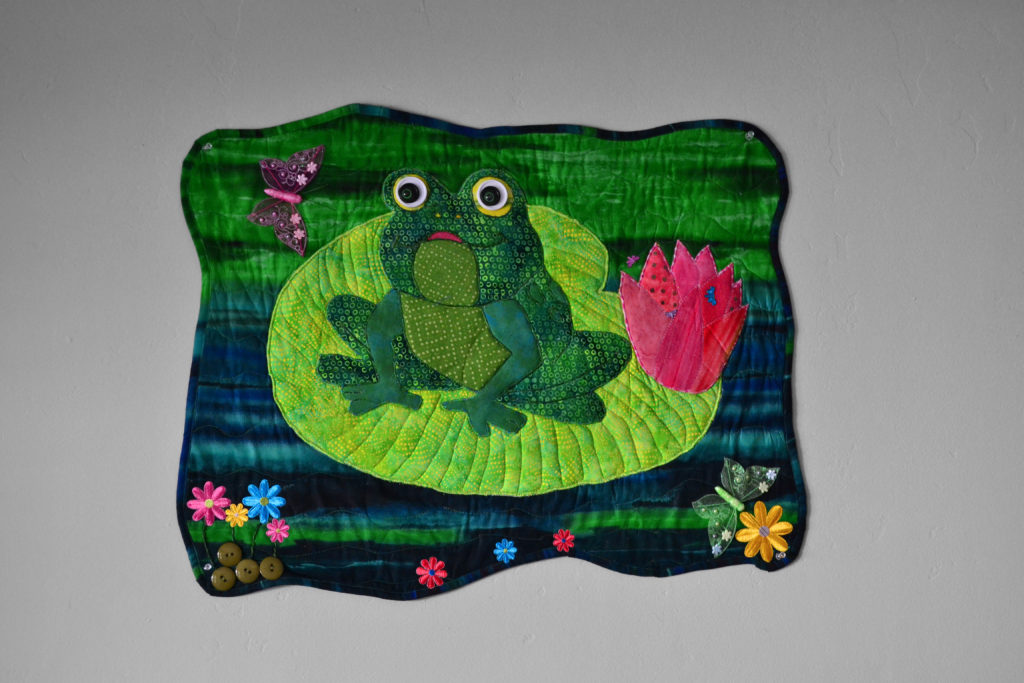
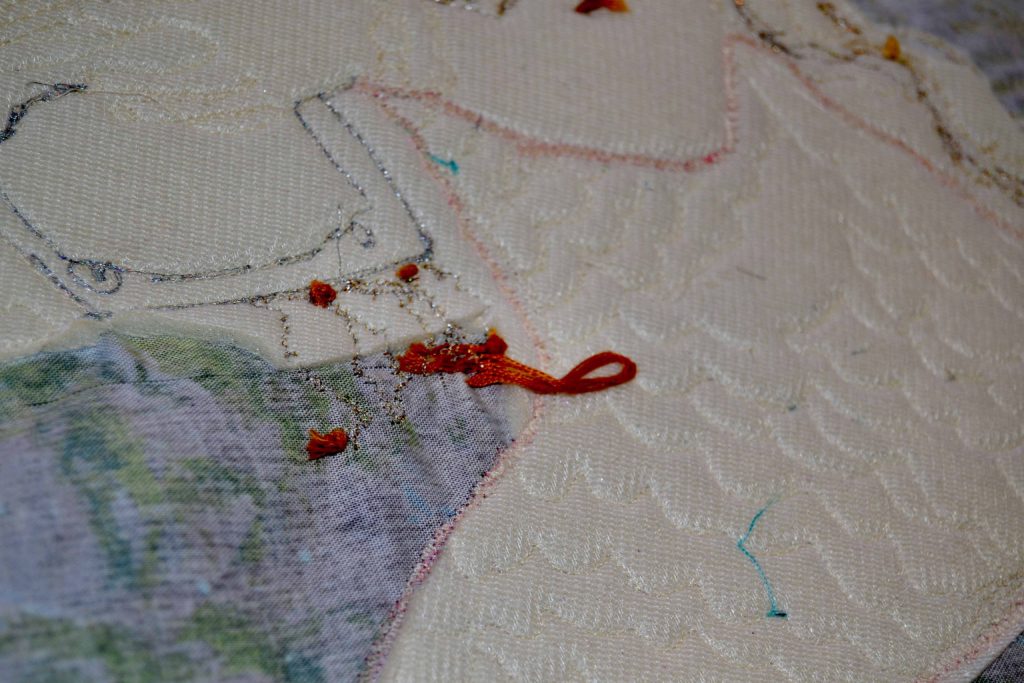
On My Pad, I did the lily pad and frog first, using embroidery thread to outline all the different sections of the frog before I placed it on my backing/background sandwich. So, if you’re planning to highlight, plan carefully how you will construct your project before you make the first cut.
Step Four – Choosing the Right Colors.
When you think about how to use embroidery thread correctly, one of your primary concerns should be color. One of the next should be shading.
Once you are ready to highlight or outline, think about the colors of the shape you’re outlining.
As I said, I use 2 different strands of embroidery thread and usually I use 2 shades of the same color – one dark and one light. I try to match the colors to those in the fabric.
Step Five – Sewing with Embroidery thread
As a quick aside, pulling the needle with the 2 strands of thread through either batting or foam can be quite difficult.
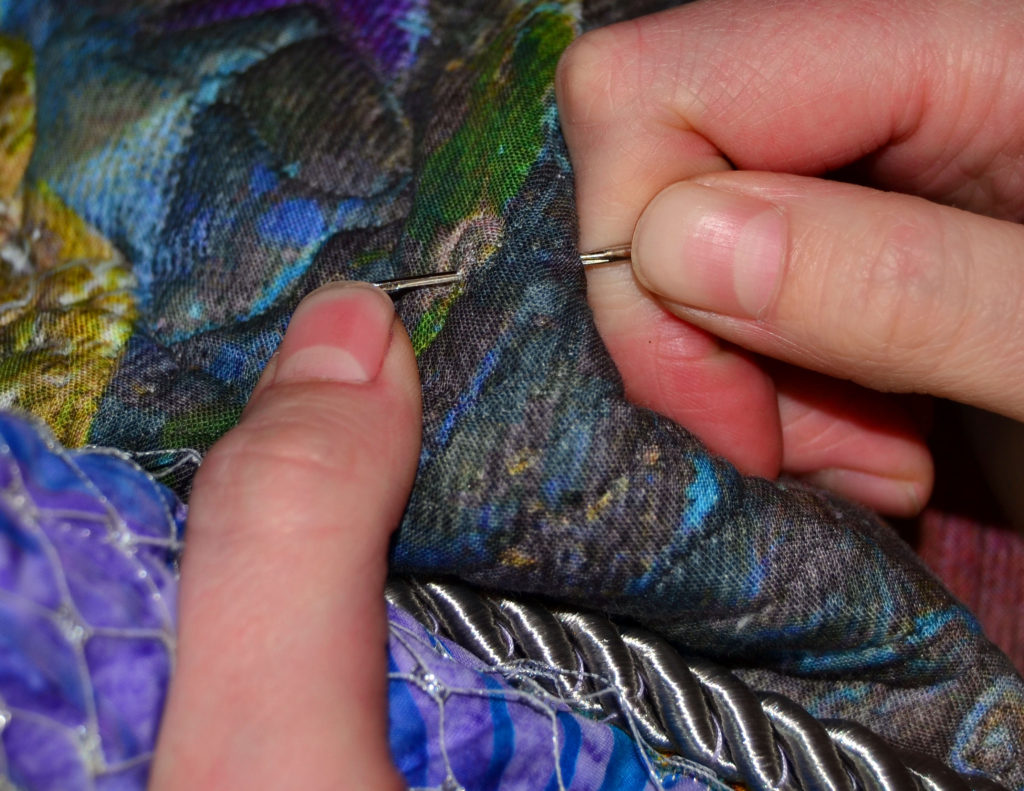
One way I get around this is to appropriate Michael’s needle-nosed pliers and use them to pull the entire thing through to the front of my project once I push the tip through. A good fitting thimble is another extremely useful in saving in saving your fingertips when you are pushing the tip of the needle through to the front.
Once your needle is through, pull gently until all of the thread is on the front. Then pull the thread out of the needle. Thankfully, we’re done sewing this stuff by hand!
The thread you have in your sewing machine should either match your embroidery thread, or be invisible as it is the outlining effect of the embroidery thread that you want to emphasize here.
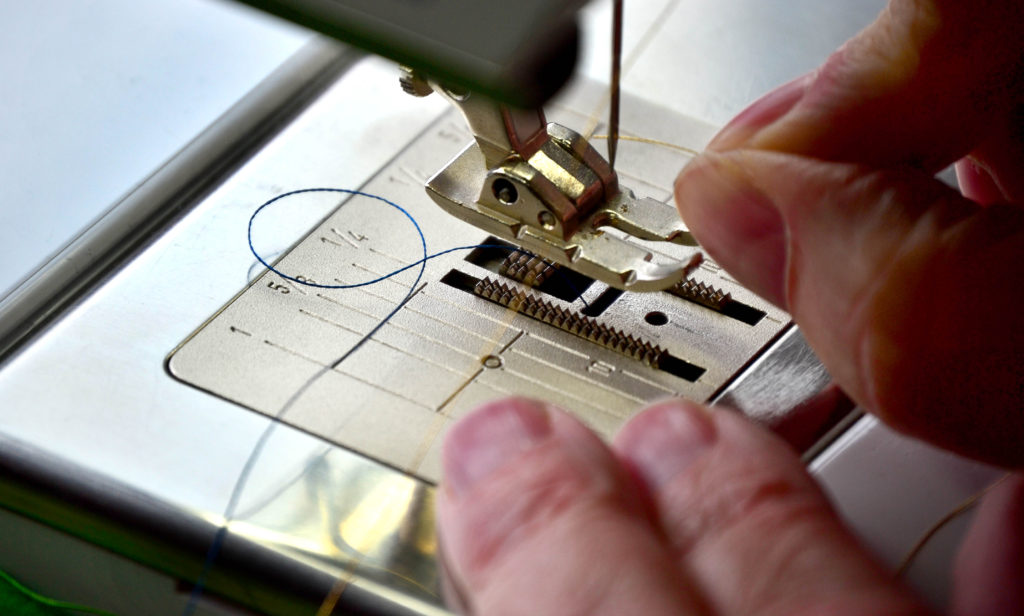
When I highlighted the mermaid’s hair, I used gold shimmer thread in my machine so it would sparkle just a little and make her appear more magical. So think carefully about your choice of sewing thread.
Once you’re ready, set your machine on a narrow zig-zag stitch, just wide enough to cover the 2 strands of embroidery thread, and set your stitch length approximately halfway between a regular stitch and a basting stitch – so not real tight but not too loose either.
Step Six – Tips to Finishing in Style
To maximize the effect of the 2 shades of embroidery thread, grab hold of your thread about 5” away from your sewing needle and start twisting it gently together, laying it down along the edge of your design and sewing it down as you go.
This is why you need at least double the length of your shape, the twisting takes up a lot of thread but it makes a delightful edge. Besides, embroidery thread is relatively cheap.
When you get to the end of your outlining, re-thread your large-eye hand sewing needle and pull the thread end through to the back.
If you’re all done, knot it off.
If you’re not and you have another area to outline walk your thread over to the next starting point by weaving it in and out of just the batting or foam layer. Bring the needle back up at your new starting point and continue on as before.
This technique leaves you with a beautiful outlined edge and all the mess invisible.
If you want to use yarn to outline instead of embroidery thread, the technique is exactly the same BUT I NEVER use 2 strands of yarn – it just becomes too thick and even with the aid of the needle-nosed pliers it is impossible to pull it through the fabric.
Yarn gives a much higher definition to your outline and increases the 3D effect of the object being outlined. I used black yarn to outline the seams of the treasure chest in my Ocean Maidens quilt and it really helped it to appear more realistic.
NOTE: There are times when you might want the outlining to be the focal point of an area as when I used a Christmas red and green together to outline the wording on my 12 days of Christmas panel.
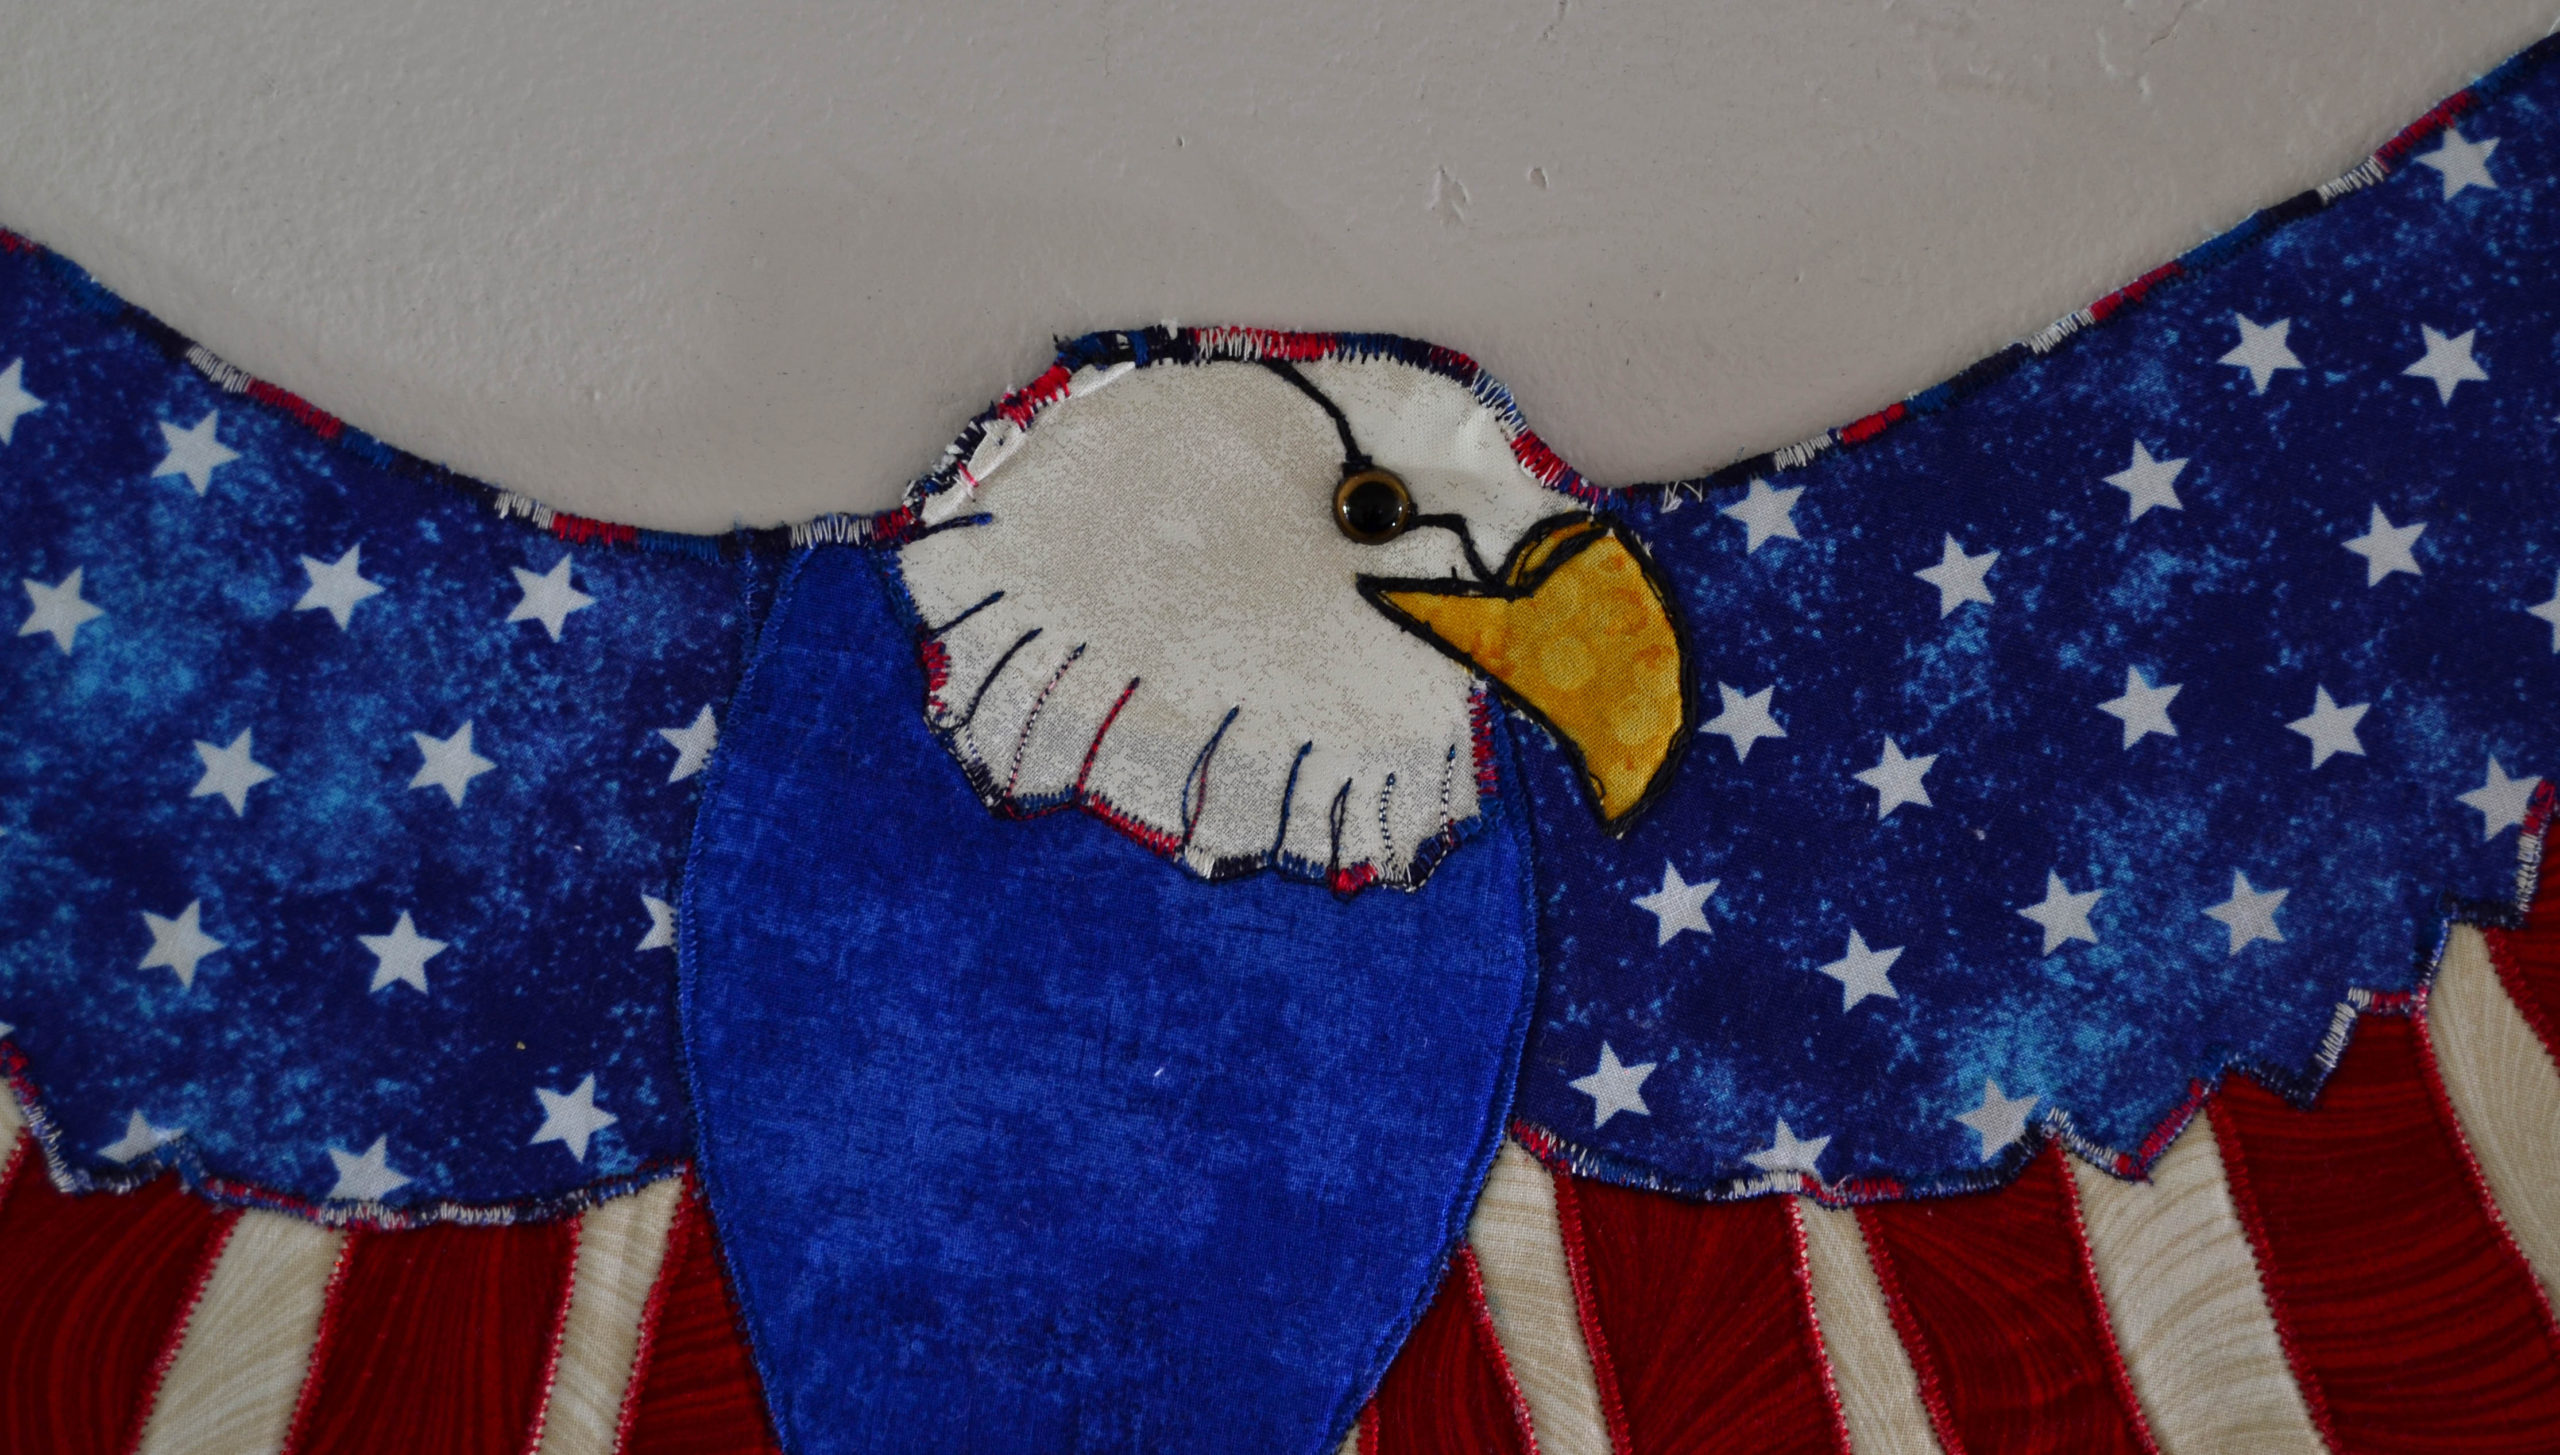
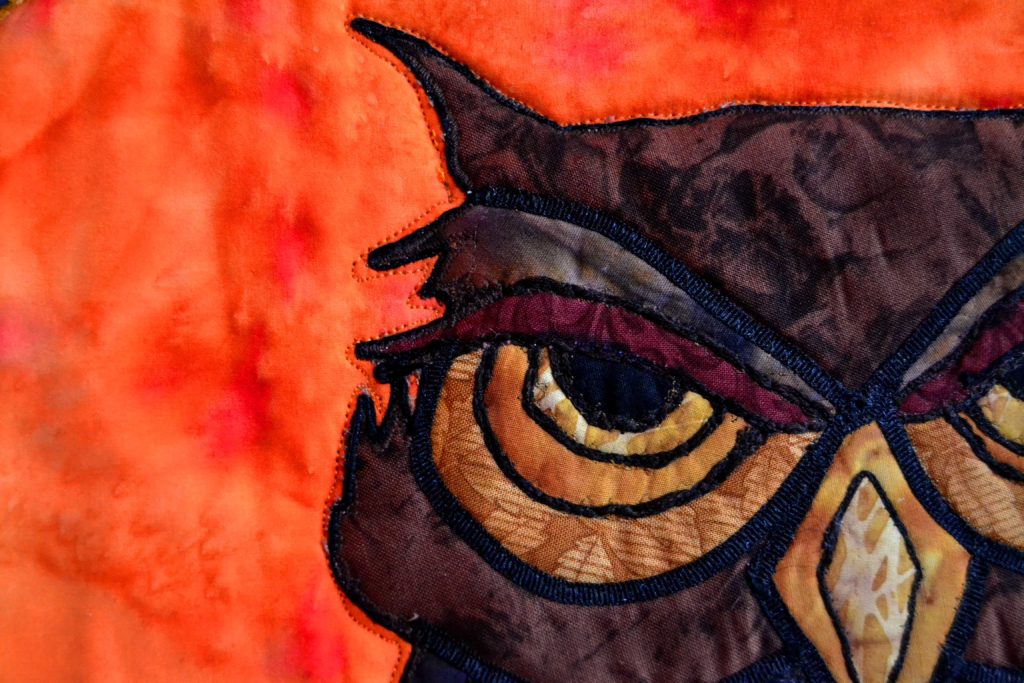
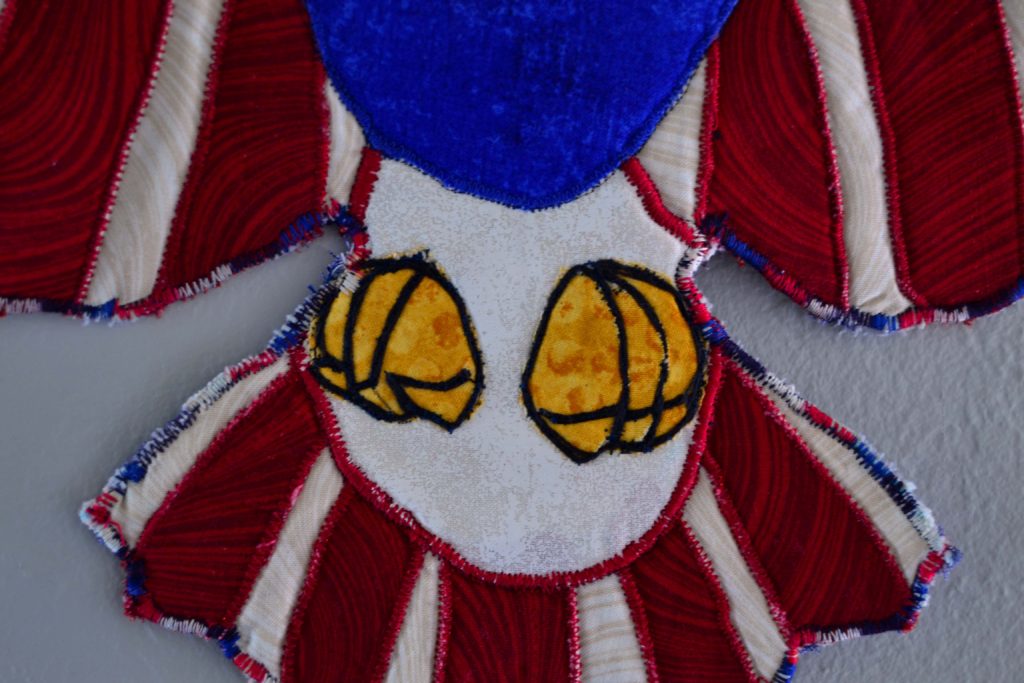
Also, sometimes you may only need one strand of 6 threads to make your point if the thread is in high contrast to the fabric. I only used one strand of black embroidery thread to make the outline of my eagle’s eyebrow on Freedom Flight.
Outlining is Essential!
When I first started cross-stitching many years ago I thought that my images looked just fine without the outline stitches. Mostly I was just lazy. My friend Jenny was totally disgusted by my attitude and took my piece away from me and did the backstitching herself so that I would see the difference – and it was HUGE.
NEVER underestimate the bang you will get for your buck when it comes to outlining and highlighting. Take the time to do it – you will never regret it!
It’s actually a great and helpful piece of information. I’m
glad that you shared this useful info with us. Please keep us
informed like this. Thanks for sharing.
Good day I am so delighted I found your blog, I really
found you by accident, while I was looking on Yahoo for something else,
Anyhow I am here now and would just like to say kudos for
a remarkable post and a all round entertaining blog (I also love the theme/design), I don’t have time to read through it
all at the minute but I have book-marked it and also included your RSS feeds, so when I have time I will be back to read a
lot more, Please do keep up the great work.
Terrific work! This is the type of info that should be shared around the
internet. Shame on Google for no longer positioning this submit upper!
Come on over and visit my site . Thank you =)
Hi there! This is my 1st comment here so I just wanted to give
a quick shout out and say I genuinely enjoy reading through your articles.
Can you suggest any other blogs/websites/forums that cover the same subjects?
Thanks a ton!
Hurrah, that’s what I was exploring for, what a data! present here
at this webpage, thanks admin of this site.
I was recommended this website by my cousin. I’m not sure whether this post
is written by him as no one else know such detailed about my difficulty.
You’re wonderful! Thanks!
I’m gone to inform my little brother, that he should also visit this webpage on regular basis to take updated from hottest information.
Thank you for the good writeup. It in fact used to be a enjoyment account it.
Look advanced to far added agreeable from you!
However, how can we keep up a correspondence?
Good blog you’ve got here.. It’s hard to find quality writing like yours these days.
I truly appreciate individuals like you! Take care!!
I am extremely inspired along with your writing skills as neatly as with the layout on your weblog.
Is this a paid subject or did you customize it yourself?
Either way keep up the nice quality writing, it’s rare to see a nice blog
like this one today..
Do you mind if I quote a few of your articles as long as I provide credit and sources
back to your site? My blog is in the very same area of interest as yours and my users would
genuinely benefit from some of the information you present here.
Please let me know if this okay with you.
Many thanks!
Way cool! Some very valid points! I appreciate you writing this
post and the rest of the website is also really good.
Fine way of explaining, and good post to take facts on the topic
of my presentation focus, which i am going to deliver
in institution of higher education.
Good day very nice site!! Man .. Excellent .. Superb ..
I will bookmark your web site and take the
feeds additionally? I’m happy to find numerous useful
information right here in the publish, we need work out extra techniques in this regard,
thanks for sharing. . . . . .
I like the helpful info you provide in your
articles. I’ll bookmark your weblog and check again here frequently.
I’m quite sure I will learn many new stuff right
here! Best of luck for the next!